I've been wanting to build a Buffalo DAC for quite a few years now. I just finished building a new computer for my home studio and with the recent release of the B III it seemed like the time was right to finally go for it. For the output stage I decided to use transformers to keep it simple. After reading the "Buffalo II & Transformers" thread I went with Sowter 3603 with the OCC wire option. They took about a month from ordering to arriving at my door since they had to make them. I wanted to shock-isolate them a bit so I made a simple bracket from aluminum to hold them:


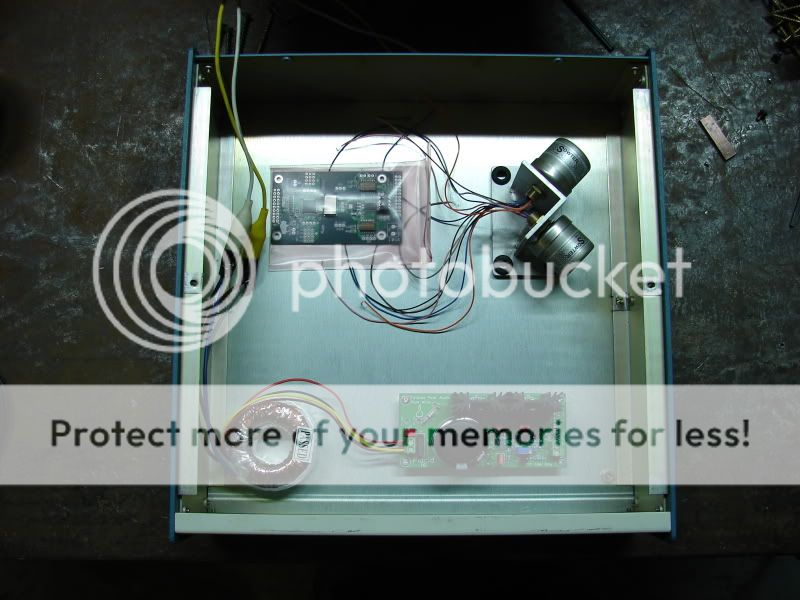
Next was playing with initial layout:
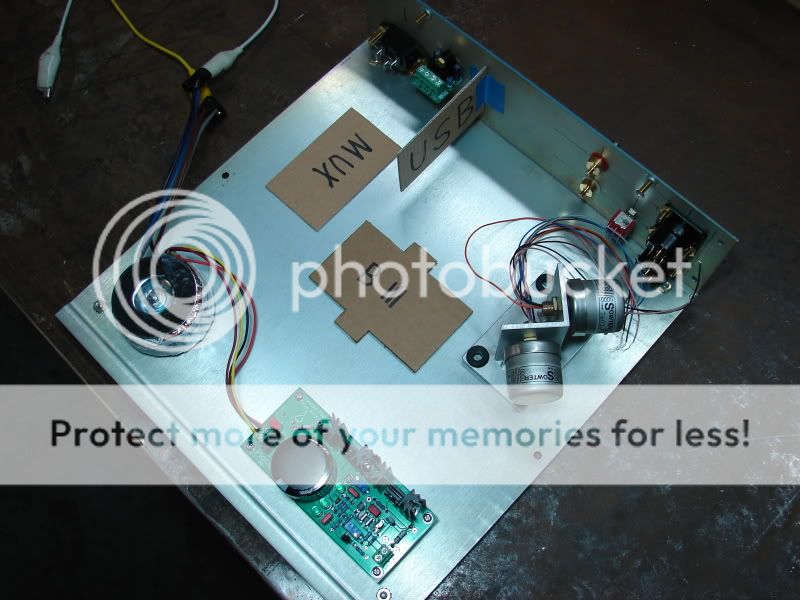
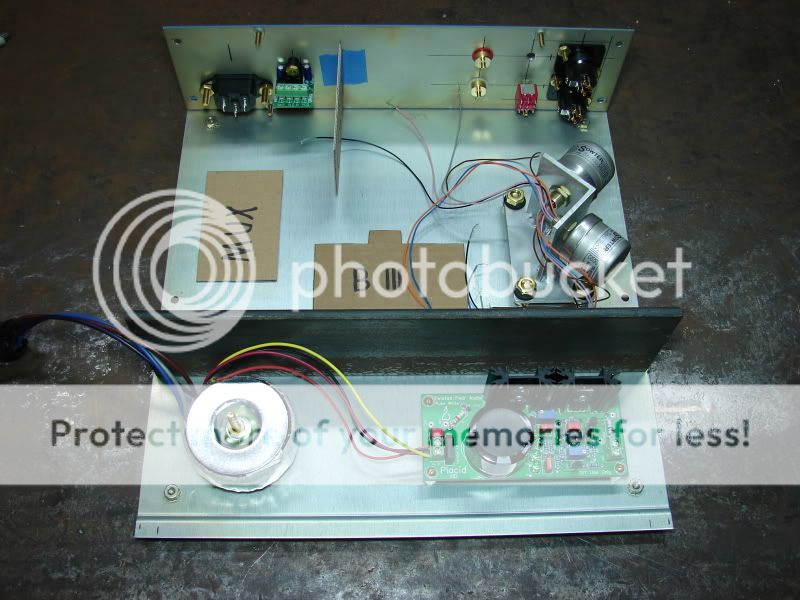
Then on to the back panel which always takes the most time in a build:


The XLR jacks are Amphenol and the RCA jacks are Vampire copper body. The toggle switches will reconfigure the secondaries for differential and single ended output:

And here is what I'm thinking for layout with all the boards I will be using:
Next was playing with initial layout:
Then on to the back panel which always takes the most time in a build:
The XLR jacks are Amphenol and the RCA jacks are Vampire copper body. The toggle switches will reconfigure the secondaries for differential and single ended output:
And here is what I'm thinking for layout with all the boards I will be using:
Looking good! I got in my B3 order the other day, so I'll be watching this build very closely. 😉
I like your layout- looks like you might be prepped for a power supply partition.
Nice.
I like your layout- looks like you might be prepped for a power supply partition.
Nice.
Very nice!. I can see how you started cutting the rectangular hole: 4 holes in the corners, but how did you cut across? And how about the small square hole for the toslink?
Thanks guys. 🙂 To cut the IEC hole I first drilled the corners as you said. Then I used a small 1/8" (3.2mm) square file to do this to the corners:

After that step I simply used the same little square file to "saw" sideways since you can't really fit a hacksaw blade in there. This is actually fairly easy to do in aluminum panels, it only took a few minutes. I loathe using this method in steel panels though.
Same deal for the square toslink hole. First I drilled a 3/8" (9.5mm) hole then used the little square file again to rough shape the corners. Then I used a big square file to true it up. Definitely helps to have calipers to precision measure and layout lines accurately.
Got some more case work done tonight. Just FTH of it I've decided to use all brass hardware on this build. First up was mounting the transformer bracket:


Next I made the power supply bulkhead. The only steel I had on hand that was tall enough to fill the case height was some 2" x 3" angle. It's 1/4" thick which is more that I wanted to go but meh:


Next I made the power supply bulkhead. The only steel I had on hand that was tall enough to fill the case height was some 2" x 3" angle. It's 1/4" thick which is more that I wanted to go but meh:
Drilled and threaded 4x holes in the steel bulkhead:

Also notched the side panels to clear the bulkhead and drilled holes in chassis bottom to finally mount it:

Also notched the side panels to clear the bulkhead and drilled holes in chassis bottom to finally mount it:
Man it's crazy how time flies when life gets busy. I'm starting to get more serious about my project studio and am finally getting back around to working on this DAC project. As part of my studio upgrade 2.0 I recently built a custom workstation desk: https://www.facebook.com/HedronMeta...4263473340822/456200654480435/?type=1&theater
This desk is going to be the heart of my studio and all of my DIY audio projects from now on are going to be balanced and 19" rack mount. So this Buffalo III DAC is going to be rebuilt into a 2RU chassis. I'm planning on leaving room inside for future upgrades like dual mono DAC modules and multiple output options. Really looking forward to getting this built and installed in my rig finally. 🙂
This desk is going to be the heart of my studio and all of my DIY audio projects from now on are going to be balanced and 19" rack mount. So this Buffalo III DAC is going to be rebuilt into a 2RU chassis. I'm planning on leaving room inside for future upgrades like dual mono DAC modules and multiple output options. Really looking forward to getting this built and installed in my rig finally. 🙂
I just ordered a pair of 2RU x 11.81" deep rack chassis from Alltronics on eBay. One is for this DAC and the other is for my upcoming monitor controller project. They should be here Friday. 🙂
- Status
- Not open for further replies.
- Home
- More Vendors...
- Twisted Pear
- Buffalo III Build Thread