My plan is to eventually delete this thread and create individual threads for each 3D printed design to allow revision updates as designs are improved. For now, I'll leave this up, however, if you want to post your own design, I recommend posting a new thread for each design in the "Parts" forum. Create a name and then put [3D print] at the end of the title to make is easy to search for 3D prints. [3-22-24]
This thread is intended to be a place to share all sorts of 3D printed based designs for the diyaudio enthusiast. All 3D printer based files shared here are expected to be "free for all to use" so please ensure anything you share has a creative commons license that meets that requirement.
This thread is intended to be a place to share all sorts of 3D printed based designs for the diyaudio enthusiast. All 3D printer based files shared here are expected to be "free for all to use" so please ensure anything you share has a creative commons license that meets that requirement.
Last edited:

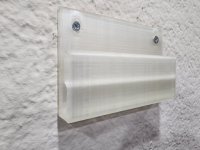
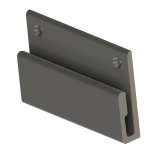
Here's a 3D printed design that allows you to mount the ACP+ kit (with ground plane) to a wall. This frees up desk space and creates a great functional wall display of the ACP+ kit.
The kit is assembled as designed to be placed on a desktop and no changes are needed to slide it into the mount for the wall. The feel hold it snug onto the wall with the mount creating the "force" to keep it snug and tight.
The kit is assembled as designed to be placed on a desktop and no changes are needed to slide it into the mount for the wall. The feel hold it snug onto the wall with the mount creating the "force" to keep it snug and tight.
Attachments

Last edited:
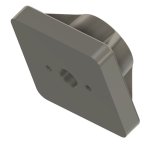
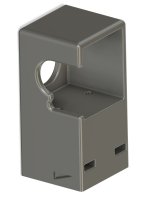
Here's a basic design to move a standard Alps R27 pot away from the front panel. It was designed for the Iron Pre SE, but probably could work elsewhere with minor tweaks. I'm willing to help make it fit your application, but would want to talk with you directly via PM as to how to best do that.
The entire design is pretty basic and I'm open to any input.
Also, if anyone in the USA (or elsewhere for that matter) wants a set, along with some wire post mounts, I'd be happy to provide a set for free if you pay shipping. I'll even toss in the 608 bearing as long as I have extras just lying around (which I currently do).
See this post for pictures in use with Iron Pre SE: https://www.diyaudio.com/community/threads/whats-wrong-with-the-kiss-boy.293169/post-7620669
Attachments
Last edited:
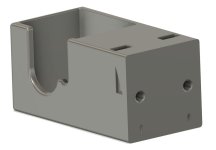
Here's the just of how you applied the 3D print to the Iron Pre SE. The two aluminum tubes are as follows....
8mm OD / 6mm ID tube: Connects to Alps R27 pot with the steal 8MM ID collar, protrudes through ID of 608 ball bearing.
6mm ID/ 4mm OD tube: Connects to inside of the 8mm OD tube (press fit works) and sticks out front panel for a standard 6mm ID dial to connect to.
The mount that holds the bearing can be hot glued in place, or use 2 M3 bolts that will thread tightly into the plastic (no nuts needed).
The mount that holds the Alps Pot is mounted to the bottom of the chassis. You can use M3 nuts that slide into the printed slots, or just have the M3 bolts long enough (say 20mm) to thread into the plastic only. The nuts are not needed and are for folks who happen to have time and want a super "bomb proof" connection.
Attachments

Last edited: