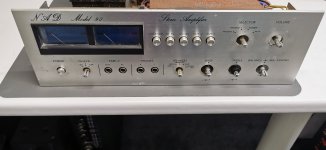
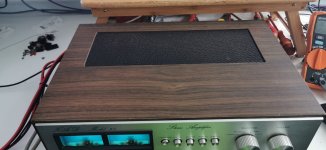
Picked this up for very little compaired to what it is worth, and its going to need a little bit of work, but a worthwhile restoration.Not many of these around these days.
Its going to need a full strip down.
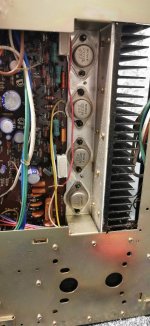
Ive got a nice bright lamp, so i guess at least one of the outputs are shot-i have some MJ15003's, they should be ok.
Its going to need a full strip down.
Ive got a nice bright lamp, so i guess at least one of the outputs are shot-i have some MJ15003's, they should be ok.
Attachments


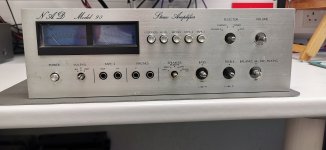
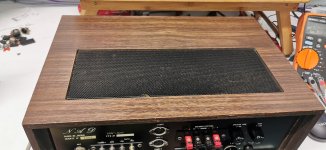
Nice find. The front looks much better than the innards.
MJ15003 should work, drivers might be faulty as well.
Hugo
MJ15003 should work, drivers might be faulty as well.
Hugo
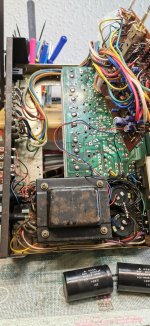
So I've replaced the 2 main ps caps and the outputs Plus R915 as it had signs of burning, but read ok when i pulled it out. VU lamps have been replaced Basic checks are all ok and ive set up the idle to 24ma.
I'll give it a go before I clean it up,put the heatsink back on etc, then recap it as its pretty old this one
I recon this is going to clean up ok, and ill be interested to see what it sounds like
I'll give it a go before I clean it up,put the heatsink back on etc, then recap it as its pretty old this one
I recon this is going to clean up ok, and ill be interested to see what it sounds like
Attachments

Last edited:
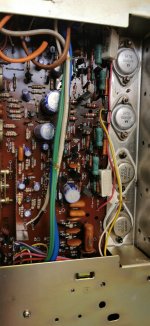
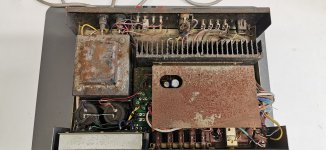
Ive cleaned up the transformer and resprayed it.Ive got new din sockets on order as the old ones are too rust to restore
so its starting to come along now.Its actualy on as i write so it works fine, and the sound is, as i would expect to my 61 y/o ears 🙂
so its starting to come along now.Its actualy on as i write so it works fine, and the sound is, as i would expect to my 61 y/o ears 🙂
Attachments
-
 IMG_20240706_145859.jpg308.2 KB · Views: 96
 -
 IMG_20240706_145851.jpg244.1 KB · Views: 89
 -
 IMG_20240706_145844.jpg522.6 KB · Views: 90
 -
 IMG_20240705_140940.jpg193.5 KB · Views: 89
 -
 IMG_20240705_140441.jpg556.2 KB · Views: 99
 -
 IMG_20240630_084520.jpg484.2 KB · Views: 96
 -
 IMG_20240630_084412.jpg488.9 KB · Views: 100

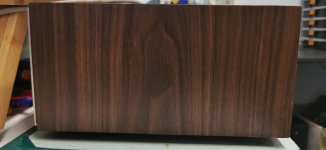
so this is all finished, and im realy pleased with it.
fully recapped and propper cleaned up.I spent along time on this, be sad to see it go, but i cant keep them all.
fully recapped and propper cleaned up.I spent along time on this, be sad to see it go, but i cant keep them all.
Attachments
-
 IMG_20240630_084355.jpg237.3 KB · Views: 75
 -
 IMG_20240630_084405.jpg336.5 KB · Views: 81
 -
 IMG_20240630_084412.jpg488.9 KB · Views: 76
 -
 IMG_20240630_091735.jpg231 KB · Views: 74
 -
 IMG_20240706_145844.jpg376.9 KB · Views: 82
 -
 IMG_20240706_145851.jpg251.8 KB · Views: 88
 -
 IMG_20240706_145859.jpg321 KB · Views: 105
 -
 IMG_20240809_161750.jpg162.3 KB · Views: 163
 -
 IMG_20240809_161806.jpg294.7 KB · Views: 96
 -
 IMG_20240809_162525.jpg240.6 KB · Views: 80
 -
 IMG_20240809_162536.jpg408.6 KB · Views: 75
 -
 IMG_20240809_162743.jpg174.4 KB · Views: 84
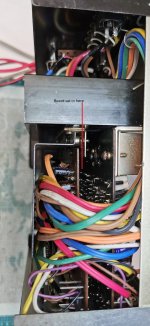
so @Mooly you might be able to answer this one.
when it was all assembled i was getting alot of low frequency hum, through the speakers and noise through switches.
when i stripped it back down to use the scope,the noise was gone.
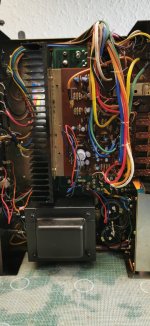
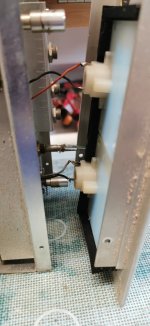
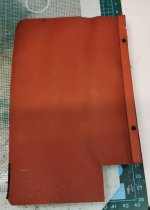
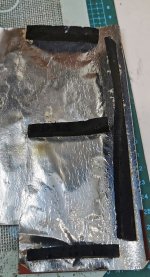
what i found was there was this panel that seperated the boards.
when this was removed, all the noise went away, so i made up some spacers to seperate them without this spacer and now all is good, no noise at all
i just wondered if you/anyone knew what was going on here.
when it was all assembled i was getting alot of low frequency hum, through the speakers and noise through switches.
when i stripped it back down to use the scope,the noise was gone.
what i found was there was this panel that seperated the boards.
when this was removed, all the noise went away, so i made up some spacers to seperate them without this spacer and now all is good, no noise at all
i just wondered if you/anyone knew what was going on here.
Attachments
i really don't without seeing one for real. Could it be something someone has added? or someone has had it apart before and omitted something.
Hard to visualize it all tbh from pictures.
Hard to visualize it all tbh from pictures.
Dunno. You would have to investigate and see if it created any ground loop ow whatever. Could it have been worked on before and put back incorrectly with regard to grounds and also being insulated from grounds.
ok so i found the issue
That card/foil arrangement that goes between must be to reflect heat away from the pre amp board(thats all i can think of.
but! when you put it in and the amp warms up, the foil curls up as it isnt glued, then it touches what ever is above it, just lucky it wasnt dead shorts.Hard to say what its touching as you just cant see, but take it out again and all is well, so its not going back!!
Good bit of detective work 🙂 If it touches anything where a signal can be introduced (like an input for example or any sensitive point in the audio circuit) then a piece of foil will be picking up lots stray noise and hum and so on and just inject it into the circuit... such are NAD's 🙂
- Home
- Amplifiers
- Solid State
- NAD Model 90 restoration