I'm making TL cabinets for Alpair 10.3. I routed holes according to the spec which says 139mm. When I tried to test fit the driver and pre drill mounting holes I realised that there is too little of meat left and I could've safely make driver holes smaller in diameter. And It's too late to redo it. I'm using 18mm MDF with 10mm cutout to fit drivers flush. Any ideas how to strengthen this area? My first idea is to put blobs of thick Poxipol epoxy under screws and redrill. Or glue pieces of 6mm MDF with the same compound.

I would glue on some small blocks of either solid wood or plywood, and then redrill the holes to accept the stock screws.
jeff
jeff

139mm is right. That is my drawing: https://frugal-phile.com/boxlib/markaudio/Alpair10x-dimensions-160616.pdf
With 18mm MDF(and yours from the looks of it is cheap MDF) you likely don’t have enuff meat. If plywood it is sufficient even with a full 45° chamfer.
Do the driver legs reach the edge of the cutout?
dave
With 18mm MDF(and yours from the looks of it is cheap MDF) you likely don’t have enuff meat. If plywood it is sufficient even with a full 45° chamfer.
Do the driver legs reach the edge of the cutout?
dave
Right you are and why the pioneers originally mounted drivers on stands or bolted to the floor in some apps and either dropped the box down over, or slid, them into position with some form of flexible surround attached to the baffle for sealing purposes and later when the 'bean counters' took over they made massive cast round frames with dual raised flanges with a taller inner one that bit into the baffle for sealing and the outer one as the screw torquing limiter (today's standard lip), so no gasket required nor uneven and/or over torqued hardware.
Maybe 139mm diameter hole is "just right", I´d measure actual cast frame to be certain, pity you rounded that edge too much (in my view) leaving less wood at a critical point.
PS: I do not trust poxipol-to-MDF adhesion at all, even less holding a heavy component ; if anything needs "rebuilding" I would use a thick paste of sawdust and wood glue and let it dry well.
Essentially , making "DIY MDF" 😉
Even better, but it requires extra skill and time, plus some guide jig for precision, , I´d glue a wood ring or disk and re-route. r
Essentially turning the clock back 😉
Last edited:
+1pity you rounded that edge too much (in my view) leaving less wood at a critical point.
I just noticed it too, asking myself for what reason (if one) it has been done.
Looks good but if you want a second try - can always cut a disc out of same mdf with diameter 1mm bigger than the hole, do a small bevel at the bottom and hammer it in with glue then redo the hole 🙂
Thank you for advices. I have glued small wood blocks with activated CA glue as it was unhandy to work with a wood glue in a tiny space and impregnated the area with the same glue

Use a different approach. strengthen the area anyway using super glue or wood hardener. Use speaker as per the DJ/Music sector to clamp the drivers down, they can be positioned anywhere about the aperture and the remaining holes filled.I'm making TL cabinets for Alpair 10.3. I routed holes according to the spec which says 139mm. When I tried to test fit the driver and pre drill mounting holes I realised that there is too little of meat left and I could've safely make driver holes smaller in diameter. And It's too late to redo it. I'm using 18mm MDF with 10mm cutout to fit drivers flush. Any ideas how to strengthen this area? My first idea is to put blobs of thick Poxipol epoxy under screws and redrill. Or glue pieces of 6mm MDF with the same compound.
View attachment 1120323
I used them in the past for a quick and safe way of swapping over drivers when appraising. B & O used them on most of there 70s designs from factory. A good seal is still key.
https://www.bluearan.co.uk/index.ph...xings&subheadnew=Speaker!fslash!Grille_Clamps
Last edited:
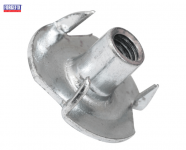
+1, but have taken so much 'heat' from DIYers that have had bad experiences with them I no longer suggest them except to the Altec, etc., vintage crowd that love them.Or use pressnuts from the inside. Works for me all the time.
I was raised on them. A set of T0nuts and bolts shipped with every KEF B110, B200, B139 i sold and used. But I have had one too many that have fallen out that i much prefer treaded inserts now. Especially in MDF
dave
dave
I can't recall ever using MDF for a driver baffle, always quality plywood, dense hardwoods with HDF for cheap plus always installed under compression using a heavy duty vice, 'c' clamp, etc., never with just hardware since any sufficiently large, thick backing plate would leave too big an imprint on the baffle unless a removable false baffle was used to mimic flush mounting.
If I had used the MDF sold locally during my active DIYing (doesn't look nearly as smooth/dense as what I typically see in DIYer's photos which looks more like HDF to me), I'd of used two T-nuts/hole with hardware to pull them tight/ensure proper alignment with the heavy drivers I mostly used plus a false/cosmetic/grill/whatever baffle.
If I had used the MDF sold locally during my active DIYing (doesn't look nearly as smooth/dense as what I typically see in DIYer's photos which looks more like HDF to me), I'd of used two T-nuts/hole with hardware to pull them tight/ensure proper alignment with the heavy drivers I mostly used plus a false/cosmetic/grill/whatever baffle.
Or use pressnuts from the inside. Works for me all the time.
Jan
As long as it’s ply
Not mdf …. Those pull chunks out of mdf when tightening, and when they let go from bass slamming , good luck getting the screws out
You can glue them in , and they sorta work ok …. But nah
I would route an access panel in side of box and use bolts and screws
- Home
- Loudspeakers
- Full Range
- I miscalculated the driver hole diameter, will it hold (photo)?