The basic implementation is here:
http://stereophile.com/amplificationreviews/54/index.html
The atenuator is TKD 2P65CS and audio input switch is Elma.
http://stereophile.com/amplificationreviews/54/index.html
The atenuator is TKD 2P65CS and audio input switch is Elma.
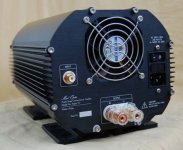
My New 220 watt Toshiba MOSFET Amp
Hi everyone
Here is my latest creation hot off the press...
Hi everyone
Here is my latest creation hot off the press...
An externally hosted image should be here but it was not working when we last tested it.
I'll take two ... er, how much ?
It will replace the "overpowered" +/0/- 67 VDC rail NX150's in my kludge box: http://3dotaudio.com/ampics.html
Should I "sink" that cute little to330 in the middle ? Got balanced / unbalanced inputs ?
... Or maybe I'll just get those reduced nx300 models ...
It will replace the "overpowered" +/0/- 67 VDC rail NX150's in my kludge box: http://3dotaudio.com/ampics.html
Should I "sink" that cute little to330 in the middle ? Got balanced / unbalanced inputs ?
... Or maybe I'll just get those reduced nx300 models ...

Don't think I've added my amps into this thread yet. They still arn't quite finished as they don't have front panels, thinking wood for them though. Feet are also needed.
Amps are aestetically matching but 2 are symasym and one is P101 design. Cases use 0.4c/w heatsinks per side and 4mm aluminium panels. All joined with M6 allen bolts. Standard unit width, 108mm tall.
All amplifiers shall have relays for switching them on remotely.
Here is the P101 amp, used for bass. Made with bought PCBs, 330VA transformer, 1 output pair, voltage +/=42VDC. Includes speaker protector (ESP PCB again), 30A relays. Sorry, only picture of this one:
Here is the standard symasym amp, used for mids. PCBs are Mike's design, made by a man advertising on ebay who doesn't seem to be there anymore unfotunately . Featuring ESP speaker protector again this time with 16A relays. 250VA transformer used here, +/-36VDC as reccomended.
Here is my "special" symasym, used for treble. Same PCBs as before but this amp features regulated (LM338T) supplies and biasing for 1W of class A per channel. Dual mono supplies on this one too, 160VA per channel, voltage after regulation of +/-30VDC. No speaker protector, tweeter will need to be capacitively coupled.
And here is a photo of them stacked up in thier not quite finished state:
Amps are aestetically matching but 2 are symasym and one is P101 design. Cases use 0.4c/w heatsinks per side and 4mm aluminium panels. All joined with M6 allen bolts. Standard unit width, 108mm tall.
All amplifiers shall have relays for switching them on remotely.
Here is the P101 amp, used for bass. Made with bought PCBs, 330VA transformer, 1 output pair, voltage +/=42VDC. Includes speaker protector (ESP PCB again), 30A relays. Sorry, only picture of this one:
An externally hosted image should be here but it was not working when we last tested it.
Here is the standard symasym amp, used for mids. PCBs are Mike's design, made by a man advertising on ebay who doesn't seem to be there anymore unfotunately
. Featuring ESP speaker protector again this time with 16A relays. 250VA transformer used here, +/-36VDC as reccomended. An externally hosted image should be here but it was not working when we last tested it.
Here is my "special" symasym, used for treble. Same PCBs as before but this amp features regulated (LM338T) supplies and biasing for 1W of class A per channel. Dual mono supplies on this one too, 160VA per channel, voltage after regulation of +/-30VDC. No speaker protector, tweeter will need to be capacitively coupled.
An externally hosted image should be here but it was not working when we last tested it.
An externally hosted image should be here but it was not working when we last tested it.
And here is a photo of them stacked up in thier not quite finished state:
An externally hosted image should be here but it was not working when we last tested it.
Pure artwork , Dr.EM ,simply beautiful. Another example of
superior DIY.
But, why the veriboard. I will show you the frugal way for simple boards if you dont mind a little precision artwork.
step 1.. draw it on 1/10th or 1/4" graph paper..
2. pinpunch pads and draw circles around puncholes draw in traces.
3. Here's the trick.. use pinpunch with latex paint to cover
sharpie drawing (surface tension keeps paint within traces)
4. Finished boards (those were my first) almost toner xfer quality
here ismy latest...
Again , awesome.. will strive to approach your level..
Chassis for XMAS....
OS
superior DIY.
But, why the veriboard. I will show you the frugal way for simple boards if you dont mind a little precision artwork.
step 1.. draw it on 1/10th or 1/4" graph paper..
An externally hosted image should be here but it was not working when we last tested it.
2. pinpunch pads and draw circles around puncholes draw in traces.
An externally hosted image should be here but it was not working when we last tested it.
3. Here's the trick.. use pinpunch with latex paint to cover
sharpie drawing (surface tension keeps paint within traces)
An externally hosted image should be here but it was not working when we last tested it.
4. Finished boards (those were my first) almost toner xfer quality
here ismy latest...
An externally hosted image should be here but it was not working when we last tested it.
Again , awesome.. will strive to approach your level..
Chassis for XMAS....
OS
Thanks for your kind words!
Interesting technique. I originally tried making my Symasym boards by drawing freehand. I simply drew the pads from the printout and joined the rest up by hand. It looked ok in marker but when etched it was unuseable, too much track material had been eroded . Seems like I must apply the latex paint, good tip
My regulator boards may not be as bad as they first appear, under the stripboard is solid copper clad board for the ground connection at least. Would rather not use it though yeah. I try and use copper clad boards with breaks made with a knife for my simple layouts like all my capacitor mountings.
The chassis arn't very expensive, work out about £50 each I think. These are the heatsinks, I saved by buying all 6 at once and they were a bit cheaper back then too:
http://export.farnell.com/fischer-elektronik/sk-56-100-sa/heat-sink-extruded/dp/1211720
The panels cost about £60 for the lot from a local firm, they cut them all too. Pack of 100 bolts is about £2 or something
Heres another pic of the treble symasym showing how the parts are all mounted to the frame with just the power supply in the base:
And the amplifier PCB mounted flat to the heatsink detail:
Interesting technique. I originally tried making my Symasym boards by drawing freehand. I simply drew the pads from the printout and joined the rest up by hand. It looked ok in marker but when etched it was unuseable, too much track material had been eroded
. Seems like I must apply the latex paint, good tip My regulator boards may not be as bad as they first appear, under the stripboard is solid copper clad board for the ground connection at least. Would rather not use it though yeah. I try and use copper clad boards with breaks made with a knife for my simple layouts like all my capacitor mountings.
The chassis arn't very expensive, work out about £50 each I think. These are the heatsinks, I saved by buying all 6 at once and they were a bit cheaper back then too:
http://export.farnell.com/fischer-elektronik/sk-56-100-sa/heat-sink-extruded/dp/1211720
The panels cost about £60 for the lot from a local firm, they cut them all too. Pack of 100 bolts is about £2 or something
Heres another pic of the treble symasym showing how the parts are all mounted to the frame with just the power supply in the base:
An externally hosted image should be here but it was not working when we last tested it.
And the amplifier PCB mounted flat to the heatsink detail:
An externally hosted image should be here but it was not working when we last tested it.

Nice implementation Dr. EM. It is obvious your excellent craftsmanship. Bravo!
I have only few comments for the pasive parts that you are using. All resistors are metal film except the 5W emitter which are vertical wirewound. If you have the economic posibility, the next time try to find Metal Plate Cemented resistors (MPC), there is a online store in Germany which is distributor of Futaba resistors, in packs of 50. The price is fairly good. I don't remember the name, type in your browser Futaba MPC resistors to find it. Futaba also offers a big variety of metal oxide film resistors up to 10W and many other difficult to find types.
As for the caps... you have made a cocktail from first quality types, such the Cornell-Doubilier silver mica, the LCR polystyrene foil and the WIMA polypropylene foil with the lower quality Arcotronics polyester which are the white caps. I know, that they was in your stock probably, and Farnell does not have WIMA MKP in 100V range. The same RS components. Try a search in "Selectronic-France" and in "ELFA-Sweeden". These two on line stores they offer a big variety of caps for audio use in good prices and in small quantity if you wish. Evox-Rifa (Sweeden) are good alternatives for WIMA. Also Arcotronics (Italy) polypropylene type are grey colour.
Please, don't misinterpret my comments as criticism. I reffered all above only for information about these stores for any member from Europe who is interested. Me also, i have two amplifiers in use with resistors and caps of middle quality and origin which i don't know
Regs
Fotios
Thanks for your comments!
I wish there was some logical selection process for my capacitors but it really was what I had and could get easily! Partly I found that the pitch on the board was too narrow for the mica caps I could get so this put me off trying to cram them in there. The poly's don't fit well either but are a bit more comfortable. I already had the arcotronics yeah, bought 100 a while back for filters and things, they are only 63v but I think it's ok for my application, definately on the +/-30v powered amp.
I have done suprisingly little critical listening to these amps yet but if after a while I decide there are some minor flaws I will probably give a go to changing some parts
Project A
This is my 'Project A' amplifier. Single channel, Class A 20W, FETs.
Do you need more information? Please visit
http://madoptic.narod.ru/projects/a.htm
and..., just , 'google it' ( http://translate.google.com/transla....ru/projects/a.htm&hl=en&ie=UTF-8&sl=ru&tl=en )
I'm sorry. It is funny to read it English but I have no time to present a 'pure' English pages at the moment.
Attachments
Futaba MPC resistors supplier....
Here is the link of a German online store which offer MPC resistors
http://www.buerklin.com/default.asp?l=e
You must type in the "search" box the code: "E074.400" and click on the search button so that the page with the Futaba MPC resistors online catalog will open.
Fotios
Here is the link of a German online store which offer MPC resistors
http://www.buerklin.com/default.asp?l=e
You must type in the "search" box the code: "E074.400" and click on the search button so that the page with the Futaba MPC resistors online catalog will open.
Fotios
More pictures of Project A.
http://madoptic.narod.ru/projects/a_page3.files/image003.jpg
Please note that thickness of pcb is 4mm.
http://madoptic.narod.ru/projects/a_page3.files/image001.jpg
http://madoptic.narod.ru/projects/a_page3.files/image009.jpg
http://madoptic.narod.ru/projects/a_page4.files/image004.jpg http://madoptic.narod.ru/projects/a_page4.files/image005.jpg
http://madoptic.narod.ru/projects/a_page4.files/image010.jpg
http://madoptic.narod.ru/projects/a_page4.files/image011.jpg
Re: Project A
Very creative layout and enclosure design, fantastic finish and assembly - congratulations!
Mad optic said:This is my 'Project A' amplifier. Single channel, Class A 20W, FETs.
...
Very creative layout and enclosure design, fantastic finish and assembly - congratulations!
- Home
- Amplifiers
- Solid State
- Post your Solid State pics here