Sometimes you may not want all the drivers in your speaker on display, and go for a more understated presentation. Or maybe your S.O. just insists on your creations innards being covered by grilles. I don't think that grille cloths themselves do any necessary damage to sound (or at least, as DIYers, we can design with any grille effects in mind). But grille frames can be a source of diffraction you may not want to tolerate after going to all the effort to round edges and avoid overhangs.
I've been trying to come up with a method of having a grille that lies flush with the cabinet surface and uses no frame. Of course, this will only work with designs in which the drivers are at least somewhat below the surface. Some good examples would be the Econowaveguide speakers much discussed over on AudioKarma AK Design Collaborative - Econo-Waveguide Speaker - AudioKarma.org Home Audio Stereo Discussion Forums. These use waveguide (horn) mid/tweeters that usually are recessed so the mouth of the guide is flush and have woofers typically inset into the baffle an inch or so to aid in delay matching with the tweeter driver.
The plan is to route a narrow groove around the drivers and waveguide, stretch grille material over it, and then hold it in place with the rubber spline material made for holding window screens into frames. The grille then sticks out only by the minimal thickness of the grille. Here are some pictures of some test runs using this technique (which looks pretty promising).
I got some 0.125" Phifer spline material from Home Depot, and an inexpensive "solid brass inlay kit" from Harbor Freight (#99552) which includes a 1/8" carbide cut-down bit for use with a 1/4" router. The grille material I used is some black relatively stretchy knit.
First order was to make a template for the router. For this, I just chopped up some MDF scrap on the table saw and rounded the corners of it with a belt sander. An initial attempt done without rounding the corners did not go well. Then a couple of wood screws were used to hold the template onto the test piece (which had also been a practice piece for a veneering project).
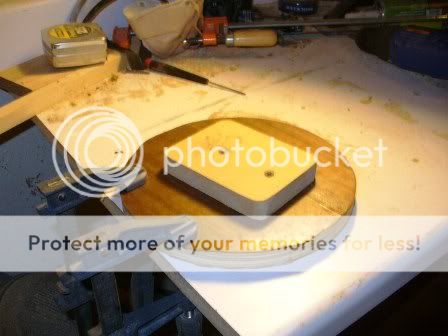
Next, I used the router and inlay kit to follow around the template and make the groove. A depth of 1/4" is about right, which is what I used on another test. This veneered piece was grooved to about 3/16" which wasn't quite enough to easily push in the spline. Cutting the groove is still a weak point of the process, as I haven't been very good at keeping the groove straight. Possibly it might be better to use a template that has an open center, with the inlay sleeve following the inside edge so that any straying that happens would occur in places that would be covered by grille cloth. Plan on practicing on some scrap first. Any suggestions on getting straighter grooves would be welcome.
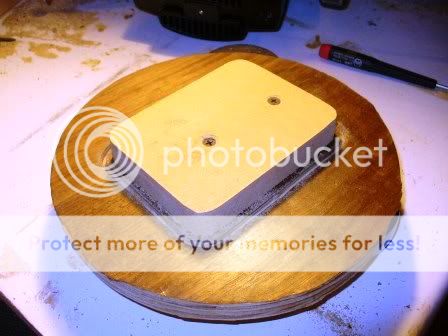
I also used a felt-tip marker to darken the edges of the groove so that bare wood wouldn't show in places where the spline would be pushed in deeply.
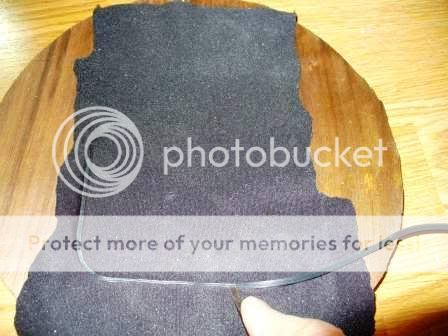
Stretch the grill cloth over the groove and start pushing in the spline. It might be a good idea to use some tape to keep the cloth taut, though I did ok without doing that. I used a small screwdriver tip to push the spline in, though thumbnails work pretty well, too. Probably for a big grille area, I'll splurge for the $3 to get a rotary tool made to do this.
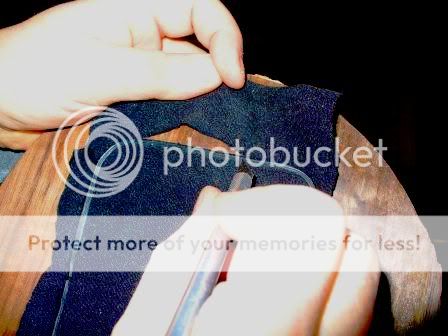
After the spline is inserted all around, a razor point knife with a NEW BLADE will easily trim the cloth. Cut into the side of the outside edge of the groove while pulling the cloth away.
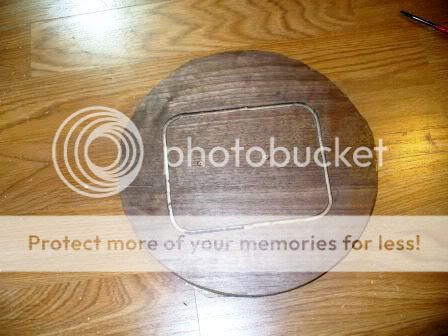
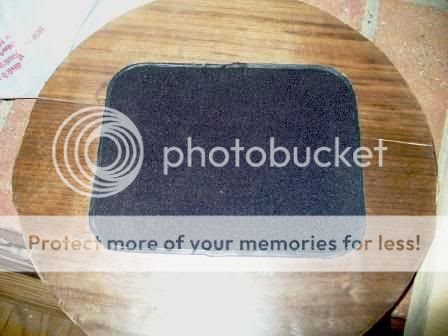
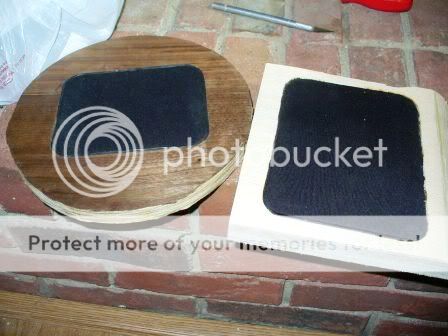
Here is the result so far. Also shown is a test done on some unfinished plywood. Should work great if I can manage to keep the groove straight.
I've been trying to come up with a method of having a grille that lies flush with the cabinet surface and uses no frame. Of course, this will only work with designs in which the drivers are at least somewhat below the surface. Some good examples would be the Econowaveguide speakers much discussed over on AudioKarma AK Design Collaborative - Econo-Waveguide Speaker - AudioKarma.org Home Audio Stereo Discussion Forums. These use waveguide (horn) mid/tweeters that usually are recessed so the mouth of the guide is flush and have woofers typically inset into the baffle an inch or so to aid in delay matching with the tweeter driver.
The plan is to route a narrow groove around the drivers and waveguide, stretch grille material over it, and then hold it in place with the rubber spline material made for holding window screens into frames. The grille then sticks out only by the minimal thickness of the grille. Here are some pictures of some test runs using this technique (which looks pretty promising).
I got some 0.125" Phifer spline material from Home Depot, and an inexpensive "solid brass inlay kit" from Harbor Freight (#99552) which includes a 1/8" carbide cut-down bit for use with a 1/4" router. The grille material I used is some black relatively stretchy knit.
First order was to make a template for the router. For this, I just chopped up some MDF scrap on the table saw and rounded the corners of it with a belt sander. An initial attempt done without rounding the corners did not go well. Then a couple of wood screws were used to hold the template onto the test piece (which had also been a practice piece for a veneering project).
Next, I used the router and inlay kit to follow around the template and make the groove. A depth of 1/4" is about right, which is what I used on another test. This veneered piece was grooved to about 3/16" which wasn't quite enough to easily push in the spline. Cutting the groove is still a weak point of the process, as I haven't been very good at keeping the groove straight. Possibly it might be better to use a template that has an open center, with the inlay sleeve following the inside edge so that any straying that happens would occur in places that would be covered by grille cloth. Plan on practicing on some scrap first. Any suggestions on getting straighter grooves would be welcome.
I also used a felt-tip marker to darken the edges of the groove so that bare wood wouldn't show in places where the spline would be pushed in deeply.
Stretch the grill cloth over the groove and start pushing in the spline. It might be a good idea to use some tape to keep the cloth taut, though I did ok without doing that. I used a small screwdriver tip to push the spline in, though thumbnails work pretty well, too. Probably for a big grille area, I'll splurge for the $3 to get a rotary tool made to do this.
After the spline is inserted all around, a razor point knife with a NEW BLADE will easily trim the cloth. Cut into the side of the outside edge of the groove while pulling the cloth away.
Here is the result so far. Also shown is a test done on some unfinished plywood. Should work great if I can manage to keep the groove straight.
The plan is to route a narrow groove around the drivers and waveguide, stretch grille material over it, and then hold it in place with the rubber spline material made for holding window screens into frames. The grille then sticks out only by the minimal thickness of the grille. Here are some pictures of some test runs using this technique (which looks pretty promising).
Linn has been doing a variation on this forever. The groove is all around the perimeter of the baffle on the side/top/bottom of the cabinet, with a piece of elastic bound into the periphery of the cloth. Drop the elastic into the groove.
dave
There have also been a number of good designs that made the grille, when on, a smooth part of the cabinet front. For example the grille frame might have a big radius on the outside edge and might drop into a recess on the front outter edge of the cabinet. As long as you account for woofer excursion the grille front or grill cloth doesn't need to be much off the cabinet surface.
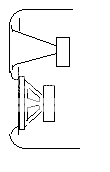
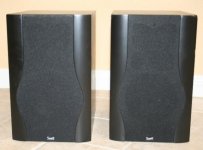
Avid did a "low diffraction" series that did this. At Snell I designed a QBX series that had the grille flush into the baffle. Where I had to cut a recess around the tweeter I gave it an irregular 4 lobe shape to randomize the reflection distance. In the photo, that is the faint butterfly outline that you can see on the right speaker. This worked very well.
Good luck with your approach, it should work well.
David S.
Attachments
Last edited:
- Status
- This old topic is closed. If you want to reopen this topic, contact a moderator using the "Report Post" button.