I recently was trying out white rustoleum appliance epoxy and managed to screw up the finish on a set a computer speakers I was building for a while. The speakers were completely sealed, and I wasn't all that attached to them, so I decided to scrap that project and repurpose the components. I may just cut them so that I can make a removable back panel. But anyway...
I'm essentially making a standalone ipod/mp3 system, using 2 3" buyout drivers from PE that I'm now guessing were prototypes or an early run of Dayton's version of the NS3, the ND-90 . I haven't seen them since I made the original boxes for them, but I think they have that same curved terminal thing, and they both have a silver/bronze colored motor. The amp will be one of the little JBL 12w boards that I bought a long time ago. I used it the other day to run my 3" mtms, and it sounded really great. Better than the Ratshack I've been using, even after making some improvements by removing the preamp. If I didn't have an extra it would be harder to let it go.
I think this'll be the first build I do with the intention of selling, although I'm pretty sure I'll be content to keep it if I have to. I'll probably be selling it through Etsy, as I think it'll be most appealing there. And I believe things like this would be more valuable in an artistic setting.
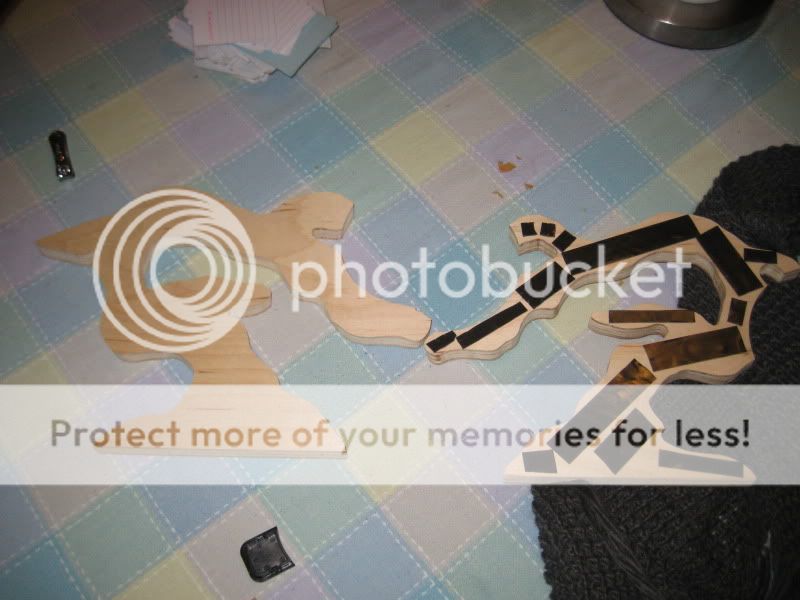
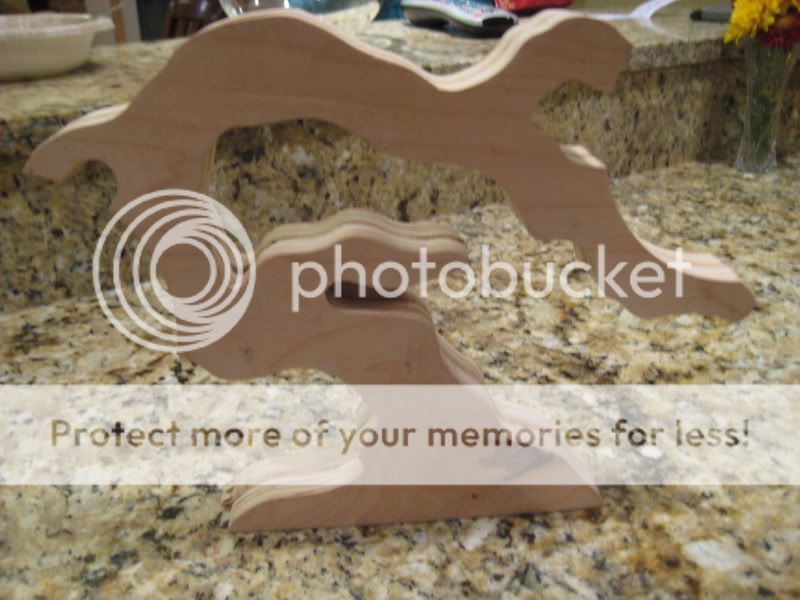
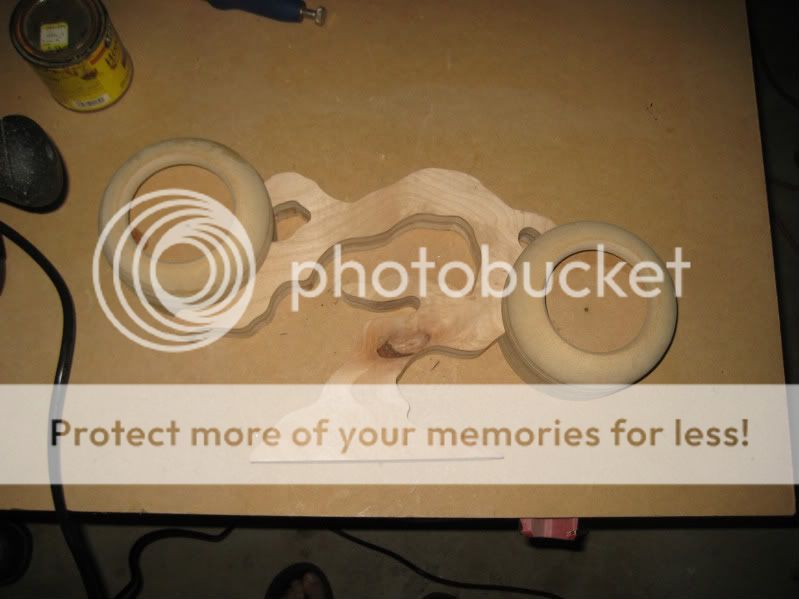
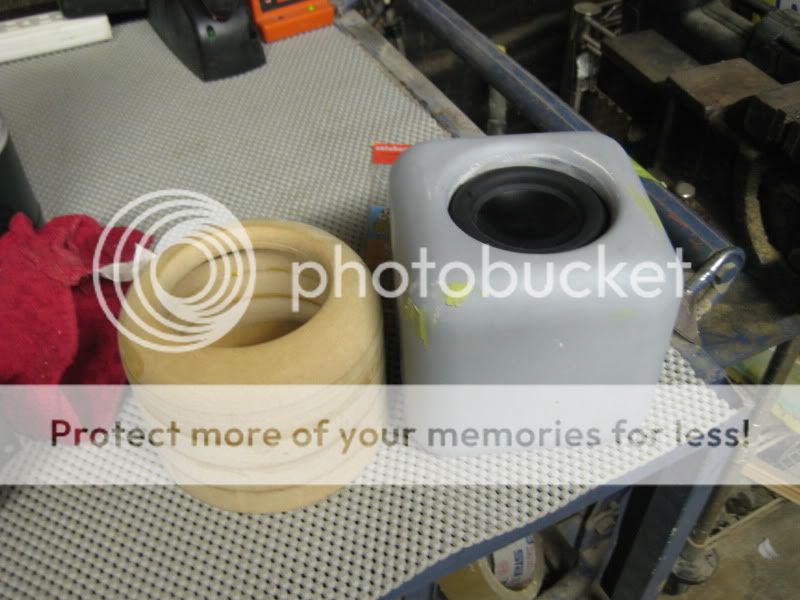
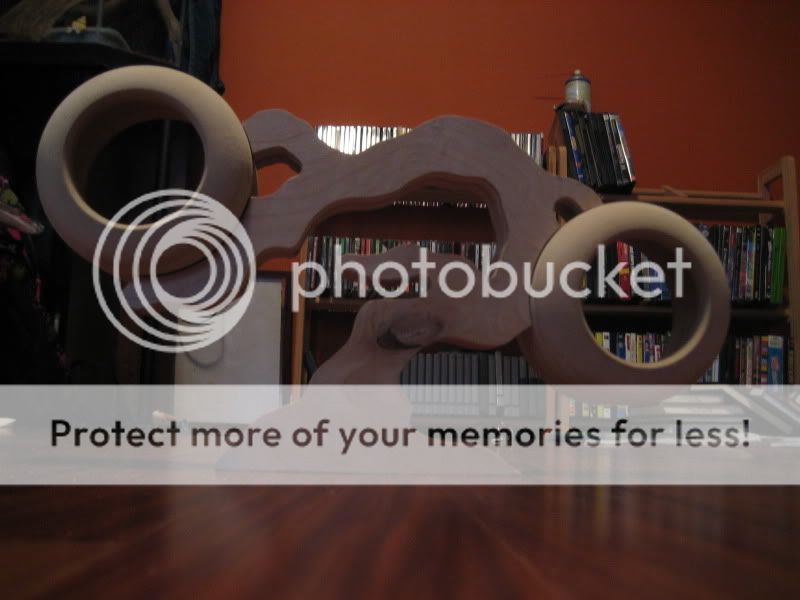
I'm gonna call it Bonsai for obvious reasons. The tree silhouette will be birch ply, probably two layers together, with grooves routed on the inside of each for wires, and a single volume pot near the base. The two 3" drivers will be in mdf "pods" on each side, modeled after the ns3 mtm. They will probably be painted an olive color, with a flat/satin clearcoat. I'm thinking a mix between a dark walnut and a cherry maple(?) for color on the tree.
There will be a single knob in the middle of the base area of the tree, although I may have to add the bass knob that comes on the amp too. I might try to bypass it somehow. I had a friend whose dad turned knurled wood into gorgeous bowls and such. I may try to get some knobs made. I have some beads that he made that are really sweet. I'm not sure if they're actually "knurled" wood, but the wood he uses has veins of black due to some sort of fungus or bacteria in the wood. Gorgeous stuff. I'll have to get pictures.
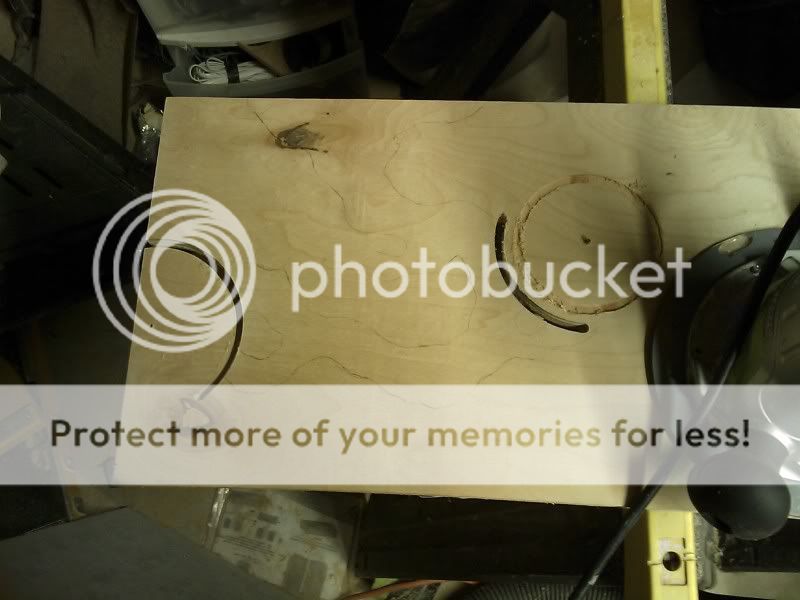
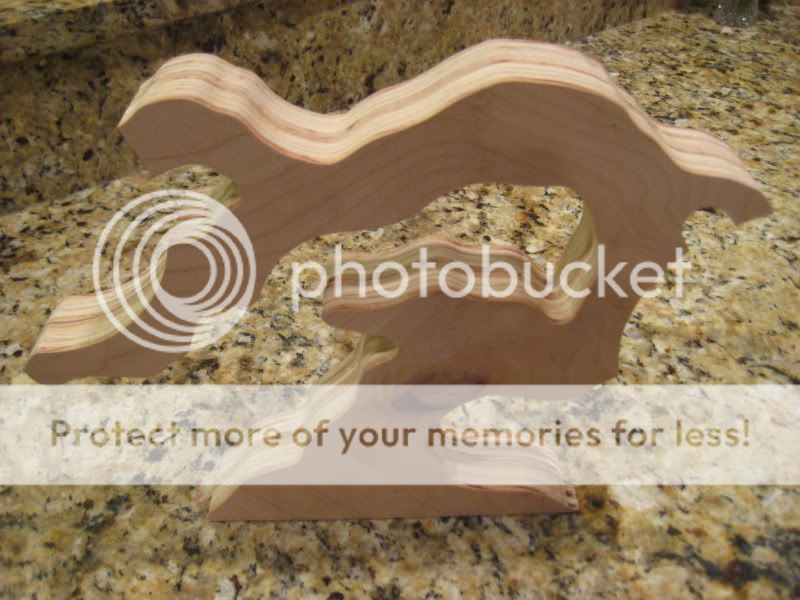
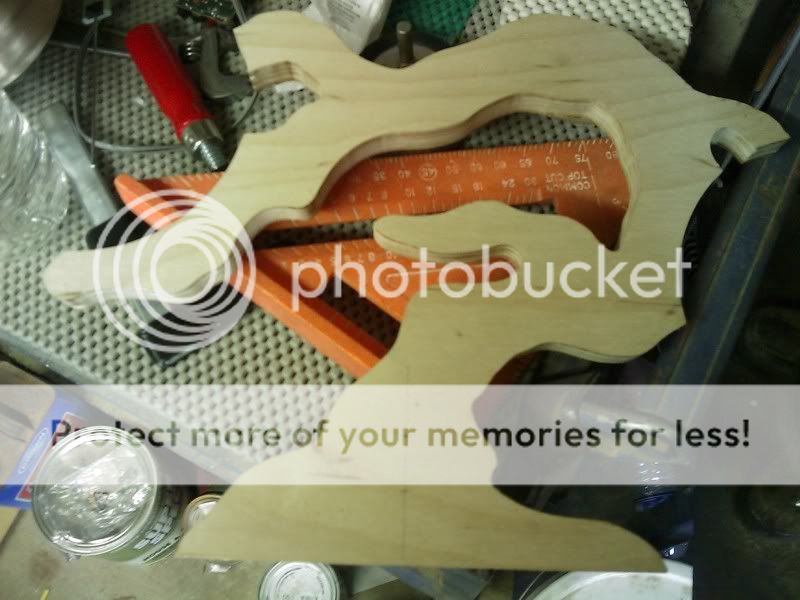
As of right now I have to run the thing on the router table with the flush trim bit and get the sides all vertically cut. The jigsaw tends to lean on me when i cut curves. I've been playing around with cleaning up the edge of this birch ply and it cleans up nicely. I do have a void to fill, but I think I will do that after staining but before clear so I can match the color.
And so, on to cellphone pics...
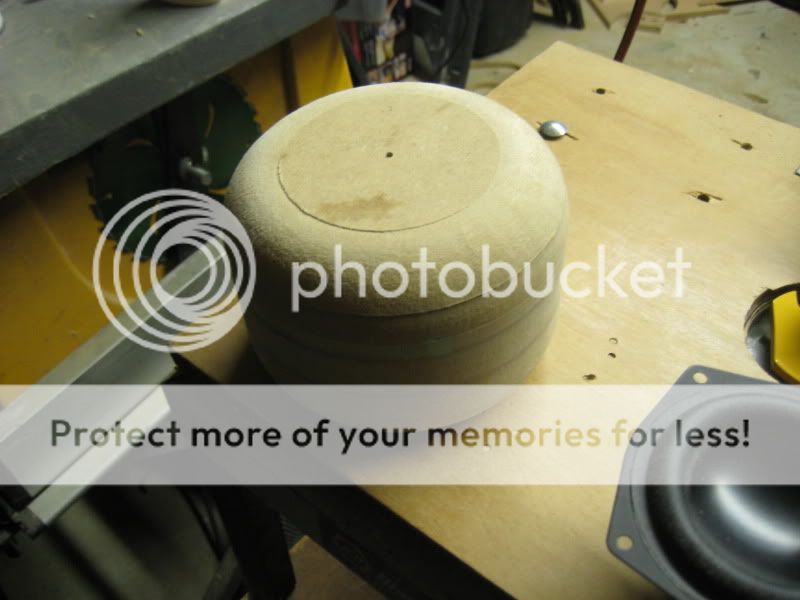
I think you can kinda get the idea from those. The amp will be in the "pot," which will be mdf cut with the compound miter. Kinda like this. I think I'll probably do satin or gloss black. I may have feet, but I'm not sure just yet. I don't really know how hot these things can get. I would love to just throw a bigger heatsink on it and not worry about it, but I'd have to buy something or hack up one I have. Which are both possible.
I was also thinking about using casting resin to cement pebbles into a recess in the "pot".
I really really hope that it's balanced. I think I'm going to test the shape with some eights today. I think if I have to I can add weight in the base.
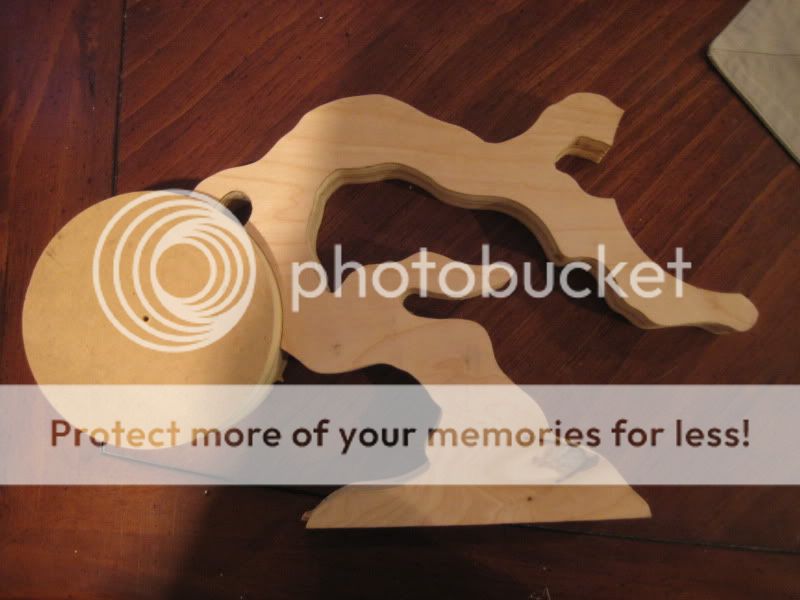
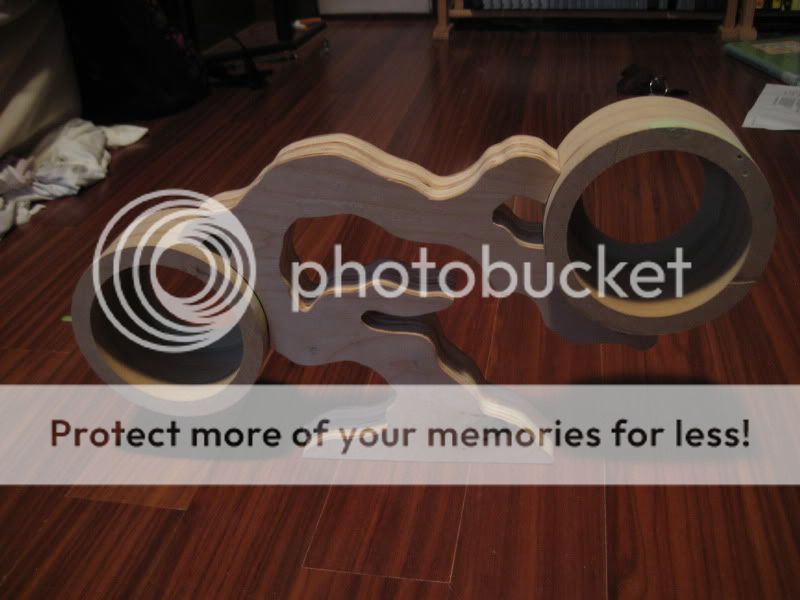
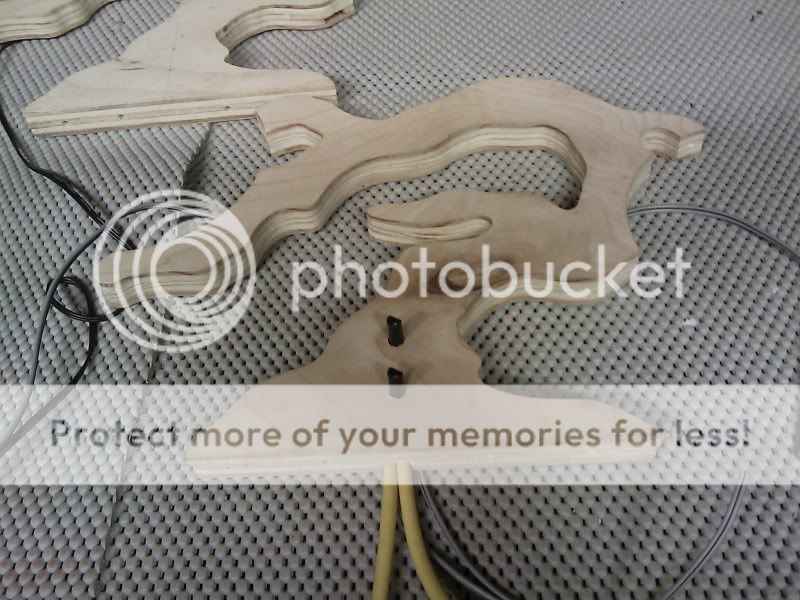
I cut out the second plywood panel with a jigsaw, then attached a bunch of double-sided foam tape. i ran the whole thing on the router table with a big new 1/2" flush trim bit.

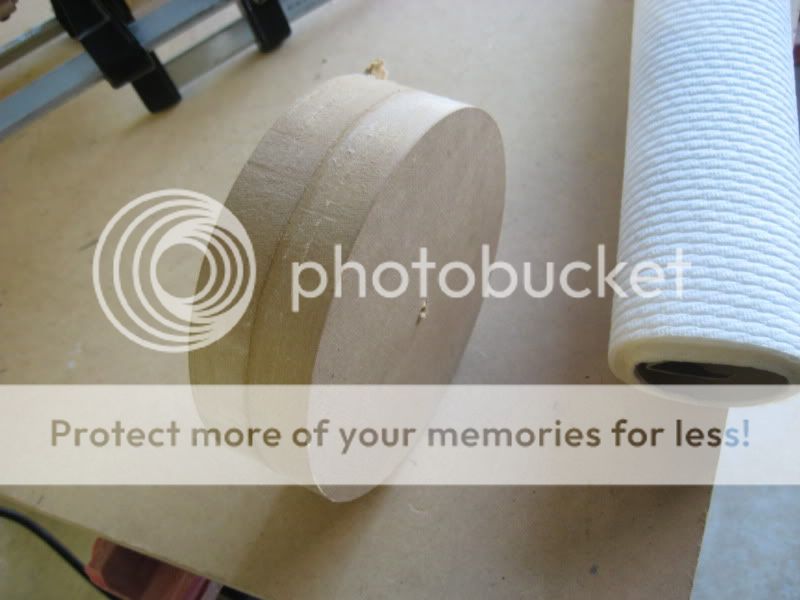
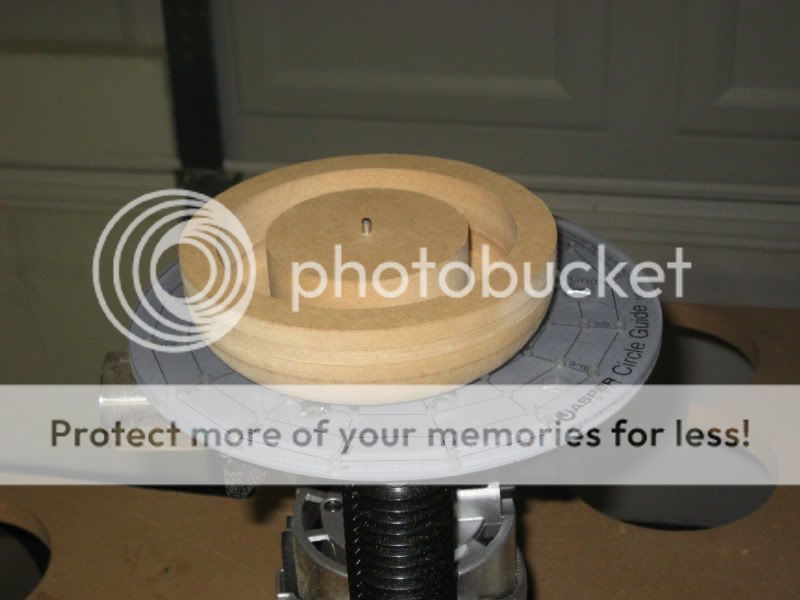
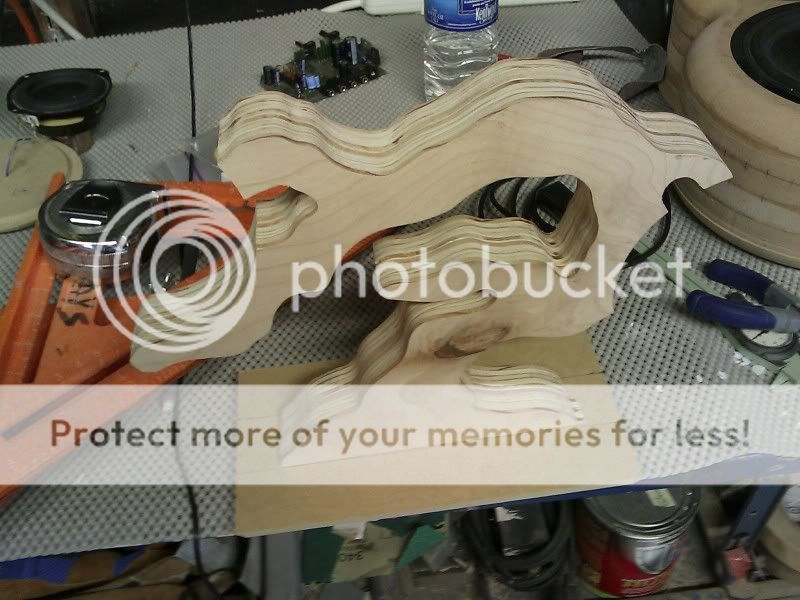
I also cut out a few of the circles that will make up the speaker bodies, and mocked them up.

I'm essentially making a standalone ipod/mp3 system, using 2 3" buyout drivers from PE that I'm now guessing were prototypes or an early run of Dayton's version of the NS3, the ND-90 . I haven't seen them since I made the original boxes for them, but I think they have that same curved terminal thing, and they both have a silver/bronze colored motor. The amp will be one of the little JBL 12w boards that I bought a long time ago. I used it the other day to run my 3" mtms, and it sounded really great. Better than the Ratshack I've been using, even after making some improvements by removing the preamp. If I didn't have an extra it would be harder to let it go.
I think this'll be the first build I do with the intention of selling, although I'm pretty sure I'll be content to keep it if I have to. I'll probably be selling it through Etsy, as I think it'll be most appealing there. And I believe things like this would be more valuable in an artistic setting.
I'm gonna call it Bonsai for obvious reasons. The tree silhouette will be birch ply, probably two layers together, with grooves routed on the inside of each for wires, and a single volume pot near the base. The two 3" drivers will be in mdf "pods" on each side, modeled after the ns3 mtm. They will probably be painted an olive color, with a flat/satin clearcoat. I'm thinking a mix between a dark walnut and a cherry maple(?) for color on the tree.
There will be a single knob in the middle of the base area of the tree, although I may have to add the bass knob that comes on the amp too. I might try to bypass it somehow. I had a friend whose dad turned knurled wood into gorgeous bowls and such. I may try to get some knobs made. I have some beads that he made that are really sweet. I'm not sure if they're actually "knurled" wood, but the wood he uses has veins of black due to some sort of fungus or bacteria in the wood. Gorgeous stuff. I'll have to get pictures.
As of right now I have to run the thing on the router table with the flush trim bit and get the sides all vertically cut. The jigsaw tends to lean on me when i cut curves. I've been playing around with cleaning up the edge of this birch ply and it cleans up nicely. I do have a void to fill, but I think I will do that after staining but before clear so I can match the color.
And so, on to cellphone pics...
I think you can kinda get the idea from those. The amp will be in the "pot," which will be mdf cut with the compound miter. Kinda like this. I think I'll probably do satin or gloss black. I may have feet, but I'm not sure just yet. I don't really know how hot these things can get. I would love to just throw a bigger heatsink on it and not worry about it, but I'd have to buy something or hack up one I have. Which are both possible.
I was also thinking about using casting resin to cement pebbles into a recess in the "pot".
I really really hope that it's balanced. I think I'm going to test the shape with some eights today. I think if I have to I can add weight in the base.
I cut out the second plywood panel with a jigsaw, then attached a bunch of double-sided foam tape. i ran the whole thing on the router table with a big new 1/2" flush trim bit.
I also cut out a few of the circles that will make up the speaker bodies, and mocked them up.
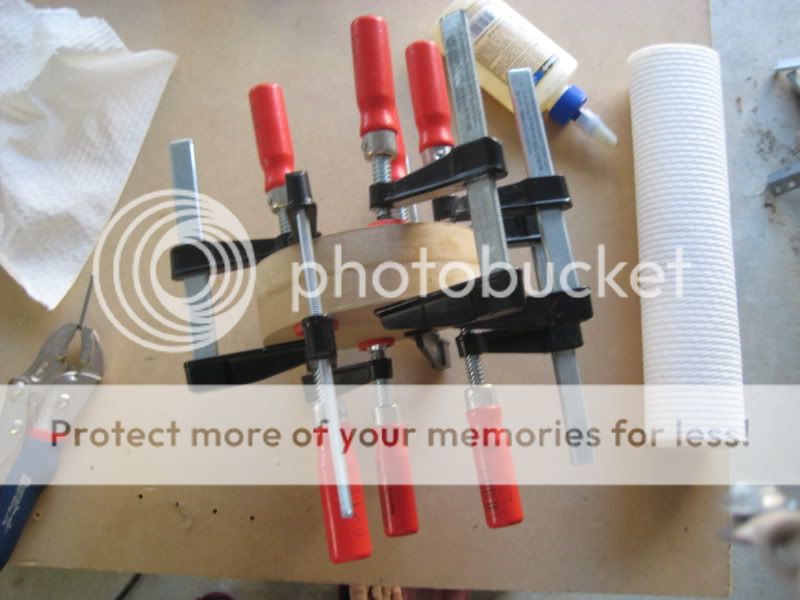
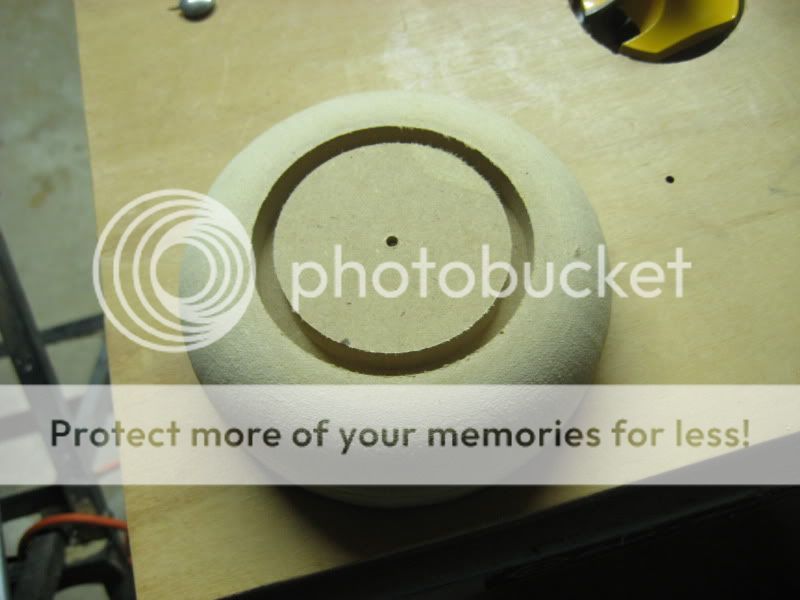
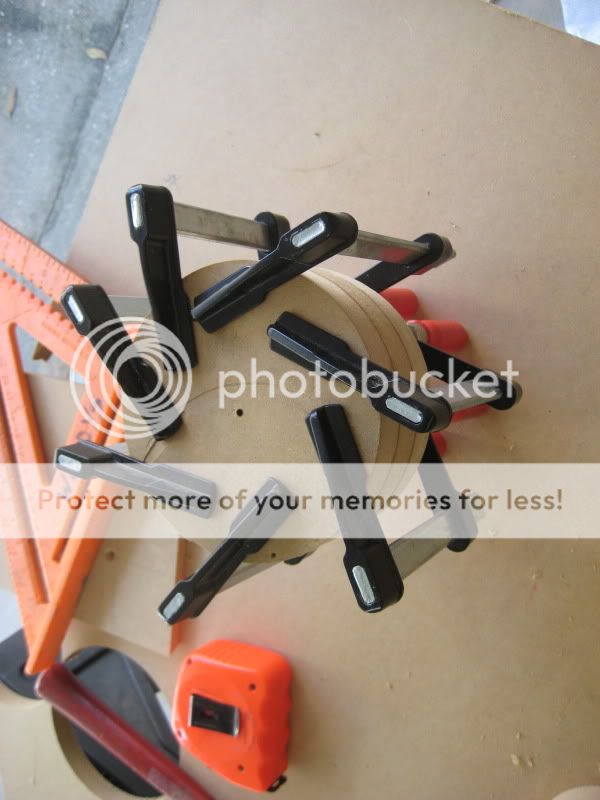
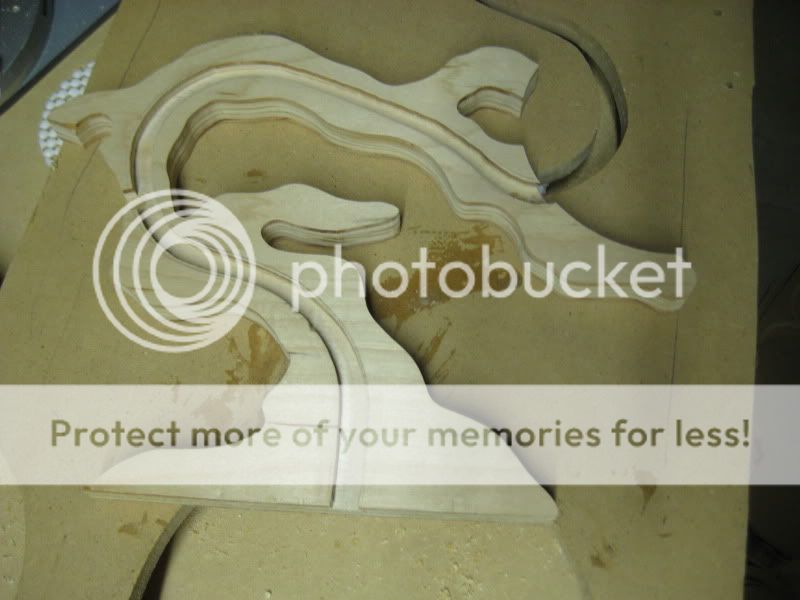
I got a bit done yesterday. I cut out all of the circles for the pods, and this time I decided to route the baffles out and round them over as a doubled up piece. This made the roundover easier, and I was able to cut them cleanly, although I was to the very limit of how deep I could cut with the jasper jig and the upspiral bit. I glued them up with the centering pin in, then removed it after clamping. I had some scary spot where I thought I would be cutting the pin out, as I only had 1/4" to grab sometimes with the vice grips. I had to unclamp one, and move the pin out a bit. Not fun. Gotta move quick with drying glue.

Very creative! I like what I see so far.
Will there be an ipod dock mounted on the base of the tree?
Regards H@kan
Will there be an ipod dock mounted on the base of the tree?
Regards H@kan
Very creative! I like what I see so far.
Will there be an ipod dock mounted on the base of the tree?
Regards H@kan
I'm still unsure if I am going to buy an Ipod dock/av cable to incorperate into the unit, or simply use a 3.5mm input cable. I am leaning more towards not using a dock, as I still want to have a pot/knob near the base of the tree. I may just try to find a nice-looking input cable. I would love to have something turned for the knob and a sort of cover for the headphone cable plug.
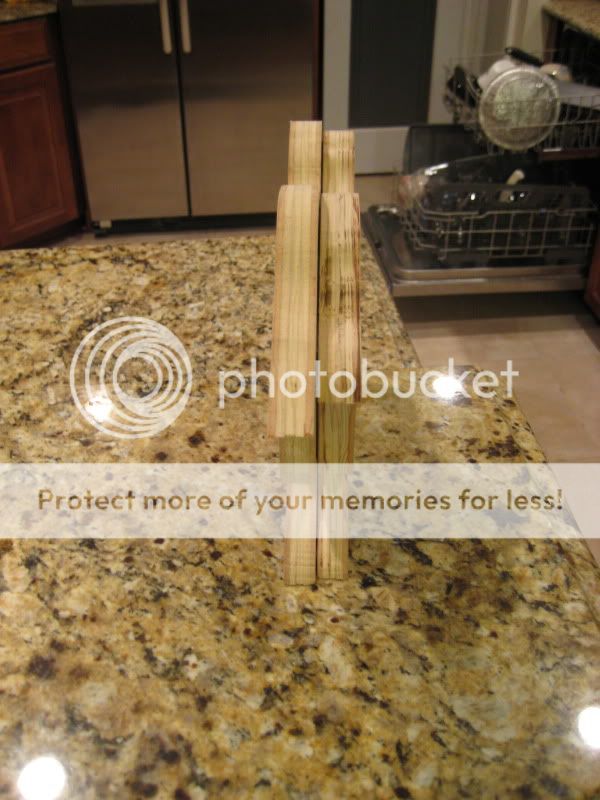
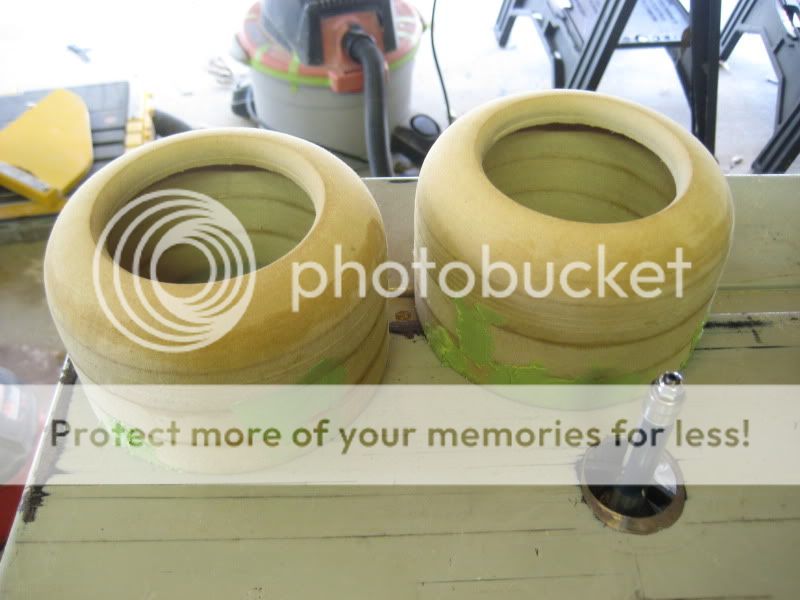
Comparison with the old boxes
Clamping 4th layer on
All cut except backs
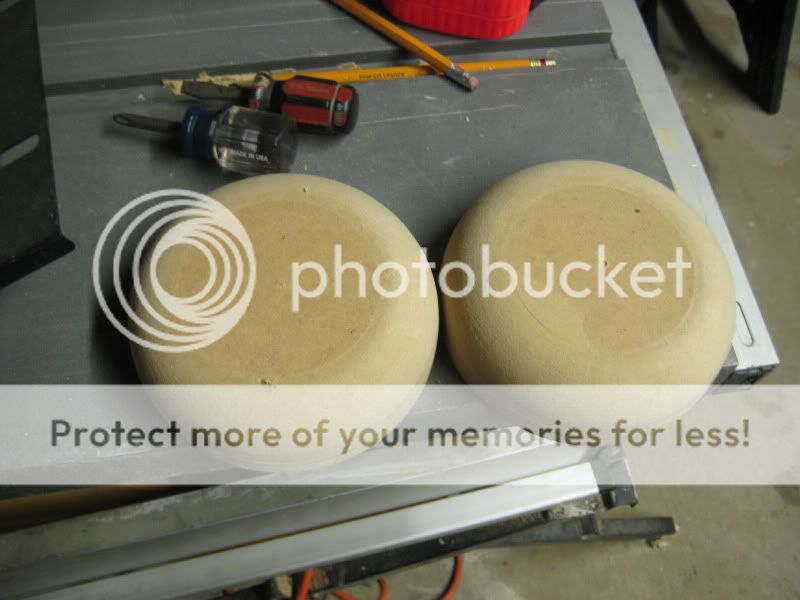
A little bondo
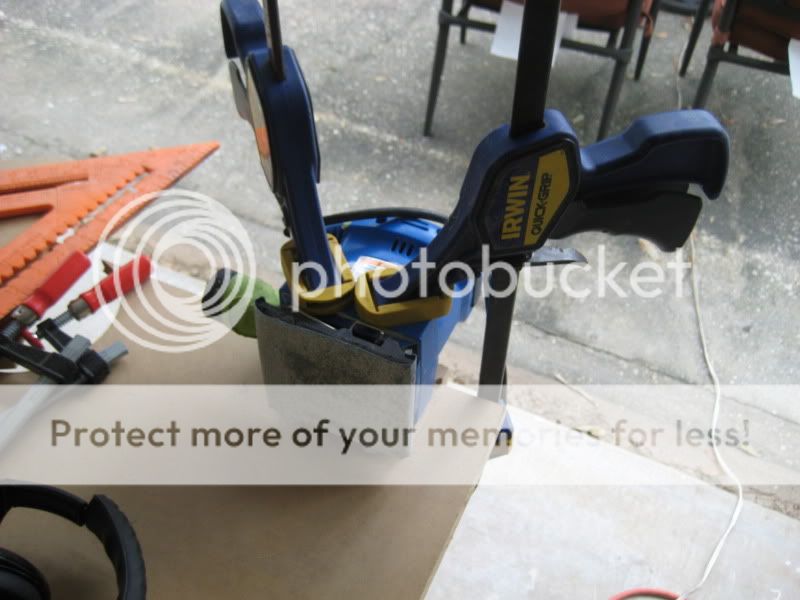
Who needs fancy tabletop sanders?
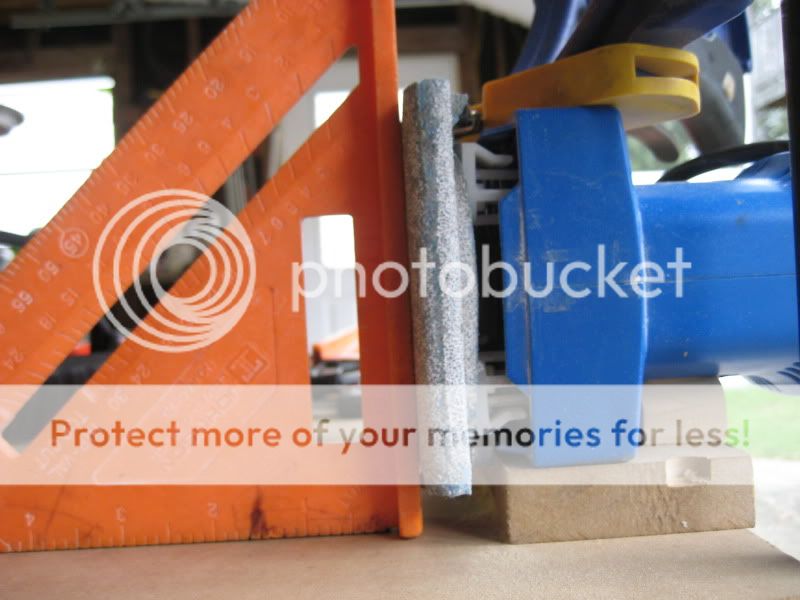
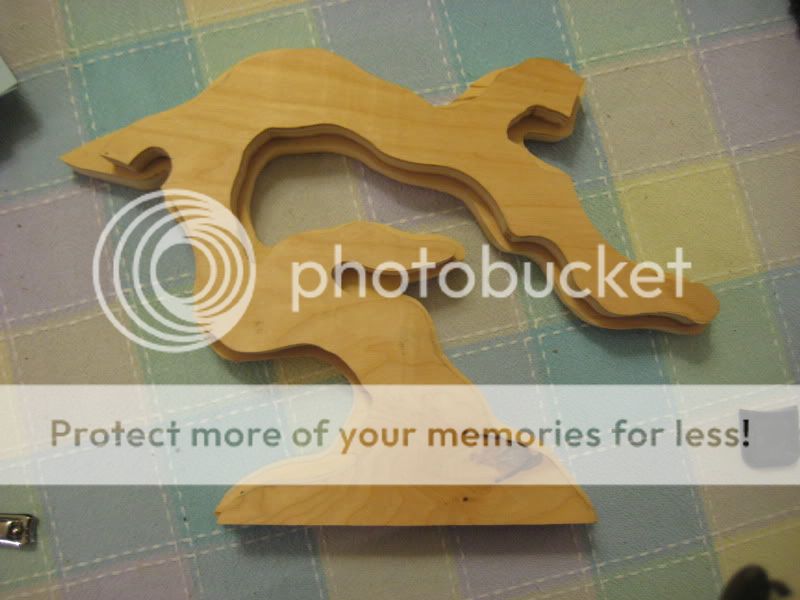
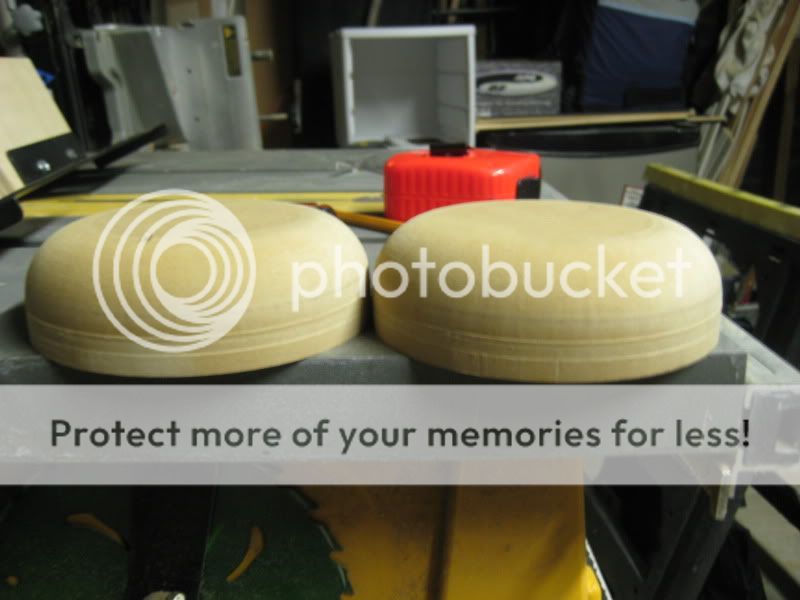
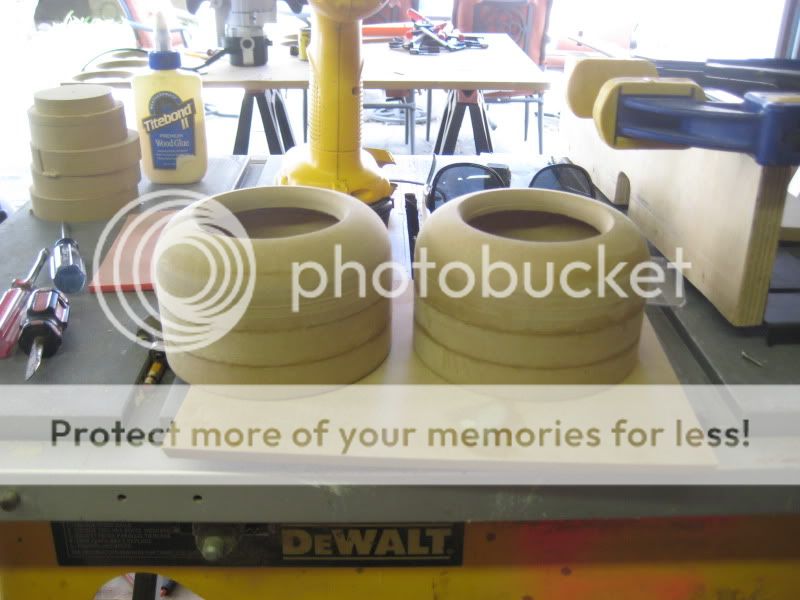
Worked out really nice
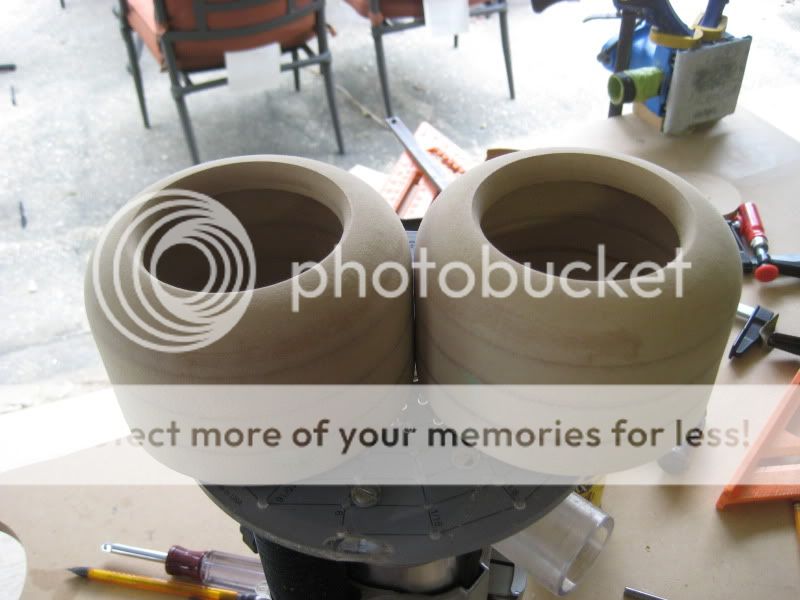

Sweet

Those look seriously tasty!!! I'm guessing you'll probably paint the pods. Prior to painting them, I'd suggest that you 'paint' them with a dilute solution of pvc glue. Otherwise the mdf will SUCK up paint like you would not believe, and will more than likely telegraph the positions of your glue joints. Several coats of 2-1 diluted pvc glue should alleviate that.
Looking forward to the finished product!
Tom.
Looking forward to the finished product!
Tom.
Those look seriously tasty!!! I'm guessing you'll probably paint the pods. Prior to painting them, I'd suggest that you 'paint' them with a dilute solution of pvc glue. Otherwise the mdf will SUCK up paint like you would not believe, and will more than likely telegraph the positions of your glue joints. Several coats of 2-1 diluted pvc glue should alleviate that.
Looking forward to the finished product!
Tom.
I will most likely be going heavy on both a glue wash and high-build primer. I think this will be one of the first jobs I paint myself with a hvlp setup.
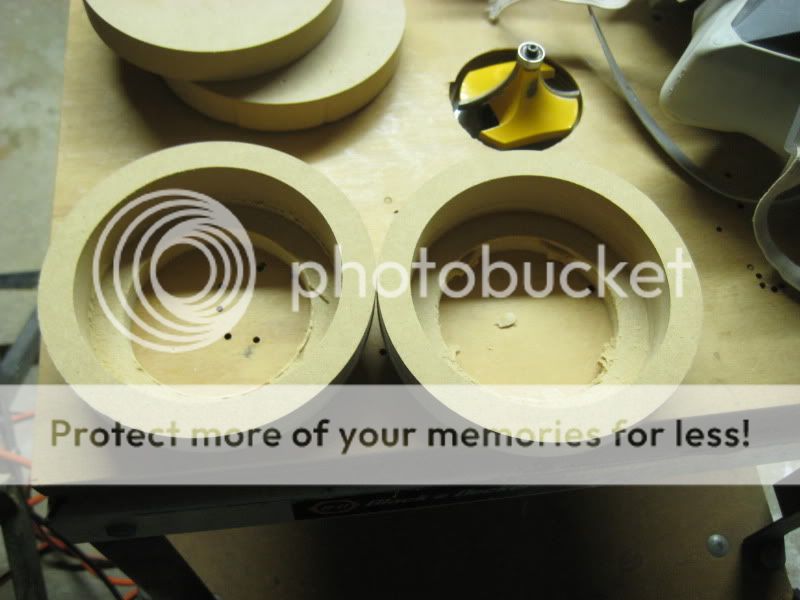
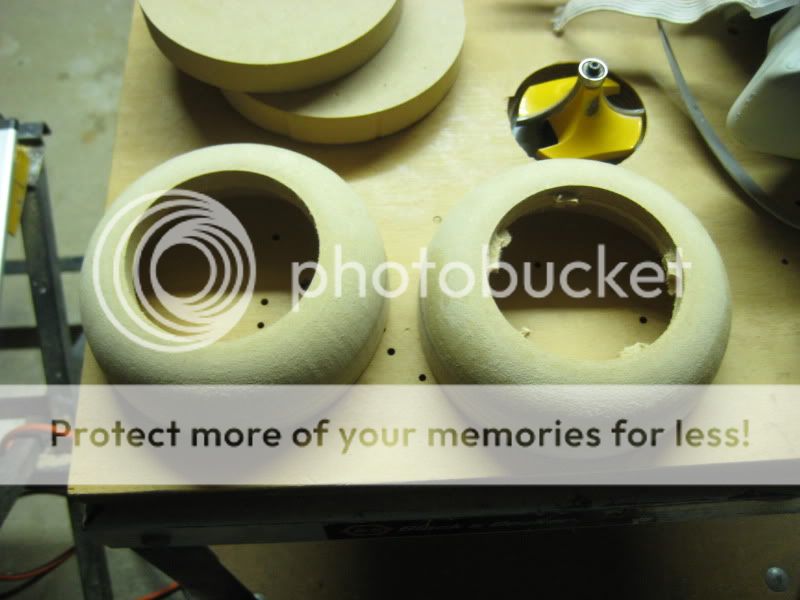
I finally figured out the easiest way to cut and route the back panels w/ usig any of that foam tape, as it leaves a gap when using it with the roundover. I decided to route out a raised circular bit to hold the panel in place while routing. I had to drum sand the inside of the enclosures a bit, but otherwise it worked perfectly.

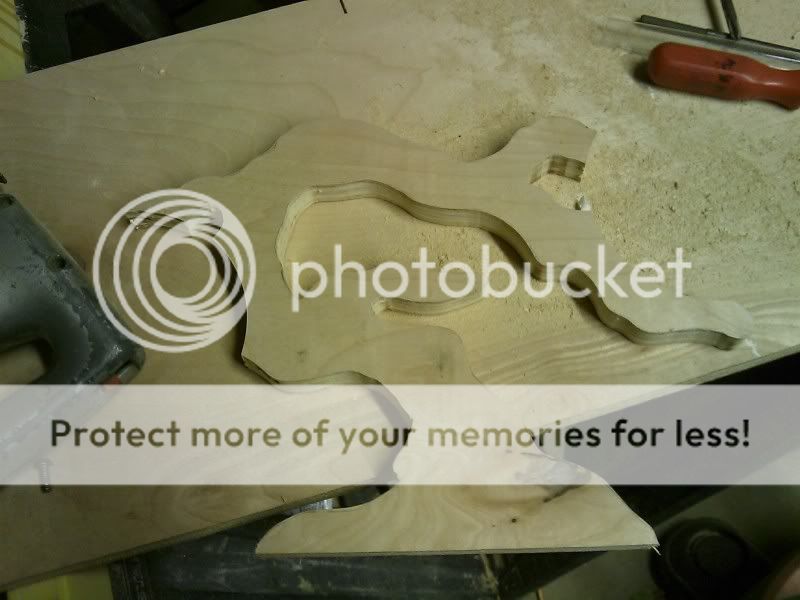
I also cut out a guide to cut the wire grooves in the tree. I used my new bushing set, and it worked flawlessly.

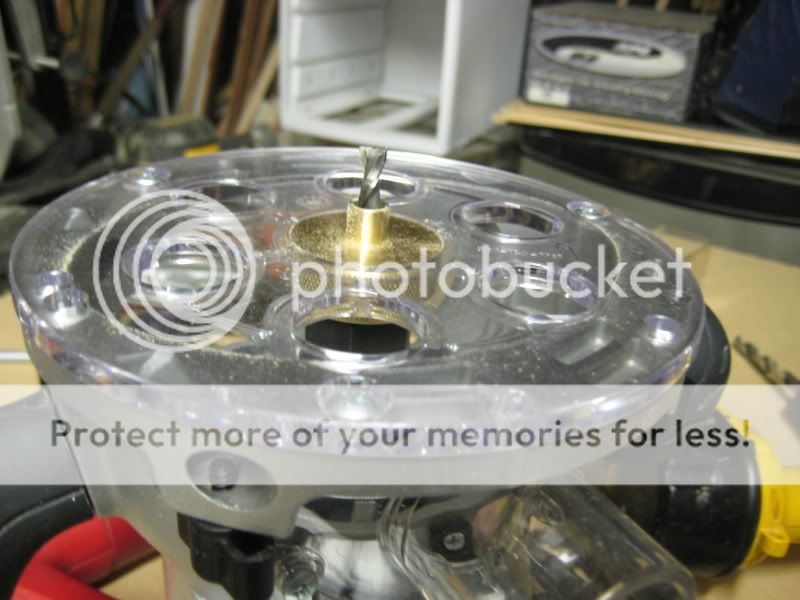
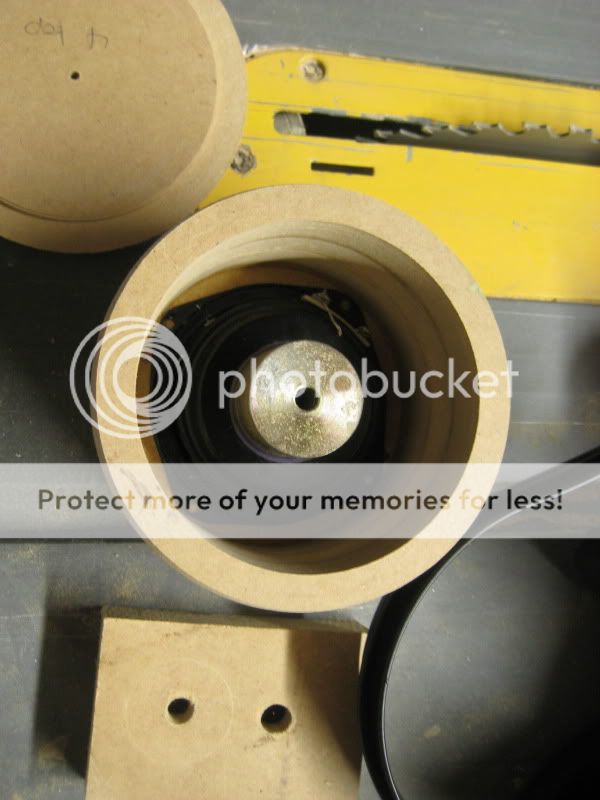
Now comes the interesting part of yesterday's work. The drivers i am using for this build were in another unfinished project. The enclosures were completely sealed, and were made from 3/4" mdf. Getting them out was interesting to say the least.
And so, I give you: The Extraction
I cut off the back of one, using tape and everything, trying to see if I could just make the backs removable and keep the enclosures.
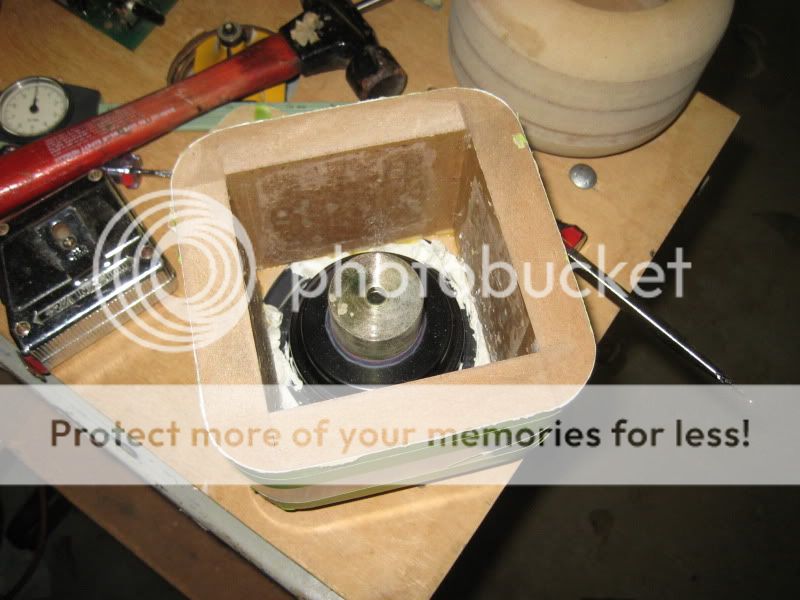
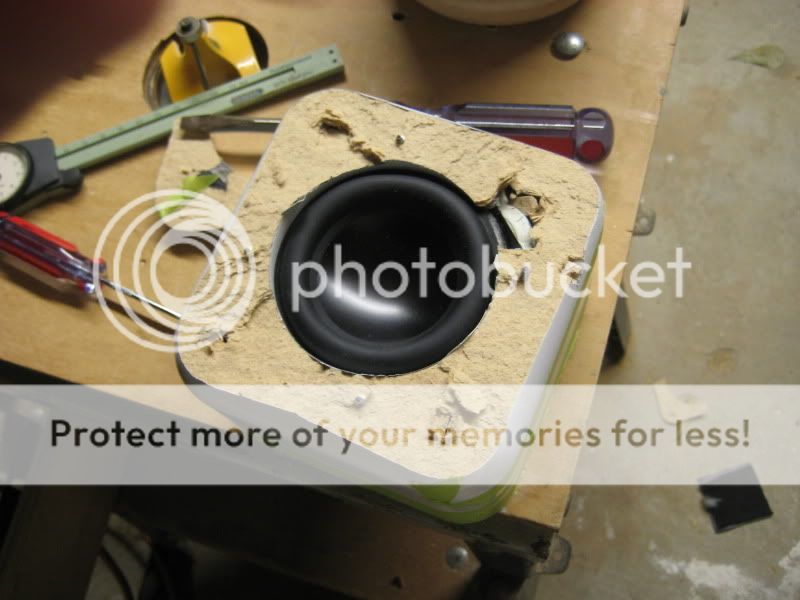
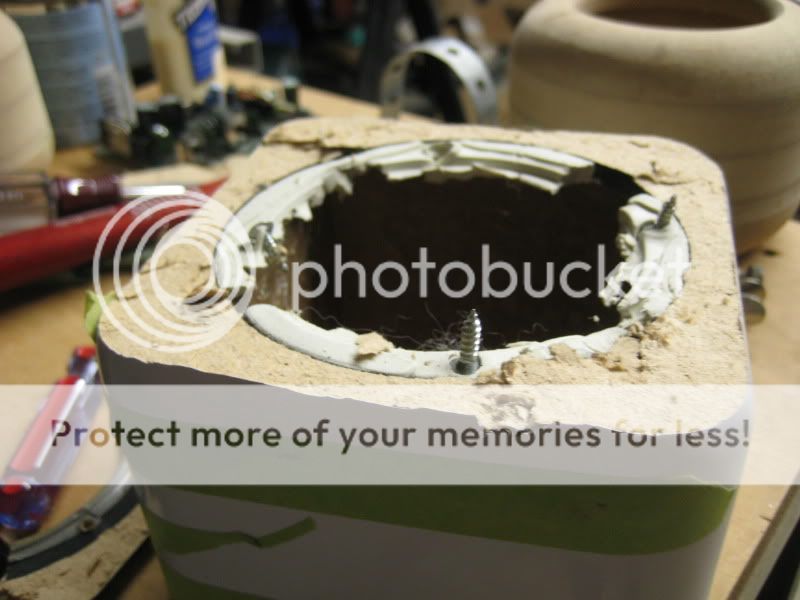
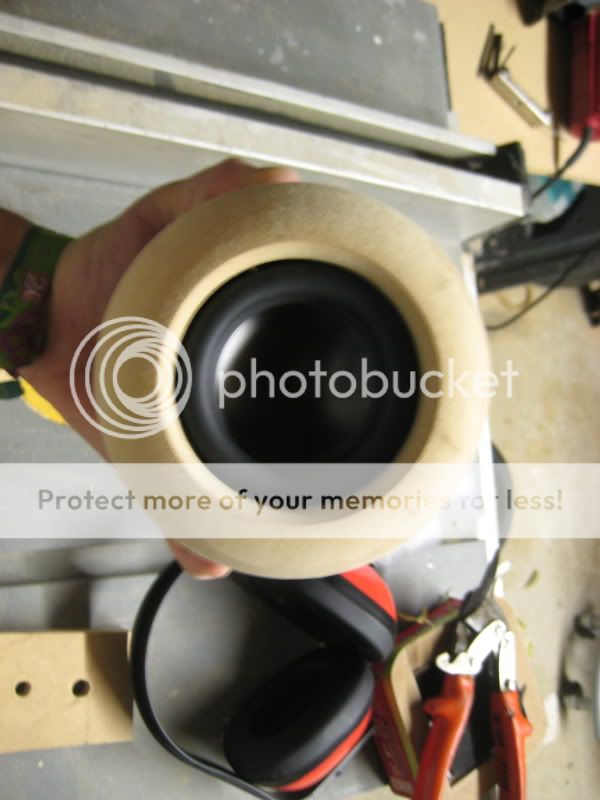
Wasn't going to work. I remembered I had glued the sides on over the drivers, requiring me to destroy the enclosures. I also have to worry about the fact that the baskets are stamped and not very strong. The best way seemed to be to knock out the baffle in front of the speaker.
Nice in his new home
Keep it updated man! You know I'm always interested in the progress! Now you've got me checking DIYaudio and DIYMA as well.
Been busy for the past couple of weeks with camping & fall music festivals. I will be back in the garage next week I assume, but i will be spending a few days on a diy dust collector.
I've been teaching myself to use autocad, so I spent about a day drawing out this:
Going to be making my own Dust Deputy out of galvanized steel ducting. Not my original idea, but I've expanded on it a bit
I just can't figure out how the inlet pipe hole will look stretched out on a cone. I imagine it will be interesting/difficult/impossible(?) to plot that out.
Create your drawings in 3-D, then you can create a solid cylinder in the desired position and then subtract it from the conical part. Autocad is not the best tool for 3-D, but it is fully 3-D capable. You can create a gearwheel by subtracting small cylinders from the periphery of a disk, athough for a fully accurate representation even more work may be required. As you gain practice, repeat rotate-create-and-subtract operations get easier.
All the complex moulded plastic parts we take for granted now exist originally as drawings created by skilled people in tools like SolidWorks or Pro-Engineer. You can even render both solid-color and transparent parts so you could see e.g. a status LED portrayed under a clear plastic dome
w
All the complex moulded plastic parts we take for granted now exist originally as drawings created by skilled people in tools like SolidWorks or Pro-Engineer. You can even render both solid-color and transparent parts so you could see e.g. a status LED portrayed under a clear plastic dome
w
Create your drawings in 3-D, then you can create a solid cylinder in the desired position and then subtract it from the conical part. Autocad is not the best tool for 3-D, but it is fully 3-D capable. You can create a gearwheel by subtracting small cylinders from the periphery of a disk, athough for a fully accurate representation even more work may be required. As you gain practice, repeat rotate-create-and-subtract operations get easier.
All the complex moulded plastic parts we take for granted now exist originally as drawings created by skilled people in tools like SolidWorks or Pro-Engineer. You can even render both solid-color and transparent parts so you could see e.g. a status LED portrayed under a clear plastic dome
w
If I were to model the 3d cone with the circular area removed, would there be a way to lay that surface are flat on a 2d plane? I am somewhat confused by what you said about the gearwheel.
Sorry, ignore the gear wheel, I was just trying to give a simple graphic example of how 3-D parts are built up from primitives such as cylinders, boxes, or polygonal extrusions.
You want to cut a piece from sheet and roll it to make the cone? It's beyond my skill to output the unrolled 2-D sheet from a 3-D autocad drawing, unfortunately. This doesn't mean it's impossible tho', I think you may be able to get a script to do it.
rhino3d.com have a tool that does specifically this, you may be able to get a demo version.
w
Love this project so far. Looking forward to seeing it complete. The pod idea is particularly appealing. 😀
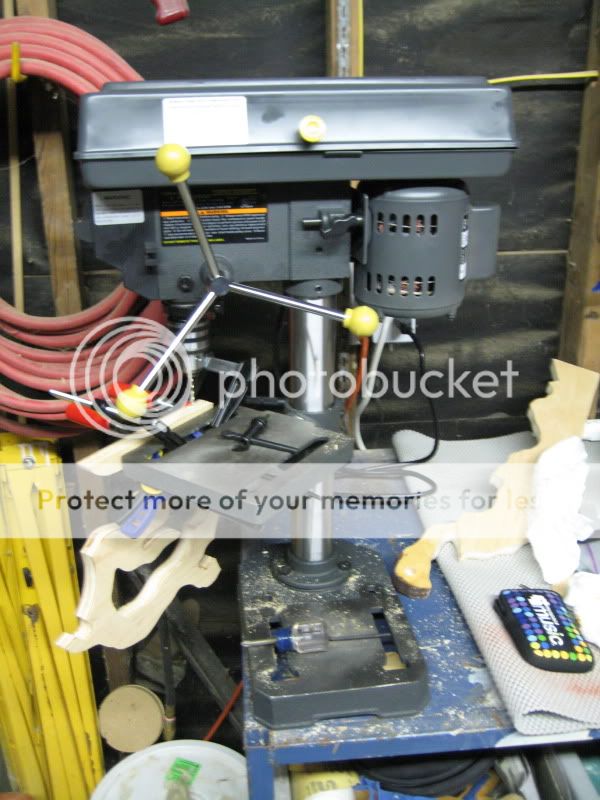
Progress! Well, a little. Picked up a drill press from Harbor Freight for $40, so now I can get this thing (and a bunch of other projects) finished.
I'll have some time this week with the couple of days we get off, and once finals are over I'll have whole days to plow through this. Plus the shop will be slow, so I can use the paint room over the break.
I'll have some time this week with the couple of days we get off, and once finals are over I'll have whole days to plow through this. Plus the shop will be slow, so I can use the paint room over the break.
An externally hosted image should be here but it was not working when we last tested it.
An externally hosted image should be here but it was not working when we last tested it.
Updates!
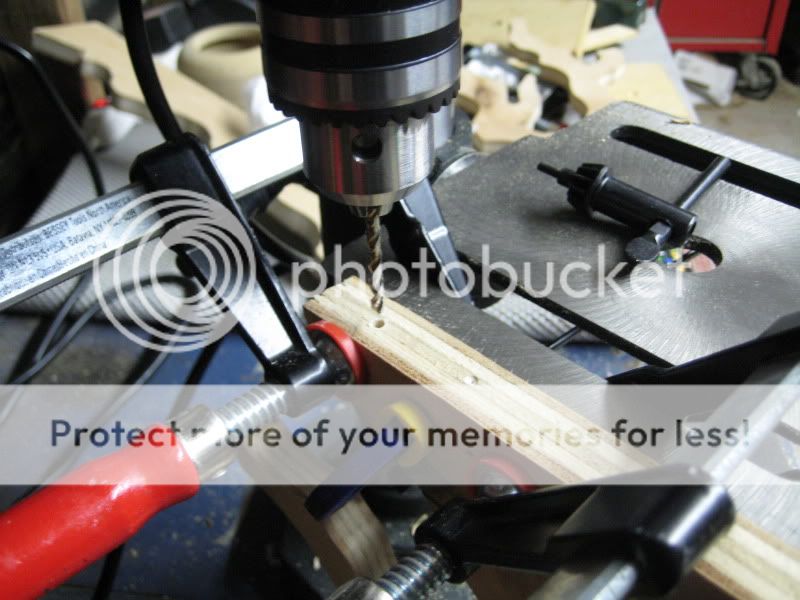
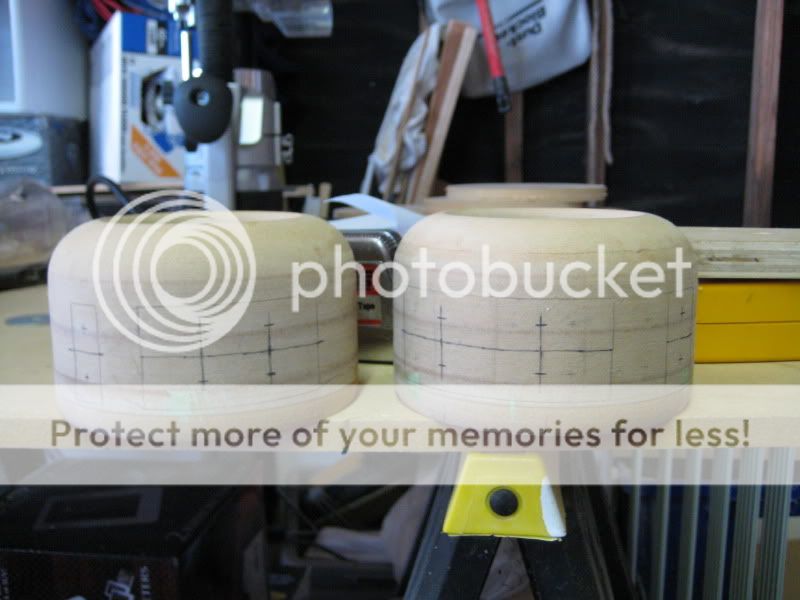
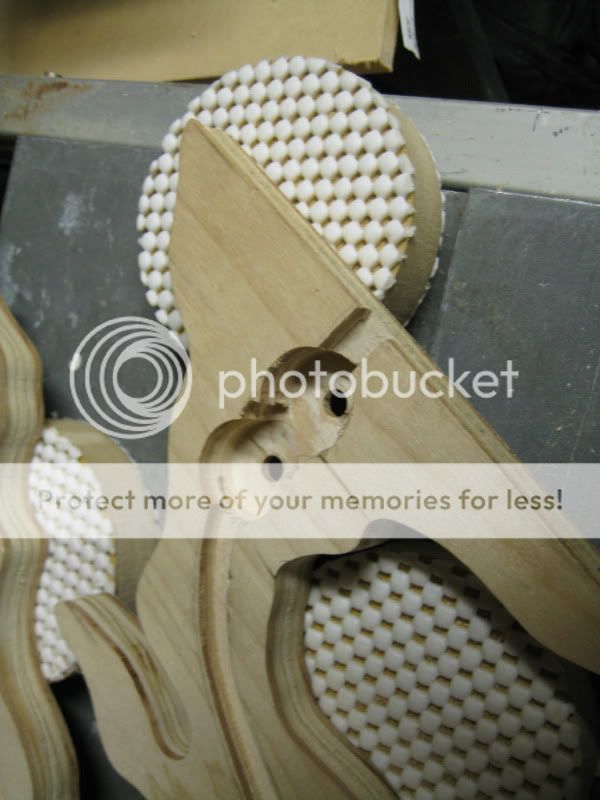
Traced the tree on the pods and marked the holes I will be using to keep the pod screwed to the tree. I'll be using glue, but I want to be sure this thing stays put for a long time.
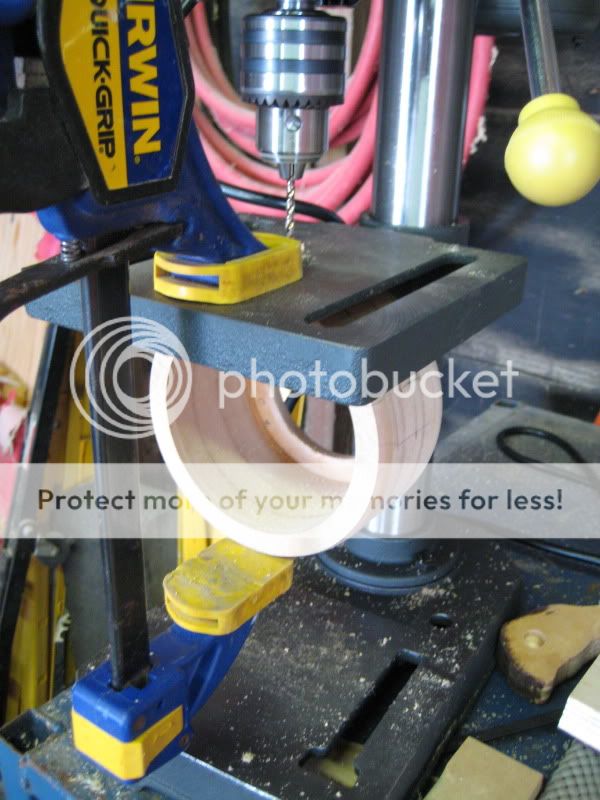
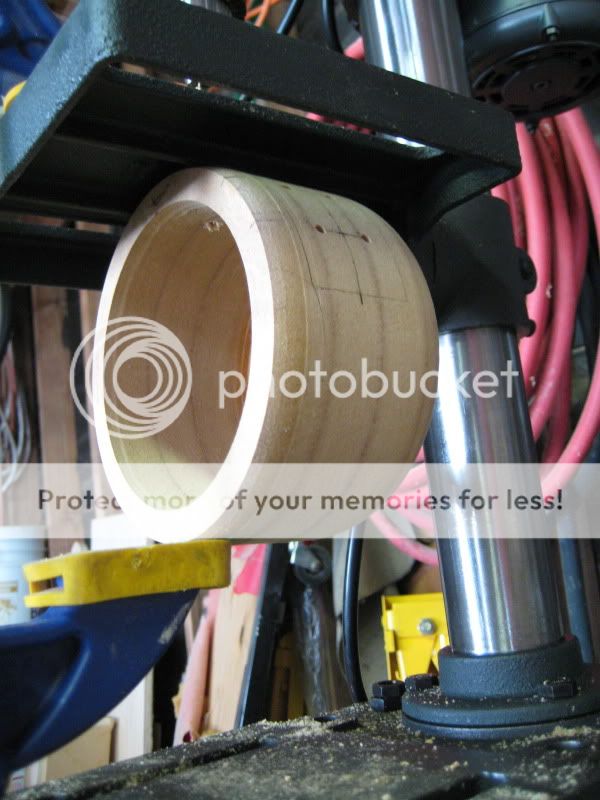
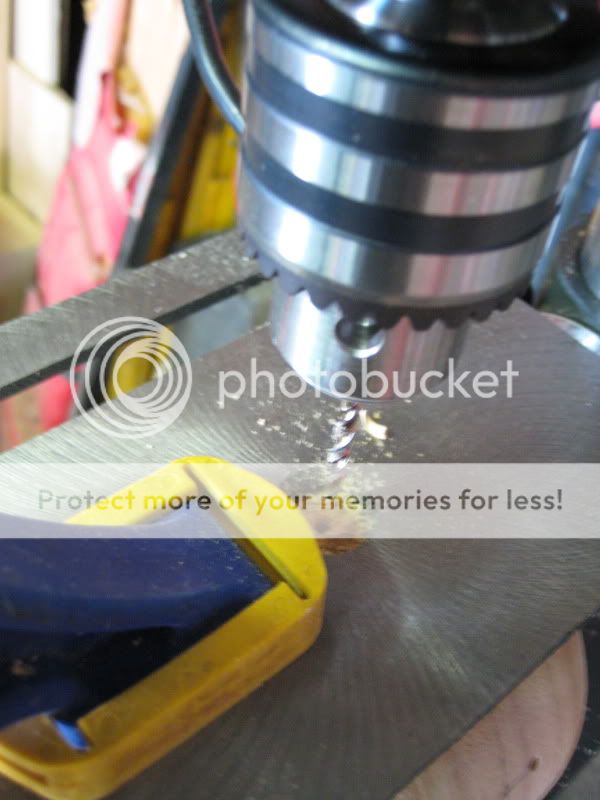
Getting the pods on the drill press was a royal pita at first. There was pretty much no way to keep them stable and clamped and still have the drill where I want it. Then I figured out that I could just clamp the piece to the bottom of the work plate, since it has a wide groove that kept the circle straight. Clamping was much easier too.
I also cut out the base, with an 18* angle to the sides. It will drop into the "pot" and I will probably have it screwed down from beneath.

I wasn't really sure where to put the knobs (I decided I should just keep both), as I was originally planning on only having one. I figured the center of the biggest part of the base would be best, but I wasn't sure if should have them flow with the shape of the tree, farther up the trunk. I eventually decided not to, because it would screw with the knot that I really like. The spots might be hard to see.
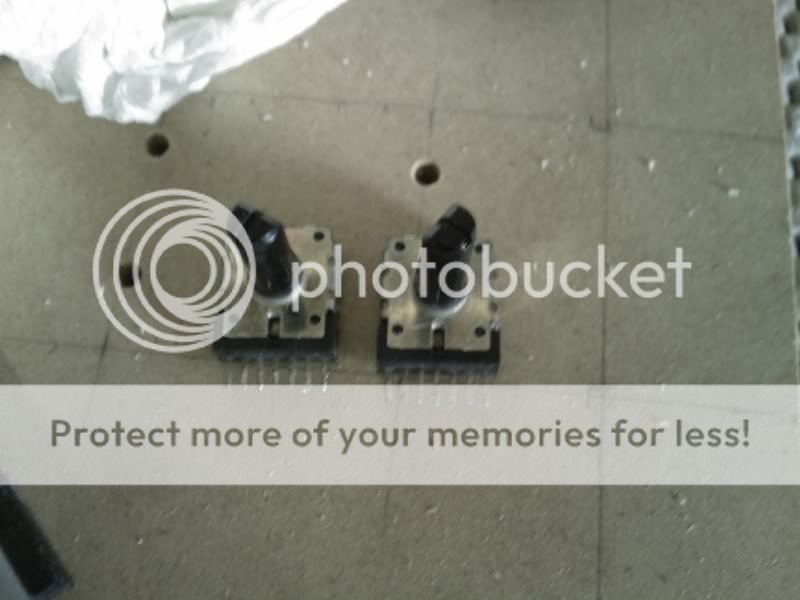
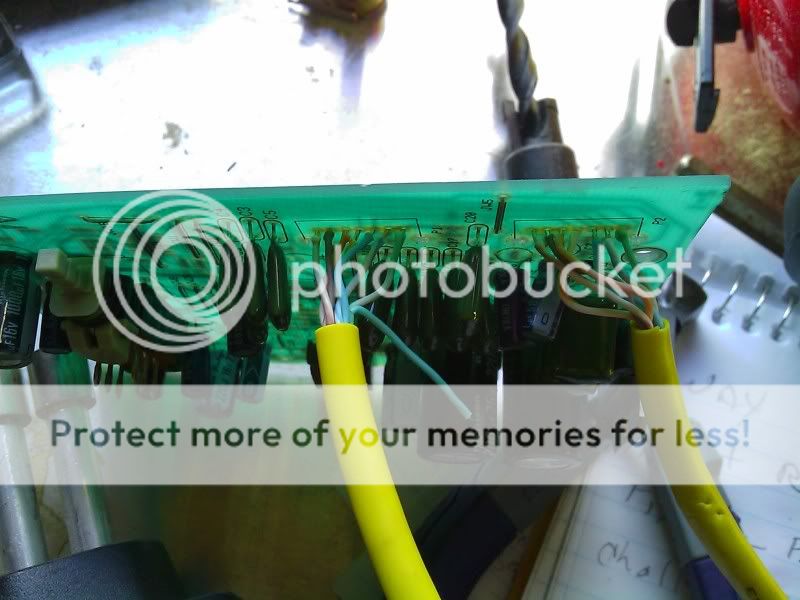
Whilst I was finishing that up, I was also working on the amp board. I bought a desoldering tool from ratshack (the desoldering braid was $3 vs the desoldering tool which was $10), since desoldering braid is a royal pos. It's much easier and I wouldn't have been able to do it without.

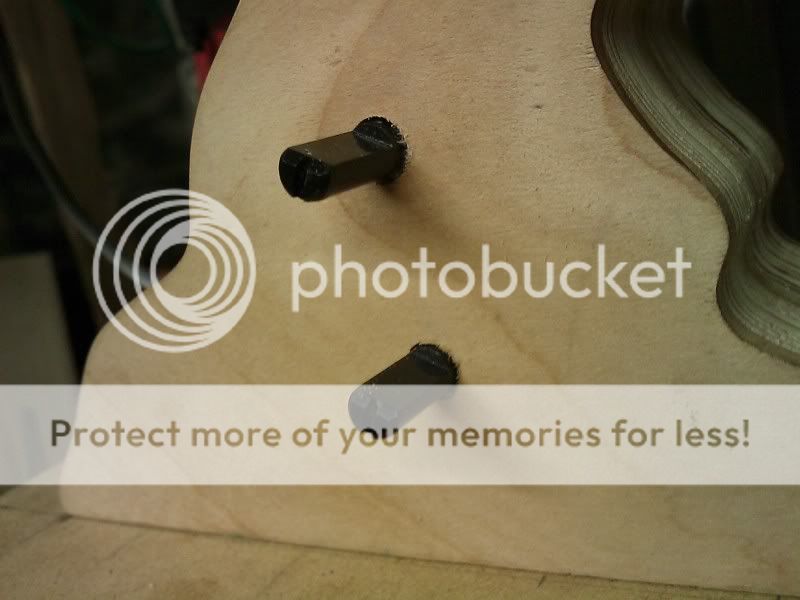
I removed the two potentiometers (one for volume, one for bass), 7 pins each and two prongs to hold it in. The sucker worked really well and I had them out in a few minutes. Then I used some ethernet cable and soldered them into place. I then realized that I needed to do the pots first because I had to glue the two halves of the tree together first. I desoldered them, as they were ugly anyway.
Traced the tree on the pods and marked the holes I will be using to keep the pod screwed to the tree. I'll be using glue, but I want to be sure this thing stays put for a long time.
Getting the pods on the drill press was a royal pita at first. There was pretty much no way to keep them stable and clamped and still have the drill where I want it. Then I figured out that I could just clamp the piece to the bottom of the work plate, since it has a wide groove that kept the circle straight. Clamping was much easier too.
I also cut out the base, with an 18* angle to the sides. It will drop into the "pot" and I will probably have it screwed down from beneath.
I wasn't really sure where to put the knobs (I decided I should just keep both), as I was originally planning on only having one. I figured the center of the biggest part of the base would be best, but I wasn't sure if should have them flow with the shape of the tree, farther up the trunk. I eventually decided not to, because it would screw with the knot that I really like. The spots might be hard to see.
Whilst I was finishing that up, I was also working on the amp board. I bought a desoldering tool from ratshack (the desoldering braid was $3 vs the desoldering tool which was $10), since desoldering braid is a royal pos. It's much easier and I wouldn't have been able to do it without.
I removed the two potentiometers (one for volume, one for bass), 7 pins each and two prongs to hold it in. The sucker worked really well and I had them out in a few minutes. Then I used some ethernet cable and soldered them into place. I then realized that I needed to do the pots first because I had to glue the two halves of the tree together first. I desoldered them, as they were ugly anyway.
Then I drilled out the pilot holes for the pots and routed out the back of the piece to accomodate the pots.

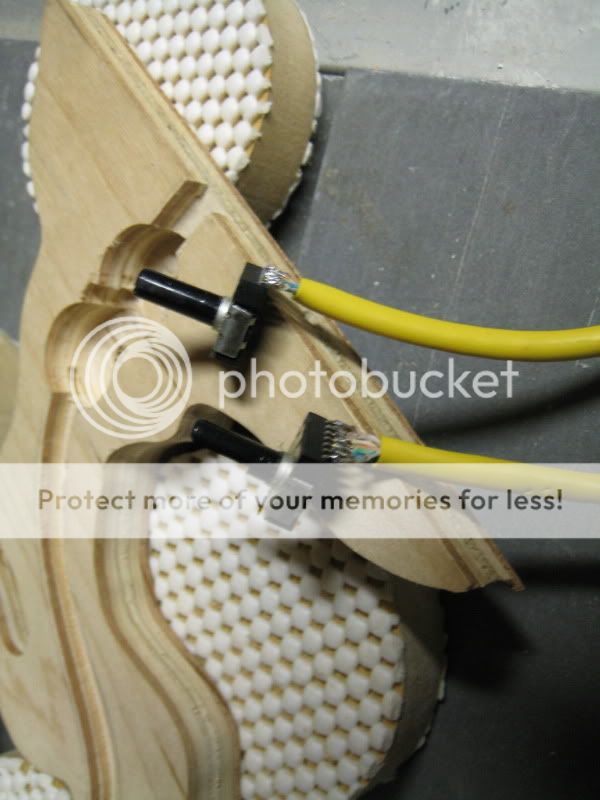
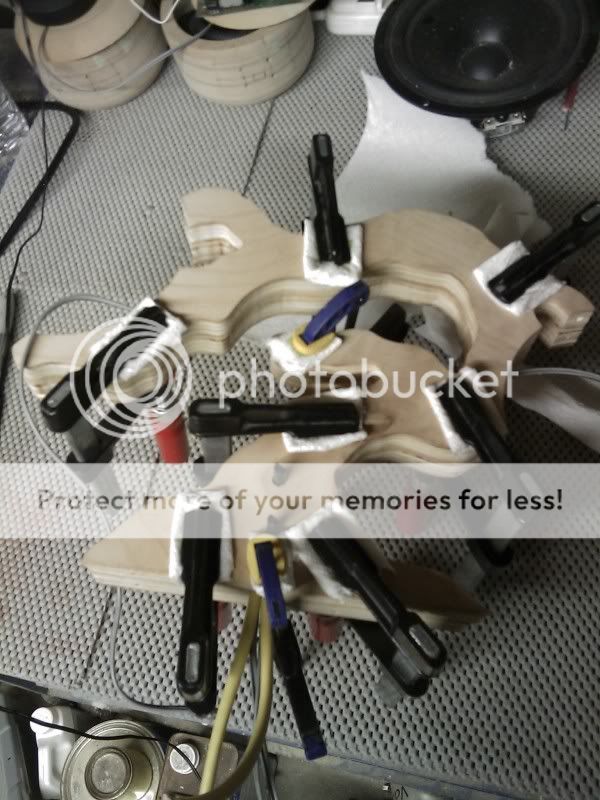
I glued in the pots, the speaker wire, and filled the groove so that they wouldn't shift and make any noise, then I glued the two together with a billion ******* clamps.
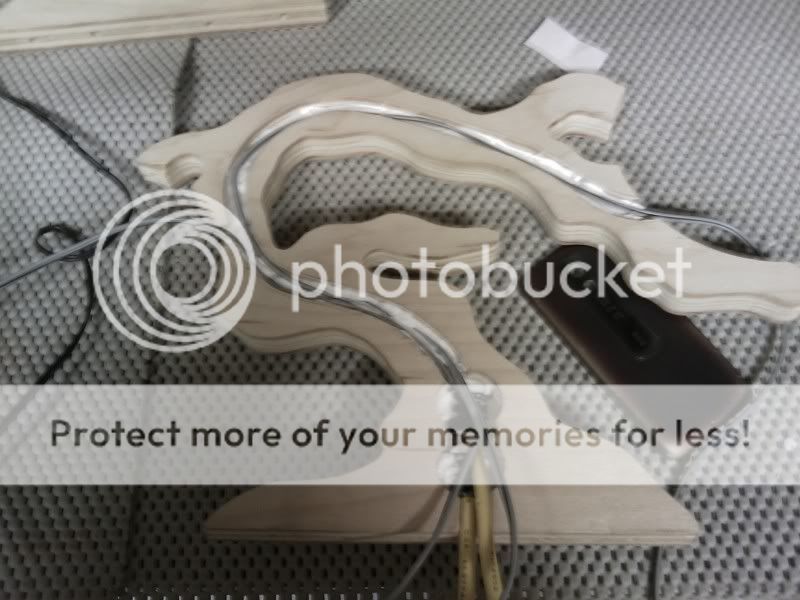
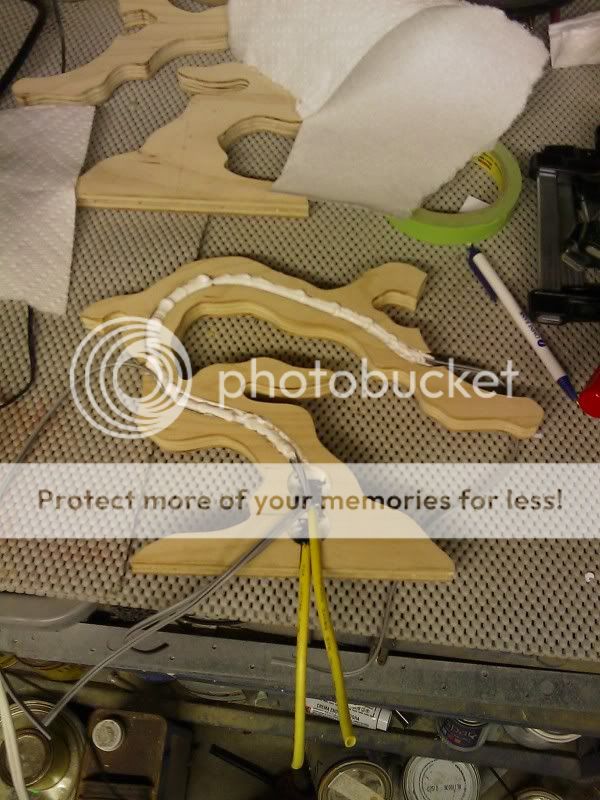

And a dry-fit (what it looks like right now)

I glued in the pots, the speaker wire, and filled the groove so that they wouldn't shift and make any noise, then I glued the two together with a billion ******* clamps.
And a dry-fit (what it looks like right now)
spudfrog, I´m absolutely anti mp3 and suchlike - but as to you, no matter if you can live with that...as a craftsman you got style, matey.
Pit,
My iPod has never seen an MP3. The biggest sonic upgrade you can make with an iPod is to switch from MP3/AAC to AppleLossLess or AIFF.
dave
My iPod has never seen an MP3. The biggest sonic upgrade you can make with an iPod is to switch from MP3/AAC to AppleLossLess or AIFF.
dave
Dave,
the biggest upgrade the youngsters can get is the one from earbuds to boxes. Let´s keep preaching.😀
the biggest upgrade the youngsters can get is the one from earbuds to boxes. Let´s keep preaching.😀
- Status
- Not open for further replies.
- Home
- Loudspeakers
- Full Range
- "Bonsai" decorative Ipod system