

This is just an area I can blab on about stuff without it using up bandwidth in the threads  Hopefully someone will find it interesting or useful.
Tony.
Hopefully someone will find it interesting or useful. Tony.
The MTM's are progressing
Posted 21st September 2009 at 03:13 AM by wintermute
Updated 2nd April 2010 at 12:35 PM by wintermute (added to category speakers)
Updated 2nd April 2010 at 12:35 PM by wintermute (added to category speakers)
I'm in a way glad that it is taking so long to finish these speakers after my four year break from them! If it had have taken a couple of weekends I would have kicked myself for not having done it sooner!
One thing that having had a four year break does is make it easier to slow down and do things properly, afterall, a month or two is relatively short in comparison
I got over two of the biggest fears with this project on the weekend. One was whether I was going to be able to do the veneering properly (this seems so far not to be an issue) and the other was whether my plans to put a 22mm chamfer on the front baffles was going to work (a test on some scrap MDF worked well). The main thread for the project is here with all the latest pictures
How to finish the veneer is as yet undecided, but I'll worry about that in a few weeks
The next big hurdle after finishing the boxes is going to be getting decent freq response measurements, though I have been reading Joe D'appolitos "testing loudspeakers" so should be in a much better position than I was the last time. I want to do some measurements before and after chamfering the baffles so that I have something to quantify what (if any) difference it makes.
Once I have some measurements there are two other dillema's to sort out. One is a practicle one, how I'm going to do grills (I have an idea but it is a little ambitious and I'm not sure if I can pull it off). The other is probably the bigger one and that is the design of the crossover... I can probably get something listenable fairly quickly (as I did when prototyping the box, by just running the mid full range and the tweeter with a single cap on it) This sounded surprisingly good.
Anyway the main thing is that progress is being made, if I keep chipping away it will be done eventually.
Some small problems can be seen on the veneer on the bottom cabinet, this is not an issue though as they will be chamfered. This was an oversight when first building the cabinets. I assumed (never assume) that my 25mm mdf was actually 25mm thick... it was actually 25.5mm... long story but detailed in the thread
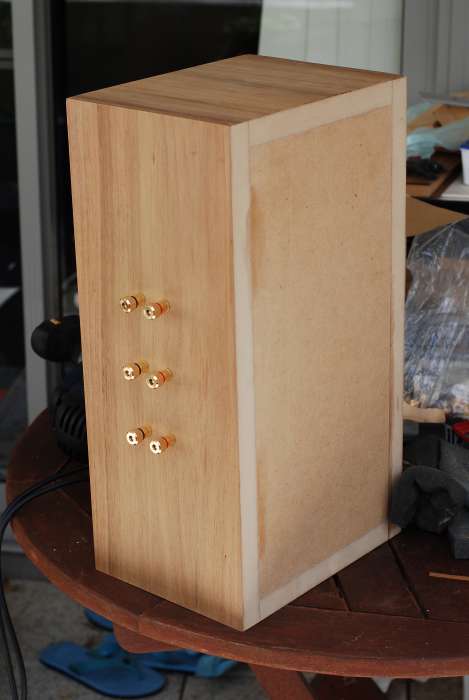
Update 24-10-2009. Well the veneer on the back of the second cabinet has been trimmed, and the holes for the speaker terminals re-drilled... I put the veneer for the tops in for flattening today... Next weekend I'll be away so it will be another two weeks before any more progress I suspect. I decided to do the tops next and the sides last. I also tried some bees wax on some trimmed veneer, didn't really care for it. Went to bunnings today to look for alternatives, but just got confused with the selection.... Saw some "brown" carnubua wax it might be the go, I think that the bees wax resulted in to light a finish for my taste.
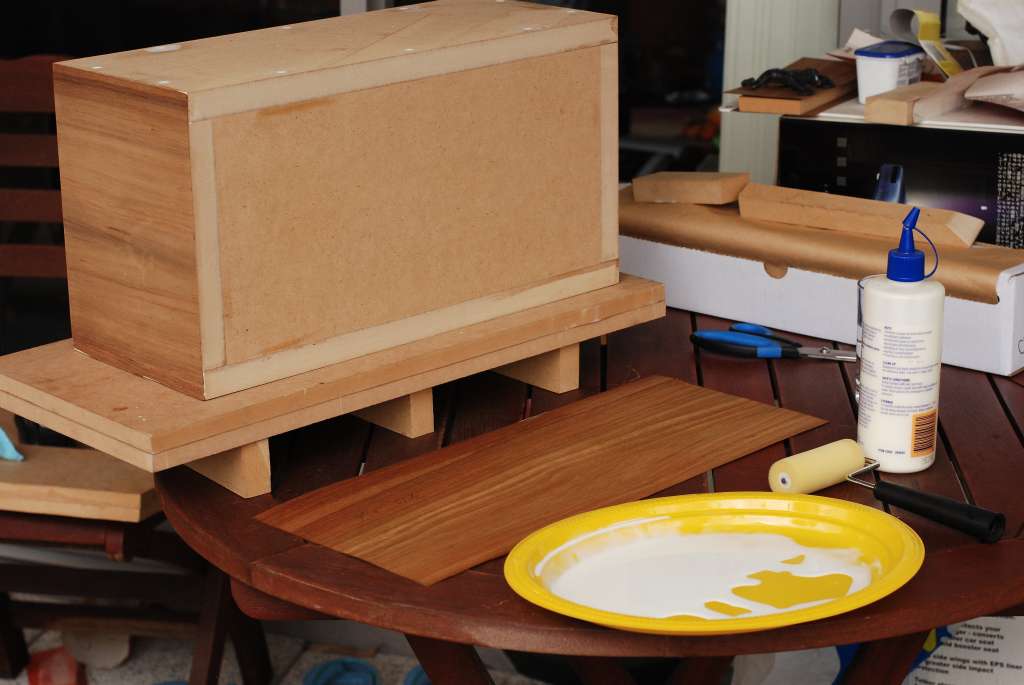
Update 08-11-2009. I was planning to veneer the tops of both cabinets this weekend and get the veneer for the sides of one of the boxes flattened, but only managed to do one box. This is the first panel that actually matters. I changed my technique slightly with the last back, I decided to dribble the pva directly onto the mdf, and roll it on. No watering down. I did the same again today. I might do the other top during the week if I get a chance. I think then it should only be two more weekends (time permitting) before I can get the sides done too.
Slowly but surely making progress.
Tony.

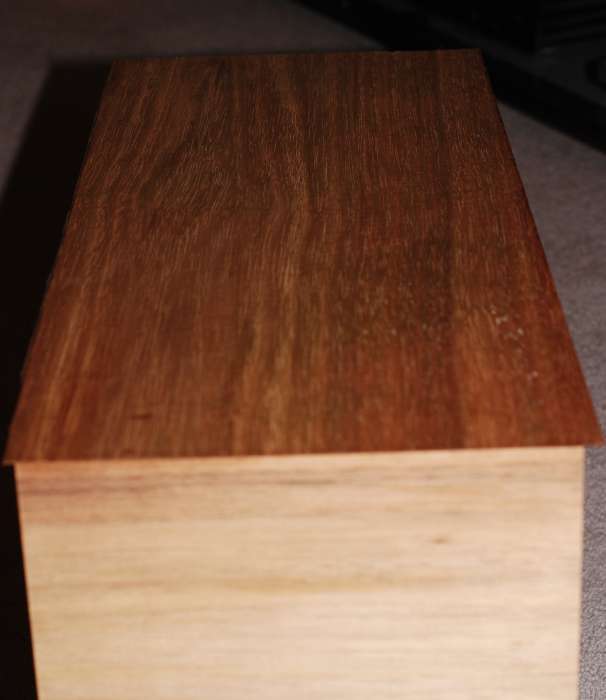
Well today (good Friday 2010) I burnished the speakers. Below is a picture of the result! Not too bad even if I do say myself two days to dry and then I can probably do some measurements!! Slowly Slowly getting there....

One thing that having had a four year break does is make it easier to slow down and do things properly, afterall, a month or two is relatively short in comparison
I got over two of the biggest fears with this project on the weekend. One was whether I was going to be able to do the veneering properly (this seems so far not to be an issue) and the other was whether my plans to put a 22mm chamfer on the front baffles was going to work (a test on some scrap MDF worked well). The main thread for the project is here with all the latest pictures
How to finish the veneer is as yet undecided, but I'll worry about that in a few weeks
The next big hurdle after finishing the boxes is going to be getting decent freq response measurements, though I have been reading Joe D'appolitos "testing loudspeakers" so should be in a much better position than I was the last time. I want to do some measurements before and after chamfering the baffles so that I have something to quantify what (if any) difference it makes.
Once I have some measurements there are two other dillema's to sort out. One is a practicle one, how I'm going to do grills (I have an idea but it is a little ambitious and I'm not sure if I can pull it off). The other is probably the bigger one and that is the design of the crossover... I can probably get something listenable fairly quickly (as I did when prototyping the box, by just running the mid full range and the tweeter with a single cap on it) This sounded surprisingly good.
Anyway the main thing is that progress is being made, if I keep chipping away it will be done eventually.
Some small problems can be seen on the veneer on the bottom cabinet, this is not an issue though as they will be chamfered. This was an oversight when first building the cabinets. I assumed (never assume) that my 25mm mdf was actually 25mm thick... it was actually 25.5mm... long story but detailed in the thread
Update 24-10-2009. Well the veneer on the back of the second cabinet has been trimmed, and the holes for the speaker terminals re-drilled... I put the veneer for the tops in for flattening today... Next weekend I'll be away so it will be another two weeks before any more progress I suspect. I decided to do the tops next and the sides last. I also tried some bees wax on some trimmed veneer, didn't really care for it. Went to bunnings today to look for alternatives, but just got confused with the selection.... Saw some "brown" carnubua wax it might be the go, I think that the bees wax resulted in to light a finish for my taste.
Update 08-11-2009. I was planning to veneer the tops of both cabinets this weekend and get the veneer for the sides of one of the boxes flattened, but only managed to do one box. This is the first panel that actually matters. I changed my technique slightly with the last back, I decided to dribble the pva directly onto the mdf, and roll it on. No watering down. I did the same again today. I might do the other top during the week if I get a chance. I think then it should only be two more weekends (time permitting) before I can get the sides done too.
Slowly but surely making progress.
Tony.
Well today (good Friday 2010) I burnished the speakers. Below is a picture of the result! Not too bad even if I do say myself
two days to dry and then I can probably do some measurements!! Slowly Slowly getting there.... Total Comments 1
Comments
-

 Well I finally made some more progress today.. first day in ages that wasn't either wet, or blowing a gale! I glued the veeneer on the back of the second box... decided to do it a little differently, I didn't water down the pva this time, poured it directly on the back and then rolled with the roller.. seems to have worked ok. Also decided to spray the non glue side with mist before clamping. Will trim it in a few days.. next comes the flattening of the veneer for the sides! first critical veneer...
Tony.Posted 18th October 2009 at 10:49 AM by wintermute


