Woodoc 25 Satin
Shaun it a product from Woodoc called "25 satin polyurethane floor sealer-indoor". It`s supposed to be colorless. I used about 2.5 liters on the whole set.
The tin is about "orange brown" in color.
I also like their "penetrating furniture wax" if you would like to experiment with that.
I will give a more detailed description of how I achieved the look soon.
Trompie
Last edited:
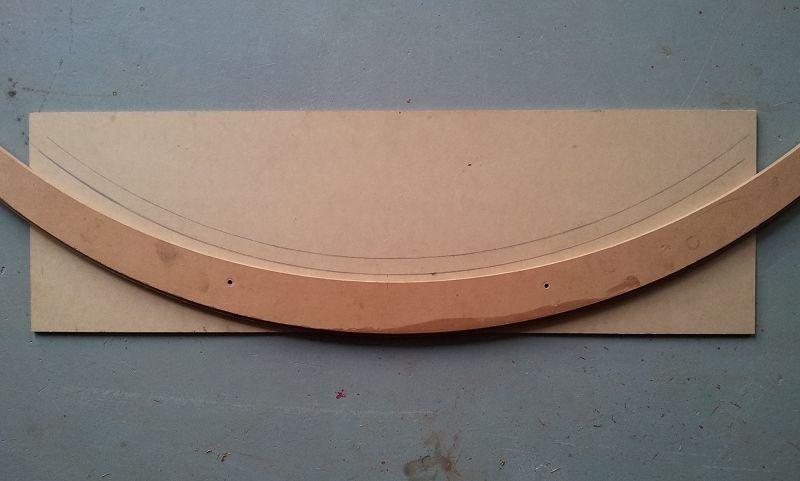
Arches for the sides and tops of the Speakers
Here are some more picks about the arches that I made for the side/top panels of my Statements. Pleas note that two of each were made. All the sides and tops on all the speakers have the same curves.
This picks is not of the actual build itself but rather a few that I put together to give a better idea of the thoughts that I had on how to achieve my goal.
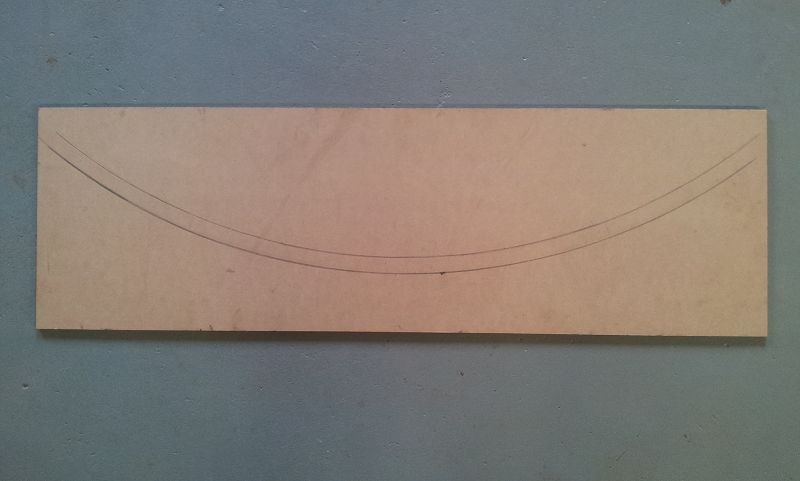
The first pick is about the" curve shape" that I wanted. I kept in mind the thickness of the final planks/product and worked around that as a guideline. No special formulas were used, I used the shape that kind of looked good to me at that time.
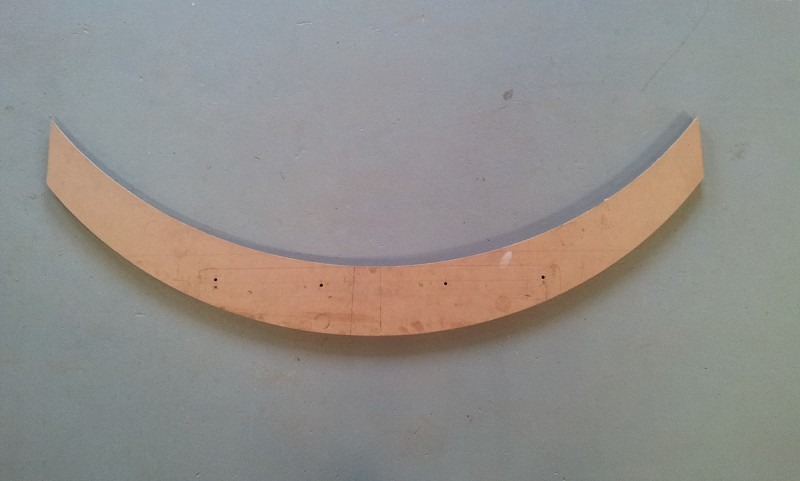
This is the "Gluing" arch made according to the curve shape that I wanted. None of the edges on these were routed for the rollers as the router would not be used on them.
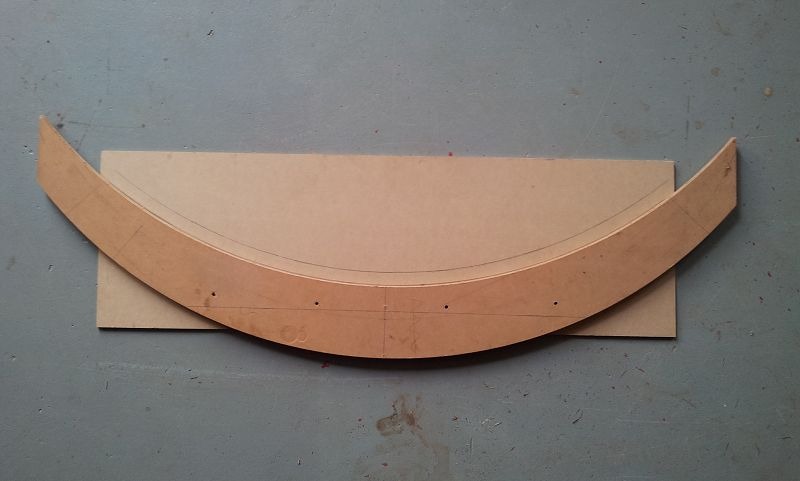
a pick to show how it followed the planed curve shape.
.... and some picks to show how it was used.
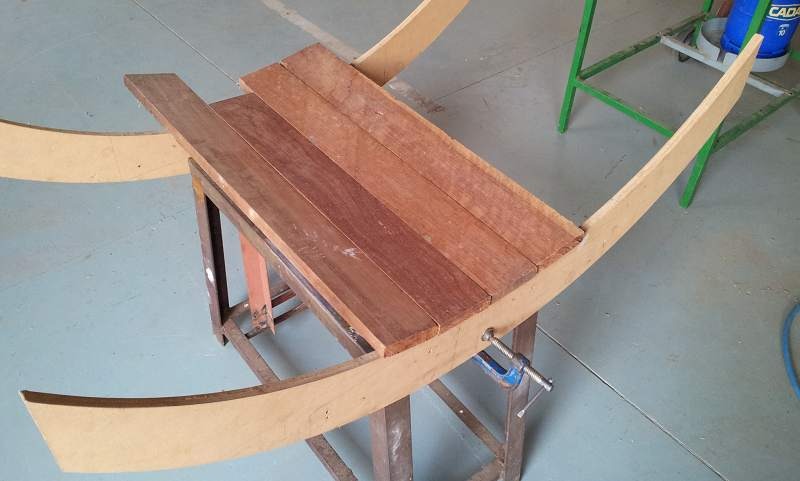
The planks that I used were first put through my old wood planer to get the correct thickness and the correct angle on the sides for easy gluing. Keep in mind that the planks in this picks is only for demonstration purpose and are not correctly prepared. The g-clamps is also a quick fix as the arches were actually bolted to the steel frame.
and when the glue dried the sides was close the curved shape that I wanted.

Here are some more picks about the arches that I made for the side/top panels of my Statements. Pleas note that two of each were made. All the sides and tops on all the speakers have the same curves.
This picks is not of the actual build itself but rather a few that I put together to give a better idea of the thoughts that I had on how to achieve my goal.
The first pick is about the" curve shape" that I wanted. I kept in mind the thickness of the final planks/product and worked around that as a guideline. No special formulas were used, I used the shape that kind of looked good to me at that time.
This is the "Gluing" arch made according to the curve shape that I wanted. None of the edges on these were routed for the rollers as the router would not be used on them.
a pick to show how it followed the planed curve shape.
.... and some picks to show how it was used.
The planks that I used were first put through my old wood planer to get the correct thickness and the correct angle on the sides for easy gluing. Keep in mind that the planks in this picks is only for demonstration purpose and are not correctly prepared. The g-clamps is also a quick fix as the arches were actually bolted to the steel frame.
and when the glue dried the sides was close the curved shape that I wanted.
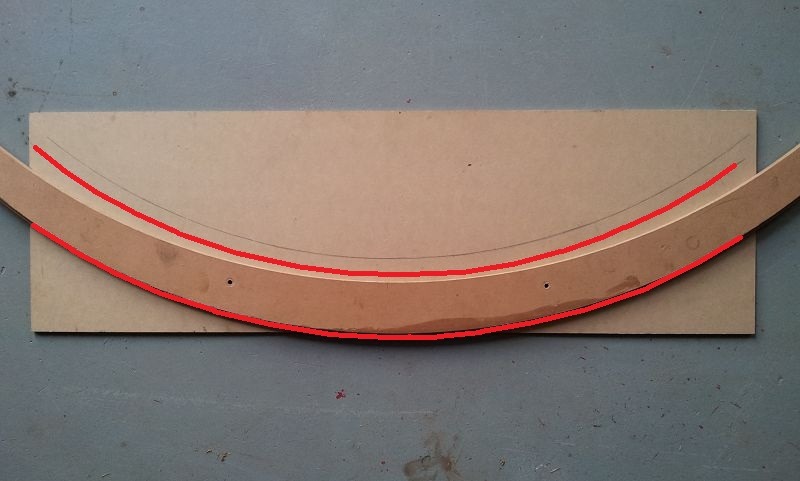
Roller arches
The arches that would be used with the router were routed so that the wheels would follow the "rails" more easily. I applied some wood glue on the "rails" to try and keep them from degrading to fast by the wheels of the router jig.

Pick of the "outside" arch.

"outside" arch on top of the curved shape board.
The RED lines indicate where the router bit would cut and were the router jig wheels will be running on the rails of the arch. The lines runs parallel to each other. The red line on the board (which is the outside of our speaker panel) WILL determine the shape of the arch. Keep in mind the length of the router bit and length it is sticking out of the router as it will have an influence on the arch as well.
The arches that would be used with the router were routed so that the wheels would follow the "rails" more easily. I applied some wood glue on the "rails" to try and keep them from degrading to fast by the wheels of the router jig.
Pick of the "outside" arch.
"outside" arch on top of the curved shape board.
The RED lines indicate where the router bit would cut and were the router jig wheels will be running on the rails of the arch. The lines runs parallel to each other. The red line on the board (which is the outside of our speaker panel) WILL determine the shape of the arch. Keep in mind the length of the router bit and length it is sticking out of the router as it will have an influence on the arch as well.
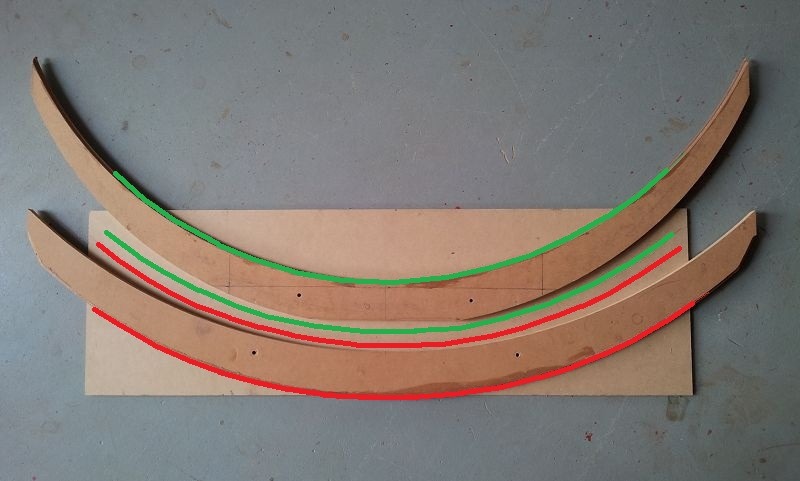
"inside" arch
Pick of the "outside and inside" arch on the board.

The green line on the board ( in the middle of the two arches) determine how the inside arch`s curve would finally look and also where the router wheels would need to run in order for the router to achieve the shape required. Again note that the lines runs parallel to each other and keep in mind the length of the router bit and length it is sticking out of the router as it will also have an influence on the arch. If not done correctly then the thickness of the speaker panel would be incorrect/uneven.
Pick of the "outside and inside" arch on the board.
The green line on the board ( in the middle of the two arches) determine how the inside arch`s curve would finally look and also where the router wheels would need to run in order for the router to achieve the shape required. Again note that the lines runs parallel to each other and keep in mind the length of the router bit and length it is sticking out of the router as it will also have an influence on the arch. If not done correctly then the thickness of the speaker panel would be incorrect/uneven.
- Status
- This old topic is closed. If you want to reopen this topic, contact a moderator using the "Report Post" button.