
Your photos are too small to see.
I will try to make them larger
Attachments
-
 IMG_0134 (Medium).JPG85.9 KB · Views: 267
 -
 IMG_0132 (Medium).JPG58.4 KB · Views: 357
 -
 IMG_0131 (Medium).JPG73.1 KB · Views: 382
 -
 IMG_0136 (Medium).JPG77.6 KB · Views: 201
 -
 IMG_0137 (Medium).JPG38.6 KB · Views: 180
 -
 IMG_0139 (Medium).JPG61.8 KB · Views: 167
 -
 IMG_0143 (Medium).JPG37.3 KB · Views: 217
 -
 IMG_0140 (Medium).JPG42.3 KB · Views: 180


Hi,
What's your experience with routing <10cm holes?
Kenneth
I tried it yesterday, and it works like a charm
You only need a few stop and go, with grip changes
Practice a bit, and you can do it in your sleep
Mind you, I usually dont take more than a few mm depth at a time
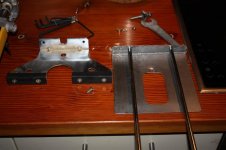
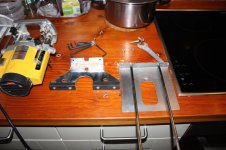
I have built a couple of hole gigs with a sliding bar with the pin brazed in it. Next time I think I'll add a threaded adjustment rod over the bar for more precise adjustment. I just make a baffle panel using a Jasper jig. My only complaint is it is in 1/16 increments and we really should have at least 1/32 inch. It sure is easy to set up and trust the numbers.
Using a collar and an oversized overlay template works very well, as well. Can get down to very small hole size.
That sounds like what I use for recessed cabinet handles and jack plates. No stopping to change grip, as the router handles remain positioned the same as I route around the template. Of course, that also works on non-circular shapes. Changing collar size or router bit size changes the offset and thus the size of what's being cut.
I make my templates, then I drive two slightly longer small-diameter brads thru the template with my air-nailer. That secures the template in position for the first cut. For subsequent cuts I just lay the template down and tap it in place with a hammer to set the thin brad pins again without noticeable damage (after filling and painting the teensie holes).
For larger shapes, I should have made my templates larger with broader flat areas for the router to sit on, which makes it easier to keep the router vertical without tipping.
Round TurnTables
Check out the swivel bases. Painters use these all the time; easy to use, screw use scrap wood, say 12" x 12" on both sides, bolt one side down to table or saw horses and spin the "table", not the router.
This is much safer also. AND you can use it for painting later on………
Can send a pic for clearer image.
McMaster-Carr
Last edited:
btw....How to measure?
How to measure?
Example: say you want a 6” hole, measure 3” from the outside of the bit to the center of the pivot (which could be a simple nail or screw).
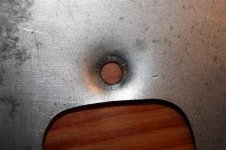
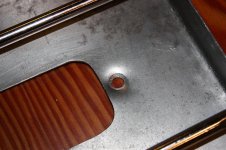
It is important to measure dead center of the hole, even if that seems insignificant. Holes too big or too small are not much fun when building speakers.
How to measure?
Example: say you want a 6” hole, measure 3” from the outside of the bit to the center of the pivot (which could be a simple nail or screw).
It is important to measure dead center of the hole, even if that seems insignificant. Holes too big or too small are not much fun when building speakers.
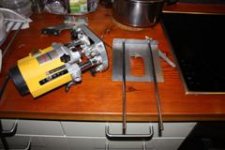
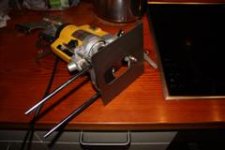
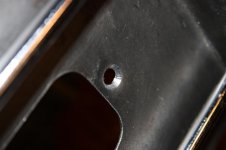
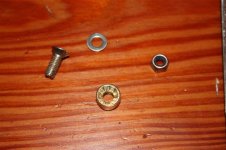
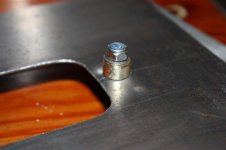
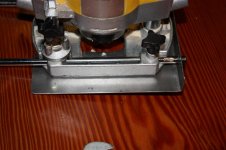
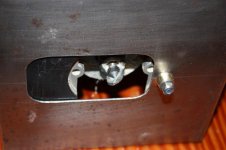
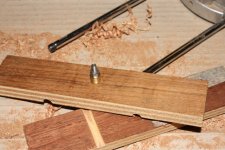
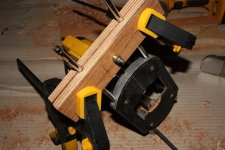
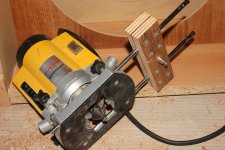
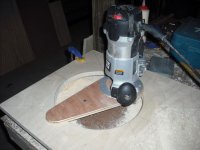
had to come up with a circle router, and fast
and I decided it had to be adjustable
turned out to be exstremely simple
I bet anyone can find the materials within 5 minutes
and besides, when changing router bits, adjustment changes
and I decided it had to be adjustable
turned out to be exstremely simple
I bet anyone can find the materials within 5 minutes
and besides, when changing router bits, adjustment changes
Attachments
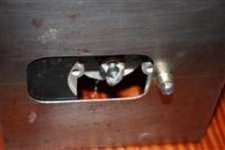
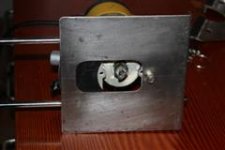
Hows this for simple
the most simple indeed
but still not adjustable
did I winn your router ?
the most simple indeed
but still not adjustable
did I win your router ?
Not adjustable??? on the contrary infinitely adjustable. The pin can go anywhere on the board. It's an old picture, now I like to use the drill bit as the pin, as it's the perfect size. measure, drill hole in swivel plate, align hole with center dot,drill center, leave drill bit set into wood to be routed. I tend to use a starter hole for the router bit as I don't like plunge routers.
Sorry, no router for you.
Last edited:
That's a good set up, my Makita came with something like that (with the bars) so all I needed to do was drill a hole in a alum support (square block at the end).
Its a little easier and safer if you "swing" the baffle board, vs. swinging the router. You can get fancy and buy/find a flat ball bearing (round table) or simply put two work-boards together with a nail in the center.
Perfect circles are easy to cut, easier than square; Imo.
Don't cut too deep in one pass......Wear eye protection! Router Bits can snap, and/or worse They spin around 25,000Rpm, depending on the router.
had to come up with a circle router, and fast
and I decided it had to be adjustable
turned out to be exstremely simple
I bet anyone can find the materials within 5 minutes
and besides, when changing router bits, adjustment changes
- Status
- This old topic is closed. If you want to reopen this topic, contact a moderator using the "Report Post" button.
- Home
- Design & Build
- Equipment & Tools
- small hole circle router jig, with pictures