strider75 said:Looking good, Dave! I feel your pain in regards to the size of your work area, mines no wider but about a foot taller.
Keep the updates coming, I look forward to them.
Merry Christmas!
Thanks Mr Strider, Merry Christmas to you too matey.
Here's another update 'specially for you (!)
")
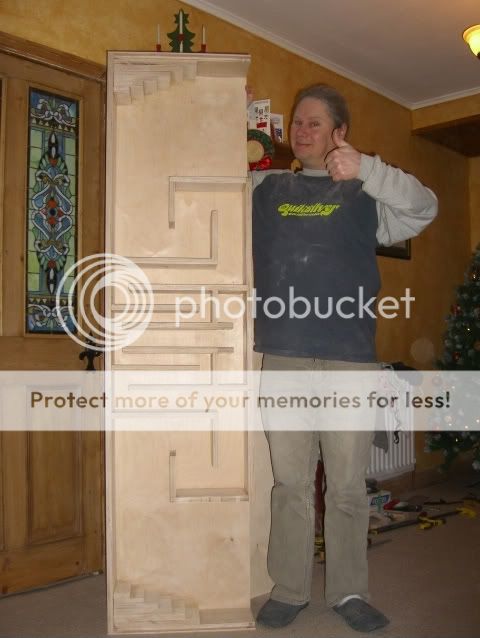
So, bright and early this morning the 2nd cab got glued up...
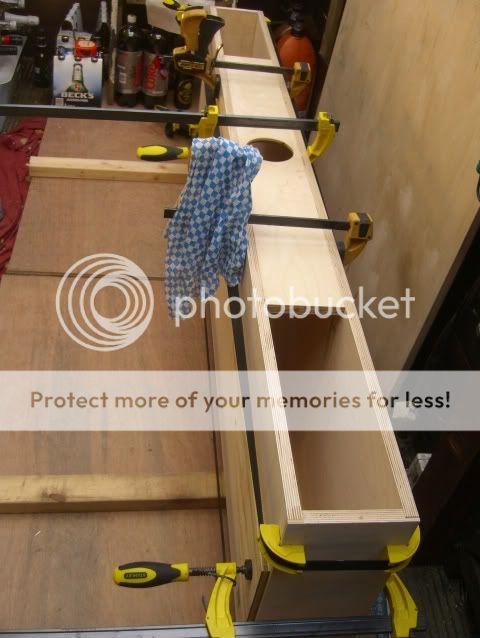
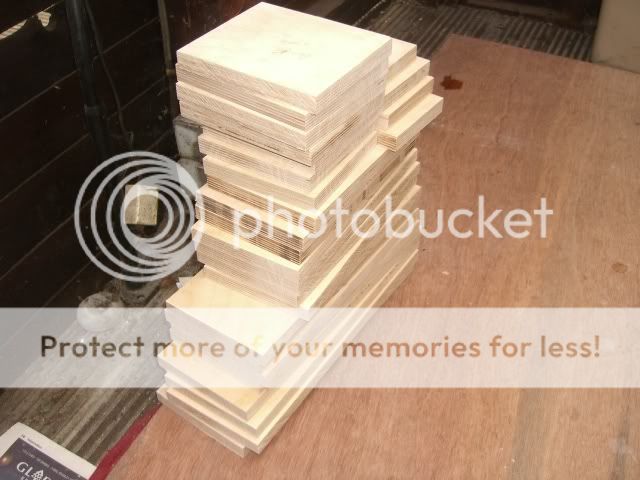
...and then it was time to turn a spare 4'x4' 1/2 sheet of 18mm BP left over from the MLTL build into 130mm wide strips that in turn will be made into the horn guide pieces (or whatever they're called). It takes a surprising amount of time to do this without a table saw, in retrospect I should've taken the chippies up on their offer to do it for me but it meant a 43 mile round trip to Lundun Village (by the duck pond). With a good supply of 130mm wide pieces I started working out the internal sizes of the bits required (no easy feat in itself IMO) and then accurately routed them all square as these are all butt-jointed together between the cab 'walls'.
Would you believe me when I say it took nearly 3 hours to make the 130mm strips and these 8 pieces...
At the end of the day the clamps came off the 2nd cab and 'Arfur' gets an identical twin...
Getting there, slowly (but accurately!)
Christmas Day tomorrow, we've got a house-full.... I'm off to the shed then
DTB
Well, while you've all been busy a-stuffing yer tum-tums with grub I've been slaving away over a hot speaker cabinet!
Christmas day I managed to sneak off down the shed for a covert back panel gluing operation. Mission accomplished, the 2nd cab's back panel is now glued on.... came back indoors just in time to wave bye-bye to our guests
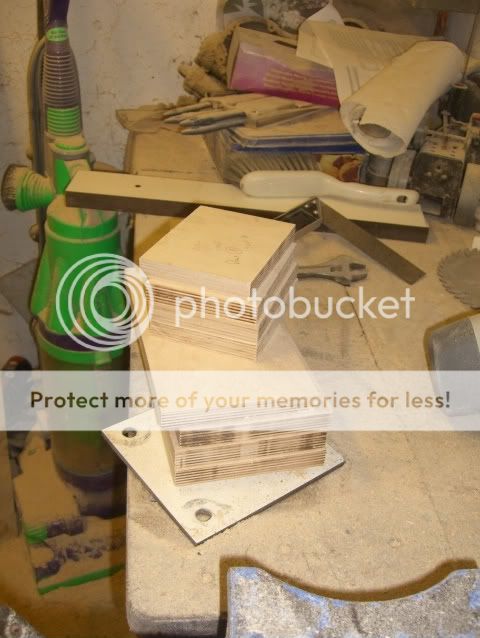
Boxing day meant a quiet day, phew. Off down the shed then. Making up all those little port-parts is a right pain in the bum as some of the bits are too small to be able to clamp and shape (square-off) easily so I popped down to B+Q and bought this...

A belt sander, it was in the 15% off Boxing Day sale, raddy daddy. It's brill. It means I can cut fiddly little bits then sand them to the right size and to a precise 90 degree angle to make for a strong and accurate butt joint. (It wasn't dusty when I bought it BTW!).
I'm sensible (ish)...
 (comes in handy when the family come round, I can't hear a thing...or smell 'em...)
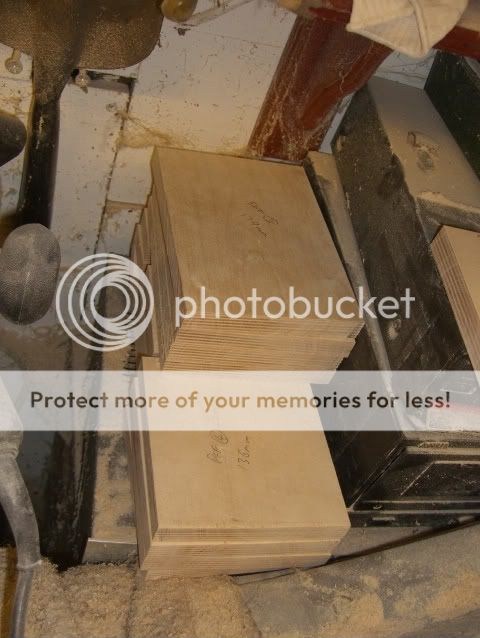
Yesterday I managed to make all these port bits...
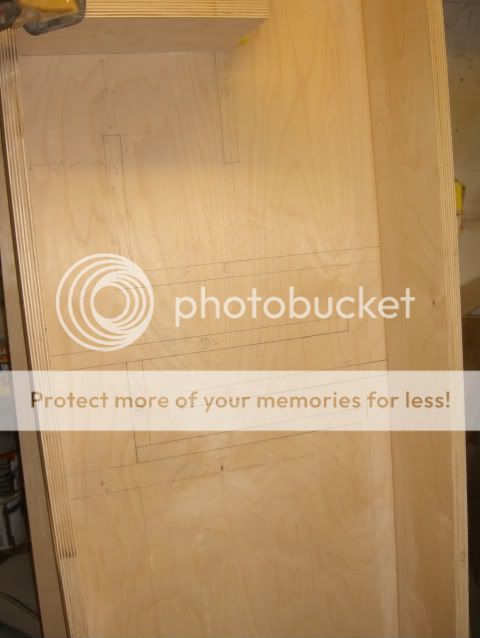
...after drawing out the precise location of where they need to go inside the cab...
...and I worked out a clamping technique to get each panel held in position whilst they drying....

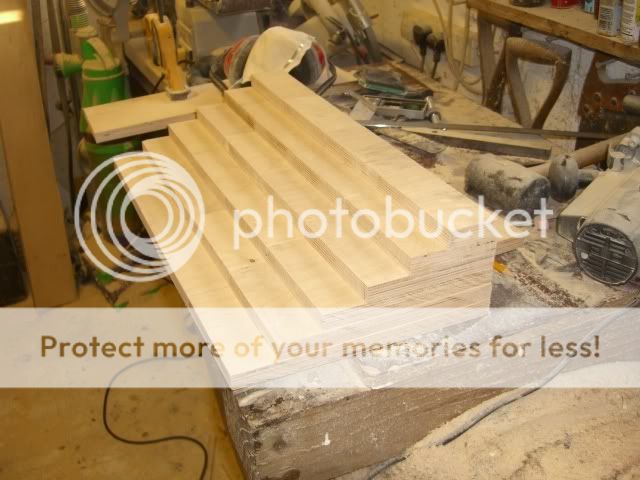
Next up are the 24 (!) deflectors....
8 more to go then it's time for panel 'A' to be made which if the Fonken build was anything to go by will be a tad fiddly as it not only has to be square (natch) but also brace the magnet of the 126 tightly against the cab structure but without bending the pressed-steel speaker basket. Oh joy! ( I love it really).
Just had a coffee, back off down the (cold) shed. Flippin' 3.5 degrees in the Garden.
TTFN
DTB
Christmas day I managed to sneak off down the shed for a covert back panel gluing operation. Mission accomplished, the 2nd cab's back panel is now glued on.... came back indoors just in time to wave bye-bye to our guests
Boxing day meant a quiet day, phew. Off down the shed then. Making up all those little port-parts is a right pain in the bum as some of the bits are too small to be able to clamp and shape (square-off) easily so I popped down to B+Q and bought this...
A belt sander, it was in the 15% off Boxing Day sale, raddy daddy. It's brill. It means I can cut fiddly little bits then sand them to the right size and to a precise 90 degree angle to make for a strong and accurate butt joint. (It wasn't dusty when I bought it BTW!).
I'm sensible (ish)...
Yesterday I managed to make all these port bits...
...after drawing out the precise location of where they need to go inside the cab...
...and I worked out a clamping technique to get each panel held in position whilst they drying....
Next up are the 24 (!) deflectors....
8 more to go then it's time for panel 'A' to be made which if the Fonken build was anything to go by will be a tad fiddly as it not only has to be square (natch) but also brace the magnet of the 126 tightly against the cab structure but without bending the pressed-steel speaker basket. Oh joy! ( I love it really).
Just had a coffee, back off down the (cold) shed. Flippin' 3.5 degrees in the Garden.
TTFN
DTB
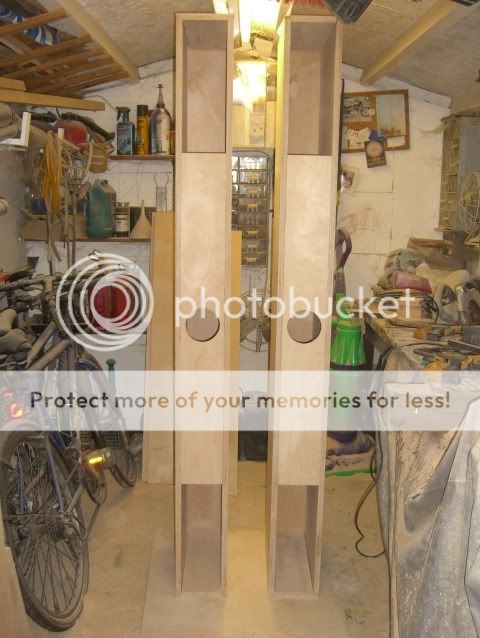
..and so it continues...
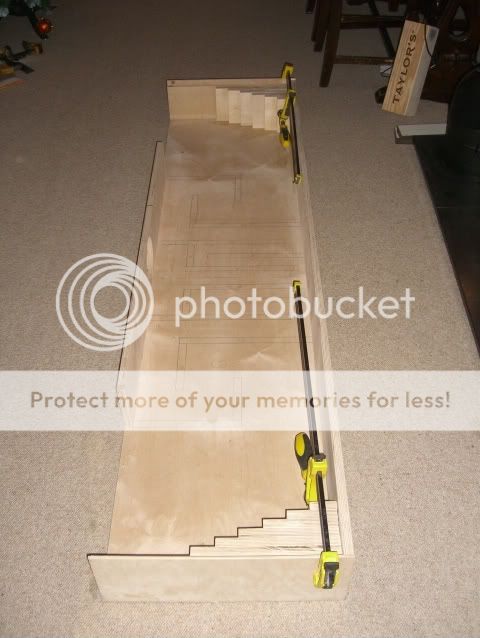
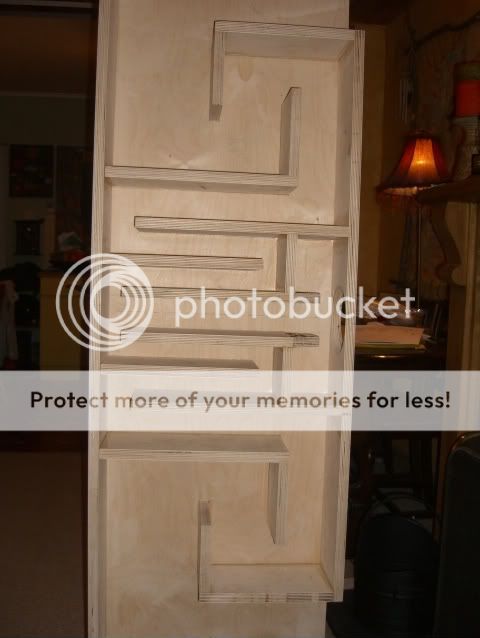
Finally got all the deflectors cut...
...which looks uncannily like a staircase to (aural) heaven when all four are placed side by side!
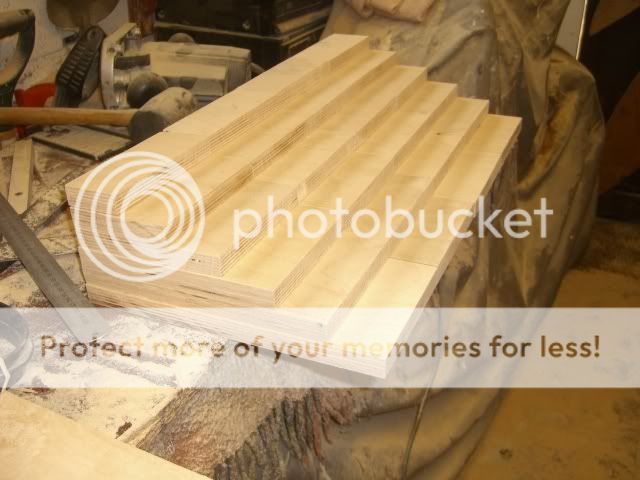
And in position they look like this...

The rest of the afternoon was spent marking out the rest of both cabs to make positioning each horn piece easier when they're being glued in.
A question though... how imperative is it to support/brace the magnet assembly? I know some details are given on page 2 of the Sachiko plans http://homepage.mac.com/tlinespeakers/FH/download/Sachiko-map-1v0-230307.pdf but I'm wondering if with such a small driver its needed?
Any thoughts/comments? I'm wondering what to do here TBH as I'm worried the extra wood in the filter chamber might muck up the internal cabinet volume.
Thoughts?
Tired but happy with progress.
DTB
Finally got all the deflectors cut...
...which looks uncannily like a staircase to (aural) heaven when all four are placed side by side!
And in position they look like this...
The rest of the afternoon was spent marking out the rest of both cabs to make positioning each horn piece easier when they're being glued in.
A question though... how imperative is it to support/brace the magnet assembly? I know some details are given on page 2 of the Sachiko plans http://homepage.mac.com/tlinespeakers/FH/download/Sachiko-map-1v0-230307.pdf but I'm wondering if with such a small driver its needed?
Any thoughts/comments? I'm wondering what to do here TBH as I'm worried the extra wood in the filter chamber might muck up the internal cabinet volume.
Thoughts?
Tired but happy with progress.
DTB
soundsinthestix said:I did not put the magnet brace in mine and have not noticed any bad effects. I did put a small amount of felt on the rear of the CC.
Thanks for the reply Mr Stix,
Whats the 'CC' btw? You've got me stumped there
DTB
Dave the bass said:Whats the 'CC' btw? You've got me stumped there
CC ] Compression chamber... we call it an air cabity now,
Personally i would endeavor to brace the back of the driver. This distributes the newtonion motion of the driver to more of the box, decreasing the likelihood of the baffle resonating (the weakest part of the box) and will improve downward dynamic range.
dave
planet10 said:
CC ] Compression chamber... we call it an air cabity now,
Personally i would endeavor to brace the back of the driver. This distributes the newtonion motion of the driver to more of the box, decreasing the likelihood of the baffle resonating (the weakest part of the box) and will improve downward dynamic range.
dave
Ahhh, so thats what CC means, thanks Dave.
Awwww, alright, I'll have another bash at the brace then. I'll post some piccies to make sure I've done it right before gluing the beasty in. It was the fiddlyest part of the Fonken build I undertook...hence my trepidation....
Cheers again Dave.
DTB
I'm persisting DaveD!
Now here's a bang-up-to-date shot of the Brace/part 'A'. It's easier than I thought TBH, I've made it a slightly different shape to how a brace was 'suggested' in the plans as it interferes less with the air-flow in the the Air Cavity (get me eh!) but still supports all the magnet area that the brace butts up against.
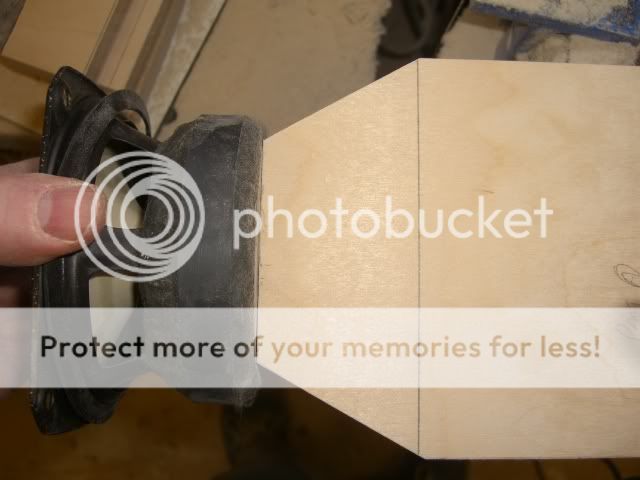
That OK?
Looks funny I know but trust me its rock solid as there's 2 of these per driver.
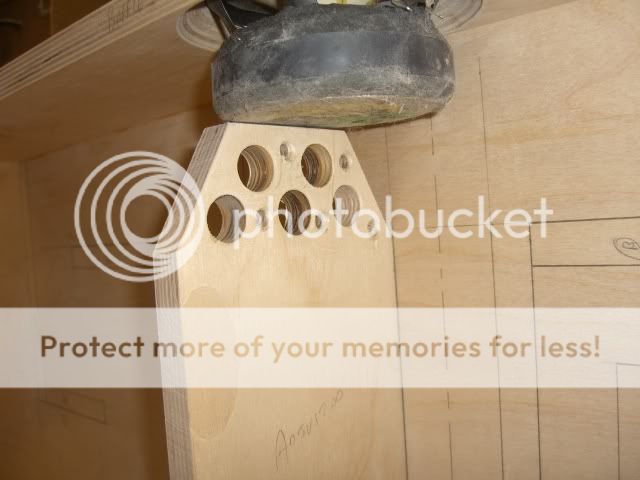
In the cab it looks like this...
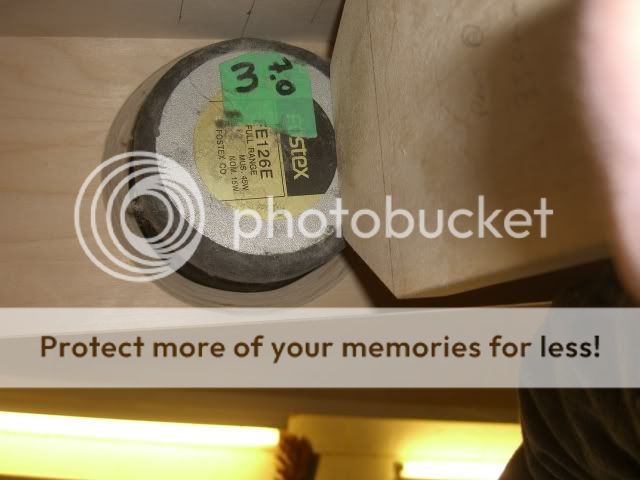
I take it it's a good idea to drill big holes to allow the air to move through the braces as I did in the Fonken 'Holey Brace'???
DTB
Now here's a bang-up-to-date shot of the Brace/part 'A'. It's easier than I thought TBH, I've made it a slightly different shape to how a brace was 'suggested' in the plans as it interferes less with the air-flow in the the Air Cavity (get me eh!) but still supports all the magnet area that the brace butts up against.
That OK?
Looks funny I know but trust me its rock solid as there's 2 of these per driver.
In the cab it looks like this...
I take it it's a good idea to drill big holes to allow the air to move through the braces as I did in the Fonken 'Holey Brace'???
DTB
Dave the bass said:I take it it's a good idea to drill big holes to allow the air to move through the braces as I did in the Fonken 'Holey Brace'???
Yes.
dave
Whahey! Sorted.planet10 said:
Yes.
dave
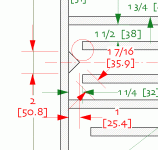
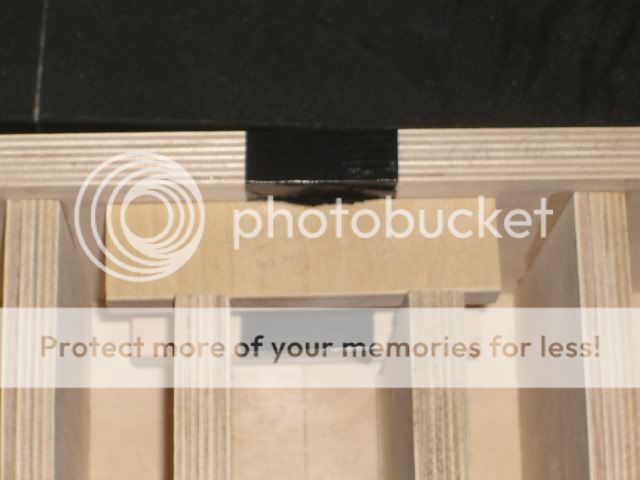
I've made up 2 x 32mm spacers to fit at the back of the cab to maintain the correct spacing betwixt the back of the cab and the end of the driver braces/part 'A'. That way I managed to get the driver-brace cut to size spot-on. Success.
Thanks for the guidance Dave.
I've got a 4 hour skateboard jam lined up tomorrow so I don't think I'm going to get much done speaker-wise.
DTB
901Fixer said:It looks like DTB is winning this battle. Nice job and documentation.
What is the purpose of the corner relief detail where the sides meet the top/bottom? Is it just a snazzy look or does the added gluing area add strength?
I've cut it that way so as not to encroach too much into the Air Cavity space. I've since routed out the edges of the holes in the Holey-Baffle-Brace (Batman!) to aid air flow too as I remembered doing that on the Fonken build.
I've rebated all the cabinet edges to add gluing area and strength as it's a long/thin/tall cab.
I've got more piccies but gluing in all this afternoon so I'll update later.
Onwards!
DTB
A question.
We've touched on this before but I'm a trifle confused... it's concerning the little triangular-profiled piece that sits on the back panel directly behind the driver, looks to be some sort of divider to send sounds into both horn sections.
Well, the plans make it look to be a 90 degree piece but no dimensions are given, Scott mentioned a wedge shaped piece 1 1/2" high x 1 1/2" wide but when I draw that out on a piece of paper it looks different, odd.
/;
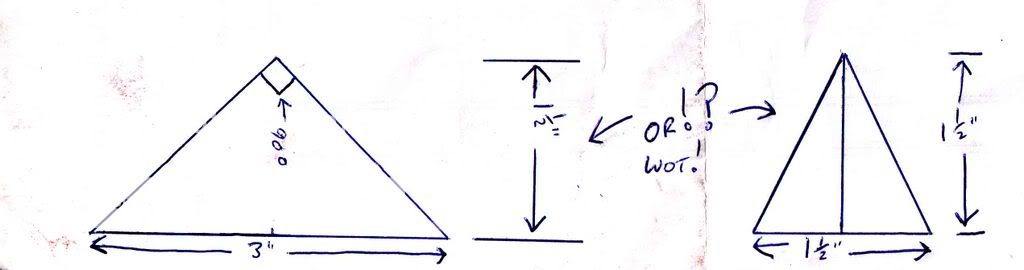
Can anyone confirm what I'm to do here, I'm stuck
Ta,
DTB
We've touched on this before but I'm a trifle confused... it's concerning the little triangular-profiled piece that sits on the back panel directly behind the driver, looks to be some sort of divider to send sounds into both horn sections.
Well, the plans make it look to be a 90 degree piece but no dimensions are given, Scott mentioned a wedge shaped piece 1 1/2" high x 1 1/2" wide but when I draw that out on a piece of paper it looks different, odd.
/;
Can anyone confirm what I'm to do here, I'm stuck
Ta,
DTB
so kids, sing along with the bass player "the square of the hypotenuse of a right triangle..."
if cut from a piece of solid, the long side of the deflector should be approx 2 1/8" ( 53.88mm).
probably a lot easier to just rip some strips at 1.5" / 45` both edges, glue up with a masking tape "clamp", and cut to length afterwards - IIRC that's what I did on the Aiko cabinets
if cut from a piece of solid, the long side of the deflector should be approx 2 1/8" ( 53.88mm).
probably a lot easier to just rip some strips at 1.5" / 45` both edges, glue up with a masking tape "clamp", and cut to length afterwards - IIRC that's what I did on the Aiko cabinets
Dave the bass said:We've touched on this before but I'm a trifle confused... it's concerning the little triangular-profiled piece that sits on the back panel directly behind the driver, looks to be some sort of divider to send sounds into both horn sections.
Exactly.
In the Changs either will do. Even just a piece of wood glued egde on.
In the nagaoka horns, the size and shape are more critical as the passage size wants to reain about the same.
Detail attached.
dave
Attachments
Update...
Big skateboard jam at an indoor skate park yesterday so didn't get much done during the day but the evening seemed like a good time to move the whoole caboodle indoors and start gluing in the deflectors...
...done at each end in 2 sets of 3 deflectors.
Here's a better view of the insides where I've marked out where each panel goes so I know I've got each one in the right spot.

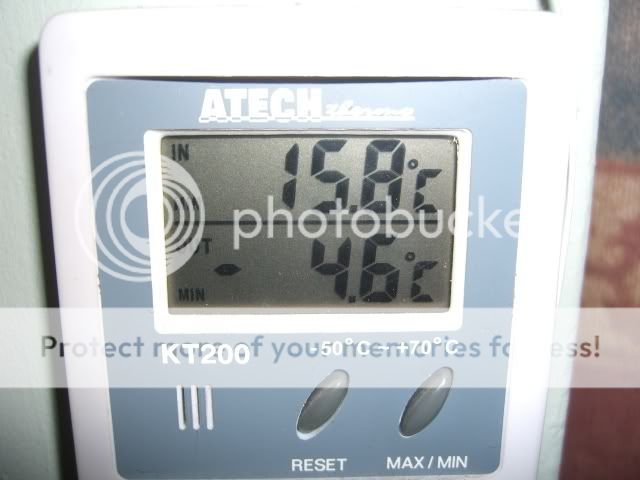
Woke up this morning to find the (usually) Sunny South frozen solid :shock:
Blow that for a game of soldiers... I'll be working indoors today
I would've claimed the table to make it easier to work on but some mad woman beat me to it...

...she was having a felt-dyeing and felt-making day today. Colours and crud everywhere :lol:
After letting all that lot dry overnight I then made a start at the internals...

and voila, hours and hours later...
...close up...
Chuffed.
Getting the driver brace/panel 'A' was made soooo much easier with those little 32mm spacers to maintain the rear channel gap leaving me to concentrate on getting the mechanical joint just right.
Stoked on that.
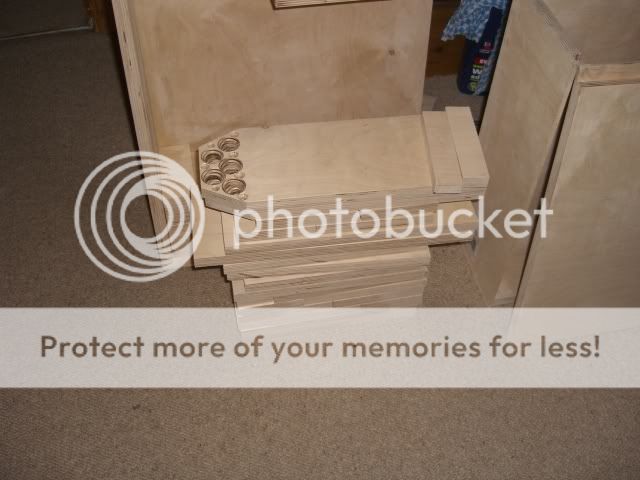
Just got this little pile to glue in tomorrow...
...and make up that little triangular bit, bit of wool felt in the Filter Chamber and a bit I'd forgotten to make... the little block to mount the 4mm binding posts onto (I've forgotten about the aluminium plate too, doh!) to make these...
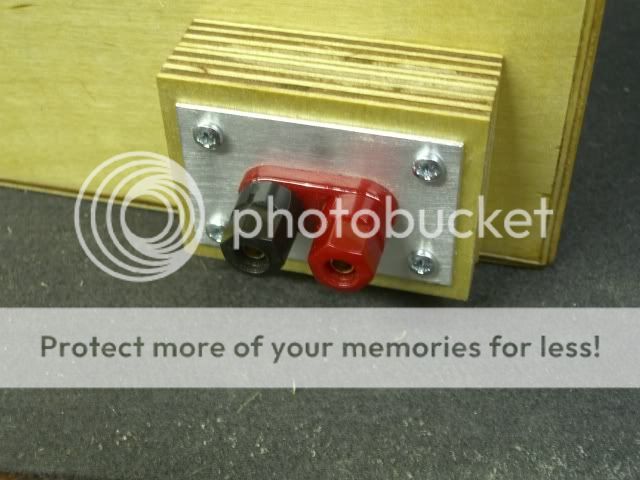
...like I did on the Fonkens.
Lucky I've still got a few days off work innit?
Thats it for now.
TTFN
DTB
Big skateboard jam at an indoor skate park yesterday so didn't get much done during the day but the evening seemed like a good time to move the whoole caboodle indoors and start gluing in the deflectors...
...done at each end in 2 sets of 3 deflectors.
Here's a better view of the insides where I've marked out where each panel goes so I know I've got each one in the right spot.
Woke up this morning to find the (usually) Sunny South frozen solid :shock:
Blow that for a game of soldiers... I'll be working indoors today
I would've claimed the table to make it easier to work on but some mad woman beat me to it...
...she was having a felt-dyeing and felt-making day today. Colours and crud everywhere :lol:
After letting all that lot dry overnight I then made a start at the internals...
and voila, hours and hours later...
...close up...
Chuffed.
Getting the driver brace/panel 'A' was made soooo much easier with those little 32mm spacers to maintain the rear channel gap leaving me to concentrate on getting the mechanical joint just right.
Stoked on that.
Just got this little pile to glue in tomorrow...
...and make up that little triangular bit, bit of wool felt in the Filter Chamber and a bit I'd forgotten to make... the little block to mount the 4mm binding posts onto (I've forgotten about the aluminium plate too, doh!) to make these...
...like I did on the Fonkens.
Lucky I've still got a few days off work innit?
Thats it for now.
TTFN
DTB
chrisb said:so kids, sing along with the bass player "the square of the hypotenuse of a right triangle..."
if cut from a piece of solid, the long side of the deflector should be approx 2 1/8" ( 53.88mm).
probably a lot easier to just rip some strips at 1.5" / 45` both edges, glue up with a masking tape "clamp", and cut to length afterwards - IIRC that's what I did on the Aiko cabinets
I don't know that song Chris, is it an underground Canadian Classic or summat?
Thanks for the tips.
planet10 said:
Exactly.
In the Changs either will do. Even just a piece of wood glued egde on.
In the nagaoka horns, the size and shape are more critical as the passage size wants to reain about the same.
Detail attached.
dave
Yeah, I saw on another build instructions on the Frugelhorn site that in one cab (Olivia?) that the triangular bit was there to stop port-to-port interference. Saburo is a Nagaoka horn I'm guessing ( sorry i don't know the history of these) so I'll build as per the detail picture you've attached.
Thanks for that picture Dave, really appreciate all the help here Gents, thank you.
All the best
DTB
- Status
- This old topic is closed. If you want to reopen this topic, contact a moderator using the "Report Post" button.
- Home
- Loudspeakers
- Full Range
- Saburo's Vs. DTB