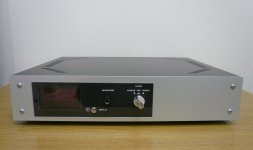
User @speedgeil posted images of toner transfer labelling on aluminium sheet here:
https://www.diyaudio.com/community/...jfet-buffered-xo-with-psu.403795/post-7492892
The surface probably needs to be protected with a durable clear coating.
https://www.diyaudio.com/community/...jfet-buffered-xo-with-psu.403795/post-7492892
The surface probably needs to be protected with a durable clear coating.
Hardcore WAY to go.I am still making my control panels and nameplates the exact same way, using the same Lamacoid material and my old Scott Signgraver pantograph.
The material is still available in a multitude of colour combinations, although it's a lot more expensive now.
I worked in a printing shop after school when I was a kid, and I was well instructed in the operation of that machine. When I began building custom industrial electronics, this was one of the first tools I purchased. I'm still pretty quick on set-ups, haha.
Interweb pic, but I use the same model machine:
View attachment 1272954
Congratulations.
The main advantage of investing in machinery, dies, etc. for "at own premises" builds is not savings per se, that may come later, you have to put significant money up front, learn to use it, it takes space, etc. ; but SPEED and FLEXIBILITY.
When you are experimenting you want results NOW to confirm/dispel an idea and keep or change that path.
You have front panels and labels in literally minutes 👍🏻
Since you already have it, you can also make personalized side or bottom illuminated name tags as Ampeg once offered.
Here is another type that I sometimes do. This is printed on clear sticky back plastic and laminated over perspex on one side. Light from behind makes the yellow text light up gold. Place on an acrylic mirror and edge lit is even nicer effect. This can be laminated with further perspex for a deeper effect and scratch resistance. The maroon part lights up nicely too. The total effect looks a bit old schoolish with the chosen colours here and went well with the brown leather look upholstery fabric used on the mod cab


Hardcore WAY to go.
Congratulations.
The main advantage of investing in machinery, dies, etc. for "at own premises" builds is not savings per se, that may come later, you have to put significant money up front, learn to use it, it takes space, etc. ; but SPEED and FLEXIBILITY.
When you are experimenting you want results NOW to confirm/dispel an idea and keep or change that path.
You have front panels and labels in literally minutes 👍🏻
Since you already have it, you can also make personalized side or bottom illuminated name tags as Ampeg once offered.
View attachment 1273034
Haha, I have been making those fliptop nameplates for decades now
Because of your post, I figured now that I've been here for a while, I'd add an avatar photo.
The pic is my main bass, an original 1959 Fender Precision, purchased from the original owner. The amp is a 1965 Ampeg B18, which I refer to as my "living room rumbler".
I'm a bit of an Ampeg fan myself, and although I have reduced the collection considerably over the years, the arsenal still consists of: 1978 SVT with two 8x10's, B15, B15N Thiel cab, B15NC(2x15 column model, the rare one!), B18(2), B12XT(2), Reverberocket (first series), G15 Gemini II.
Cool, looks good 👍🏻
Laser printing on auto adhesive, shiny, coated, "magazine" paper, typically used for stickers or labels, saved many a prototype.
Light spraying with fast drying acrylic lacquer or varnish such as Krylon protects it, specially from dirty fingers.
It also makes laser toner blacker , because lacquer solvent partially dissolves it and dots merge with those around. .
Not only lasers, modern inkjet printers on same paper give excellent results.
- Home
- Design & Build
- Construction Tips
- How to transfer a front panel print/design onto an aluminum front panel
