maybe you boys should get a room - under assumed names of course")
Heheheheheh! You're just jealous ..... ya big hunk!
DTB
Davethebass,
I am about the same point in my build of these horns, except mine weighs less than a lb and was made without saw dust I am looking forward to hearing how it sounds though. Very nice build by the way.
Regards,
Xrk971
http://www.diyaudio.com/forums/full-range/223313-foam-core-board-speaker-enclosures-104.html
I am about the same point in my build of these horns, except mine weighs less than a lb and was made without saw dust
I am looking forward to hearing how it sounds though. Very nice build by the way.Regards,
Xrk971
http://www.diyaudio.com/forums/full-range/223313-foam-core-board-speaker-enclosures-104.html
Heheheheheh! You're just jealous ..... ya big hunk!
Ladies, please.
Dave The Bass,
Build looking neat. You'll be making a removable top for adjusing stuffing?
Ta Mr Zman, yeah, just temp fixing the tops on to fiddle about with stuffing, I've not damped and other speaker I've built in the past but know a lotta folks do on this build, hence the temp loose lids.
Ladies, please.
He started it <points to chrisb in Canada-lands>
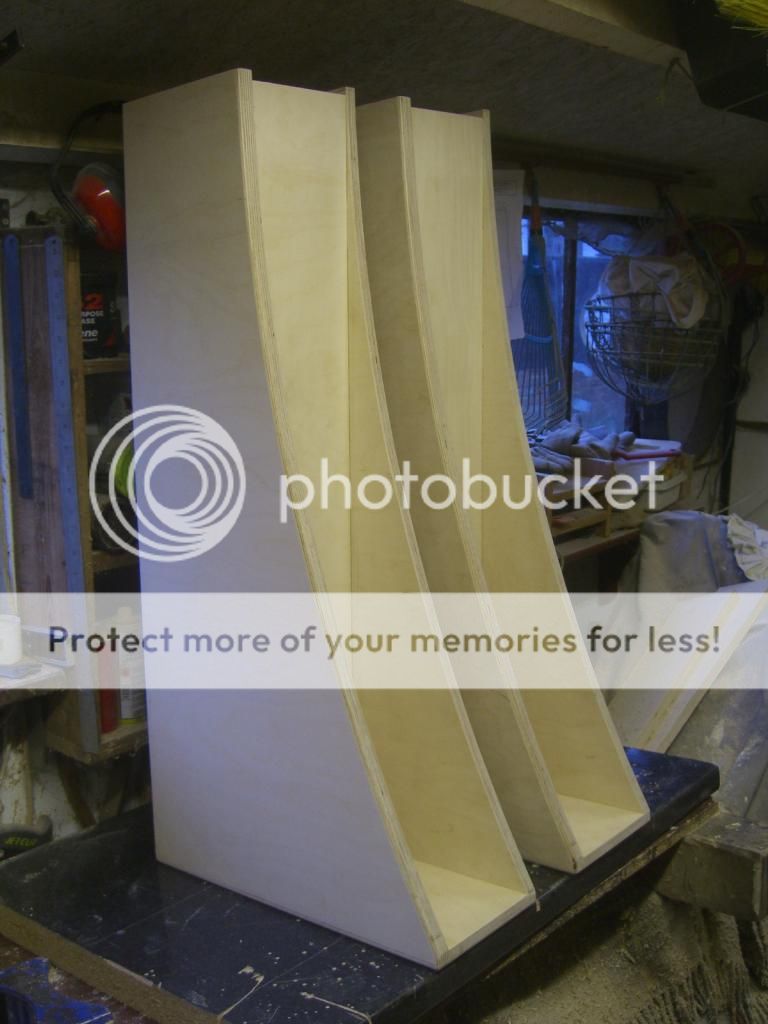
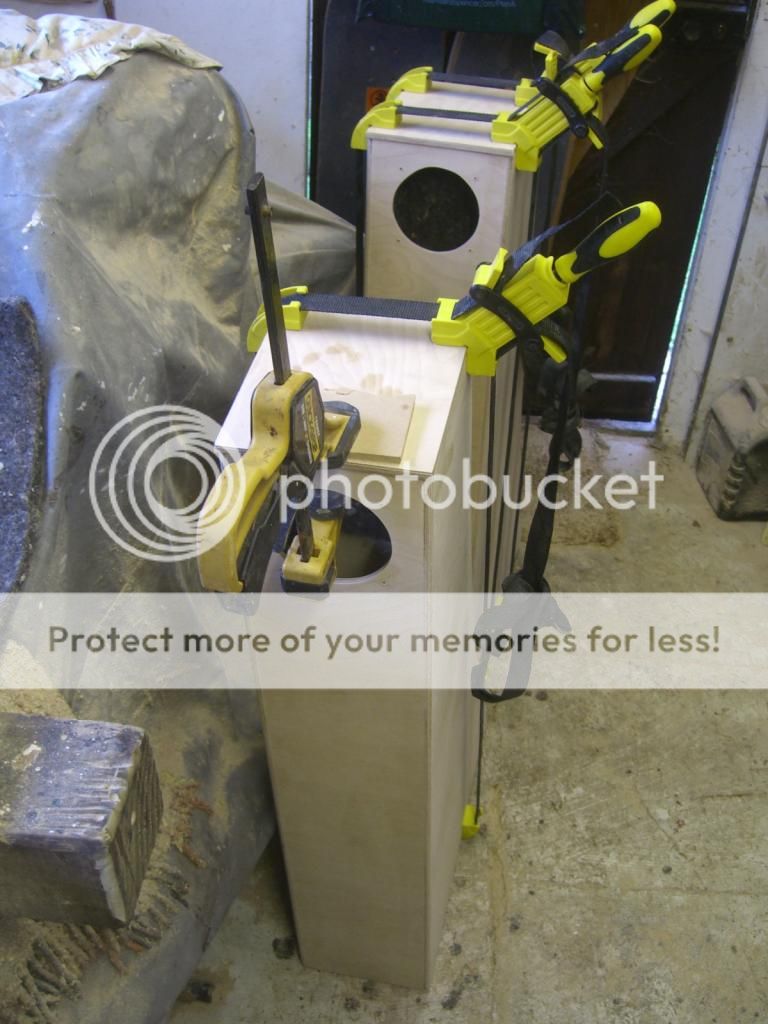
Mega hard work today.
Clamps came off both cabs after 14 hours of drying time...
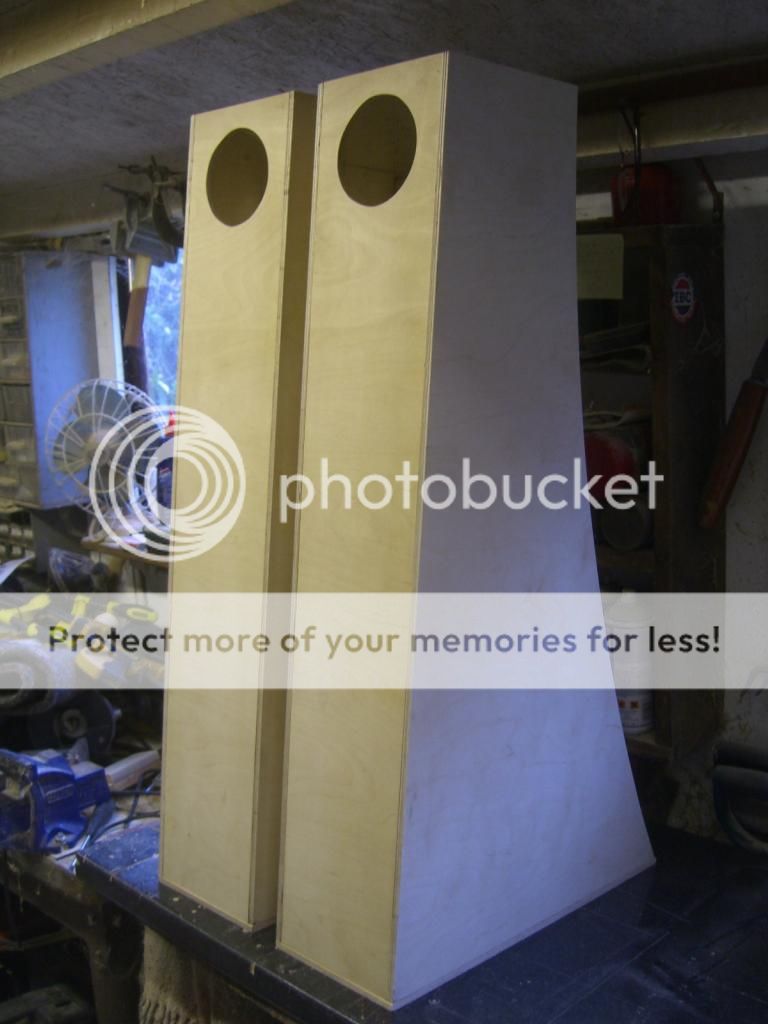
...they're shy...

Bit o' classic Lou Reed will see them right.

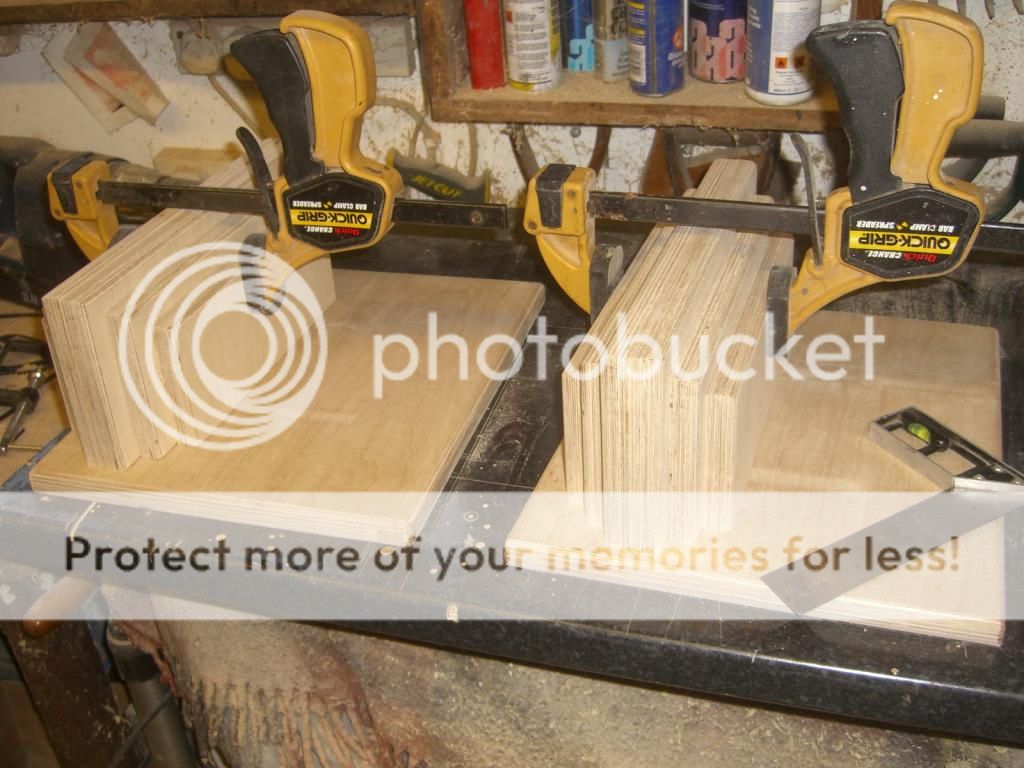
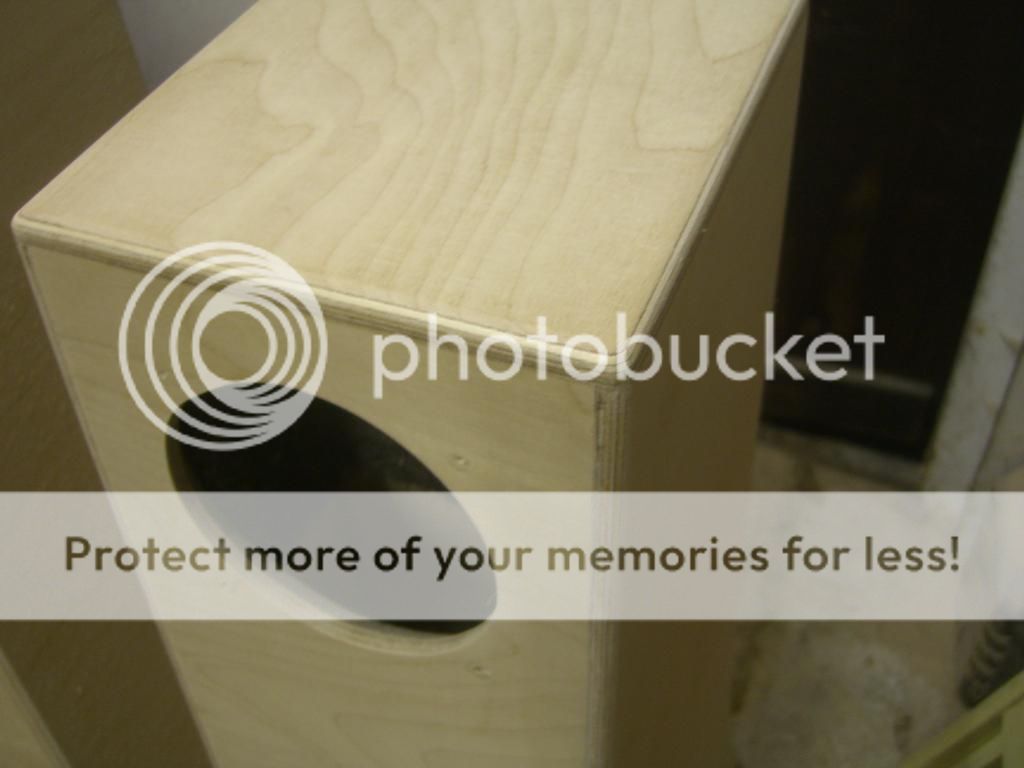
Next up was to clean up every edge by trimming then with a small radius bit round over the outside edges.
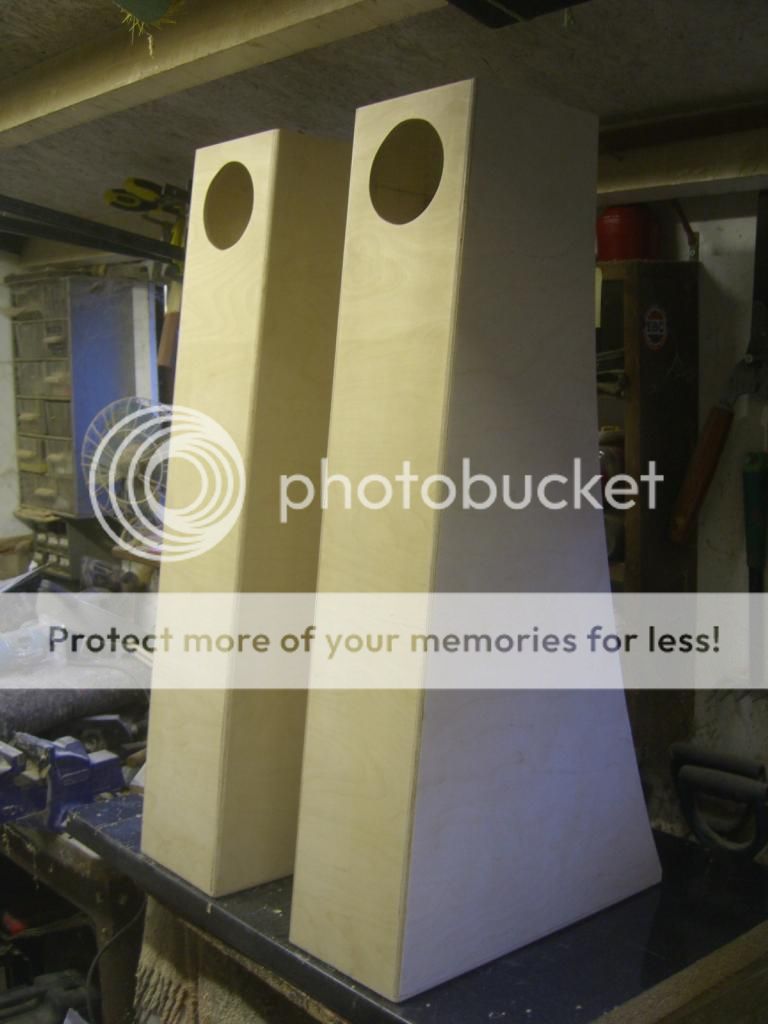
Neatness n' sweetness...

Bit out of focus but you get the idea...

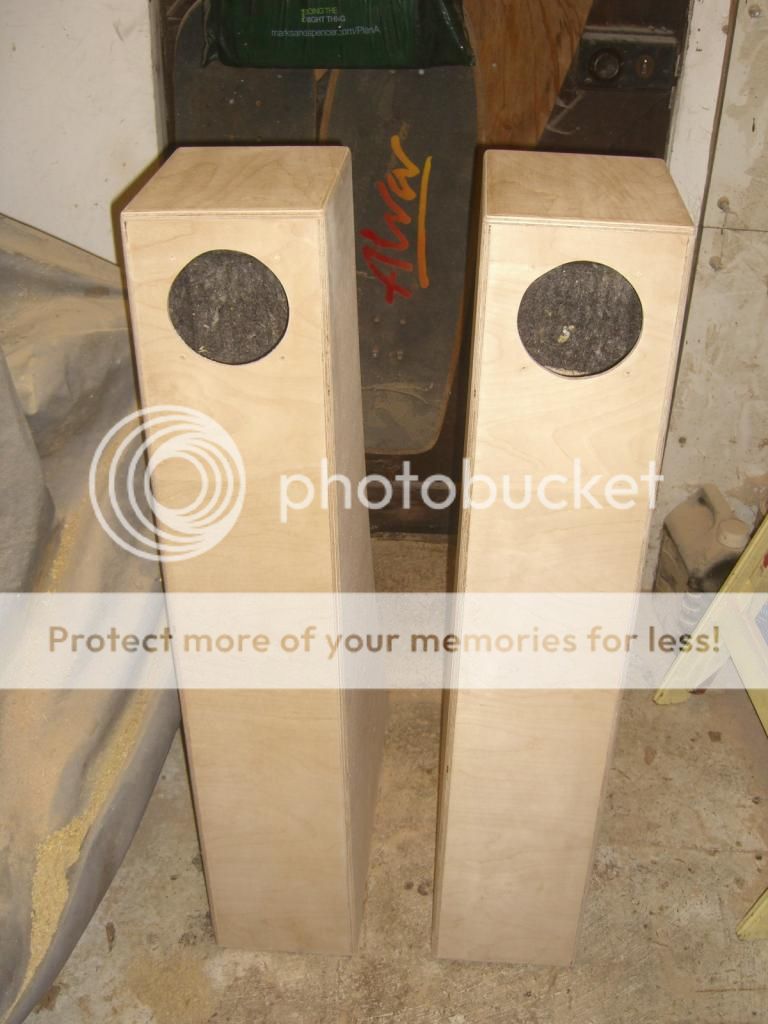
So after a proper rub down to remove all clamp and finger marks plus the odd bit of glue, they look like this...
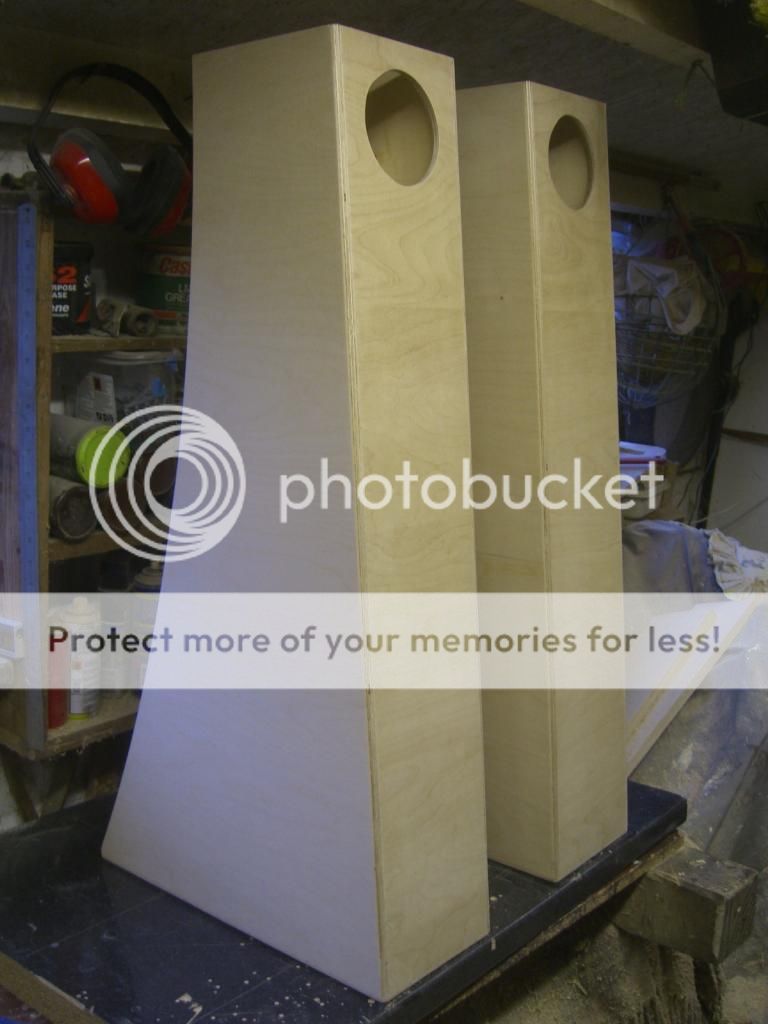
They actually look like FH3's now!...
Yummy and clean...
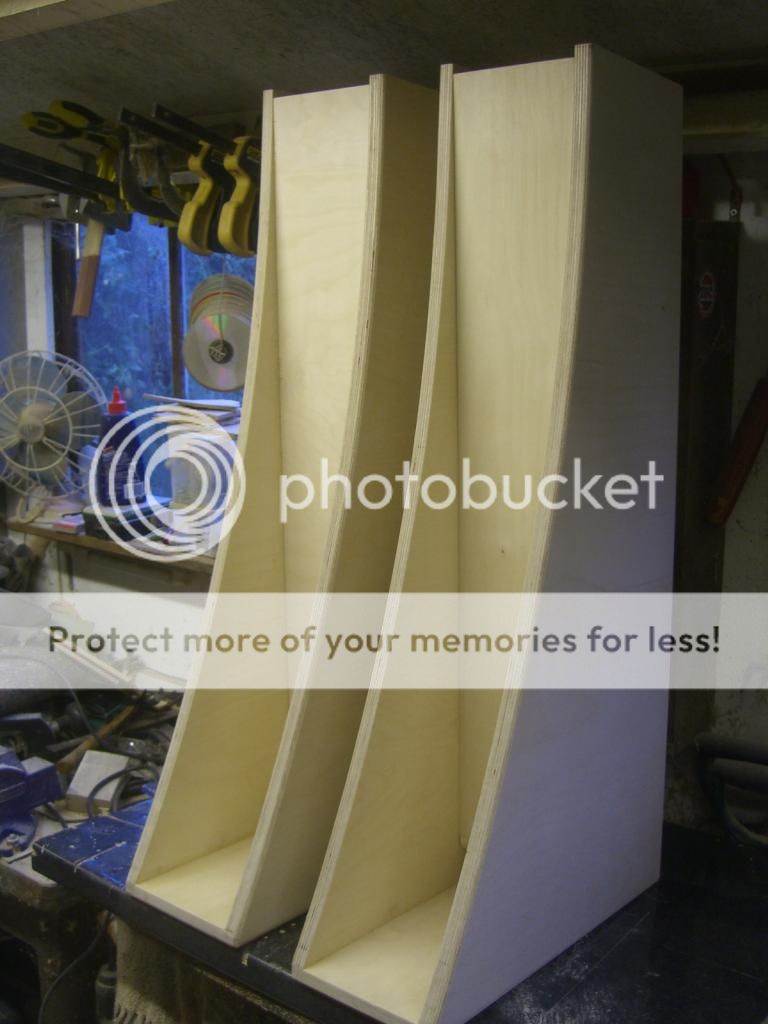
Obligatory rebate shot!

Next up was the cutting and fitting of the pukka 1/2" wool felt, thankfully I can't think of any good gags that involve sticking my hand in a fresh furry well-clamped box...
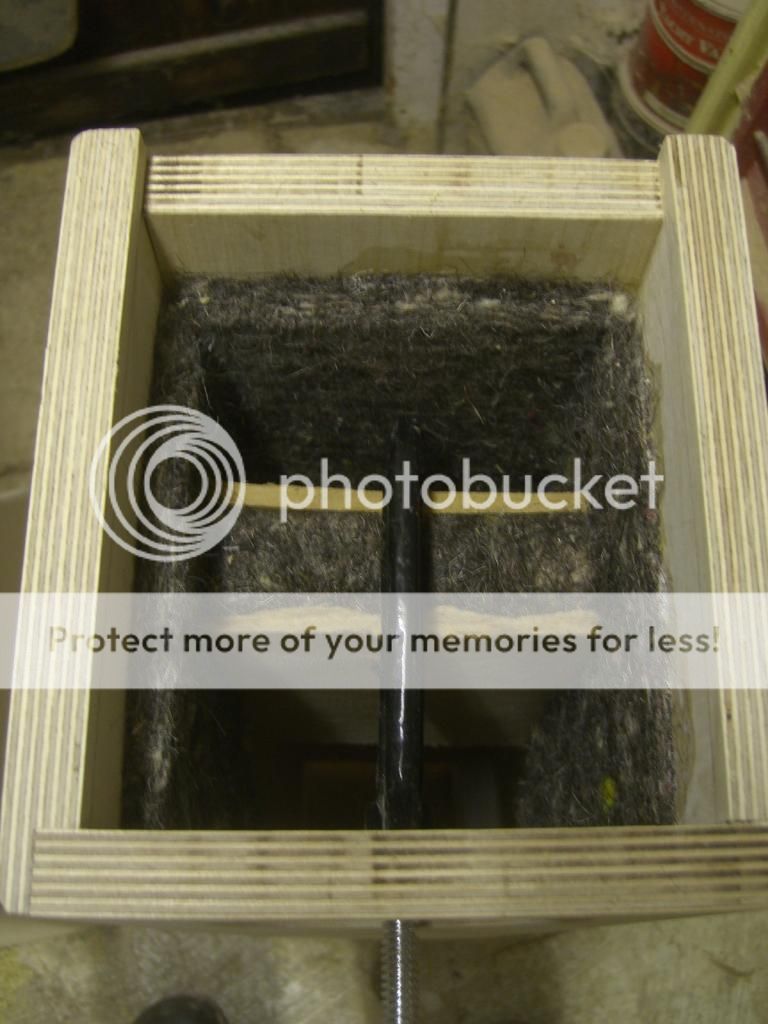
Done...
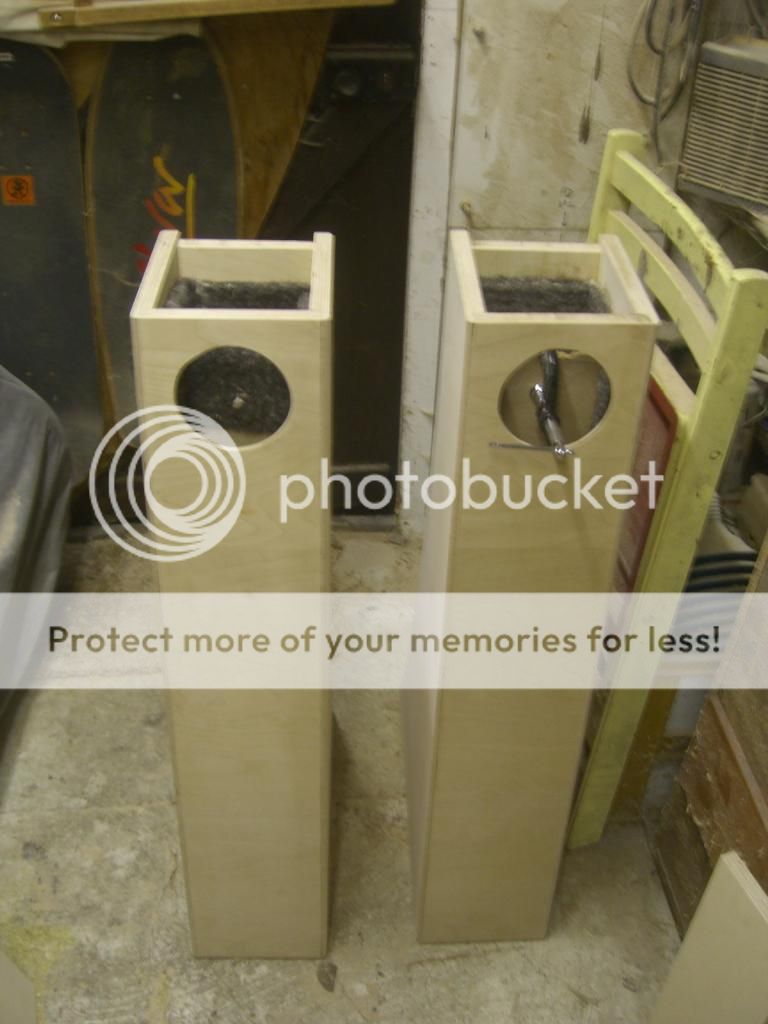
Next up drill both cabs and fit the drivers and temp lash the lids on for damping material fettling and bring 'em indoors for listening.
Phew!
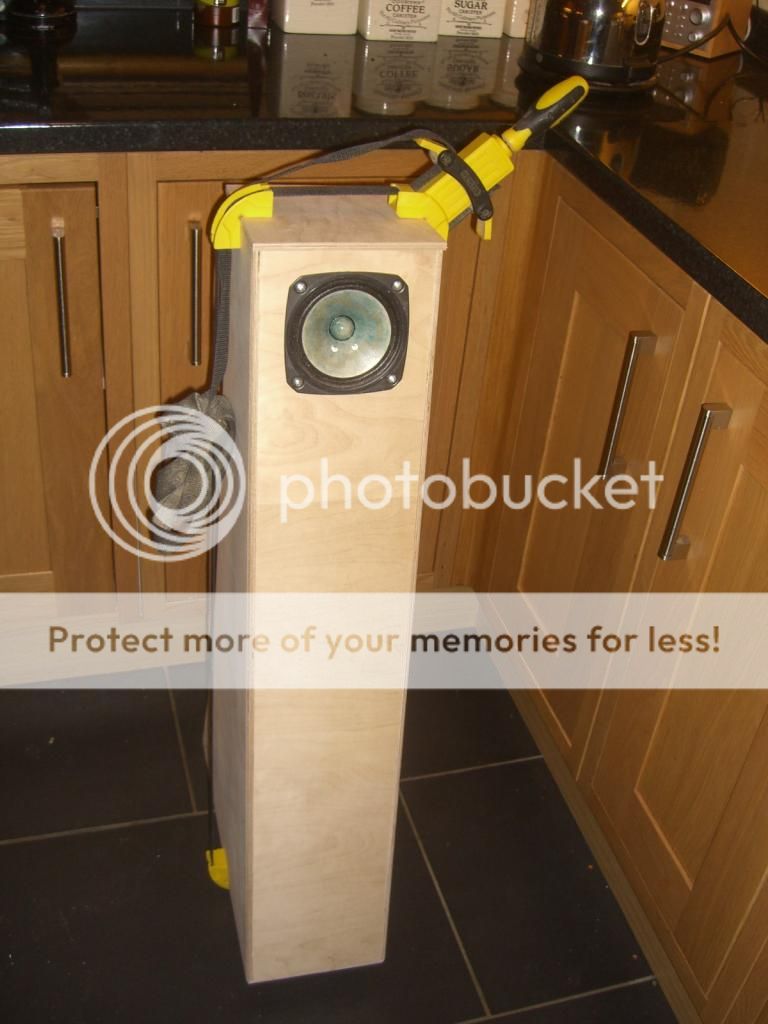
I'm listening to them right now up in their new home. With no damping (except the wool felt) they sound ace. The tops are only held on with a single Box clamp and can be felt to move. I'm sure they and the box clamps are singing along too but they do sound good from the outset, partly because the drivers have been in constant use for the last 10 months in our-Phil's MDF FH3's I'm guessing.
A question re-damping them a smidge. I've got a 1Kg bag of hollowfibre filling to play with (£7.99!), now then, I don't want to kill the mid range dynamics too much and I'm sure the cabinet lids are adding to the slight peak too but tomorrow is set aside for experimenting with the damping. Question is... do I ram some hollowfibre deep down in the bottom of the 'V' or leave it loose and fluffy up towards the more open end of the 'V' shaped inner channel?
Any tips anyone?
DTB
Mr Bass: you had me at "furry, well clamped box"
Now, I understand that was a trap, but if I'm still around after YOUR 40th matrimonial anniversary, please feel free to PM me to discuss the irony therein.
Mate - we better be careful, or we could both receive yellow cards from the refs.
Back to the FH3 with FE126En - I'd suggest you give them at least a full week of listening before assessing whether additional levels of fiber fill might be required below the drivers.
I've never taken the time to verify by experimentation ( and of course then it would only be anecdotal) so it's only my opinion, but I suspect that the use of any type of clamps to "seal" an enclosure such as these during the initial period of assessing /adjusting fill levels can add mass and/or change the enclosure's "tension" characteristics enough to affect the final results - so when they (clamps) are removed things sound different again.
does that paragraph make sense?
geeze, sometimes I wish I went further than just grade 12 vocational
edit "BTW" - nice joinery work, mate
You'd have to wait for at least 40 years from todays date ChrisB.... don't tell anyone but JTS (Julie The Stitch) and me aren't married.... been together 18 years though (insert 'luvved-up' smiley!).
Good points re trying to assess the new wunder-boxes whilst having their hats strapped down. Yesterday I suspected the tops and box clamps are singing along
I'm tempted to glued down the lids and just use my tiny little girly (bass playing) hands in through the driver hole if any damping material needs shovelling in.
They sound great this early in the morning too... so its not just post build-adulation
DTB
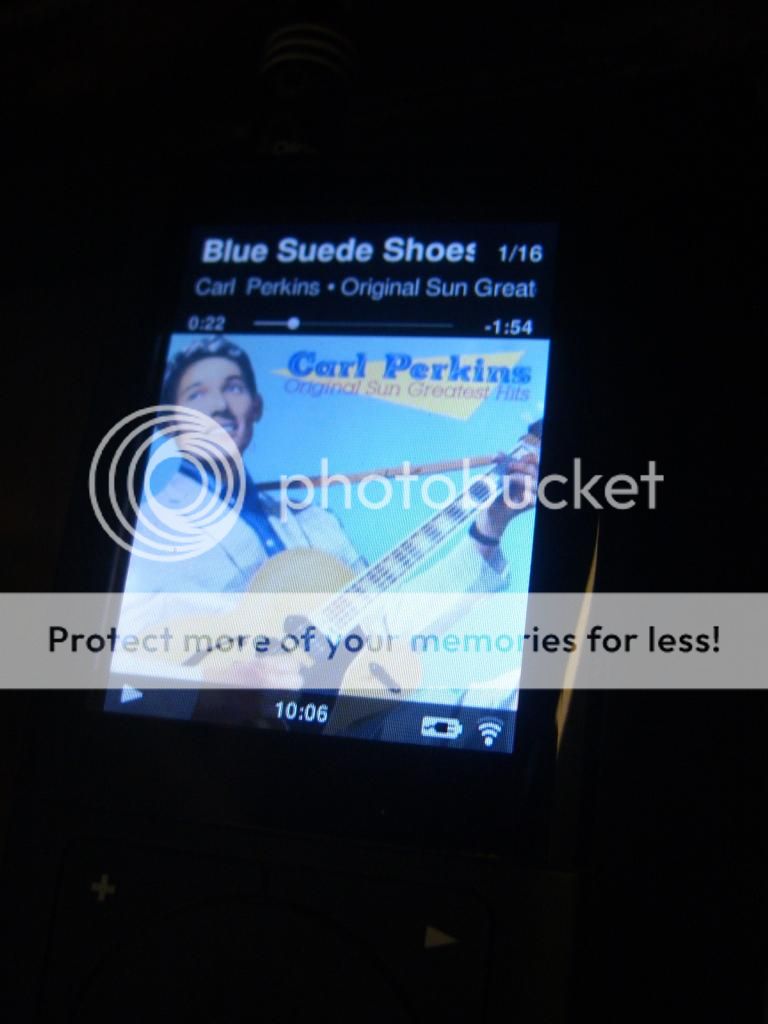
I 'manned-up' and glued and clamped the lids on early this morning...
Carl Perkins dropped in to help me too... I had to bond a part of his footwear... "Glued-Suede Shoes".... geddit???Ha!
Whilst that was going on I turned my attention to making up a pair of 'stabilisation bases' like I did with the Saburo's. Tall wobbly speakers are prime targets for getting knocked over when I'm lugging guitars and basses amps in and out the project room.
I like the ethos of the 'Frugal' part of the Frugalhorn project so in keeping with the spirit of this, lets use all those funny shaped off cuts...

.... and make some 'Frugal Foots'!
Looks daft at the moment but just you wait and see
Late afternoon, off came the clamps of the newly bonded lids, they received a trim and fettle and now look lovely and smart...
Schweeeet...
Shortback and sides, something their owner hasn't had in approx 40 years!

After another total sanding I was ready to start putting the finishing touches to them. During the afternoon I'd been experimenting with different finishes. Our house has a lot of exposed wood and some of itis waxed, it looks ace (IMO). Aha, lets test a few bits of BBP with some wax we had left over from decorating the project room, I did. The results looked fantastic. Down to B+Q to buy a fresh new tin and start applying.....and rubbing.....and rubbing ....and rubbing.....and rubbing ....and rubbing.....and rubbing ....and rubbing.....and rubbing ....and rubbing.....and rubbing ....and rubbing.....and rubbing ....and rubbing.....and rubbing ....and rubbing.....and rubbing ....and rubbing.....and rubbing . Oh dear! I think I've over estimated my ability and also how long and how much work its going to take to get them looking like my samples did. Oooops!
1st cab is buffed and smooth as a very smooth thing to the touch... but... its made the cabs look 'untidy'. Doh! Think rustic... think medieval hi-fi! :lol:
I'll do pictures in the daylight. It'd be too easy to bluff it tonight as they look better when its dark, really dark, like black-dark when your eyes are closed!
Doh again!
I've committed to it now so I'll just have to live with em for now.
Triple Doh.
Doh The Bass.
DTB
Carl Perkins dropped in to help me too... I had to bond a part of his footwear... "Glued-Suede Shoes".... geddit???Ha!
Whilst that was going on I turned my attention to making up a pair of 'stabilisation bases' like I did with the Saburo's. Tall wobbly speakers are prime targets for getting knocked over when I'm lugging guitars and basses amps in and out the project room.
I like the ethos of the 'Frugal' part of the Frugalhorn project so in keeping with the spirit of this, lets use all those funny shaped off cuts...
.... and make some 'Frugal Foots'!
Looks daft at the moment but just you wait and see
Late afternoon, off came the clamps of the newly bonded lids, they received a trim and fettle and now look lovely and smart...
Schweeeet...
Shortback and sides, something their owner hasn't had in approx 40 years!
After another total sanding I was ready to start putting the finishing touches to them. During the afternoon I'd been experimenting with different finishes. Our house has a lot of exposed wood and some of itis waxed, it looks ace (IMO). Aha, lets test a few bits of BBP with some wax we had left over from decorating the project room, I did. The results looked fantastic. Down to B+Q to buy a fresh new tin and start applying.....and rubbing.....and rubbing ....and rubbing.....and rubbing ....and rubbing.....and rubbing ....and rubbing.....and rubbing ....and rubbing.....and rubbing ....and rubbing.....and rubbing ....and rubbing.....and rubbing ....and rubbing.....and rubbing ....and rubbing.....and rubbing . Oh dear! I think I've over estimated my ability and also how long and how much work its going to take to get them looking like my samples did. Oooops!
1st cab is buffed and smooth as a very smooth thing to the touch... but... its made the cabs look 'untidy'. Doh! Think rustic... think medieval hi-fi! :lol:
I'll do pictures in the daylight. It'd be too easy to bluff it tonight as they look better when its dark, really dark, like black-dark when your eyes are closed!
Doh again!
I've committed to it now so I'll just have to live with em for now.
Triple Doh.
Doh The Bass.
DTB
And finally, here's how they look a few days after I finished them. Wax finish has redeemed itself, they look 'better' now than when I'd 1st applied it. No really!

Like what it does to the grain...

Sweet backends!

This picture has been lightened to make it viewable, they're not this light in colour in real life...

Nice noises come from this bit...

Yesterday I took Phil's MDF FH3's back to him after I'd had them on load for about 10 months. Ply FH3's were given the stamp of approval. Really pleased I've finally got my own pair in the project room.
Whahey! Onwards to amps and tuners and TT's again now.
DTB
Like what it does to the grain...
Sweet backends!
This picture has been lightened to make it viewable, they're not this light in colour in real life...
Nice noises come from this bit...
Yesterday I took Phil's MDF FH3's back to him after I'd had them on load for about 10 months. Ply FH3's were given the stamp of approval. Really pleased I've finally got my own pair in the project room.
Whahey! Onwards to amps and tuners and TT's again now.
DTB
I love the handles on the back.
I was going to comment on that. With askward shaped speakers it is nice to have convienient handholds, with this idea one does not have to trust that the cabinet topology supply them.
Thanks Mr Bass.
dave
Beautiful! I love the handles on the back. The horizontal grain makes them look like they will be "blowing you away" like the classic Maxell commercial.
Aye, they've been blowin' me away for ages now, its a combination of Scott and 4" drivers y'know. I blame them both! He brought a large double mouthed pair of Fostex loaded Harvey Cabs (I think) to a DIY HiFi meet up the North of England in about 2009. He played a Doobie Brothers track and the Doob's were stood there in front of me... since then I've been hooked on biggish cabs and small ish drivers. Awethumne!
Nice work mate!
Thanks Cal, yeah, I'm pleased with them too.
I was going to comment on that. With askward shaped speakers it is nice to have convienient handholds, with this idea one does not have to trust that the cabinet topology supply them.
Thanks Mr Bass.
dave
S'pleasure Mr D, I love their sound and sticking piccies up on how I made 'em! The Frug3's are in two 'heavy traffic' corners of my project room. Both have a door on either side. One to the 'stock cupboard' and the other to the rest of the house. Fitting handles makes it easier to shift the FH's out the way when I want access to either door! THAT type of handle doesn't ingress inside the cab in anyway, the 'sacred ground' behind the driver isn't breeched at all. Made sense to me
DTB
Ta Scott, its all YOUR fault y'know....
Aren't those pretty blue 126 the ones Scott had in Harvey (the 1st spawn)?
We might have to conspire to give them measles.
dave
Aren't those pretty blue 126 the ones Scott had in Harvey (the 1st spawn)?
We might have to conspire to give them measles.
dave
Yep, I think so Dave. The cabs a crazy colour too IIRC. I trawled through some piccies of the 1st ever DIY Fest I ever went to in 2006 (not 2009 as I thought earlier) and found the exact cabs and drivers (I think).

And our-Scott doing his demo

awesome!
the horizontal grain is rare touch the bass, it's growing on me.
congrats
Cheers BassyBoy! Aye, every good quality sheet of BB Ply that B+Q had I found the grain going down the 4ft span not the 8ft span, bonkers, especially after I'd shifted my cut sheet to get the grain matched, doh! It all went out the window but the quality was good so I just went with it (baybeee).
They turned out very nice DTB!
Ta Mr Z, yeah they work and look good up in my little project room.
Last edited:
- Status
- This old topic is closed. If you want to reopen this topic, contact a moderator using the "Report Post" button.
- Home
- Loudspeakers
- Full Range
- FH3 Vs. DTB