Hi ") I wanna thank everybody who joined on the thread for all the positive input. I'm making progress!
I wanna thank everybody who joined on the thread for all the positive input. I'm making progress!
Today i routed the first front panel and this is the result:
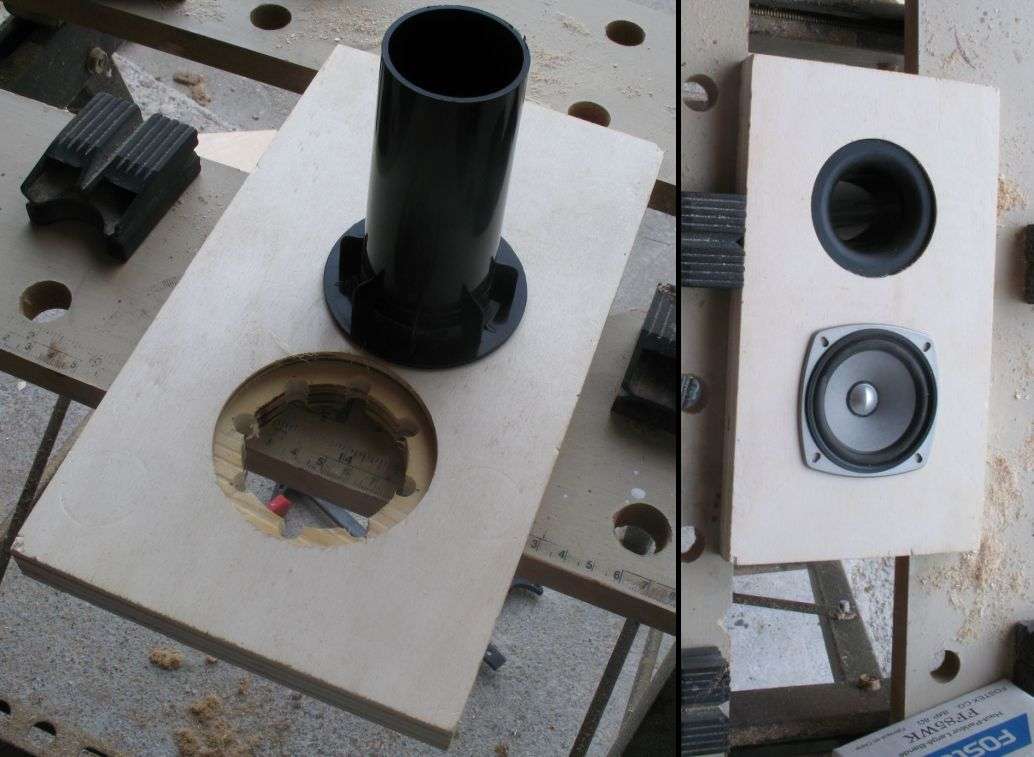
Using 20mm Birch Plywood panels.
I sunk the reflex duct by 4mm for estethic purposes, and the little cuts allow this particular duct, CIARE YAC 413 (44x110), to be placed firmly with little effort (i will maybe add some glue but overall i think treating the internals with black tar stuff and with a mixture of vynil glue and wood powder in the junctions will seal everything in place).
Chamfering the back of the speaker baffle hole, as instructed by planet10-dave using a 30° routing tip, was moderately easy. Tomorrow i'll route the second speaker front panel and then i'll get to fitting amplifier and all the electronics in!
I can't understand how people can craft speakers so quickly and with ease. The process of cutting holes with a power router and a jig is EXHAUSTING, ditto for building enclosures using only wooden plugs and vynil glue. I wonder if i'm missing some tools or technique?
It's unbelievable that speaker builders normally go through all this effort on their own. I'm physically knackered every night after i worked on these little ones.
I wanna thank everybody who joined on the thread for all the positive input. I'm making progress!Today i routed the first front panel and this is the result:
Using 20mm Birch Plywood panels.
I sunk the reflex duct by 4mm for estethic purposes, and the little cuts allow this particular duct, CIARE YAC 413 (44x110), to be placed firmly with little effort (i will maybe add some glue but overall i think treating the internals with black tar stuff and with a mixture of vynil glue and wood powder in the junctions will seal everything in place).
Chamfering the back of the speaker baffle hole, as instructed by planet10-dave using a 30° routing tip, was moderately easy. Tomorrow i'll route the second speaker front panel and then i'll get to fitting amplifier and all the electronics in!
I can't understand how people can craft speakers so quickly and with ease. The process of cutting holes with a power router and a jig is EXHAUSTING, ditto for building enclosures using only wooden plugs and vynil glue. I wonder if i'm missing some tools or technique?
It's unbelievable that speaker builders normally go through all this effort on their own. I'm physically knackered every night after i worked on these little ones.
I can't understand how people can craft speakers so quickly and with ease.
I think it must be practice. As for myself, I'm not one of those people. It takes me weeks (if not months) to build a set of speakers. But, there is a lot of satisfaction that comes from the care you put into your work.
Nice job on the routing. I can't wait to see the rest. I have a pair of the previous generation FF85K, and I'm impressed by what the little guys can do. I find myself frequently listening to them even when larger speakers are available.
Last edited:
I think it must be practice. As for myself, I'm not one of those people. It takes me weeks (if not months) to build a set of speakers. But, there is a lot of satisfaction that comes from the care you put into your work.
Nice job on the routing. I can't wait to see the rest. I have a pair of the previous generation FF85K, and I'm impressed by what the little guys can do. I find myself frequently listening to them even when larger speakers are available.
Thanks a lot. I think i'll start listening to these in 10 days or so. I can't wait! My vacation time is nearly over and i finished the "structural" work just today. From tomorrow it will be gluing everything, treating the internals and finishing up the electronics. (I still have to wire the source selector, the volume pot and the on/off switch to the back panel).
About your build: WOOT. You glued all those complex angles without plugs?? If only i could do that
I think my next project (next summer or later) will be a non-BR enclosure. Something like a Transmission Like or a uFonken/FrugelHorn.
If people are interested i'll keep posting pics and i'm thinking about a little build log at the end of everything.
Thanks for the feedback!
I think that Port is to big!
It's 4mm wider than what Fostex recommends but i couldn't find *anything* even close to this. Either 50mm or 35mm internal diameter, i even looked for pvc plumbing pipes and apparently 40mm internal diameter tubing doesn't exist in italy. This will have to do
Shamelessly bumping my own thread.
The boxes are now gluing, next step is treating the internals and i don't really know what damping material to use inside.
I was thinking about:
Should i use some of the cone-shaped sponge material as well?
Should i place sonofil/cones on the sides as well or just the back is enough?
Thanks again for all the help
The boxes are now gluing, next step is treating the internals and i don't really know what damping material to use inside.
I was thinking about:
- Cork pads on all the side panels as a base.
- Black tar stuff on the whole internal to damp most of the big vibrations
- Sonofil damping material (i have it on hand) on the back panel
Should i use some of the cone-shaped sponge material as well?
Should i place sonofil/cones on the sides as well or just the back is enough?
Thanks again for all the help
If people are interested i'll keep posting pics
Yes, keep the pictures & commentary coming.
dave
Hey ^^ As promised there is a new update. Sorry for the amount of pics but they say a picture is worth a thousand words
For those interested in building this simple design, here is a very rough comparison of how big they end up to be.
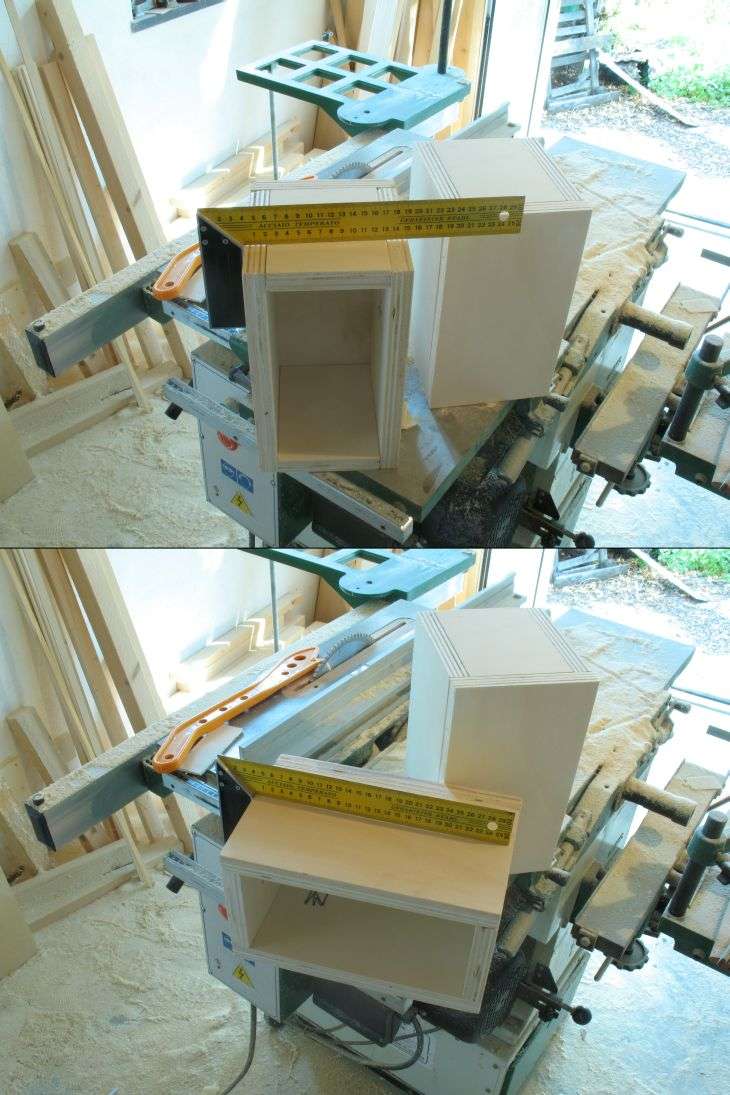
I *strongly* suggest to use 20mm panels like i did because it makes everything easier.
By using panels of this thickness you can use 4 identical panels for front/back and sides. This way, you will have many more options to fix little mistakes like drilling the wrong panel or recycling a badly routed piece. I speak from direct experience here
Following Fostex design, i tried to use dimensions as faithful to theirs as possible but they suggest some numbers that are very hard to cut precisely (like 149mm for one side).
My dimensions are:
Quantities are for a PAIR of speakers.
You might want to buy spares if you're at your first build.
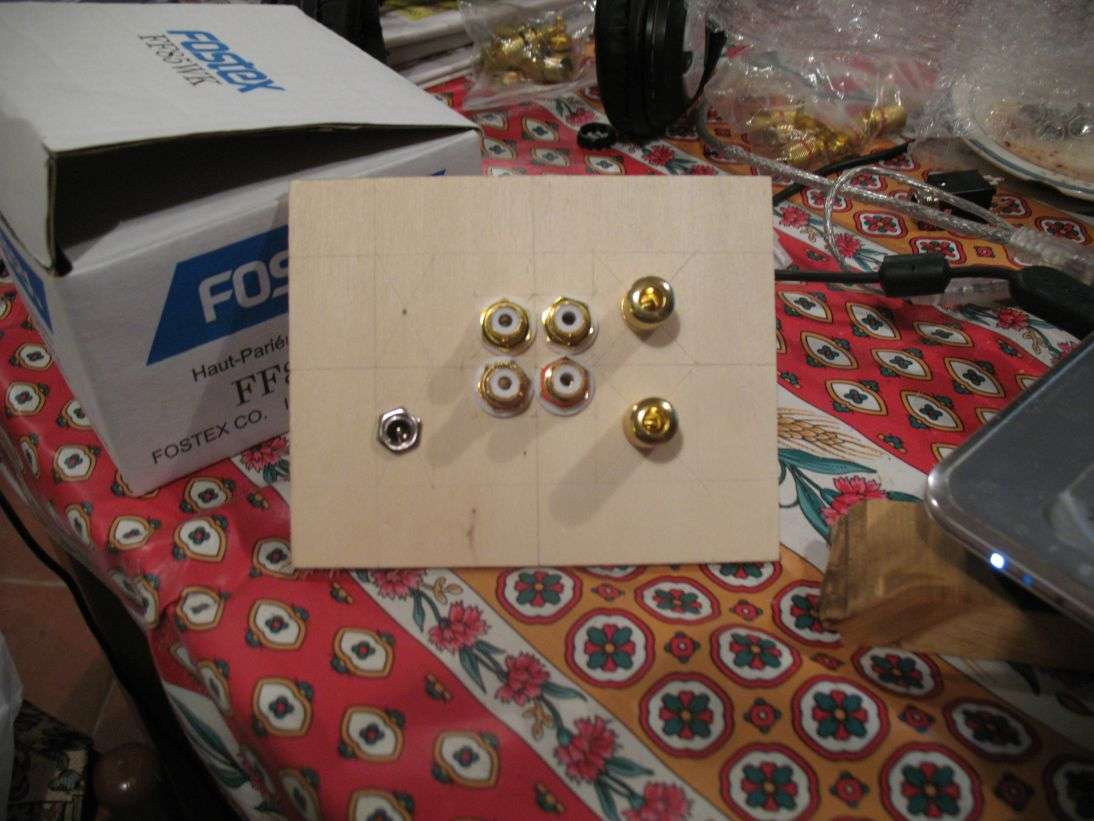
Yesterday i assembled a mockup of the backpanel with the connections. I still have to figure out how to assemble the USB port.
Today i started treating the internals. I'm now gluing Cork Pads on 4 of the internal side (left/right/top/back). I'm leaving bottom "uncorked" because that's where the electronics will go and i'd like a little more room.

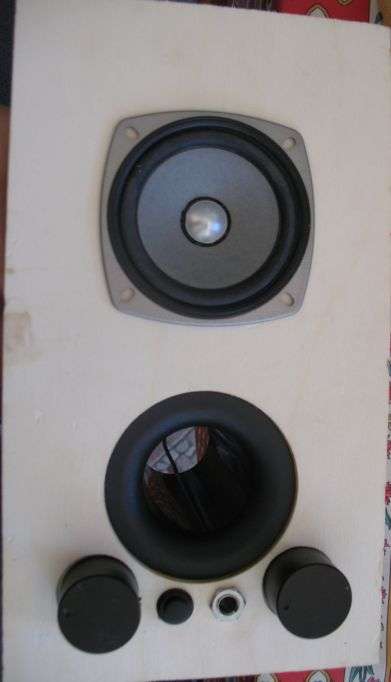
This is the general look the "main" speaker will have. It features a 6.3mm TRS jack for headphones, a good looking (imho) on/off switch and knobs attached to a 100 kOhm Pot for Volume and a 4Poles-3Throws rotary switch for source selection.
Lately i'm getting very tired quickly and work on the speakers is dragging on more than i'd like. Deadline is coming very very quickly and i still have to start finishing them. I read of some people here on the forum that give 7-10 hands of whatever finish they use. I will be lucky if i will have time for two
Also, i completely forgot how hard it is to make 7mm brass plugs fit. I use them for the back panel every time because they give an easy way to open the speaker and perform repairs or improvements, but they're machined in a size that is not quite 7mm but bigger than 6. They're hell to fit.
Here's the product link of the closest thing i could find on Fischer's website if someone is interested
Mine are suitable for wood as well but are otherwise almost identical.
After the cork is glued properly, i will add black tar as said before and then i need to decide where and how to place the Sonofil.
For those interested in building this simple design, here is a very rough comparison of how big they end up to be.
I *strongly* suggest to use 20mm panels like i did because it makes everything easier.
By using panels of this thickness you can use 4 identical panels for front/back and sides. This way, you will have many more options to fix little mistakes like drilling the wrong panel or recycling a badly routed piece. I speak from direct experience here
Following Fostex design, i tried to use dimensions as faithful to theirs as possible but they suggest some numbers that are very hard to cut precisely (like 149mm for one side).
My dimensions are:
- 8 panels of 265x150x20mm
- 4 panels of 150x110x20mm
Quantities are for a PAIR of speakers.
You might want to buy spares if you're at your first build.
Yesterday i assembled a mockup of the backpanel with the connections. I still have to figure out how to assemble the USB port.
Today i started treating the internals. I'm now gluing Cork Pads on 4 of the internal side (left/right/top/back). I'm leaving bottom "uncorked" because that's where the electronics will go and i'd like a little more room.
This is the general look the "main" speaker will have. It features a 6.3mm TRS jack for headphones, a good looking (imho) on/off switch and knobs attached to a 100 kOhm Pot for Volume and a 4Poles-3Throws rotary switch for source selection.
Lately i'm getting very tired quickly and work on the speakers is dragging on more than i'd like. Deadline is coming very very quickly and i still have to start finishing them. I read of some people here on the forum that give 7-10 hands of whatever finish they use. I will be lucky if i will have time for two
Also, i completely forgot how hard it is to make 7mm brass plugs fit. I use them for the back panel every time because they give an easy way to open the speaker and perform repairs or improvements, but they're machined in a size that is not quite 7mm but bigger than 6. They're hell to fit.
Here's the product link of the closest thing i could find on Fischer's website if someone is interested
Mine are suitable for wood as well but are otherwise almost identical.
After the cork is glued properly, i will add black tar as said before and then i need to decide where and how to place the Sonofil.
Cool project, like the look of that new driver! Perhaps your brass plugs are 1/4", ie, 6.35mm fitting? Either way, a 1/4" drill bit may save you a lot of effort, I had to use one recently to fit some toggle switches.
Looks like it! after sweating a full morning trying to thicken them with duct tape to make them fit on the 7mm holes i made (as advertised on the packaging!) i measured them with a caliper and they were 6.2mm!
I really doubt i can find easily an imperial size drill bit in Italy, it's already hard enough finding some metric ones!
I kinda solved the plug issue by making 6mm holes and hammering the plugs in. It's ok as long as you have enough wood between the hole and the surface. If you try to hammer one in close to the panel surface you will likely end up with a crack tho :/
I'll shop on ebay for the 1/4 inch bit for the next project tho, thanks for pointing it out!
Tonight i plastered over some holes and imperfections.
I used vynil glue mixed with the very very thin powder that comes off the electric sanding machine i'm using. It has a collector and i just mixed some glue with a generous helping of whatever came out of it. It worked really well to fill holes and such but i won't know until tomorrow if sanding it will be easy and if it will leave a stain!
Speaking of stains, anyone knows how to "fix" some black-ish stains like the one visible in the front panel picture? Since i'm using plywood, i can't be too harsh on sanding or i will lift off one of the layers.
Speaking of stains, anyone knows how to "fix" some black-ish stains like the one visible in the front panel picture? Since i'm using plywood, i can't be too harsh on sanding or i will lift off one of the layers.
Find a scrap piece of ply around your shop floor. Make a similar stain on it, and practice trying to clean it off. I wonder if chlorine bleach or hydrogen peroxide (but not both at the same time!) would take it out without causing too much damage?
Find a scrap piece of ply around your shop floor. Make a similar stain on it, and practice trying to clean it off. I wonder if chlorine bleach or hydrogen peroxide (but not both at the same time!) would take it out without causing too much damage?
At first i thought of hydrogen peroxide as well. Today i tried gently sanding it with a 240 grit paper and it all went away.
Thanks for the feedback!
You're gonna have to tell me to stop posting
Here is today's train of pictures.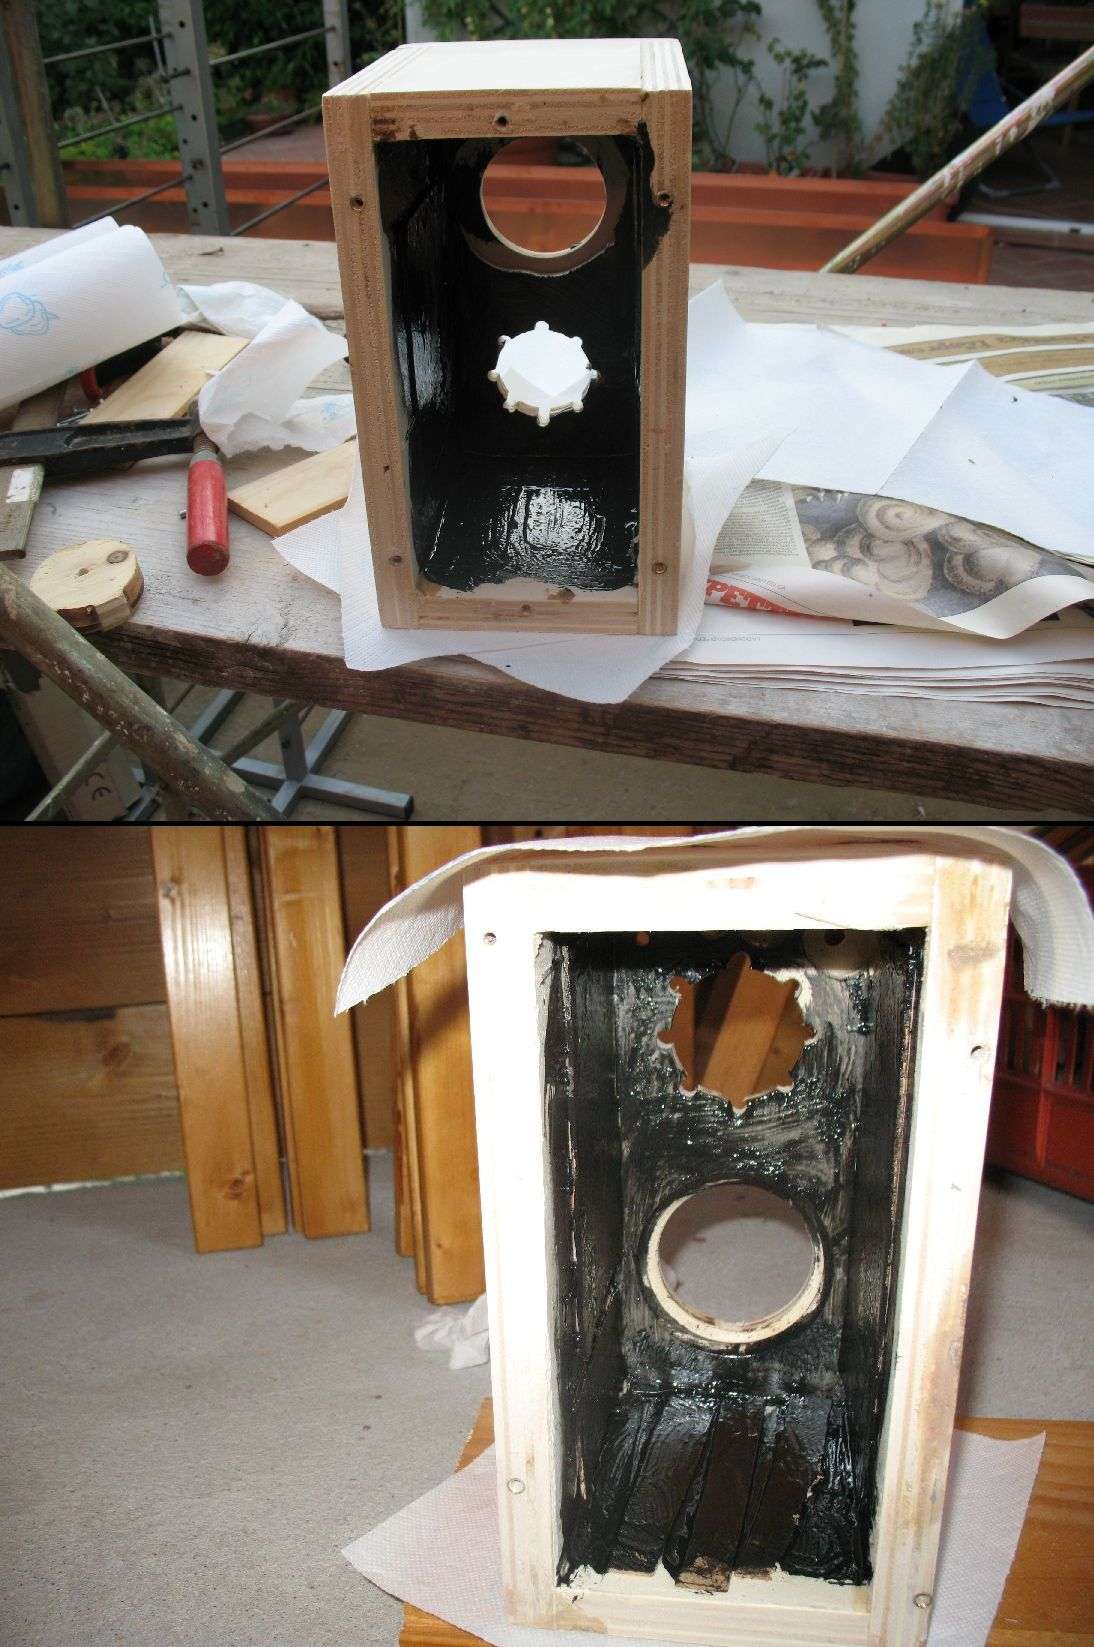
I'm basically done treating the internals. This is the black tar stuff (it's called "antirombo" in italy and it's used as an automotive vibration damper, mostly in car doors. Also comes in adhesive sheets).
I will probably give another hand tomorrow but apart from that, that's about it. As you can see i did an awfully sloppy work, i'm just lucky all the stains i made will be covered by either the speaker basket, the reflex duct or the back panel.
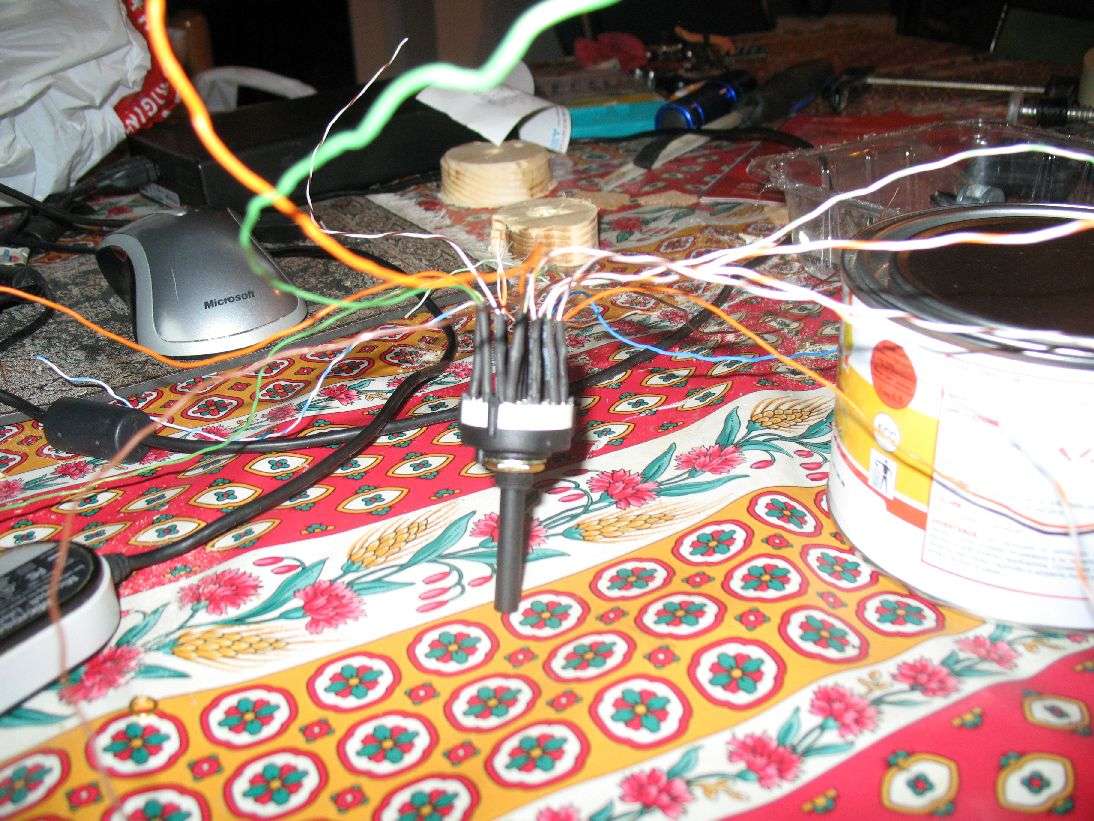
Ugh. This took the better part of the evening. This was _painful_. It's 16 connections, each of which is made by soldering a metal pin to the cable and then soldering the metal pin to the switch. AND then applying the shrinking cover
This is a 4 poles, 3 throws rotary switch. It also took a few minutes to figure out how the pins are wired, they're _not_ one after another. I can post a schematic if people need it.
The wiring is done with 0.8mm solid core wires (taken from CAT5 UTP cable).
I was also able to find a 100 kOhm _linear_ pot. I think i will try to make a better logarithmic volume pot following this little schematic:
ESP - A Better Volume Control.
As a backup plan, i also have a 47 kOhm dual log pot.
Today i bought all i need to finally start making my little ones "pretty".
I will stain the front, top, bottom and back with a dark walnut wood stainer (this one has varnish in it as well, it's a complete product rated for exteriors) and i bought a semi-glossy black for the side panels. The shopkeeper also sold me a light brown primer to apply before the black paint.
I plan to lay a lot of hands of paint, until they are super-smooth to the touch. If the staining achieves the desired color before it's smooth enough to the touch, i will buy a transparent varnish and keep laying hands.
I also managed to wreck the back panel of the main speaker, and i ran out of plywood. The options are either to use pine hard wood from my dad's leftover (he's building a hut) or wait tomorrow late afternoon and beg someone to take me to the DIY store
That's all for tonight folks! See you tomorrow and by all means keep the feedback coming
Last edited:
Well i'll keep posting just for my sake, as a kind of build log
not much to report tonight, i started staining and adjusted the knob holes. Tomorrow i'll know if all the electronics fit.
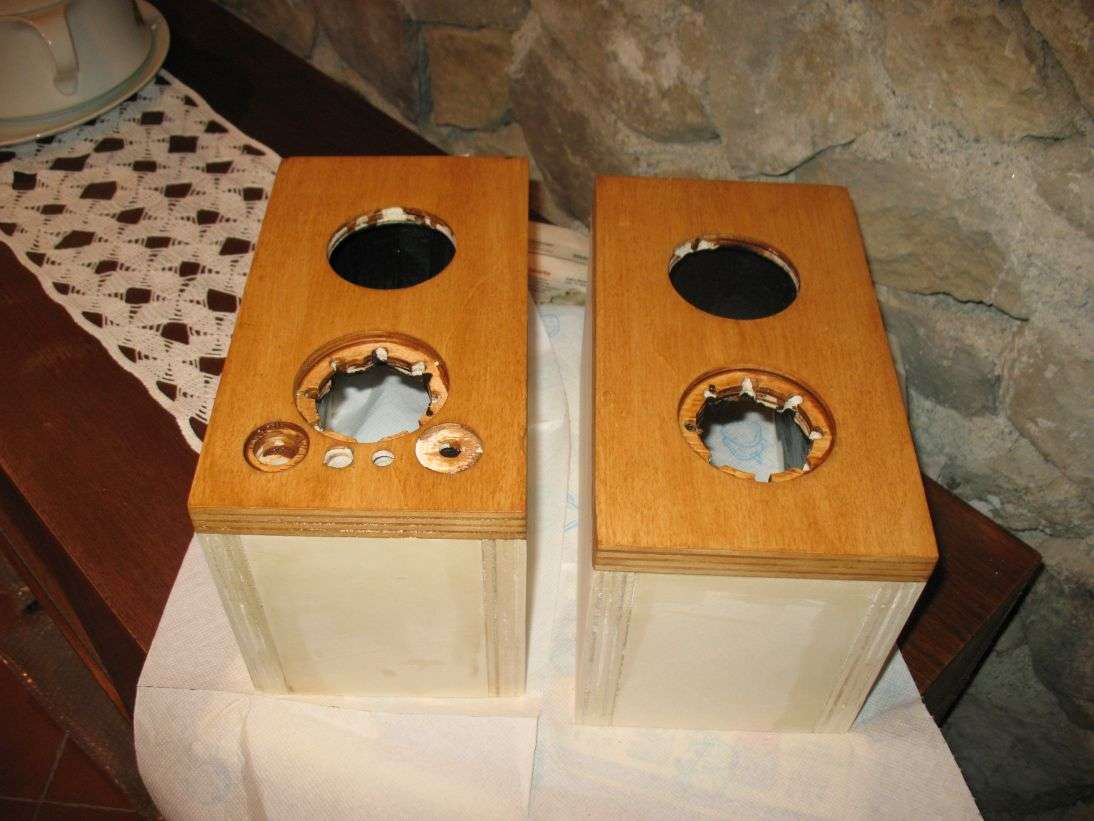
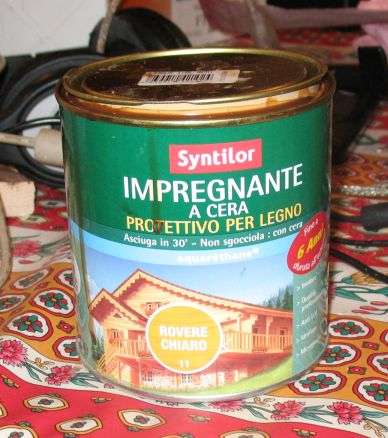
This is the result after 2 hands of light oak wood stainer.
The brand is Syntilor - Wood Stain - Aquarethane - Light Oak.
The tint already satisfies me but it's very rough to the touch. According to some sites, it's because wood stainers "lift" the fibers. I will sand with a 320 grit tomorrow and apply a third hand.
Stay tuned
not much to report tonight, i started staining and adjusted the knob holes. Tomorrow i'll know if all the electronics fit.
This is the result after 2 hands of light oak wood stainer.
The brand is Syntilor - Wood Stain - Aquarethane - Light Oak.
The tint already satisfies me but it's very rough to the touch. According to some sites, it's because wood stainers "lift" the fibers. I will sand with a 320 grit tomorrow and apply a third hand.
Stay tuned
Ok now i'm carrying out the big guns.
I'm currently wiring the main speaker. Everything fits inside VERY tightly, and i will probably have to run some wires around and below the reflex duct.
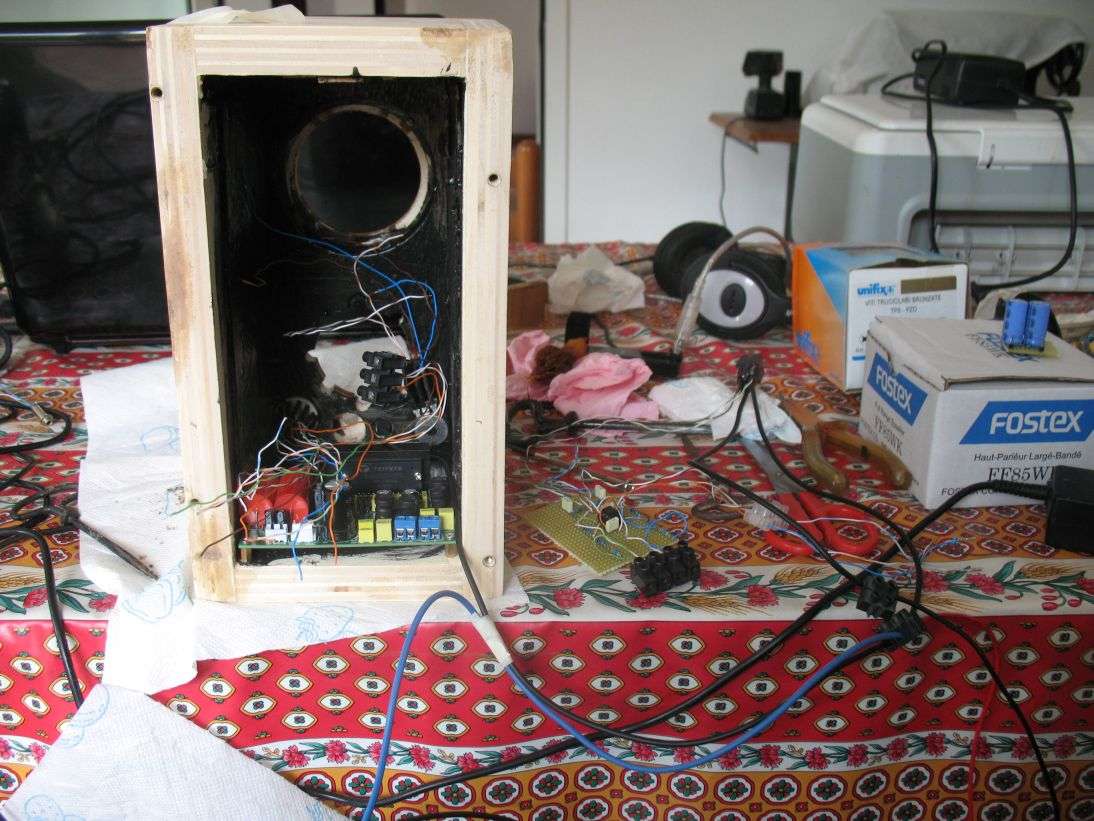
Lots of screw-in connectors had to be placed inside. They're essential to keep the construct modular.
Any pointers before i close everything?
Thanks for the feedback so far
I'm currently wiring the main speaker. Everything fits inside VERY tightly, and i will probably have to run some wires around and below the reflex duct.
Lots of screw-in connectors had to be placed inside. They're essential to keep the construct modular.
Any pointers before i close everything?
Thanks for the feedback so far
Any pointers before i close everything?
Thanks for the feedback so far
If you recess the driver so that it's flush with the baffle, it will improve the frequency response. It will also reduce listener fatigue by eliminating diffraction off the edge of the frame.
If you add a roundover to the face of the enclosure it will make the speakers 'disappear' to a greater extent. This is because diffraction off the baffle creates a 'phantom source' delayed in time, when the radiation strikes the edges. This will occur about half a millisecond after the initial wave launch.
Ok now i'm carrying out the big guns.
I'm currently wiring the main speaker. Everything fits inside VERY tightly, and i will probably have to run some wires around and below the reflex duct.
Lots of screw-in connectors had to be placed inside. They're essential to keep the construct modular.
Any pointers before i close everything?
Thanks for the feedback so far
Uh, was this project completed? Did it work well?
Woah i had no idea someone would still read the thread over a year after it was done
Sadly, that project was a train-wreck for non-technical reasons (Here i detail what transpired: Cautionary Tale for DIYers - What to _never_ do while on a project).
Things are looking much better now and i have now room and disposable income enough to start building my workshop as i've said in the rant. Summer 2014 could be the year these babies will be reborn
I think i will stick to a sort of active design (these will be my desktop speakers for sure) but the overall cabinet design will likely be µFonkens from Planet10's great site.
We'll see how it goes
Last edited:
- Status
- This old topic is closed. If you want to reopen this topic, contact a moderator using the "Report Post" button.
- Home
- Loudspeakers
- Full Range
- FF85-wk (new one) or FE83 for Quick Summer Project?