John,
This may be of interest:
HiFi
Scroll down to "From dust to horn"
He has posted here in English: Page 2 scroll to MIWI post.
Poured concrete as a plinth material? (page 1) - The Lab - Lenco Heaven Turntable Forum
Good luck with an interesting project.
This may be of interest:
HiFi
Scroll down to "From dust to horn"
He has posted here in English: Page 2 scroll to MIWI post.
Poured concrete as a plinth material? (page 1) - The Lab - Lenco Heaven Turntable Forum
Good luck with an interesting project.
Last edited:
I have the mold nearly finished - still have some more coats of urethane to apply then wax before I can think about casting. Letting the urethane cure for a while is a good idea.
I'll need to order the casting resin soon but I'm trying to see if there is anything else I need from that company (like expanding foam) - save on shipping if I get it in one order.
I'm also entertaining the idea of a larger midrange horn experiment once this one is done...
I'll need to order the casting resin soon but I'm trying to see if there is anything else I need from that company (like expanding foam) - save on shipping if I get it in one order.
I'm also entertaining the idea of a larger midrange horn experiment once this one is done...
Ooh, i'm glad i stumbled across this thread. Work looks fantastically well done!
I have just started my build (well ordered the waveguides). My plan to create a 2 way with a cast cement baffle 3-4" thick, using a Dayton 8" waveguide as the mold and cast the baffle with a 6" polystrene cylinder for the mid drivers hole. Should look like the completely speaker on the first page, although heavier and industrially grey. Wrap it all in a box. Ill work up some sketchup pics soon. Quite a way off completing as no drivers have been decided upon.
Perhaps plaster is a better option, certainly looks good, and super smooth.
Keep up the good work. Big horns have to be the next project.
This is how i envisage mine looking. Casting the entire baffle, minimises the woodwork. Might cast cement egg boxes for the rear panel.
Not the best model or most accurate but if anyone wants to play heres the sketchup file.
http://dl.dropbox.com/u/1444609/diyaudio/Nf.%20first%20concept%20by%20Studio%20Au.skp
Suggestions welcome, sorry for the hijack.
An externally hosted image should be here but it was not working when we last tested it.
An externally hosted image should be here but it was not working when we last tested it.
An externally hosted image should be here but it was not working when we last tested it.
Not the best model or most accurate but if anyone wants to play heres the sketchup file.
http://dl.dropbox.com/u/1444609/diyaudio/Nf.%20first%20concept%20by%20Studio%20Au.skp
Suggestions welcome, sorry for the hijack.
Hi Studio,
Nice idea to use a production waveguide as a template. That's something I didn't think about.
Casting the entire baffle should be fun - I like that idea actually. Plaster is great and once it is dried out takes a finish well. Several coats of urethane on my mold has produced something that resembles glazed porcelain.
Good luck with your project.
You could easily add mass to the rigid casting structure.
Is glossy smooth surface design chosen over say a ''patent leather'' surface shape or slightly less than smooth surface.
Smooth of course offers the least passive resistance, are we following suit [when the horns we used were designed, low passive resistance was probably a design/marketing goal]. More driving power to overcome passive resistance of the surface could be made available if deemed desirable.
Plaster cast tricks
I am a little late with my notes on plaster but the info may be useful. Plaster modeling is used in the orthotic and prosthetic arena to create positives for thermoforming sheet plastics or laminating thermoset resins with a cloth matrix. Wet plaster can be coated with Laminac, a shellac based sealer that reliably controls seepage of water in both liquid and vapor states. Production of the horn component can be done by droop forming or vacuum forming. Droop uses gravity and the operators hands to shape the plastic on the model once out of the oven. Vacuum provides a higher quality fit and finish but requires a more elaborate set up. The plastics used for thermoforming have a common structural characteristic. There is a cross linking of the molecules that relaxes with heating but stabilizes when cooled to retain the new shape. Two of the easier materials to use include KYDEX which is PVCA or CYCOLAC which is ABS. Kydex becomes very flexible around 275 F and can be spot heated to address ripples and other cosmetic concerns.
I will stop here but would answer any ?s if they arise.
So, how's the waveguide looking now?
I got the resin and cast the horn:
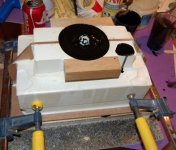
Unfortunately a couple of problems: first, the mold didn't survive the un-molding, in particular the positive centre part - I had to pretty much chip it out of the horn casting. Second is the finished surface of the casting was not great, not nearly smooth enough (even though the mold looked really smooth).
So, I have decided to take this casting and make it perfect and then form a silicone mold from it for the finished horns. Seem like a never ending process?
Anyway, here is how it looks. I have been doing some sanding and eventually it will be as smooth as glass:
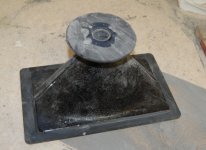
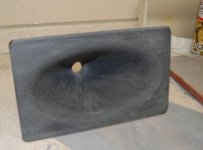
Plaster learning curve
Sorry your horn didn't separate easily. Using compressed air helps loosen the positive and negative parts. If you run around the edges with an air gun you overcome the stress risers that prying and pulling generate. Soaking the plaster in a solution of vinegar and H2o (1:1) dissolves the negative and helps in removal. It will take a while but yields an intact product.
Smoothing the negative...
The plaster model needs to be wet for smoothing and fresh plaster needs to be applied during the process. The fresh application is mixed thin so it will easily fill any voids left by trapped air bubbles. When this dries you should have a smooth glossy finish. The other option is to degas the initial pour. Jewelers use a bell jar placed over the contained investment and a vacuum pump pulls the air out. I have used a stout 5 gallon bucket with a fitting and placed it on a piece of 1/4" polyethelene foam to complete the seal. Cheap alternative to a large bell jar with one minor drawback. The vacuum cannot be turned on at full force as the bucket may distort/collapse. Mixing your plaster with cold water will lengthen the pot time and allow the lower vacuum value to work in degassing.
As far as degasing the pour...
Could vibration possibly help the problem of trapped air...? I have never done any molding of this type personally, but I have used vibrators for concrete and plaster type pours.
Pnuematic vibrators are relatively cheap, could be easily apoxied to the mold, and have the benefit of having their intensity controlled by a simple regulator.
Just a thought...
Hey Jarrett,
I agree with you. If you used a slower set plaster (green tag vs red tag) and it was mixed with cold water you could probably squeeze 20-25 minutes of vibe time in. I tend to over design and over build stuff, the bell jar is overkill. A more reliable method of manufacturing would be to vacuum form a sheet into a hollow opening, as the plastic cooled it would self release from shrinkage. The mold would could be used multiple times with just a touch up.
David
First, when I say the mold wasn't smooth enough it is not because of air bubbles (just go back a few posts and look at the mold, the pictures show enough detail) or the need to fill voids. It has to do with surface smoothness that is impossible to get unless you spend a lot of time sanding with consecutively finer sandpaper, which I didn't do enough of. The mold should have been perfect - it wasn't.
Second, I don't know what kind of plaster is available to you but the type I had is unmovable in a matter of seconds after it has be mixed. I even used cold water to mix it. Continuously vibrating the form while pouring is the only way to "degas" it - it will be as hard as rock by the time it could be put in a vacuum pot (not that I have one of THOSE).
Third, the mold didn't release because it didn't have the correct release agent on it - in places the urethane that I used to coat the plaster mold was strongly adhered to the urethane of the casting - compressed air is not going to loosen it, it had to be broken out and scraped off the casting.
There is a lesson to be learned and I did learn it: Don't use plaster for a mold, there is a MUCH better substance.
Silicone:
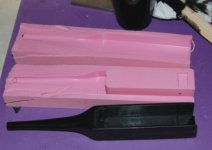
It would be that pink stuff. It forms a mold for the black thing which was actually cast into the silicone mold (to restate the obvious, the black thing is the same casting resin used on the horn flare).
It requires no release agent and is flexible for easy de-molding.
Second, I don't know what kind of plaster is available to you but the type I had is unmovable in a matter of seconds after it has be mixed. I even used cold water to mix it. Continuously vibrating the form while pouring is the only way to "degas" it - it will be as hard as rock by the time it could be put in a vacuum pot (not that I have one of THOSE).
Third, the mold didn't release because it didn't have the correct release agent on it - in places the urethane that I used to coat the plaster mold was strongly adhered to the urethane of the casting - compressed air is not going to loosen it, it had to be broken out and scraped off the casting.
There is a lesson to be learned and I did learn it: Don't use plaster for a mold, there is a MUCH better substance.
Silicone:

It would be that pink stuff. It forms a mold for the black thing which was actually cast into the silicone mold (to restate the obvious, the black thing is the same casting resin used on the horn flare).
It requires no release agent and is flexible for easy de-molding.
great stuff
Ot maybe.A while back I had a go with some ludicrously expensive chrome paint(mirrachrome),long story short, even the finest polishing marks easily visible under the final layer.Point being,untouched sprayed sealant,varnish,has smoothest surface.
2 cents
Kind Regards Max Albin
p.s I am not worthy etc.
Last edited:
Point being,untouched sprayed sealant,varnish,has smoothest surface.
.
Not even close actually. Wet sand with 2000 grit paper and polish with polishing compound and you are getting there.
- Status
- This old topic is closed. If you want to reopen this topic, contact a moderator using the "Report Post" button.
- Home
- Design & Build
- Construction Tips
- Casting Experiment: Elliptical Horn Flare

