This is a series of videos to show how to assemble the aluminum IMS adapter PCBs with the LU1014D/LD1014D JFETs. These adapter boards were designed by JPS64 to allow the unique Luoveltech LU1014/LD1014D power JFETs to easily be utilized in DIY projects by giving the part a larger footprint and easy to mount to heatsink bolt holes. These boards are described in more detail in the LU1014D GB where Nelson Pass has graciously given away hundreds of these devices, and members Woofertester matched them with a curve tracer, and Wg45 is organizning the GB. What are the LU1014D's good for? They behave like a static induction transistor (SIT), and hence behave much like a triode and hence, provide a unique way of enjoying triode like tube amp sound but with solid state devices. I designed a 39w SE Class A amp using these here.
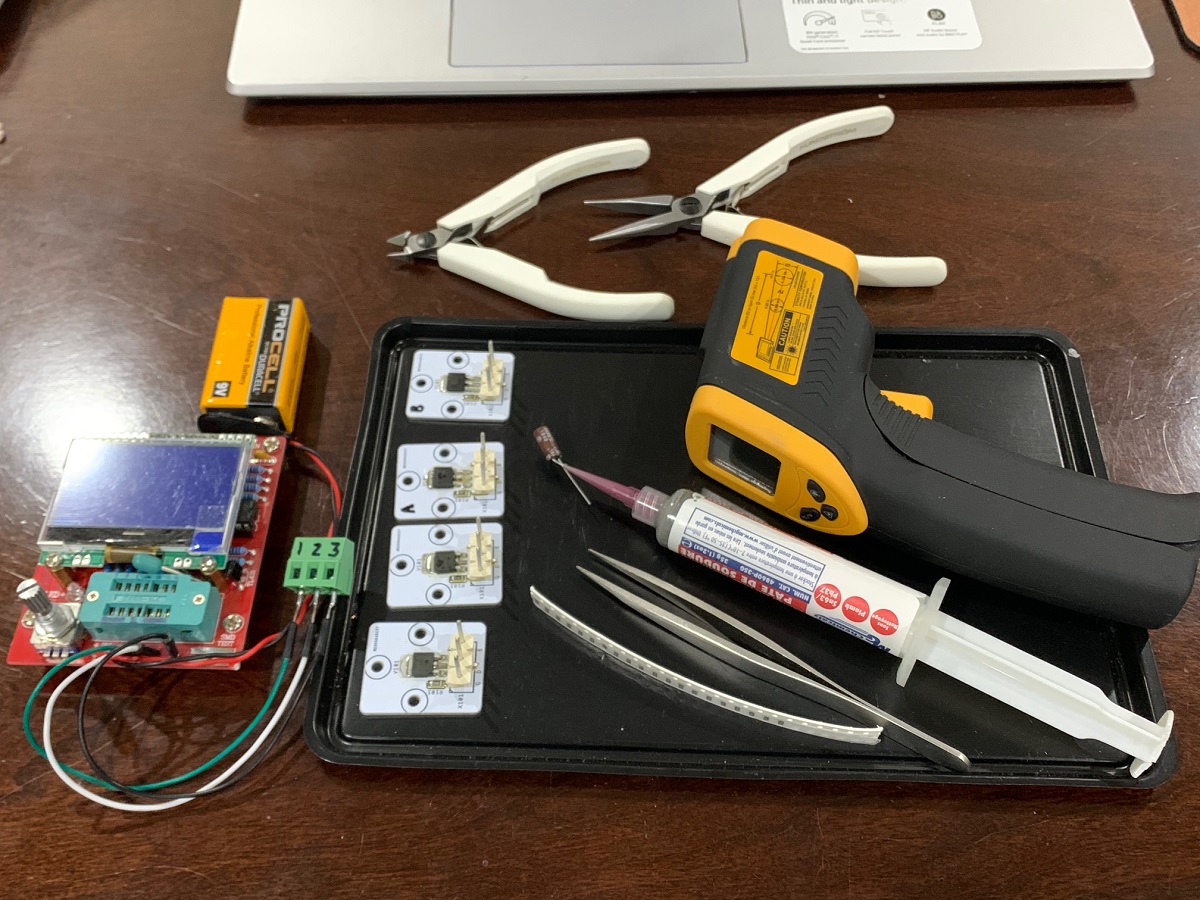
To assemble the LU1014D to the adapter PCB you will need the following:
1. An electric hotplate - similar to the single burner dorm room cook plates. I don't recommend doing this in the kitchen where there is food as you will be heating up lead based solder annd there are noxious fumes.
2. An old frypan or skillet that you will not use for food anymore. Nonstick aluminum if good as it heats evenly and the paste is easy to clean.
3. Solder paste - a no clean type with Sn63/Pb37 is good in syringe with an applicator tip. Hypdermic needles can work by I prefer the tapered plastic "Henna" nozzles (search for Henna Nozzle 20ga or 21ga).
4. Good tweezers (stainless steel ones made in Switzerland seem to be the best). Invest in good ones as they are extension of your fingers.
5. A flip up binocular magnifier headband - this helps you to see the tiny parts annd pads as you work.
6. An IR thermometer to know your skillet temperatures so that you do not overheat the parts.
7. Optional SMT high current header pins from Samtec HPM-03-01-T-S-VS
Here are some of the tools needed. Use pliers to bend the leads to lie flush with the pads if you are using LU1014D's. If you are using LD1014D's, they are premade for SMT installation and no lead bending is needed.
Step 1 - Apply the paste: Assembling LU1014D TO-247 Adapter Part 1 - YouTube
Step 2 - Install the parts: Assembling LU1014D TO-247 Adapter - Part 2 - YouTube
Step 3 - Place on Hotplate: Assembling LU1014D TO-247 Adapter - Part 3 - YouTube
Step 4 - Cool Parts: Assembling LU1014D TO-247 Adapter - Part 4 - YouTube
Step 5 - Test and Inspect: Assembling LU1014D TO-247 Adapter - Part 5 - YouTube
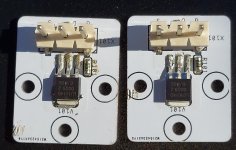
This is what the parts look like once assembled:

Closeup:
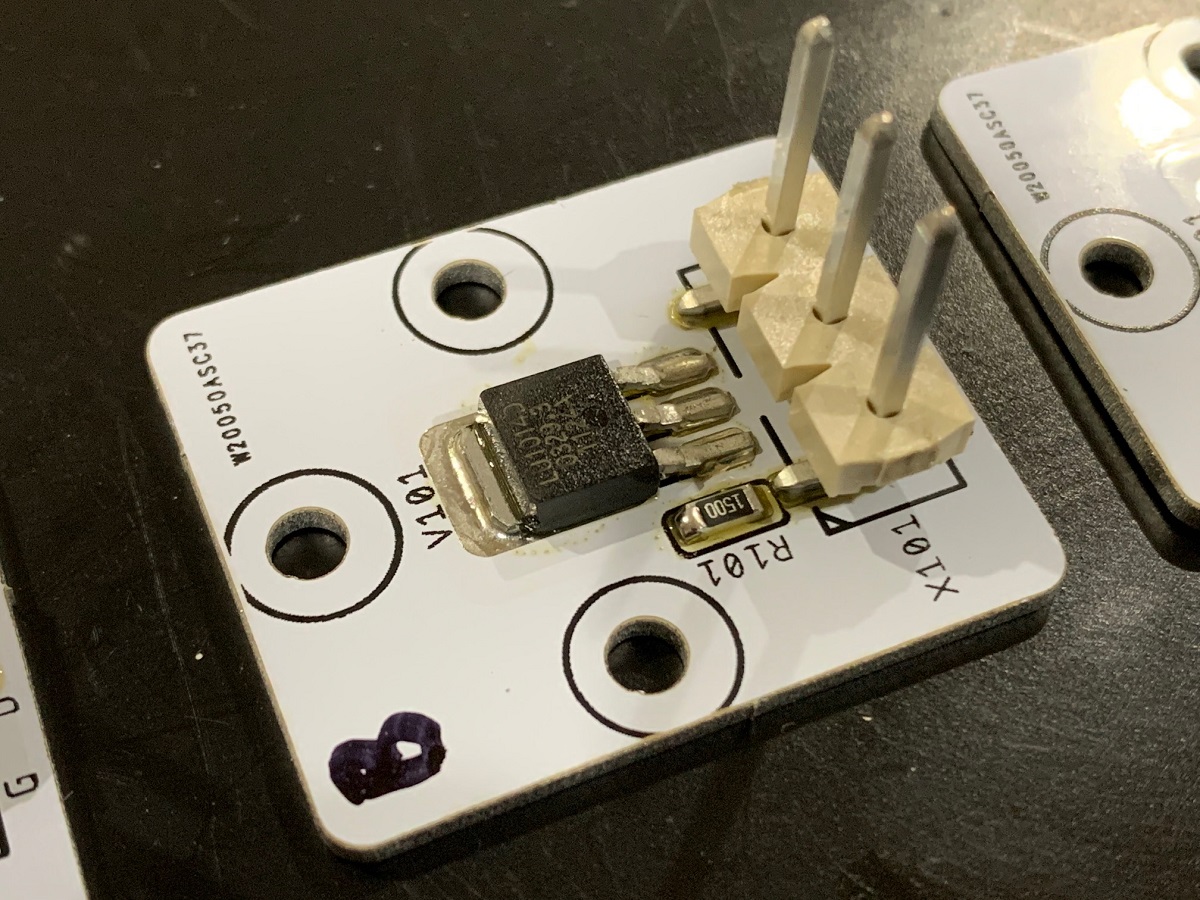
You may notice that the resistor value is 150ohms and not 100ohms - I ran out of 100ohms and 150 should work fine as a gate stopper.
To assemble the LU1014D to the adapter PCB you will need the following:
1. An electric hotplate - similar to the single burner dorm room cook plates. I don't recommend doing this in the kitchen where there is food as you will be heating up lead based solder annd there are noxious fumes.
2. An old frypan or skillet that you will not use for food anymore. Nonstick aluminum if good as it heats evenly and the paste is easy to clean.
3. Solder paste - a no clean type with Sn63/Pb37 is good in syringe with an applicator tip. Hypdermic needles can work by I prefer the tapered plastic "Henna" nozzles (search for Henna Nozzle 20ga or 21ga).
4. Good tweezers (stainless steel ones made in Switzerland seem to be the best). Invest in good ones as they are extension of your fingers.
5. A flip up binocular magnifier headband - this helps you to see the tiny parts annd pads as you work.
6. An IR thermometer to know your skillet temperatures so that you do not overheat the parts.
7. Optional SMT high current header pins from Samtec HPM-03-01-T-S-VS
Here are some of the tools needed. Use pliers to bend the leads to lie flush with the pads if you are using LU1014D's. If you are using LD1014D's, they are premade for SMT installation and no lead bending is needed.
Step 1 - Apply the paste: Assembling LU1014D TO-247 Adapter Part 1 - YouTube
Step 2 - Install the parts: Assembling LU1014D TO-247 Adapter - Part 2 - YouTube
Step 3 - Place on Hotplate: Assembling LU1014D TO-247 Adapter - Part 3 - YouTube
Step 4 - Cool Parts: Assembling LU1014D TO-247 Adapter - Part 4 - YouTube
Step 5 - Test and Inspect: Assembling LU1014D TO-247 Adapter - Part 5 - YouTube
This is what the parts look like once assembled:
Closeup:
You may notice that the resistor value is 150ohms and not 100ohms - I ran out of 100ohms and 150 should work fine as a gate stopper.
Attachments

Last edited:
Any “no clean” Sn63/Pb37 paste will work. Chipquick is one brand:
Chip Quik Solder Paste no clean 63Sn/37Pb in 5cc syringe 15g https://www.amazon.com/dp/B0186IM0P0/ref=cm_sw_r_cp_api_glt_fabc_55M1GYPMEWMKJJVVX7M7
Kester:
Kester EP256 Solder Paste, No-Clean 63/37, Syringe Dispenser (1) https://www.amazon.com/dp/B006UTCYM2/ref=cm_sw_r_cp_api_glt_fabc_5N4XR1R4CZM3NHJBKANT
Or MG Chemicals:
MG Chemicals - 4860P-35G 4860P 63/37 No Clean, Leaded Solder Paste, 35 g (1.2 oz) Pneumatic Dispenser (Complete with Plunger & Dispensing Tip) https://www.amazon.com/dp/B00M1RC0YY/ref=cm_sw_r_cp_api_glt_fabc_APCFZPKMV6F8N3NSX7Q6
Just do a search on eBay or AliExpress “Transistor Tester” and you will see many variants. They all probably use the same underlying electronics. It seems that the ones available nowadays are typically color screen and come prebuilt (I had to assemble mine from a kit). They are about $20.
Here is an example closest to what I had with monochrome screen and has external probe leads.
12864 Mega328 ESR Transistor Resistor Diode Capacitor Mosfet Tester w/ Test hook | eBay
LCR - TC1 Multifunction TFT Transistor Tester Diodes Full Color Graphics Display | eBay
GM328A English Assembled Transistor Tester Diode Capacitance ESR ATMEAG328P USA | eBay
I’m sure anyone of these would work fine. They also can measure passive parts and is a handy LCR meter.

I do not plan on using surface mount parts, this was the only exception. These transistors are relatively big and easy to handle. When I assembled Wayne's line stage, I sworn not to ")
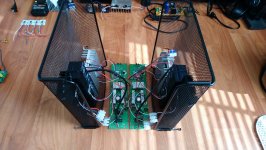
I got F1J working with these, and it sounds great. F3 is next? Or maybe small headphone amp. Lots of projects with these.
I got F1J working with these, and it sounds great. F3 is next? Or maybe small headphone amp. Lots of projects with these.
Yes, some pics in F1J thread. You posted soon after me.
Firstwatt F1J
Firstwatt F1J
Attachments
Last edited:

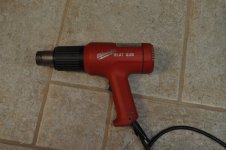
Yes, that can work well. I use this - it has precise temp control and interchangeable tips and variable air flow rate. I use the lowest air flow rate in general to prevent blowing the parts off their positions.
https://www.amazon.com/CO-Z-Soldering-Temperature-Desoldering-Electronics/dp/B08WWHN6W8/
https://www.amazon.com/CO-Z-Soldering-Temperature-Desoldering-Electronics/dp/B08WWHN6W8/
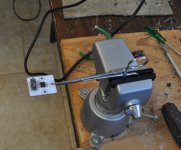
I just made my first attempt at smt soldeing on your boards using the method @lhquam showed above. I've attached an image.
I felt, without really knowing, that I might have used less that the optimal amount of solder paste and or not qute heated it enough. The devices are secuely attached, and resistance measuresments (everything to everything) are the same.
WRT solder application, it seemed that the past did not stick to the pads as readily as I expected. Is there a pre-treatment recommended (like a small dab of liquid flux)? I used the recommended Kester.
Also, does the paste solidify or dry out in the needle. Hopefully I can just use it again without needing to clean it out now, or just before I go to use it again.
Thanks for your tutorials, and all the work you share.
Skip
Attachments
The paste has flux built in. If you heat it hot enough, it melts and flows and forms a smooth fillet. Yours looks a bit lumpy. Maybe not hot enough for long enough. Once it melts keep the heat there for 10 more seconds to flow.
A hot plate on the bottom really helps since this is aluminum PCB.
I take a skinny resistor lead and plug up the syringe needle. Put it in a ziplock and put it in the refrigerator and it keeps for a year. When the solder paste feels too hard to squeeze out even with a new needle tip, it’s time to throw it away and get a new one.
As I slowly proceed with this project I need more resistors and boards. The resistors fly away so I have lost an number of them, Could you provide either a mouser/digikey reference or the size/quality specs I would need to search for beyond 100-200 ohms?
Second, I want to become more skillfull doing this so I could use another 20 boards or so (I have the jfets). Does anyone have them available, or should I have a batch run -- what is the minimum quantity for a practical order?
I got a tester, and seem to be getting 50% succesful results (found to be an njfet) as shown in the tutorial testing video. I really want to do better, and suspect too much heat. Thanks for all the help.
Search for Vishay MMA resistors - for example 220R 1% size is MELF 0204
https://www.mouser.com/ProductDetail/Vishay-Beyschlag/MMA02040C2200FB300?qs=ENcmUmD87PZlnmDGfgn6eg==
You can also use 1206 chip resistors just fine in these spots.
https://www.mouser.com/ProductDetail/Vishay-Beyschlag/MMA02040C2200FB300?qs=ENcmUmD87PZlnmDGfgn6eg==
You can also use 1206 chip resistors just fine in these spots.
The assembly house just received 600 LD1014D’s, plus a roll of 100ohm MELF resistors, and they will now assemble a whole set of the TO-247 IMS adapters for characterization. Woofertester will be characterizing these for me with his state of the art script-enabled Keithly test bench.
