How does it compare to the Starving Student II or the Crack 1.1 kit?
The Crack is a way easier build, but is a speaker amp. The TU-8100 can easily drive headphone if you make a banana plug adapter.
Hello all,
I’m interested in this kit, but would like to add a 1/4” or 1/8”headphone jack. I’m not an electronics tech, just a builder. How would I proceed ? I realize a hole would need to be drilled in the front or rear panel depending on which would provide enough room. Would the jack need to be insulated from grounding to the case with a gasket ? Would you add a 100 ohm 1/2 watt resistor to each left and right positive speaker output at the speaker terminals in line with each added red left and right wire going to the new phones jack ? Or, no resistors ? And add a black ground wire from each negative speaker terminal, connect the two wires together and connect it to the common ground terminal on the new phones jack ? Like I said, I’m no circuit designer, just a builder. I would be using mostly around 30 ohm dynamic type phones, however I would like to try 150 to 300 ohm phones. Would the amp have enough power for high impedance phones ? And, would the amp work well with planar magnetic type phones if I got them ? Lastly, is there any tonal difference between the two type tubes you can use ? Any preferences ?
Sorry for all the questions, and thanks for any help !
I just finished the TU-8100. I made a banana plug to XLR (4-pin) adapter to use with my headphones, but it could have as easily been a banana plug to TRS jack adapter. The TU-8100 sounds OK as a headphone amp, but it's a little light on the bass compared to a WHAMMY or Mainline. Might be I just need to let the tubes burn in a little longer.

To make one, just use a foot of 24AWG quad microphone cable. Right red to ring, left red to tip, and both blacks to sleeve.
As for the tubes, any thoughts on PCL86 vs ECL86? The TI-8100 can use either (via some internal jumpers). From what I understand, the ECL86 was actually designed for audio, but I don't know how that will translate into better or different sound. Anyone try ECL86 tunes? Anyone have a pair to loan to me or sell a good price?
Last edited:
Hi all - I've had an 8100 for several months now, and am generally very pleased with it. But I think it's starting to develop a slight hum when there is no music being played. it's by no means noticeable once music comes in, but I'm wondering if this is a normal development - or a fixable issue? Many thanks in advance.
thanks - will do!you need to check all soldering points..
it is abnormal to have hum without signal
Update - I redid a couple of solder joints that looked a bit iffy around the AUX plug and tried again. Same hum - but figured out that it's an artefact of the source going into the input 2, a DAC+blue tooth receiver, when using its AUX output. Using input 2 with an AUX cable from my phone gave no hum at all. And using the DAC+BT by way of input 1 also gives no hum. No idea why the AUX out of the DAC+BT is wonky in this way, but at least don't have to use it with the 8100. Ho-hum!you need to check all soldering points..
it is abnormal to have hum without signal
Thanks again for good advice!
If the soldered connections are solid, I don't see a serious problem - but the far more experience folk on this forum may well know better / different. But if you're learning to solder, you will also need to learn to unsolder to fix the inevitable errors and mistakes, such as this one. (It likely got off kilter when you turned the board over to solder it from the backside - this happens to me frequently.) My soldering kit came with a vacuum desolderer - it's an unassuming device that looks like a syringe, but it generates a strong suction after the plunger is pushed into position and then released. Reheat and melt the solder you want to remove - push the nose of the desolderer as close to it as possible - when the solder liquifies, push the button and at least some of the liquid will be sucked up and away. This may need to be done several times to remove enough solder in a case like this, but it will (eventually) do the trick. There is also desoldering wire - a copper braid that will absorb molten solder. I've had less luck with it, but perhaps that's because of lack of experience. Good luck and be of good courage!
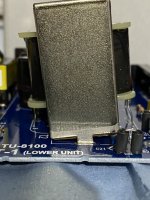
Thanks for encouragement and advice. I was ready to toss the soldering iron out the window. I used the wick braid to absorb the solder and it worked great. I was able to reseat the transformer.If the soldered connections are solid, I don't see a serious problem - but the far more experience folk on this forum may well know better / different. But if you're learning to solder, you will also need to learn to unsolder to fix the inevitable errors and mistakes, such as this one. (It likely got off kilter when you turned the board over to solder it from the backside - this happens to me frequently.) My soldering kit came with a vacuum desolderer - it's an unassuming device that looks like a syringe, but it generates a strong suction after the plunger is pushed into position and then released. Reheat and melt the solder you want to remove - push the nose of the desolderer as close to it as possible - when the solder liquifies, push the button and at least some of the liquid will be sucked up and away. This may need to be done several times to remove enough solder in a case like this, but it will (eventually) do the trick. There is also desoldering wire - a copper braid that will absorb molten solder. I've had less luck with it, but perhaps that's because of lack of experience. Good luck and be of good courage!
Congrats! Nothing like learning a new skill that will help you cope that much better with inevitable problems and occasional errors.Thanks for encouragement and advice. I was ready to toss the soldering iron out the window. I used the wick braid to absorb the solder and it worked great. I was able to reseat the transformer.
- Home
- The diyAudio Store
- Elekit TU-8100 PCL86 integrated amplifier