I did not find here any trade that sells something similar to these binding posts, they must be long to cross the 18 mm MDF panel..... 
Dayton Audio BPA-38SN HD Binding Post Banana Jack Pair Satin Nickel
Dayton Audio BPA-38SN HD Binding Post Banana Jack Pair Satin Nickel
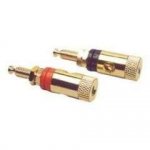
So I found a dilemma, ordering them from the foreign supplier involved a long wait and e-commerce procedures that are always a complication ..
But they are the same as those installed in my DTQWTII cabinets, they are Troels' favorites!
So, I decided to get to work, change for each other !
I hope the sound quality is not altered too much! (just kidding, I consider this a superstition)
Next pics !
But they are the same as those installed in my DTQWTII cabinets, they are Troels' favorites!
So, I decided to get to work, change for each other !
I hope the sound quality is not altered too much! (just kidding, I consider this a superstition)
Next pics !
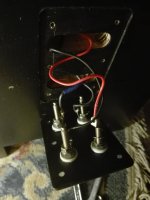


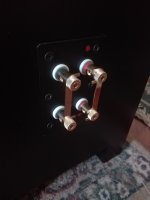

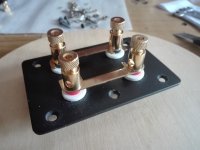
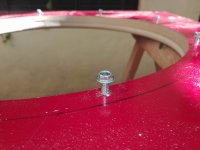
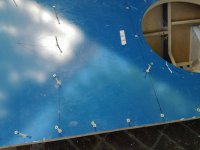
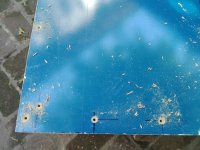
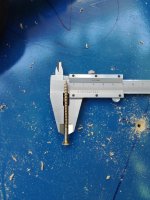
In my K's I used directly a 3/16" brass screws with washers and wing nuts. If they are very tight to the wood panels, no air may leak. I used independent screws for the tweeter and the woofer, for better flexibility of the connections. Although it's not necessary, the chassis of the speakers are grounded in the bass (-) pole.
In my K's I used directly a 3/16" brass screws with washers and wing nuts. If they are very tight to the wood panels, no air may leak.......
Look at post 191 of this same thread :
......But I am thinking about placing three solid feet of wood, and in this way making the connection with screws / wing nuts, and "U" connectors..........
But a search in shops near my house did not yield positive results, I did not find either copper or bronze, so I preferred to have a little fun !
BULONERA TIGRE S.A.BulonesBULONERA TIGRE S.A.
PS :
You say :
" If they are very tight to the wood panels, no air may leak. "
The sealing is not so strict , in fact, Sigfrid Linkwitz (RIP) recommended making a small hole of +- 1 mm to equalize the pressure of air of the outside with that of the inside of the enclosure. That way you prevent the cone from being outside the resting position in those situations, do you understand?
Subwoofer design
Hey, upload some pictures of those butterflies you have !
Are they beautiful like this ?
Attachments

Last edited:
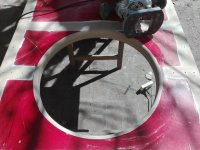
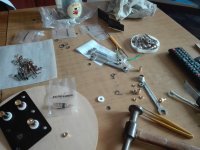
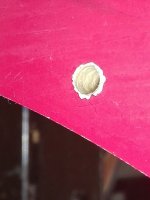
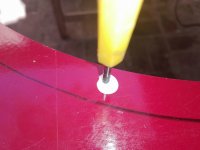
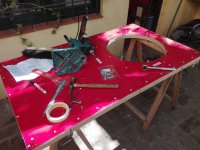
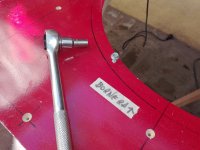
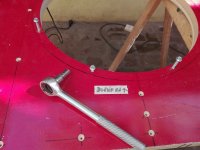
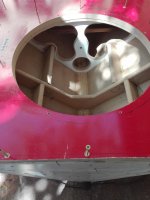
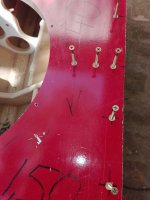
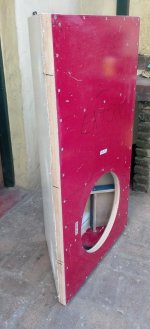
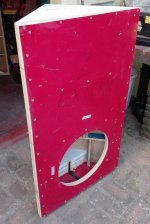
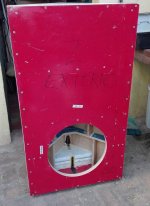
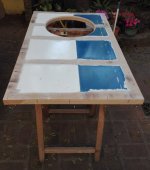
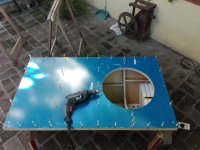
The holes for fixing both speakers are ready.
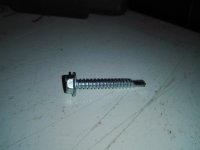
The screws were placed, then removed and abundant vinyl glue was applied to the holes to harden the threads in the MDF panel. It is a good trick !
The screws were placed, then removed and abundant vinyl glue was applied to the holes to harden the threads in the MDF panel. It is a good trick !
Attachments
-
 IMG_20190917_181305.jpg383.9 KB · Views: 52
 -
 IMG_20190917_152052.jpg558.8 KB · Views: 53
 -
 IMG_20190917_150410.jpg496.7 KB · Views: 48
 -
 IMG_20190917_145655.jpg660.7 KB · Views: 46
 -
 IMG_20190917_145636.jpg782.3 KB · Views: 47
 -
 IMG_20190917_145632.jpg746.4 KB · Views: 46
 -
 IMG_20190917_181440.jpg401.2 KB · Views: 47
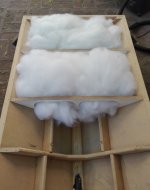
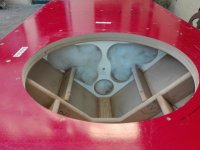
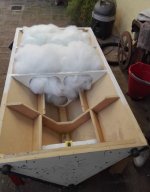
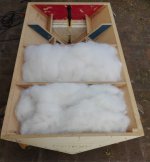
I have closed one of the cabinets.
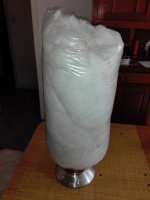
As I mentioned in a previous post, 2.20 kg of polyfill are placed between the three compartments.
So I have separated the material corresponding to the lower housing where the subwoofer goes, it will be placed after the cosmetic part is finished.
This is already weighing too much, and almost 8 kg will be added. more between the weight of the speaker, screws and binding posts .....
I think I will have to hire staff to move these creatures to the living room !
Next photos shortly ....

The promised photos
Attachments
-
 IMG_20190921_163913.jpg462.2 KB · Views: 60
 -
 IMG_20190921_162658.jpg811.5 KB · Views: 59
 -
 IMG_20190921_162410.jpg512.6 KB · Views: 46
 -
 IMG_20190921_131336.jpg610 KB · Views: 50
 -
 IMG_20190921_131325.jpg571.2 KB · Views: 45
 -
 IMG_20190921_131316.jpg686.3 KB · Views: 130
 -
 IMG_20190921_115337.jpg479.3 KB · Views: 132
 -
 IMG_20190921_115300.jpg582.8 KB · Views: 142
 -
 IMG_20190921_115227.jpg591.8 KB · Views: 150
The rest ....
Attachments
-
 IMG_20190921_180247.jpg322.3 KB · Views: 49
 -
 IMG_20190921_180208.jpg445 KB · Views: 51
 -
 IMG_20190921_180155.jpg367.6 KB · Views: 66
 -
 IMG_20190921_175542.jpg666.1 KB · Views: 57
 -
 IMG_20190921_164624.jpg459.4 KB · Views: 42
 -
 IMG_20190921_163939.jpg358 KB · Views: 49
 -
 IMG_20190921_163931.jpg387 KB · Views: 47
I was moved until almost crying ..... thanks freddi !!!
Last edited:
After reading old posts in this same thread, the conclusion is that for large cabinets one pound of polyfill should be used for each cubic foot.
So it would be 0.454 Kg x every 0.028 M3 (28 liters)
After the modification of the reinforcements, I gained approximately 2 liters per cabinet.
Then, each cabinet has a net volume of 106.50 liters.
The filling will add between 25 and 27% (in this several articles coincide, thanks freddi and GM) depending on its compaction, so I will have a virtual volume of 135.25 liters, very close to 137 liters for an " ideal Qtc " of 0.707.
I will not be able to lower that figure as I wanted, but a little EQ will level the response between 20 and 40 Hz.
Then the simple 3 rule will be:
0.454 x 135.25 / 28 = 2.1929 Kg
Rounding, I will place 2.20 kg of polyfill per box, in all compartments and without compacting.
I think this is wrong, could someone help me?
If I am correct, I should not multiply by the virtual volume that will be obtained after placing the fill, but by the actual net volume before filling.
Then it will be 0.454 x 106.50 / 28 = 1.72
2.20 - 1.72 = 0.48
It is almost 1/2 kg less ......
Thanks in advance !
Revised accounts:
1720 grams of polyfill in each cabinet.
27% increase in real to virtual volume.
It goes from 106.50 liters to 135.25 liters.
WinIsd does not support decimals in the liter box, so using 136 liters the QTC is 0.709, 1 watt / 1 meter, without filter applied, series resistance 0.1Ohm
I played a little with the filter box and advanced, the variations are important when I calculate the inductance of the coil.
But a little bit of EQ will solve everything, once I hear how the profit of the room behaves.
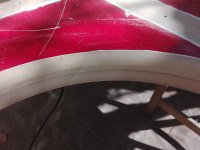
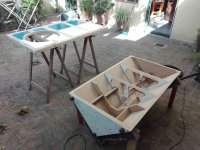
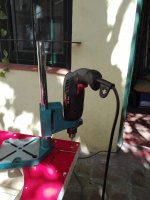
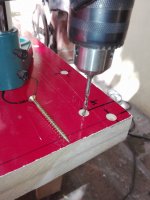
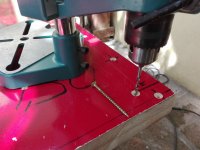
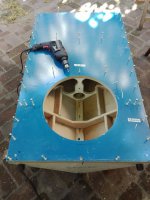
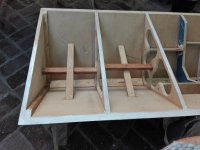
I have closed cabinet number two, the first step was to screw everything in the exact position, then remove them, apply the vinyl glue on the two surfaces to be joined, and then finally screw again.
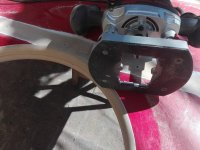
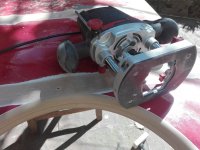
Fortunately this is done very quickly with a modern drill, which regulates speed without losing strength, and has reverse rotation.
It has been lent to me by my oldest son, because I have lost my old external regulator.
A very versatile tool, I have to admit that I didn't know that modern drills have evolved so much. Obviously, miniaturization in electronics has increasing applications.
Wow, I remember when I used the Stanley "Yankee" screwdriver, I also had "reverse mode", I used the Handyman 233H model in naval carpentry ....
Yankee screwdriver - Wikipedia
Attachments
-
 IMG_20191007_161525.jpg603.9 KB · Views: 40
 -
 IMG_20191007_161134.jpg724.4 KB · Views: 28
 -
 IMG_20191007_161118.jpg661.4 KB · Views: 41
 -
 IMG_20191007_161101.jpg659 KB · Views: 38
 -
 IMG_20191007_155710.jpg704.5 KB · Views: 41
 -
 IMG_20191007_150740.jpg771.1 KB · Views: 32
 -
 IMG_20191007_150643.jpg883.3 KB · Views: 28
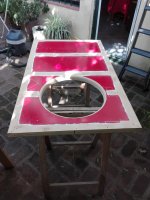
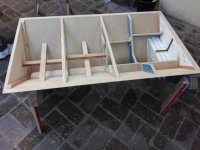
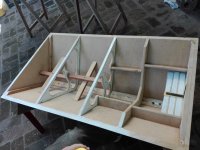
On this occasion I discovered that it is better to place the filling material inside the cabinet once it has been closed and the vinyl glue is dry, introducing it through the speaker hole.
How I did not realize before ? This does not cause us so much "stress" because we must hurry before the tail does not start to dry, and one less step is important. Here the hot days are already beginning.
The filling is already set, except in the lower compartment. This will be for the end, before installing the speaker. You can see it "hover" in the cabinet on the left, it is more comfortable to do it with the box upside down, of course it is not easy to manipulate this creature, no sir! My spine asks for rest more and more often ..........
PS: Apply the glue with a brush and on both surfaces, and in abundant form, the pressure of the screws will "spit" the excess! Isn't this a wonderful thing?
How I did not realize before ?
This does not cause us so much "stress" because we must hurry before the tail does not start to dry, and one less step is important. Here the hot days are already beginning.The filling is already set, except in the lower compartment. This will be for the end, before installing the speaker. You can see it "hover" in the cabinet on the left, it is more comfortable to do it with the box upside down, of course it is not easy to manipulate this creature, no sir! My spine asks for rest more and more often ..........
PS: Apply the glue with a brush and on both surfaces, and in abundant form, the pressure of the screws will "spit" the excess! Isn't this a wonderful thing?
Attachments

- Status
- This old topic is closed. If you want to reopen this topic, contact a moderator using the "Report Post" button.
- Home
- Loudspeakers
- Subwoofers
- Eminence Delta Pro 18 A in prism sealed 150 liters