Hi Rick,
You are lucky to have the hot air machine -i have a Weller soldering station - basic one only. The SMT parts are cheap - so destroying is not too much a problem, as i always over order parts too.
The amplifier design is my own - based on the basic amplifier in Bob's book - i added a cascode for the VAS. I have two boards working - but when i added the second set of output transistors, the amplifier oscillated. So, i took the bare bones approach to only add those parts needed to test a working amp - as i anticipate my mitigation for oscillation when simulating, may also be the problem in the real world. I also wanted to change values to see what happens.
I assume the BC-1 is on this website ?. Will search for it. I have the boards for my design - so will progress these - as it is a learning experience.
Regards,
Shadders.
The BC-1 is described in detail in Chapter 4 of the second edition of my book.
Cheers,
Bob
Hi Shadders,
I bought a cheap hot air machine from Sparkfun. Basically a Hakko clone that uses the same nozzles. Only used it for the removal of one part, a DFN/QFN leadless packaged part. Suggest to get another iron, makes removal of passive smd so much easier. I use Weller irons too, good enough for me.
Chapter 4 of the newly released book, is devoted completely to the BC-1 design.
Post your simulations of your design, pics etc
Rick
Hi Bob,The BC-1 is described in detail in Chapter 4 of the second edition of my book.
Cheers,
Bob
Thanks. Did not realise that is what it meant - i have both books - i used first edition designs as the basis to work to.
Regards,
Shadders.
Hi Rick,Hi Shadders,
I bought a cheap hot air machine from Sparkfun. Basically a Hakko clone that uses the same nozzles. Only used it for the removal of one part, a DFN/QFN leadless packaged part. Suggest to get another iron, makes removal of passive smd so much easier. I use Weller irons too, good enough for me.
Chapter 4 of the newly released book, is devoted completely to the BC-1 design.
Post your simulations of your design, pics etc
Rick
Thanks for the pointer for the hot air gun - very cheap compared to most. I will have to save up to buy one - especially if i can remove SMT without destroying, and also use it for small SM chips - QFN.
At the moment, two other boards work - but this third board newly built has a problem and i have traced to a zener diode failing - which protects the DC servo input (back to back zeners). There is 1Meg resistor from amp output to opamp input - restricts the current - but the output of the opamp is positive for a positive voltage on the negative input - i think the opamp has failed. No errors in soldering - and the replaced zener was getting warm - i calculated 0.2mW power, but the temperature says otherwise. It is possible i applied the amp power before the opamp power (OPA192) using bench supplies.
Regards,
Shadders.
....with an output Triple, a VAS operating at still-reasonable bias current will....
So why stop there?
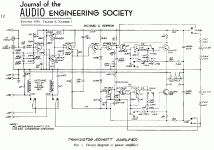
Return with us now to 1958. Tubes Ruled!! We liked Ike. Sherman Fairchild(!) was president of AES. And Richard was messing with transistors.
This is not the first 20 Watt Solid-State audio amplifier, but maybe one of the best of its day. Unlike many others it overloaded benignly. Because of the very limited choices of transistors, this runs a *Quadruple*. Two layers of this are powered with floating-bootstrap Mercury(!) cells, with modified relays for power sequencing. But we see a Darlington Vas Q1 Q3, a CCS load Q2, Darlington Vas buffer Q4 Q5, and "bias diodes" as still commonly used to bias the idle of a class B stage.
EIGHT stages of current gain! (Gain per stage was less those days: Vas hFE>60 and ft=60MHz was fabulous then, power 2N277 was hFE>35 and ft 200kc.)
THD @500cps (we didn't Hertz) 20W is <0.02% (10kc 1%-5% but we didn't have Disco yet).
JAES Volume 6 Issue 1; January 1958
Permalink: AES E-Library >> Complete Journal: Volume 6 Issue 1 ($33 non-member)
Attachments
Last edited:
A fair bit of history for these parts.
If you look at the Onsemi(Fairchild) datasheets for these parts, you will see that the two names are synonymous.
2SC3503/KSC3503
2SA1381/KSA1381
These parts with EIAJ names were originally Sanyo parts that Onsemi acquired a few year back now and dropped them from the product line.
In 2010, Sanyo sold its semiconductor operations to ON Semiconductor.
Fairchild acquired these parts with the acquisition of Samsung power discrete product line iirc. According to wiki,
In December 1998, Fairchild announced the acquisition of Samsung's power division
https://www.onsemi.com/pub/Collateral/KSA1381-D.pdf
On page 87, Input Network it describes the input network of the BC-1.
At the end of the second paragraph it talks about how the 10-uf NP coupling capacitor and the 27K shunt return resistor create a roll off at 0.6 Hz.
Isn't the high pass filter created by C2 (10uf Cap) and R4 + R5 so 28K ?
At the end of the second paragraph it talks about how the 10-uf NP coupling capacitor and the 27K shunt return resistor create a roll off at 0.6 Hz.
Isn't the high pass filter created by C2 (10uf Cap) and R4 + R5 so 28K ?
R4 is in series with C2, shunted by R5 to form the input high pass filter.
Xc of C2 is 26,539 Ohms at 0.6Hz. Having R4 in series with C4 changes the frequency a very smalll amount.
R4, C3 form a low pass filter at 720KHz
R4, shunted by R5, attenuate the signal by a slight amount, a 1/27 ratio, at mid band, so a 1V 1KHz input signal will be reduced by 37mV
Xc of C2 is 26,539 Ohms at 0.6Hz. Having R4 in series with C4 changes the frequency a very smalll amount.
R4, C3 form a low pass filter at 720KHz
R4, shunted by R5, attenuate the signal by a slight amount, a 1/27 ratio, at mid band, so a 1V 1KHz input signal will be reduced by 37mV
Is the BC-1 something new? Does it have unique features?
The BC-1 is a simple amplifier that was designed, built and measured for the new Chapter 4 in my second edition. The whole idea was to take a version of one of the amplifiers in Chapter 3 on amplifier evolution and make it into a real project that a reader could build. All of Chapter 4 is devoted to the BC-1, including the design, how to build it and how to test it.
It is a fairly simple version of a Thompson topology amplifier. Its IPS is an LTP loaded with a 3-transistor current mirror. It uses a 2-T VAS and has ordinary Miller compensation for ULGF of about 1 MHz. The output stage is a 3-EF Locanthi Triple. The drivers and output transistors are mounted on the heat sink. The amplifier uses a dual bias spreader consisting of 2 Vbe multipliers in series. The transistor of one is mounted on an output transistor and temperature compensates the output stage. The transistor of the other one is mounted on an on-board heatsink along with the pre-driver transistors for temperature compensation of the pre-drivers. The output stage includes 2 output pairs. The design is nominally rated for 120-150 W, depending on rail voltages and heat sink size.
The design also includes a fairly comprehensive protection circuit so it is less likely to be blown up.
The design was presented at Burning Amp last weekend. Rick Savas and I are working on making PCBs available. It should make a good starter amplifier for people to get experience with amplifier design.
Cheers,
Bob
The design was presented at Burning Amp last weekend. Rick Savas and I are working on making PCBs available. It should make a good starter amplifier for people to get experience with amplifier design.
Cheers,
Bob
Was this recorded if so will it be available to view at some stage?
Was this recorded if so will it be available to view at some stage?
Yes, most of the Burning Amp presentations were recorded and will be available soon on Linear Integrated Systems' Youtube site (as are presentations from previous BAFs).
We all owe a debt of gratitude to LIS for being a major sponsor of BAF.
Cheers,
Bob
The BC-1 is a simple amplifier that was designed, built and measured for the new Chapter 4 in my second edition. The whole idea was to take a version of one of the amplifiers in Chapter 3 on amplifier evolution and make it into a real project that a reader could build. All of Chapter 4 is devoted to the BC-1, including the design, how to build it and how to test it.
It is a fairly simple version of a Thompson topology amplifier. Its IPS is an LTP loaded with a 3-transistor current mirror. It uses a 2-T VAS and has ordinary Miller compensation for ULGF of about 1 MHz. The output stage is a 3-EF Locanthi Triple. The drivers and output transistors are mounted on the heat sink. The amplifier uses a dual bias spreader consisting of 2 Vbe multipliers in series. The transistor of one is mounted on an output transistor and temperature compensates the output stage. The transistor of the other one is mounted on an on-board heatsink along with the pre-driver transistors for temperature compensation of the pre-drivers. The output stage includes 2 output pairs. The design is nominally rated for 120-150 W, depending on rail voltages and heat sink size.
The design also includes a fairly comprehensive protection circuit so it is less likely to be blown up.
The design was presented at Burning Amp last weekend. Rick Savas and I are working on making PCBs available. It should make a good starter amplifier for people to get experience with amplifier design.
Cheers,
Bob
I'm surprised that you didn't use MIC compensation.
But why not options for something at least better than Miller, TMC or whatever?
I'm surprised that you didn't use MIC compensation.
But why not options for something at least better than Miller, TMC or whatever?
Good question. The answer is that I wanted to present a simple amplifier that people could understand and build if they wanted to, and gain experience up front, before they dug into the later material.
Indeed, I did at the end of Chapter 4 outline a path forward for various kinds of improvements that could be made to the simple design.
Cheers,
Bob
Pete, take a look at the very first paragraph (literally!) of Chapter 4 of the 2nd edition. That's the chapter which systematically develops the BC-1.
Please notice the fourth sentence of the chapter, the one which begins
(emphasis added by me)
Please notice the fourth sentence of the chapter, the one which begins
This amplifier is not sophisticated, but yields very respectable performance and it is designed to be ...
Everything is a trade-off. MIC suffers degraded cross-over distortion attenuation and there can be stability problems with the LTP+VAS if the VAS transistor is too fast, requiring a TMC cap anyway, or degenerate the LTP. But both MIC and TMC reduce the output impedance to the OPS which improves the OPS speed, which can be paramount. Bruno has an AES article about the Miller cap introducing PSRR problems. A cap from the output can create RF rectification problems unless it is limited with a ~1KR. Years ago I had to exorcise CB radios (etc) from many amps by adding a small resistor in the feedback. I favor solutions that minimize rather than cancel because cancellation can go very wrong as parts very. A useful way to improve the loop response is to reduce the feedback network impedance. Some use high power resistors to do this but I prefer to shunt the hi-Z DC network with a HF low-Z network of the same ratio, ie two RC where the cap ratio is the inverse or the R ratio. This also avoids offset due to different DC resistances to the + and - inputs.
Last edited:
Everything is a trade-off. MIC suffers degraded cross-over distortion attenuation and there can be stability problems with the LTP+VAS if the VAS transistor is too fast, requiring a TMC cap anyway, or degenerate the LTP. But both MIC and TMC reduce the output impedance to the OPS which improves the OPS speed, which can be paramount. Bruno has an AES article about the Miller cap introducing PSRR problems. A cap from the output can create RF rectification problems unless it is limited with a ~1KR. Years ago I had to exorcise CB radios (etc) from many amps by adding a small resistor in the feedback. I favor solutions that minimize rather than cancel because cancellation can go very wrong as parts very. A useful way to improve the loop response is to reduce the feedback network impedance. Some use high power resistors to do this but I prefer to shunt the hi-Z DC network with a HF low-Z network of the same ratio, ie two RC where the cap ratio is the inverse or the R ratio. This also avoids offset due to different DC resistances to the + and - inputs.
You've touched on a number of important points. I first used MIC in the early 80s on my MOSFET power amplifier with error correction. It provided very high slew rate and did not introduce the power supply rejection that simple Miller compensation can (both sides of the capacitor are referenced to signal). MIC does not make crossover distortion worse than ordinary Miller compensation - neither encloses the output stage. All of that having been said, the compensation loop itself must be compensated, since it encloses both the IPS and VAS. This is trickier than straight Miller compensation. Usually some lag-lead compensation is placed within that loop to limit ULGF of that loop to 10 MHz or so.
I do like to keep the impedance of the feedback network low to keep noise down and to push out the pole at the IPS node. I often use about 500 ohms as the feedback shunt resistor. This does indeed want to have the series feedback resistor have a decent power rating. I generally use two 1W or 2W resistors in series for that resistor.
Alternatively, an R-C capacitance voltage divider feedback network can be used, which is what I think you were referring to - just like input attenuators in test equipment. This can pretty much kill the pole at the IPS, but will not reduce noise if larger impedances are used for the feedback network. It also does provide a small capacitive path from output to the sensitive input stage which can become a little unpredictable at very high frequencies. It is for the same reason that I am very cautious about using a lead capacitor across the feedback resistor. I seem to recall that Cherry discussed this sort of thing a long time ago in his paper on output networks and feedback networks. Speakers and their cables can act as big antennas for RFI ingress.
When using low feedback network impedances, the electrolytic capacitor often in series with the feedback shunt resistor may become undesirably large and a possible source of distortion. One solution to this is to eliminate that capacitor and use a DC servo for offset correction.
Cheers,
Bob
- Home
- Amplifiers
- Solid State
- Bob Cordell's Power amplifier book