Hello,
first of all, I want to say that my experience with designing & building horns and other types of foldable enclosures is limited, so please take this as an idea that might have glaring flaws, and an idea that definitely needs lots of refinement. Also unfortunately I don't have the time to do a tutorial, so you'll only be able to try this if you have some Blender basics or learn them elsewhere, which may take some time.
When learning about folding horns I was surprised that there seem to be no better methods than trial and error, sometimes for hours, until you get something. There are some good excel scripts if you're attempting an enclosure that is supported, but other then that, I've only found some old Autocad scripts, and I don't know and don't own Autocad, and a basic method in Sketchup, which is just a bit better than printing horn profiles on paper and cutting them into pieces.
Well, I don't bring anything revolutionary (=automatic), but I thought that at least there must be a faster way to bend a long horn than splitting it into small rectangles in sketchup. And I found one, I just don't know how accurate it is and it needs some testing, but I think that it has decent potential.
Blender is a free software for 3D graphics work, in other words not technical modeling, so using it for CAD work is generally a huge pain, but for general modeling it has a great non-destructive workflow using modifiers.
So the idea here is: you model your horn profile that you get from hornresp (done using one or two resized basic planes), subdivide it so that it has enough polygons for the bends, create a mark (or marks) where the driver is attached, and then you can separately create a curve, place it in the middle of the horn, and let the horn bend along the curve using a modifier. This happens in real time as you modify the curve, so any folding is super fast and modifications like "well this doesn't fit, need to make the first fold closer to the beginning" only take a few seconds. The setup takes a couple minutes once you know your way around Blender.
I tried to show the rough idea in the attached screenshots:
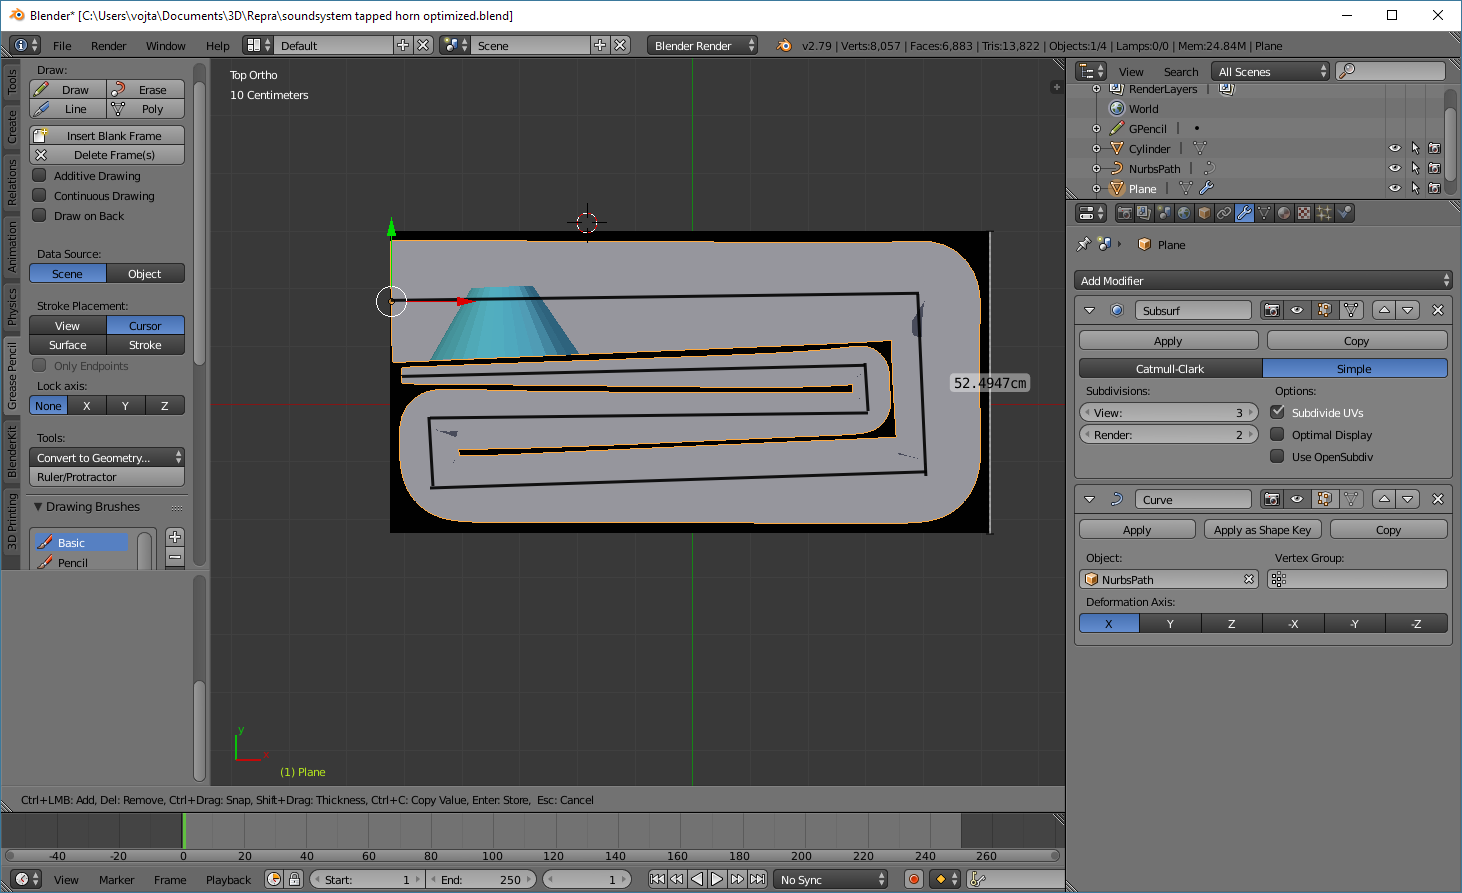
1. Create the horn profile - first it's best to set the scene units to meters (or other real world dimensions) on the right, then I created a basic plane and resized it to 1.2cmx180cm, then I scaled the right edge to 14cm in edit mode, this was my horn. The ruler/protractor tool (shown on the left) is useful to check that the dimensions are correct. Then I subdivided it using loop cut tool in edit mode, but there's also a non-destructive subdivide modifier which works just as well. Lastly I created another plane in the size of the final box (I knew the final size in advance, cheating).

2. Create a path and place it in the middle of the horn (and place both in the proper place in the enclosure). Then select the path and set it up correctly (shown on the right).
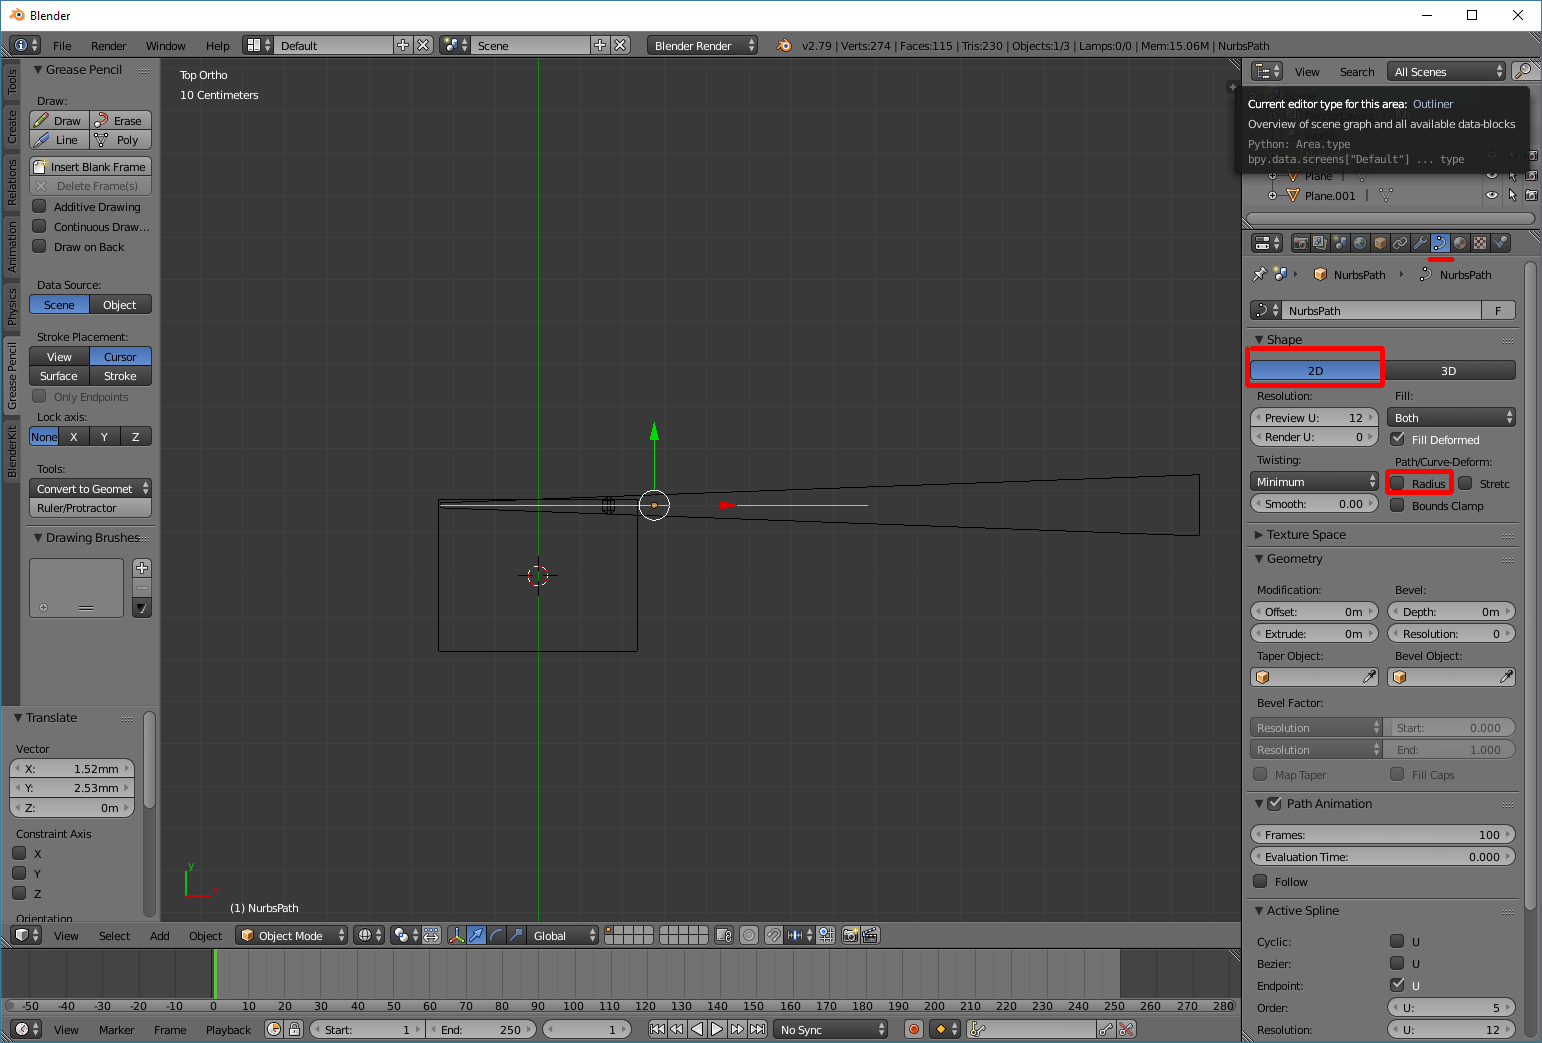
3. Select the horn profile, add a curve modifier in the modifier submenu, set it to use the nurbs path. The curve or the horn will jump a bit because both objects origins must be in the same spot, just move them in the correct place again.
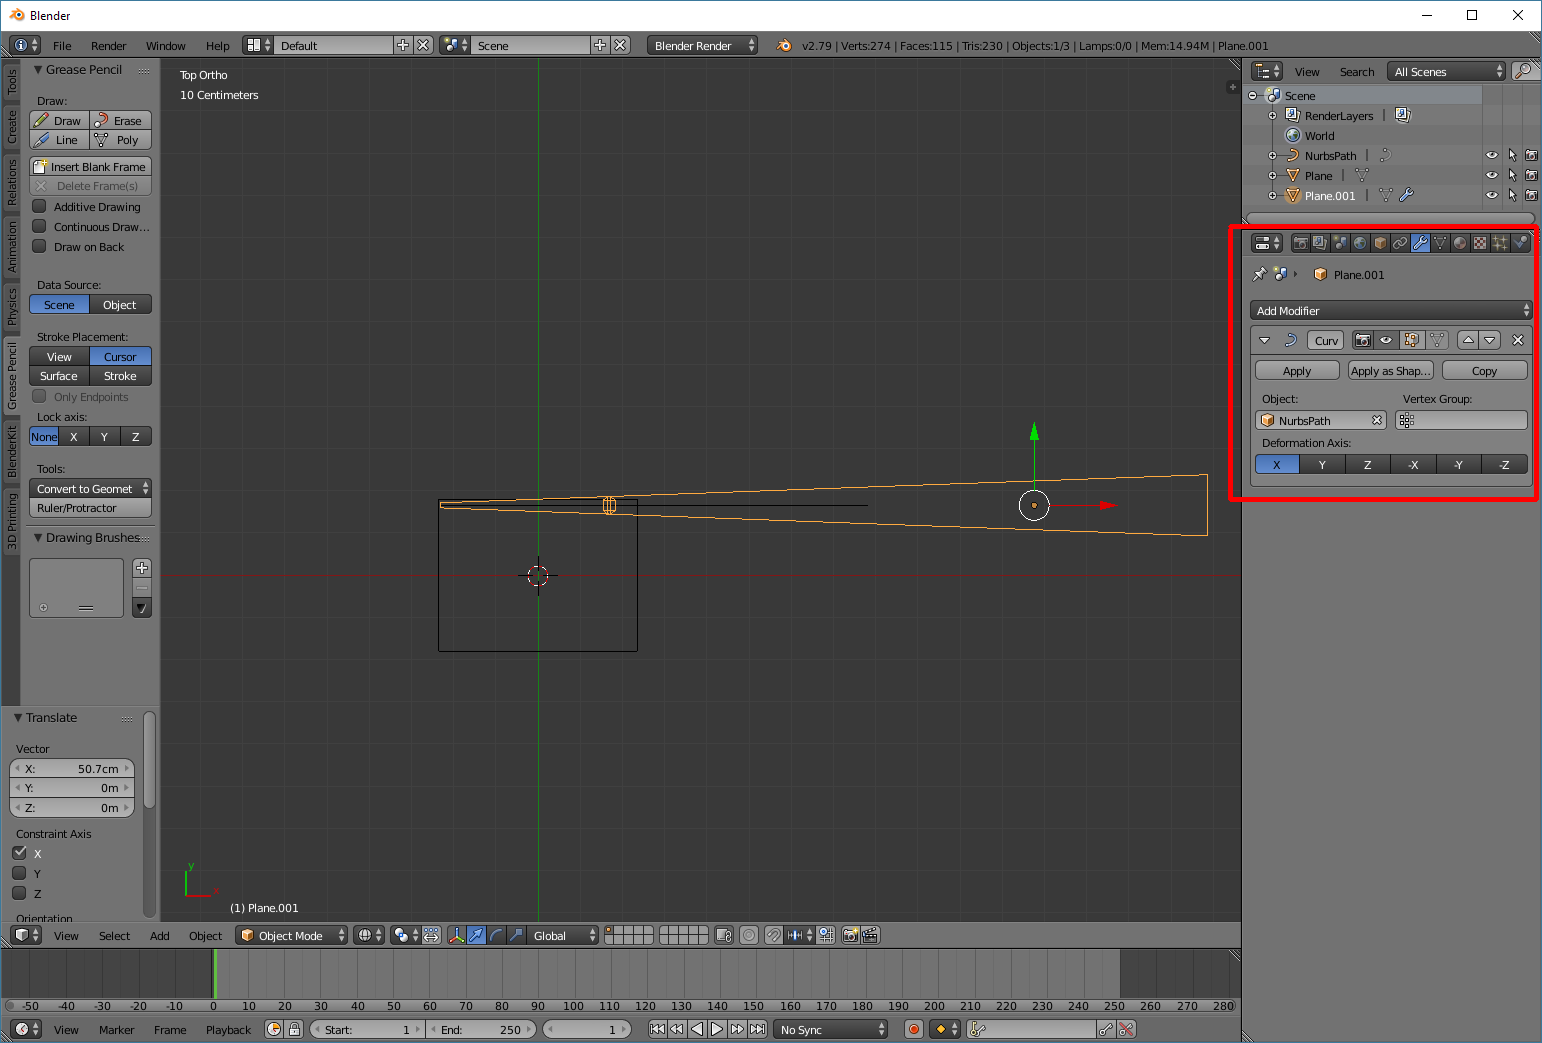
4. In the edit mode edit the curve and the horn profile should immediately be deformed correctly. You can add more points using extrude, move one or more at a time, rotate them... and the horn should fold accordingly while preserving the length.

I didn't verify this precisely enough, but it seems that this method preserves the length of the horn, although unless "radius" setting in the curve parameters is unchecked, it affects the width for some reason.
There is also a method that should give exactly the same results as the Sketchup method while being faster to work with - creating a series of rectangles and rigging them using bones to behave like a connected chain. Setting this up takes at least as long as using Sketchup, probably longer. The advantage is that it is evident that it should produce the exact same result and that it's faster to work with than in Sketchup once set up. An example of how to do that type of rigging (it's the absolutely simplest type) can be found in the first five minutes of this video: YouTube
Now the disadvantage is obvious - learning even the basics with Blender takes some time, it's a big piece of software.
But the big potential advantage is that it's free, open source and scriptable in python, so it's accessible to anyone and both methods could be scripted as a blender addon to automatically import exported hornresp data and create the folding rig automatically. So you could just come in, load the data and only learn how to modify the curve and measure the result, that's realistic for anyone and the workflow is super fast.
first of all, I want to say that my experience with designing & building horns and other types of foldable enclosures is limited, so please take this as an idea that might have glaring flaws, and an idea that definitely needs lots of refinement. Also unfortunately I don't have the time to do a tutorial, so you'll only be able to try this if you have some Blender basics or learn them elsewhere, which may take some time.
When learning about folding horns I was surprised that there seem to be no better methods than trial and error, sometimes for hours, until you get something. There are some good excel scripts if you're attempting an enclosure that is supported, but other then that, I've only found some old Autocad scripts, and I don't know and don't own Autocad, and a basic method in Sketchup, which is just a bit better than printing horn profiles on paper and cutting them into pieces.
Well, I don't bring anything revolutionary (=automatic), but I thought that at least there must be a faster way to bend a long horn than splitting it into small rectangles in sketchup. And I found one, I just don't know how accurate it is and it needs some testing, but I think that it has decent potential.
Blender is a free software for 3D graphics work, in other words not technical modeling, so using it for CAD work is generally a huge pain, but for general modeling it has a great non-destructive workflow using modifiers.
So the idea here is: you model your horn profile that you get from hornresp (done using one or two resized basic planes), subdivide it so that it has enough polygons for the bends, create a mark (or marks) where the driver is attached, and then you can separately create a curve, place it in the middle of the horn, and let the horn bend along the curve using a modifier. This happens in real time as you modify the curve, so any folding is super fast and modifications like "well this doesn't fit, need to make the first fold closer to the beginning" only take a few seconds. The setup takes a couple minutes once you know your way around Blender.
I tried to show the rough idea in the attached screenshots:
1. Create the horn profile - first it's best to set the scene units to meters (or other real world dimensions) on the right, then I created a basic plane and resized it to 1.2cmx180cm, then I scaled the right edge to 14cm in edit mode, this was my horn. The ruler/protractor tool (shown on the left) is useful to check that the dimensions are correct. Then I subdivided it using loop cut tool in edit mode, but there's also a non-destructive subdivide modifier which works just as well. Lastly I created another plane in the size of the final box (I knew the final size in advance, cheating).
2. Create a path and place it in the middle of the horn (and place both in the proper place in the enclosure). Then select the path and set it up correctly (shown on the right).
3. Select the horn profile, add a curve modifier in the modifier submenu, set it to use the nurbs path. The curve or the horn will jump a bit because both objects origins must be in the same spot, just move them in the correct place again.
4. In the edit mode edit the curve and the horn profile should immediately be deformed correctly. You can add more points using extrude, move one or more at a time, rotate them... and the horn should fold accordingly while preserving the length.
I didn't verify this precisely enough, but it seems that this method preserves the length of the horn, although unless "radius" setting in the curve parameters is unchecked, it affects the width for some reason.
There is also a method that should give exactly the same results as the Sketchup method while being faster to work with - creating a series of rectangles and rigging them using bones to behave like a connected chain. Setting this up takes at least as long as using Sketchup, probably longer. The advantage is that it is evident that it should produce the exact same result and that it's faster to work with than in Sketchup once set up. An example of how to do that type of rigging (it's the absolutely simplest type) can be found in the first five minutes of this video: YouTube
Now the disadvantage is obvious - learning even the basics with Blender takes some time, it's a big piece of software.
But the big potential advantage is that it's free, open source and scriptable in python, so it's accessible to anyone and both methods could be scripted as a blender addon to automatically import exported hornresp data and create the folding rig automatically. So you could just come in, load the data and only learn how to modify the curve and measure the result, that's realistic for anyone and the workflow is super fast.
Attachments

Last edited:
I know this probably looks complicated from my description, but it's totally worth it, here's another example.
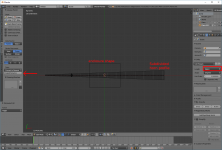
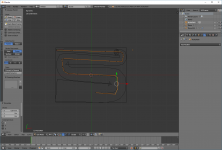
Years ago I was building my first subwoofer. It was a tapped horn designed in hornresp and I had a super-tight deadline, so although I spent half a day trying to fold it properly (something I have not done ever before that moment, learning as I go), the final version had a pocket of useless empty space:

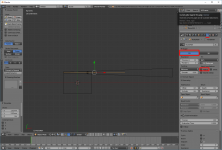
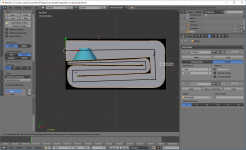
Today I tried to optimize it to test this method, it took me about 20 minutes including setup and, what's best, it was FUN! The black lines were drawn in blender using grease pencil and measured using ruler/protractor tool - the length is correct, +-2 cm (out of 385 cm), although as you can see the black lines I drew as measuring guide are quite imprecise, so the reality might be a bit different. It would need to be redrawn in a CAD first to check everything properly but for getting from hornresp model to having something to draw and finalize this method is awesome.
Years ago I was building my first subwoofer. It was a tapped horn designed in hornresp and I had a super-tight deadline, so although I spent half a day trying to fold it properly (something I have not done ever before that moment, learning as I go), the final version had a pocket of useless empty space:
Today I tried to optimize it to test this method, it took me about 20 minutes including setup and, what's best, it was FUN! The black lines were drawn in blender using grease pencil and measured using ruler/protractor tool - the length is correct, +-2 cm (out of 385 cm), although as you can see the black lines I drew as measuring guide are quite imprecise, so the reality might be a bit different. It would need to be redrawn in a CAD first to check everything properly but for getting from hornresp model to having something to draw and finalize this method is awesome.
Attachments
Very interesting stuff! Have you been using Blender 2.8/9 at all? Would love to see if you've got any tips and tricks for the later versions. Also any chance you could do a bit more of a specific breakdown on how you're exporting/importing your hornresp data? Quite new to this but been using blender for a bit and would love to design some cabs with it!
- Status
- This old topic is closed. If you want to reopen this topic, contact a moderator using the "Report Post" button.