Listening update.
Irshad and I are really really enjoying listening to what the diffusers are doing in the listening room. Thanks again for a great project.
How much space do you have between the diffusers and ceiling ? They look like a close fit.
Nice job on the fabrication.
") There is about 0.75 inches of space. I had to set the bottom of the diffuser in first then walk it in, the carpet made sliding them a no-no.
There is about 0.75 inches of space. I had to set the bottom of the diffuser in first then walk it in, the carpet made sliding them a no-no. Hi there,
Thanks for the plans. The panels look great. I have a quick question (for anyone): I'm in Germany and the dimensions of the wood at the Home Depot equivalent are a bit different. Will this difference, if within 10% or so, severely diminish the effectiveness or just change the frequencies it's affecting? Also, are there certain dimensions that are more important than others to preserve? Thanks again for the effort!
A.
Just completed my first set of diffusers. My intention was to eliminate slap echo i had between some parallel walls in my theater, the slap echo was between the center channel up front, it was causing a bit Of intelligibility issue with dialog, i couldnt understand, i could hear it but couldnt make out what they were saying......at low volume
That issue is gone ! Slap echo, GONE !!!!! Thank you for a well designed product
PS: I start my second set tonite expecting the same results :0)
That issue is gone ! Slap echo, GONE !!!!! Thank you for a well designed product
PS: I start my second set tonite expecting the same results :0)
Last edited:
Here is a little bit of Mini-Me and Where's Waldo. See if you can find the Depot-Diffuser serving double duty.
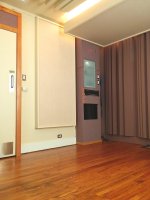
Putting my room back together so things are in a bit of a disarray. Broadband traps are not hung yet and will be recovered. May make AbFusers out of the broadband traps.

Putting my room back together so things are in a bit of a disarray. Broadband traps are not hung yet and will be recovered. May make AbFusers out of the broadband traps.
would 7/16" OSB be okay to use? Have some leftover from a dedicated theater room build, no biggie if not will buy the 11/32" if required.
There are 2 layers of plywood in this build. The thickness of the back piece should not be a problem acoustically as long as it is structurally sound. 3/32" more against a wall is not going to make any difference. The OP uses his as "room dividers" that are placed out into the room.
I doubt 3/32" deeper on the 2nd layer would make much difference either. The LeanFuser design is based from 10mm metric stock. The author of the LeanFuser has stated that substituting Imperial dimensioned lumber (1/2" or 12.5mm) yields slightly better results due to the increased depth than the shallower metric version.
Using OSB will be more of an aesthetic issue. Also, many papers state that you should paint/varnish your diffusers to minimize absorption and increase diffusion by having a harder, sealed surface.
This whitepaper discusses sealing versus not sealing wood diffusers (Section 3, Figure 2).
The Effect of Geometrical and Material Modification of Sound Diffusers on Their Acoustic Parameters
Last edited:
Works Great!
I came across this helpful "Depot" approach as I was designing a dining/tracking room. Having already ruined a perfectly good living room by turning it into a mixing room (thanks, Honey!) I was tasked with acoustic treatment that would still allow human dining, be "tight & bright" enough for a drum kit or guitar amps and be economically DIY. I've tested the room (11' W x 13.5' L x 9.2' H)with guitar amps moderate to screaming and the room is excellent. Full drum kit next week.
I came across this helpful "Depot" approach as I was designing a dining/tracking room. Having already ruined a perfectly good living room by turning it into a mixing room (thanks, Honey!) I was tasked with acoustic treatment that would still allow human dining, be "tight & bright" enough for a drum kit or guitar amps and be economically DIY. I've tested the room (11' W x 13.5' L x 9.2' H)with guitar amps moderate to screaming and the room is excellent. Full drum kit next week.
Attachments


First, thanks to Bwaslo for designing these and sharing the construction technique. I am building four of these for my back wall. I have started to build them and then stopped my construction as I ponder an adjustment to their construction.
There is some empty space behind the outside plywood piece which supports the furring strips which form the diffuser steps. This empty space is created by the two 1 x 2 wooden pieces which supports either end of the outside plywood pieces. If one 1 x 2 piece is moved inward towards the center of that outside plywood piece, it would make a horizontal space which would add to the diffuser "depth." The potential downside to the horizontal space is that the absorption would be greater than the vertical wells. But it would be interesting to at least model the effect that a horizontal well could have on the diffuser performance. I hope to get the model working to see if I can model this change, and figure out how deep the horizontal wells should be for best performance.
Just one construction idea that I used. For half of the 1 x 3 pieces I used rough furring strips, but for the pieces facing the outside, I used finished pieces so that the outside face of the diffuser would have a nicer appearance. The downside of this approach is that the rough 1 x 3 pieces are a little wider than the finished ones. I started out sanding the wider pieces down, but this was going to take forever, so I ripped them using a table saw and that worked good, and then I touched them up with some finish sandpaper to smooth out the finish of the table saw cuts.
Retsel
The very first post contains the list of building materials and a diagram of how to put them together.
I should also note that I am gluing and screwing everything together with these diffusers to prevent this thing from singing like a canary when the sound levels are higher in the room.
One more note, since I am coupling multiple diffuser panels together for my back wall, the height of each diffuser panel should be different to improve the diffusion properties of multiple diffusers.
Here is another website where diffuser ideas are discussed, and the original designer of these 1D diffusers, Tim Perry, regularly posts to this site.
DIY Sound Diffusers—Free Blueprints—Slim, Optimized DIY Diffuser Designs (+Fractals) - Page 16 - Gearslutz
I remodeled a dining room into a recording room so I also glued & screwed since high SPLs would be a given. I was concerned about possible cavity resonance, so I filled them with mineral wool. Since I had multiple modules, I too varied the height as per your linked article.I should also note that I am gluing and screwing everything together with these diffusers to prevent this thing from singing like a canary when the sound levels are higher in the room.
One more note, since I am coupling multiple diffuser panels together for my back wall, the height of each diffuser panel should be different to improve the diffusion properties of multiple diffusers.
Attachments

You've turn a diffuser into an absorber, entirely different thingI was concerned about possible cavity resonance, so I filled them with mineral wool.
You've turn a diffuser into an absorber, entirely different thing
Perhaps. However, I believe the diffusion is generated by the topography of the hard surface. Those very shallow, narrow cavities wouldn't perform very well as membrane absorbers.
Right. The inside space is just to save materials (and weight), the outside surface is what does the diffusing. Filling the void with fluff shouldn't hurt anything thoug I doubt it would really be much of an issue for resonances (I've not noticed anything). But not a lot of effort so might be a safer way to go.
To reduce the weight (and cost) I made some out of high density styrene foam (same as used on the outside of houses) and glued the profiled shapes to 12mm ply and built the basic 7 segment arrays (with the offsets) on a steel frame - this is used on the wall of a band practice studio and the higher volume does make the structure vibrate quite noticeably - I then added some extra bracing and some heavy leaded vinyl to the back ply surfaces that deadened the vibration but doesn't seem to effect the behavior of the diffusors at all.
Out of interest, I cut some styrene profiles to accommodate an added 3mm thick plywood strips glued on the front flats and this certainly increased the diffusion - no doubt, even with a few heavy coats of paint, the simple styrene units still absorbed some energy.
I increased the 'flats' on the styrene profile to suit the 63mm slats of the venetian blinds (7 x 63 = 441mm, up from 420 per module) with no perceived difference - same thing with the plastic slats.
With the 12mm ply as the rear support surface per section and steel tube supports, it's a reasonable, lighter compromise, but a lot more 'stuffing around'.
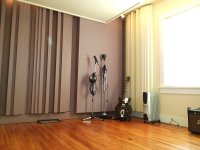
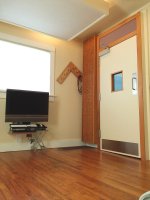
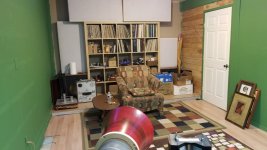
I plan on building the Depot Diffuser for my room. I have an Idea 5x5 bookcase in the back of the room surrounded by bass traps (see pix) and want to build two diffusers as tall as the book case and on hinges so they will be doors. so, do I have to do anything special where the two Door Depot Diffusers meet in the middle?
Also I'm wondering if building them for the front behind my audio rack will add anything to the room's sound quality???
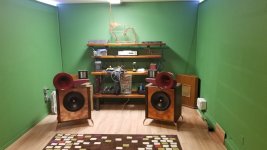
P.S., I am just now setting up the room so excuse the mess.
Also I'm wondering if building them for the front behind my audio rack will add anything to the room's sound quality???
P.S., I am just now setting up the room so excuse the mess.
Attachments
- Home
- General Interest
- Room Acoustics & Mods
- Making easy DIY "Depot" sound Diffuser panels, step by step