Got my flatpack a number of weeks ago but have not yet even opened the pack due to scheduling. It includes a pair of Alpair 7.3
A couple of quick ones before I get to it:
1. I believe the flatpack has everything I need to assemble it except for glue? Anyways, my question is if there are items in there that I can replace with a higher grade (without breaking the bank of course) for better performance such as better damping material or connectors?
2. What's the max power handling of those Alpairs 7 if anyone knows off the top of your head?
Thanks,
UL
\1. I believe the flatpack has everything I need to assemble it except for glue? Anyways, my question is if there are items in there that I can replace with a higher grade (without breaking the bank of course) for better performance such as better damping material or connectors?
Hi Moses,
Wire, maybe, that is a minefield.
Binding posts, but i fell you'd need to go to Eichmann cable pods or WBT Next Gens to make a serious impact. The flat-pak has been designed so that those can be swapped in any time down the road.
You will also need a philips screwdriver, clamps (or clamp substitutes) and a right triangle (square).
Damping material is fine.
dave
Got my flatpack a number of weeks ago but have not yet even opened the pack due to scheduling. It includes a pair of Alpair 7.3
A couple of quick ones before I get to it:
1. I believe the flatpack has everything I need to assemble it except for glue? Anyways, my question is if there are items in there that I can replace with a higher grade (without breaking the bank of course) for better performance such as better damping material or connectors?
2. What's the max power handling of those Alpairs 7 if anyone knows off the top of your head?
Thanks,
UL
Glue (yellow carpenter's for the wood and white "Weldbond" etc for the damping felt) and clamps (can't have too many) should be all you need
The input terminals were selected not only for their price, but they sound quite decent - as Dave noted above, you'd probably have to spend more on the terminals than the cost of stock drivers to find something sounding better.
Upgrade the wire if you like, but at power levels the Alpairs - and I think in most rooms your ears - will tolerate, much more than #18 over-kill.
The nominal power rating on the Alpair 7 spec sheet says 20W (continuous), but I've played them as loud as I can stand in a 5.1 system (with bass management XO set to 110Hz) on a 70WPC receiver.
We've yet to damage any of Mark's drivers from too much power - creasing the metal cones OTOH ...
As this enclosure has a narrow / tall format, they can be a bit wobbly on carpeted floors, so sometime of outrigger supports are advisable, and to keep curious fingers from the shiny and very delicate cones, I'd suggest some type of grille as well.
Binding posts, but i fell you'd need to go to Eichmann cable pods or WBT Next Gens to make a serious impact. The flat-pak has been designed so that those can be swapped in any time down the road.
What binding posts do you all include, if you don't mind me asking?
I'll snap some pictures. They are small cups -- 2" D cutout -- to keep the panel weaking hole as small as possible and still allow access (to fix or replace wire or binding posts). We wanted plastic nuts to keep metal mass down. Some would call them cheesy. But you have spend a fair amount of money to upgrade.
Standard 3/4" spacing for those using double banana plugs (like us)
dave
Standard 3/4" spacing for those using double banana plugs (like us)
dave
Finally finished up the outriggers on my build:
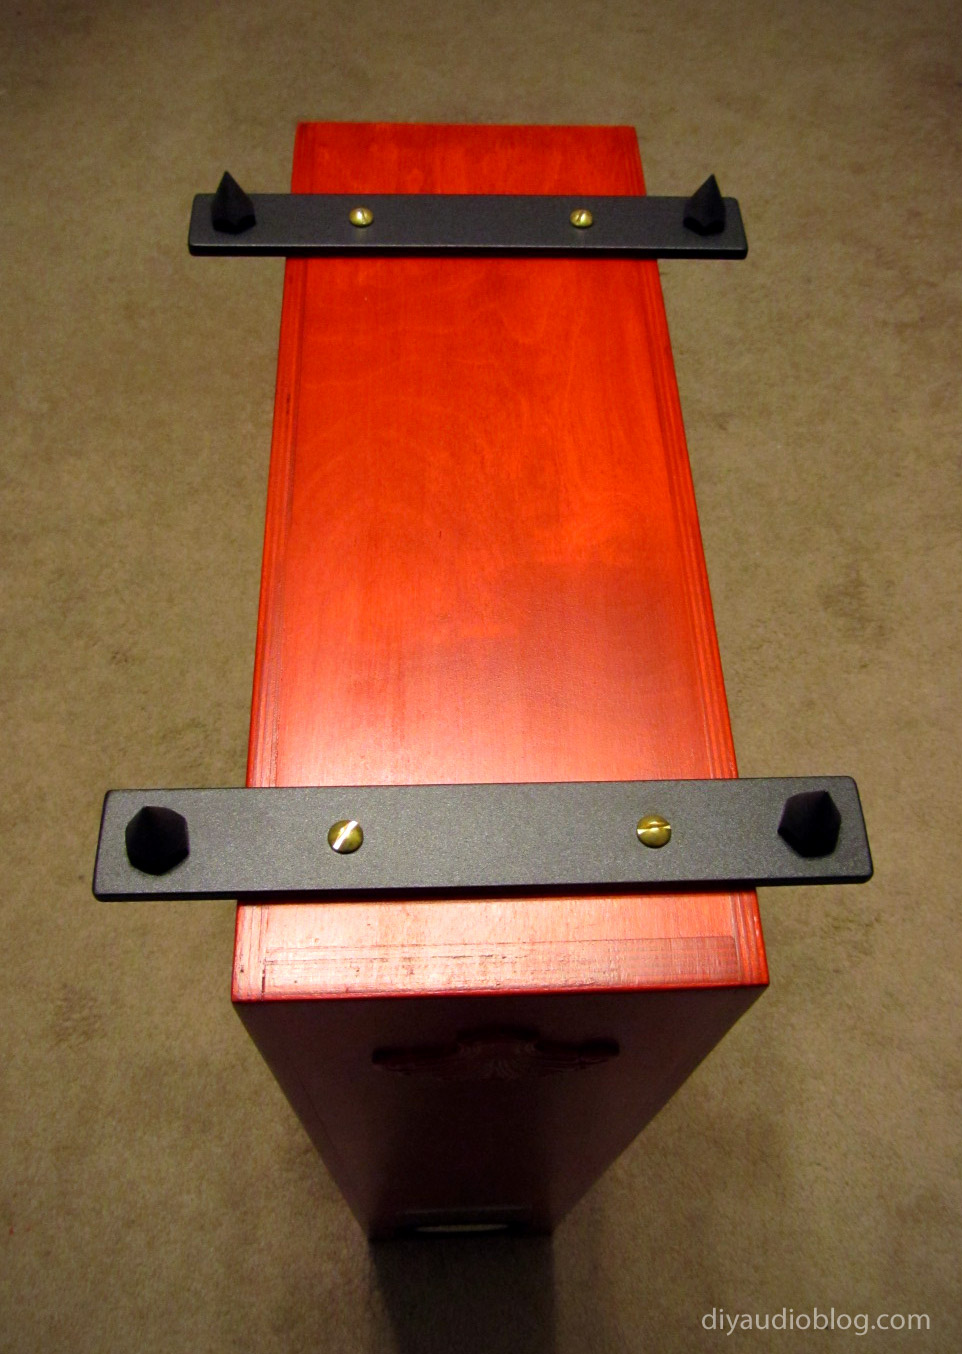
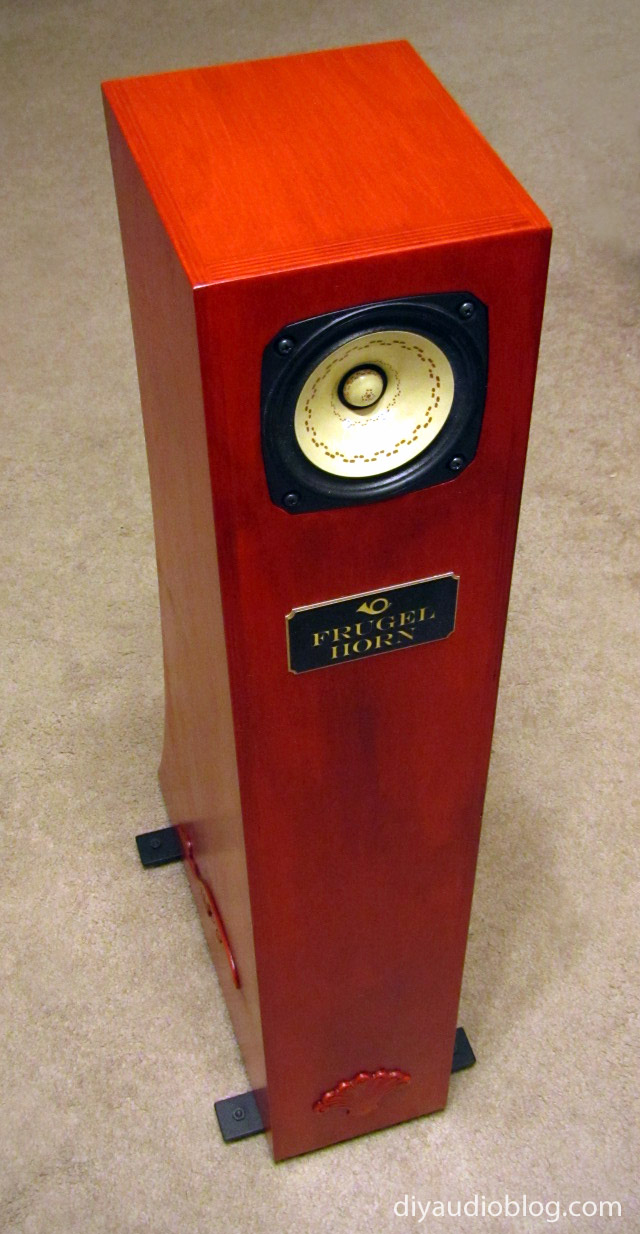
Full write-up @ DIY Audio Electronics from Zynsonix.com: The Planet10 Frugel-Horn mk3 Backloaded Horn
Full write-up @ DIY Audio Electronics from Zynsonix.com: The Planet10 Frugel-Horn mk3 Backloaded Horn
I forgot to mention the most important bit: my wife loves it! She loves the narrow shape with single driver.
I am undecided on how to finish the wood. The CNC operators took great care to ensure the visible sides are very nice wood with no flaws, i think i could just stain it and have it look majestic.
Hands down a great purchase. Job well done to Dave and the team.
I am undecided on how to finish the wood. The CNC operators took great care to ensure the visible sides are very nice wood with no flaws, i think i could just stain it and have it look majestic.
Hands down a great purchase. Job well done to Dave and the team.
Yes, care is taken to book match the sides (and match the sides in a pair) and have any less nice stuff on the inside. Baffles are also pair matched.
Parts we aren't happy with the look of are set aside for our own builds as they get veneered. And any outright mistakes are recycled into the smaller boxes we make.
dave
Parts we aren't happy with the look of are set aside for our own builds as they get veneered. And any outright mistakes are recycled into the smaller boxes we make.
dave
Thanks for the quick response.
Ill see what i can find out.
Hi
Any news on european mainland supply?
thanks
Are these still available in the US?
I ship most of ours into the US. No other North American suppliers at this time.
dave
Got reconnected back and bought the flat pak from Bill (See post #158) yesterday and spent the day to read through all the related posts again.
This is my first speaker build, so please bear with me for silly questions:
1. the back board and the divider board are a little too tight to go in the groove of the side board. A few posts suggested to sand down a little, I supposed it is to sand the board to fit, not the wall of the groove.
2. in post #45, Chris said:
3. I have 4 CSS FR125S that came with a lot purchase from another member some time ago. In the same post, Chris said Other than the unfortunate behavior when excursion limit is reached, they should work fine. Does anyone have any reference this excursion limit issue?
Can't wait to start the build, going out to buy more clamps, like the pro said, can never have too many")
Thanks!!
This is my first speaker build, so please bear with me for silly questions:
1. the back board and the divider board are a little too tight to go in the groove of the side board. A few posts suggested to sand down a little, I supposed it is to sand the board to fit, not the wall of the groove.
2. in post #45, Chris said:
I do plan to stain the cabinet, so what kind of pre conditioning sealer should I purchase?BB takes a clear top coat ( lacquer / polyurethane / shellac / natural oil ) quite nicely, but if planning on staining, a pre conditioning sealer would be recommended to avoid blotchiness.
3. I have 4 CSS FR125S that came with a lot purchase from another member some time ago. In the same post, Chris said Other than the unfortunate behavior when excursion limit is reached, they should work fine. Does anyone have any reference this excursion limit issue?
Can't wait to start the build, going out to buy more clamps, like the pro said, can never have too many
Thanks!!
1. the back board and the divider board are a little too tight to go in the groove of the side board. A few posts suggested to sand down a little, I supposed it is to sand the board to fit, not the wall of the groove.
Yes. A mallet and a block is sometimes all that is needed to make them fit.
3. I have 4 CSS FR125S that came with a lot purchase from another member some time ago. In the same post, Chris said Other than the unfortunate behavior when excursion limit is reached, they should work fine. Does anyone have any reference this excursion limit issue?
Bill's kit came with EnABLed EL70 and the baffles were rebated for the same, i'd strongly recommend using those.
The FR125 motor is ver linear over almost all of its stroke. But it gives no warning that it has reached the limit, and when the coil strikes the back plate it makes a very disturbing noise. This is particularily bad with single ended amps (tube or SS, seemingly of an power), so we recommend PP amps and enclosures that provide some back pressure to provide a safety margin. 4.5litre aperiodic to 7 litre sealed or aperiodic.
In theory it will work in FH3 but you may find this specific issue a problem
dave
Thanks for the explanation, Dave. It was more like curiosity of what that means than anything else as I just have happen to have those FR125S around. I will build the MK-3 kit as is. As this hobby never ends once it starts, I can see my next project is enclosure for these FR125S, oh boy!!
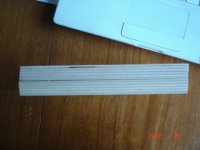
One of top boards cut wrong?
Attached are 2 pictures of the top boards.
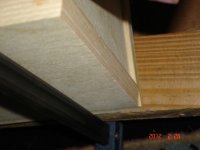
The one at the top of the 1st picture aligns to the baffle, the back, and the sides, but the one at the bottom of the 1st picture doesn't, see the 2nd picture.
Is there any easy way to fix this cosmetic defect?
Thanks!!
Attached are 2 pictures of the top boards.
The one at the top of the 1st picture aligns to the baffle, the back, and the sides, but the one at the bottom of the 1st picture doesn't, see the 2nd picture.
Is there any easy way to fix this cosmetic defect?
Thanks!!
Attachments
pchw,
I just assembled a FH3. I'm not a woodworker and not very handy, and this also was my first project. I don't really know what the pictures show, so I can't help you, but I do have another piece of advice. When you assemble the backboard and divider I would recommend to use some masking tape and mock up the top, bottom and front. If you do that and the other side fits flat you did it right. If the divider is not all the way down, the other side will not close correctly.
My FH3 went together butter. The divider needed some talking too, it was tight. It's a very well fitting kit. If a piece didn't fit right, rotate the piece and you will see that it fits like a glove! Quality kit. I'm ready to stain it and hopefully by next weekend listen to it. I'm very happy with the kit.
Hi nrg2009,
The back board and the divider fit just fine. It was when I put all panels together (with clamps) to get a previw, I found one of the top boards didn't "flush" to the surface.
Look at the 2 boards in the 1st picture, both are taken from the side. You can see one of them is kind of like a parallelogram which is correct as it has the same angle of the front and the back panels. However, the second one is cut like a trapezoid; therefore, when one end is flushed to the front panel, the other side won't.
If you look at the second picture, you can see the bottom surface stuck out a little outside of the side board which isn't too bad, maybe 0.5mm-0.75mm; however, due the wrong angle, the side board is exposed more and more towards the top. You can see that at the bottom of the 2nd picture, kind of like a little white triangle. I don't think it will affect the sound, just doesn't look as good.
Cheers,
- Home
- More Vendors...
- Planet 10 hifi
- Frugel-Horn Mk3 flat-paks