^ Did you start with very low resistance reading across R5 and R6 as Dennis suggested? Is that what you mean by correct adjustments to P1 and P2?
With those readings low, it sounds like the fuse did not blow, correct? You have solved this issue?
I think that is what you said in #2079, but just confirming.
------
After setting P1 and P2 to their proper starting positions, did you then slowly adjust P1 and P2 to achieve your desired bias current, Iq?
What is your desired Iq? What voltage readings do you want across R7 and R8?
What voltage readings do you see across R7 and R8?
-----
Edited for clarity
Yes, after the low bias setting, did not find an issue with fuse. I also did check for any DC leak to the outputs, did not read any.^ Did you start with very low resistance reading across R5 and R6 as Dennis suggested? Is that what you mean by correct adjustments to P1 and P2?
With those readings low, it sounds like the fuse did not blow, correct? You have solved this issue?
I think that is what you said in #2079, but just confirming.
------
After setting P1 and P2 to their proper starting positions, did you then slowly adjust P1 and P2 to achieve your desired bias current, Iq?
What is your desired Iq? What voltage readings do you want across R7 and R8?
What voltage readings do you see across R7 and R8?
-----
Edited for clarity
But I did not make further pot adjustments after lowering R5-R6 reading values to 1-2 ohms. I have no idea about the target bias current, what should I target (no preamp will be used)? What should be read accross R7 R8? Havent done these measurements yet.
Bermek,
The adjustment I suggested is the starting position. The P1/P2 pots aren't for 'fine adjustments'. They are there to set the operational parameters of the amp and you now have to adjust the pots gradually to bring up the bias current for proper operation.
The general idea is: (One channel at a time). Short the input, put one volt meter on a source resistor (0.47R) and another across the output of the amp channel. Adjust P1 and P2 in tandem gradually so you start seeing voltage across the source resistor, while at the same time keeping the dc offset low. The DC offset should be ideally zero but anything below 50mV should be acceptable; you should not have trouble doing better than that. The voltage across the source resistor gives a measurement of the bias current. The 'target' Iq is about 1.3A, so about 0.6V across the source resistors. Note this is with the amp fully warmed up and in thermal equilibrium. (i.e. lid on) I would suggest for now bringing things up slowing to no higher than 0.5V. Do things in half steps and let things stabilize after each set of adjustments.
These adjustments do not depend on whether a preamp will be used.
Edit: Please read carefully the first posts in this thread. Everything is there, but ask if things aren't clear.
Last edited:
Patrick and Dennis has given all the advice you need.Yes, after the low bias setting, did not find an issue with fuse. I also did check for any DC leak to the outputs, did not read any.
But I did not make further pot adjustments after lowering R5-R6 reading values to 1-2 ohms. I have no idea about the target bias current, what should I target (no preamp will be used)? What should be read accross R7 R8? Havent done these measurements yet.
Yes, as I should have pointed out, my advice of setting P1 and 2 to minimum was just iot check/confirm that in fact you may have a working amp. In other words, to see if it was possible to turn it on without the fuse blowing.
Now you need to try and adjust the amp, which is another process, as described by Patrick (Itsall) and Dennis.
Whether fets are fried or not you will soon find out when trying to bias the amp.
To point out the obvious: Your sinks are cold because you have yet to adjust P1 and 2
") Go slow.
Go slow.I sure will. Thank you.Jim (6L6) does a thorough job of explaining bias procedure in this build guide. Go back and read the first posts in this thread.
@bermek
Adjustments (Bias and Offset, set with P1 and P2)
This is easiest with three DMM.
Shorting the input jacks is helpful, although not strictly necessary.
Before power up, dial pots P1 and P2 to 0 ohms . DON'T adjust P3 during bias
Place one voltmeter (Set to DC volts) across the speaker output jacks - to observe DC offset
Place a voltmeter (Set to DC volts) across R7, and another across R8.
For test - slowly dial up Variac ( presuming that you have one , as man with many skills) up to full mains voltage , observing rail voltage at PSU ....... thinking about max cap voltage ( 25V as in FW ? ) , because with 0 Iq PSU is unloaded and voltage is maxed (It’s useful to have another meter for this…) If nothing is smells bad, and the magic smoke is still in the circuit - leave Variac at full mains ;
IF you don’t have a Variac, you must build a lightbulb mains lead. (with a 25W bulb)
What's important - Iq (measured as the voltage across source resistors; the Mosfet bias) must be very low , offset is irrelevant in this moment .
Now turn one pot one turn ( assuming that you have multiturn pots) then turn other pot one turn. Continue, one turn at a time on each pot until something happens.
Observe voltage across resistors and output DC offset.
Proceed one then second pot , again just one turn
Observe Iq and offset
Again one turn + one turn
Now you are probably in range when you can see which pot is pulling offset in right direction - to 0 . It will feel like one of the pots is controlling the bias on both sides of the circuit, and the other is controlling the DC offset. (That’s not what’s actually happening, but carry on…)
It’s best to increase the bias a bit, and then zero the offset. As you zero the offset you will decrease some of the bias, so it will be two steps forward and one step back. This action is normal.
As you increase the bias and zero the offset, remember to always keep the offset near zero. If you run out of turn on the pots, determine your max bias, with zero offset. (It’s useful for troubleshooting)
Proceed iteratively with pots , while you set - say - 80% of desired bias, with zero offset. Remember, full bias is 0.6V across R7 and R8, with zero offset At the speaker jacks.
Now - put lid on box and let it cook for a while - until you get thermal equilibrium on heatsinks
It's best to use wire/clips to leave those voltmeters in place ;
Open the lid , up bias to - say - 90% of desired one ,while maintaining offset
Put lid on , let it cook.
Check again.
If all is OK - move voltmeters for Bias and offset to other channel and repeat procedure.
Use it few days at 90% of desired bias , then check and set to 100%
Remember - temp. equilibrium with lid on is important.
Thanks very much for all details. I am short of 2 DMMs. Would 1 DMM and a 2-ch scope do?@bermek
Adjustments (Bias and Offset, set with P1 and P2)
This is easiest with three DMM.
Shorting the input jacks is helpful, although not strictly necessary.
Before power up, dial pots P1 and P2 to 0 ohms . DON'T adjust P3 during bias
Place one voltmeter (Set to DC volts) across the speaker output jacks - to observe DC offset
Place a voltmeter (Set to DC volts) across R7, and another across R8.
For test - slowly dial up Variac ( presuming that you have one , as man with many skills) up to full mains voltage , observing rail voltage at PSU ....... thinking about max cap voltage ( 25V as in FW ? ) , because with 0 Iq PSU is unloaded and voltage is maxed (It’s useful to have another meter for this…) If nothing is smells bad, and the magic smoke is still in the circuit - leave Variac at full mains ;
IF you don’t have a Variac, you must build a lightbulb mains lead. (with a 25W bulb)
What's important - Iq (measured as the voltage across source resistors; the Mosfet bias) must be very low , offset is irrelevant in this moment .
Now turn one pot one turn ( assuming that you have multiturn pots) then turn other pot one turn. Continue, one turn at a time on each pot until something happens.
Observe voltage across resistors and output DC offset.
Proceed one then second pot , again just one turn
Observe Iq and offset
Again one turn + one turn
Now you are probably in range when you can see which pot is pulling offset in right direction - to 0 . It will feel like one of the pots is controlling the bias on both sides of the circuit, and the other is controlling the DC offset. (That’s not what’s actually happening, but carry on…)
It’s best to increase the bias a bit, and then zero the offset. As you zero the offset you will decrease some of the bias, so it will be two steps forward and one step back. This action is normal.
As you increase the bias and zero the offset, remember to always keep the offset near zero. If you run out of turn on the pots, determine your max bias, with zero offset. (It’s useful for troubleshooting)
Proceed iteratively with pots , while you set - say - 80% of desired bias, with zero offset. Remember, full bias is 0.6V across R7 and R8, with zero offset At the speaker jacks.
Now - put lid on box and let it cook for a while - until you get thermal equilibrium on heatsinks
It's best to use wire/clips to leave those voltmeters in place ;
Open the lid , up bias to - say - 90% of desired one ,while maintaining offset
Put lid on , let it cook.
Check again.
If all is OK - move voltmeters for Bias and offset to other channel and repeat procedure.
Use it few days at 90% of desired bias , then check and set to 100%
Remember - temp. equilibrium with lid on is important.
@bermek
Adjustments (Bias and Offset, set with P1 and P2)
This is easiest with three DMM.
Shorting the input jacks is helpful, although not strictly necessary.
Before power up, dial pots P1 and P2 to 0 ohms . DON'T adjust P3 during bias
Place one voltmeter (Set to DC volts) across the speaker output jacks - to observe DC offset
Place a voltmeter (Set to DC volts) across R7, and another across R8.
For test - slowly dial up Variac ( presuming that you have one , as man with many skills) up to full mains voltage , observing rail voltage at PSU ....... thinking about max cap voltage ( 25V as in FW ? ) , because with 0 Iq PSU is unloaded and voltage is maxed (It’s useful to have another meter for this…) If nothing is smells bad, and the magic smoke is still in the circuit - leave Variac at full mains ;
IF you don’t have a Variac, you must build a lightbulb mains lead. (with a 25W bulb)
What's important - Iq (measured as the voltage across source resistors; the Mosfet bias) must be very low , offset is irrelevant in this moment .
Now turn one pot one turn ( assuming that you have multiturn pots) then turn other pot one turn. Continue, one turn at a time on each pot until something happens.
Observe voltage across resistors and output DC offset.
Proceed one then second pot , again just one turn
Observe Iq and offset
Again one turn + one turn
Now you are probably in range when you can see which pot is pulling offset in right direction - to 0 . It will feel like one of the pots is controlling the bias on both sides of the circuit, and the other is controlling the DC offset. (That’s not what’s actually happening, but carry on…)
It’s best to increase the bias a bit, and then zero the offset. As you zero the offset you will decrease some of the bias, so it will be two steps forward and one step back. This action is normal.
As you increase the bias and zero the offset, remember to always keep the offset near zero. If you run out of turn on the pots, determine your max bias, with zero offset. (It’s useful for troubleshooting)
Proceed iteratively with pots , while you set - say - 80% of desired bias, with zero offset. Remember, full bias is 0.6V across R7 and R8, with zero offset At the speaker jacks.
Now - put lid on box and let it cook for a while - until you get thermal equilibrium on heatsinks
It's best to use wire/clips to leave those voltmeters in place ;
Open the lid , up bias to - say - 90% of desired one ,while maintaining offset
Put lid on , let it cook.
Check again.
If all is OK - move voltmeters for Bias and offset to other channel and repeat procedure.
Use it few days at 90% of desired bias , then check and set to 100%
Remember - temp. equilibrium with lid on is important.
And I have no variac, can you describe what is lightbulb mains lead?
I appreciate your input 😁Patrick and Dennis has given all the advice you need.
Yes, as I should have pointed out, my advice of setting P1 and 2 to minimum was just iot check/confirm that in fact you may have a working amp. In other words, to see if it was possible to turn it on without the fuse blowing.
Now you need to try and adjust the amp, which is another process, as described by Patrick (Itsall) and Dennis.
Whether fets are fried or not you will soon find out when trying to bias the amp.
To point out the obvious: Your sinks are cold because you have yet to adjust P1 and 2
Thank you very much.Bermek,
The adjustment I suggested is the starting position. The P1/P2 pots aren't for 'fine adjustments'. They are there to set the operational parameters of the amp and you now have to adjust the pots gradually to bring up the bias current for proper operation.
The general idea is: (One channel at a time). Short the input, put one volt meter on a source resistor (0.47R) and another across the output of the amp channel. Adjust P1 and P2 in tandem gradually so you start seeing voltage across the source resistor, while at the same time keeping the dc offset low. The DC offset should be ideally zero but anything below 50mV should be acceptable; you should not have trouble doing better than that. The voltage across the source resistor gives a measurement of the bias current. The 'target' Iq is about 1.3A, so about 0.6V across the source resistors. Note this is with the amp fully warmed up and in thermal equilibrium. (i.e. lid on) I would suggest for now bringing things up slowing to no higher than 0.5V. Do things in half steps and let things stabilize after each set of adjustments.
These adjustments do not depend on whether a preamp will be used.
Edit: Please read carefully the first posts in this thread. Everything is there, but ask if things aren't clear.
Take this lightly as I am inexperienced but I had a similar problem when I built my F5. Biasing didn't work properly and I only heard line level volume from my speakers. It turned out that I had mistakenly installed the N and P power transistor opposite to how they should have been installed. Based on the schematic I was following, I was sure I had installed them correctly. Might be worth confirming the orientation with the more experienced builders.
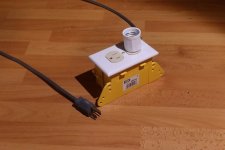
Dim Bulb Tester.And I have no variac, can you describe what is lightbulb mains lead?
Use for first power up. It is a current limiter in case you have a short circuit in your amplifier. If your amplifier passes the dim bulb test, you can then power up without the Dim Bulb Tester.
Here is some information on buillding one. My tester is similar in construction except I omitted the on-off switch.
How to: Dim Bulb Tester
Attachments
Last edited:
Thanks a lot. I had built and have been using the same setup Benmah, only except I was stupid to have forgotten to hook it up on my very first power up. Thats when the fuse went off. I will never start without it until all set up.
By the way what would be the ideal bulb wattage for this amp??
By the way what would be the ideal bulb wattage for this amp??
Thanks for the input. I am also a novice. But I checked the transistor placements and it looked correct. Besides, I was able to adjust the pots down to the levels where R5-R6 ohm readings could be lowered to 1-2 ohms. I am guessing that would not work as smooth if there were mistakes in parts installation. I may be wrong too.Take this lightly as I am inexperienced but I had a similar problem when I built my F5. Biasing didn't work properly and I only heard line level volume from my speakers. It turned out that I had mistakenly installed the N and P power transistor opposite to how they should have been installed. Based on the schematic I was following, I was sure I had installed them correctly. Might be worth confirming the orientation with the more experienced builders.
Phew... long thread.
One thing to note about the design of the thermistors placement, they are NOT UPS SAFE.
The shipping monkeys might, will, shake the amp and they might, will, somehow separate the thermistor from the heat sink / washer. All it takes is a 32nd of an inch and a simple visual inspection, mandatory when you receive a package from the shipping monkeys, won't catch it.
If you ship this amp, when you get it, make sure to open it up and push those thermistors back down.
Otherwise, you will power it up, let it warm up, and the house will start to smell funny. Bad funny. and there will be some burnt hardware in there, I guarantee it, from personal experience.
I wonder if there is a better way to fasten them so they won't be held down strictly by bending pressure.
^ It's a different attachment mechanism altogether, but I like these.
https://www.mouser.com/datasheet/2/427/ntcalug02a-1762595.pdf
https://www.mouser.com/datasheet/2/427/ntcalug02a-1762595.pdf
It can't hurt to do a visual check. The IRFP240 is the n-channel. The IRFP9240 (or 9141) is the p-channel. One of the wonderful things about most of these circuits is that they're pretty hard to break. You can go through all of what you've done, with the wrong parts in the wrong places and get the results you've seen. I haven't seen any measurements (or I missed them) to indicate otherwise...Besides, I was able to adjust the pots down to the levels where R5-R6 ohm readings could be lowered to 1-2 ohms. I am guessing that would not work as smooth if there were mistakes in parts installation. I may be wrong too.
The readings across R5 and R6 are not affected by the type of MOSFET. You're measuring the resistor in parallel with the two non-wiper terminals of the potentiometer. So, if you adjust the potentiometer to be very close to zero ohms across the two terminals, then the measured, combined parallel resistance will be close to zero. Anything in parallel with zero resistance will read as zero.
The reason for this is to start at the lowest practical bias current => not blow fuses => allow a slow and methodical setting of the desired bias current => keep the magic smoke contained.
After you've followed 6L6s post in #2087 please share your results. I look forward to hearing that you've got a wonderful sounding amplifier.

Last edited:
Well dear Allin. It seems like I will have to wait until I visit my friend’s shop in another city (who owns several DMMs), as I have only one dmmeter and a digital oscilloscope, and I doubt that the scope will be useful for this purpose. ☹️It can't hurt to do a visual check. The IRFP240 is the n-channel. The IRFP9240 (or 9141) is the p-channel. One of the wonderful things about most of these circuits is that they're pretty hard to break. You can go through all of what you've done, with the wrong parts in the wrong places and get the results you've seen. I haven't seen any measurements (or I missed them) to indicate otherwise...
The readings across R5 and R6 are not affected by the type of MOSFET. You're measuring the resistor in parallel with the two non-wiper terminals of the potentiometer. So, if you adjust the potentiometer to be very close to zero ohms across the two terminals, then the measured, combined parallel resistance will be close to zero. Anything in parallel with zero resistance will read as zero.
The reason for this is to start at the lowest practical bias current => not blow fuses => allow a slow and methodical setting of the desired bias current => keep the magic smoke contained.
After you've followed 6L6s post in #2087 please share your results. I look forward to hearing that you've got a wonderful sounding amplifier.
- Home
- Amplifiers
- Pass Labs
- An illustrated guide to building an F5