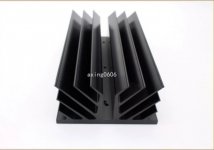
 (moderator comment) Let’s not insult the Chinese here. I’ve seen a lot of much thicker and prettier and probably more expensive extrusions from China. As members are mentioning, your heatsinks actually DO look a bit inadequate. Certainly I would be concerned that the back plate is much too thin to efficiently distribute heat longer distances. And given the number and dimensions of the fins, the heat would have to travel quite far to involve enough fins. One solution might have been to have wires to extend the transistors from the PCB to various shorter lengths of heatsink stacked right next to each other, like one at each corner of each PCB. Unfortunately your transistors are already mounted although it would certainly be possible to remove them. I know from painful experience!
 Guess it all comes to surface area, I'm confident it will work, it's not cheap China profiles

insulting chinese is an old 90's joke. i will choose this heatsink "made in china" due to it's massive size and cheap price (let's put away trade mark issue for a while)
https://m.aliexpress.com/i/32831420344.html
https://m.aliexpress.com/i/32831420344.html
Attachments
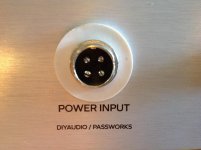
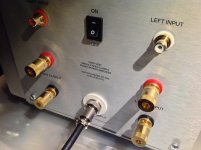
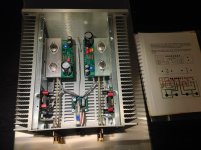
Made with and for Friend Xavier
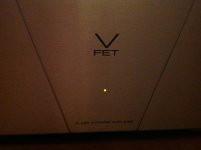
I guess Diyers are busy with the build of this new VFet SE amplifier Thanks to Mr. Pass & Team's
I guess Diyers are busy with the build of this new VFet SE amplifier
Thanks to Mr. Pass & Team'sAttachments
-
 7C4D1ACC-710C-4AD3-A243-F314A9410EBA.jpg523.1 KB · Views: 1,187
 -
 8B46B218-53C6-433C-872A-402C436E28D5.jpg449.4 KB · Views: 1,080
 -
 E89A3BC9-B73B-426A-B918-078C77025BA5.jpg456.6 KB · Views: 1,079
 -
 44285C0C-B533-4F88-9F0A-21E3B4126685.jpg535 KB · Views: 1,075
 -
 0BDCEF24-FB87-40E1-8160-9690FDAF5B3A.jpg472.7 KB · Views: 259


My take on Iron Pre/
View attachment 954617 View attachment 954618
View attachment 954619 View attachment 954621
More info and photos here
me likee
and - how it sounds?
Fantastic! Congratulations!
Thanks!
me likee
and - how it sounds?
At the moment I can only confirm that it plays music
Haven't done any serious listening yet.I have some strange issue with OLED display - sometimes after powering on it displays rubbish and I have to reset Arduino to make it behave correctly. Not sure whether it is hardware or software issue...
My take on Iron Pre/
View attachment 954617 View attachment 954618
View attachment 954619 View attachment 954621
More info and photos here
Beautiful work Qwertyl!
What brand RCA sockets are those? Love the look of the black flat head machine screws holding them.
Nash
I have some strange issue with OLED display - sometimes after powering on it displays rubbish and I have to reset Arduino to make it behave correctly. Not sure whether it is hardware or software issue...
Make sure you have defined the correct reset pin in your code.
It took me some time to realise this in my ESS9018S HiFiduino with OLED.
Beautiful work Qwertyl!
What brand RCA sockets are those? Love the look of the black flat head machine screws holding them.
Nash
Thanks
It is Neutrik:
NF2D-B-2 Neutrik | Mouser United Kingdom
NF2D-B-9 Neutrik | Mouser United Kingdom
Make sure you have defined the correct reset pin in your code.
It took me some time to realise this in my ESS9018S HiFiduino with OLED.
What do you mean? I don't think I have defined reset pin in my code at all...
My OLED has a reset pin. It needs to be connected to one of Arduino pins.
You have to make sure that when you initialise the display you pass the correct pin to the initialisation routine.
I have failed to do this initially. In that case the display behaves a bit randomly at startup (ie sometimes it manages to initialise properly sometimes not and then displays rubbish)
In my case (but you need to check syntax for your libs)
#define I2C_ADDRESS 0x3C
// Define proper RST_PIN if required.
#define RST_PIN 4
void setup() {
....
#if RST_PIN >= 0
display.begin(&Adafruit128x64, I2C_ADDRESS, RST_PIN);
#else // RST_PIN >= 0
display.begin(&Adafruit128x64, I2C_ADDRESS);
#endif // RST_PIN >= 0
....
}
By all means google a bit first. I remember having issues with that until trying the above. It might depend on your OLED but I would assume they are all pretty similar.
Which library do you use btw? I like big characters like on a LCD 20x4.
Thanks. I use this OLED: NHD-0420DZW-AB5 Newhaven Display | Mouser United Kingdom with serial interface.
I don't think that it has a reset pin. I downloaded OLED library from Newhaven Displays website.
I don't think that it has a reset pin. I downloaded OLED library from Newhaven Displays website.
- Home
- Amplifiers
- Pass Labs
- Pictures of your diy Pass amplifier