finally gave my ACA a slightly better home. I got the correct heatsinks from the store and drilled and tapped them then just needed a place to mount them.
Cleaning out the garage I found a chunk of oak and then added thinner panels to the front and back.
It still needs some filling and sanding though.
Very nice looking. Always someone in the crowd who can make things work in a different way. Keep it up.
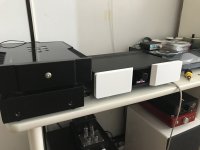
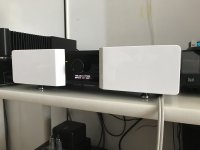
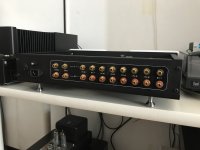
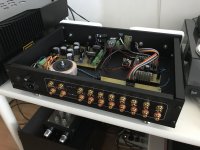
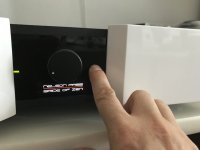
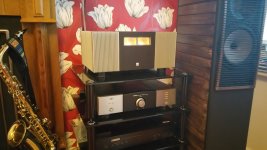
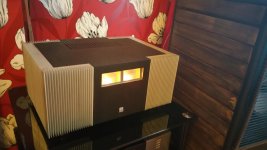
Hello, here picture of my new Bride of Zen by Nelson. Inside, outside, back, Switch-on a switch-off. At last, picture of the IR sensitive zone for change Input selection. My hand made touch screen !!! Green Led bar show you which of the eight input is active... Cheap and glamour.
Attachments


")
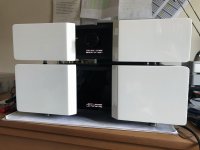

Hello, here picture of my new Bride of Zen by Nelson. Inside, outside, back, Switch-on a switch-off. At last, picture of the IR sensitive zone for change Input selection. My hand made touch screen !!! Green Led bar show you which of the eight input is active... Cheap and glamour.
Very nice! How did you make the white "Nelson pass Bride of Zen" and the red/orange stripe? OLED?
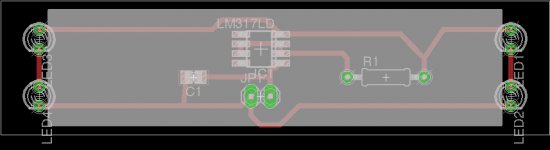
Hi, NELSON PASS text is the result of a backlight rear a printer film for serigraphy. NO LCD, NO OLED, none of this... is more simple.
4 white led + courrent driver (LM317) for connect it in any voltage source (from 7 to 28 v).
It's easier to do than to explain...
Cheap and HQ.
Bye!
4 white led + courrent driver (LM317) for connect it in any voltage source (from 7 to 28 v).
It's easier to do than to explain...
Cheap and HQ.
Bye!
Attachments
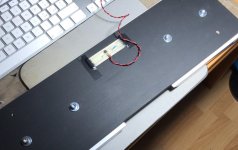
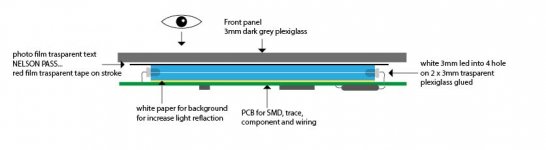
No, it is not necessary to have 2 x 3 mm (non gap between - they are glued together), I simply did not find the 6 mm plexiglass. Normally it is 5 mm. After you have to drill 4 holes (3 mm) and 5 mm of plexiglass are few. I suggest making the upper surface matt with a light sandpaper (800 or more grain) for best diffuse light.
- Home
- Amplifiers
- Pass Labs
- Pictures of your diy Pass amplifier