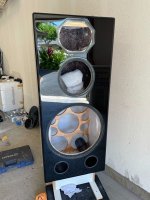
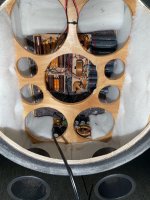
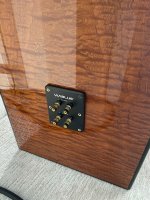
I had originally planned on using Medex for the front baffle, as it will be painted black. But the cabinet shop has started using this new 3/4” material for high gloss painted cabinet doors. The core is similar to Medex but has paint ready liner on one side and a typical laminate stabilizing liner on the other. This product saves a lot of effort of multiple coats of high build primer to prep for paint. Plus better results.
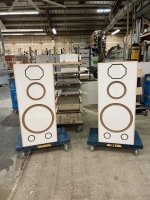
After a couple test panels the final front baffle was cut out on the CNC. I used a test panel to precut the driver and port openings in the inner cabinet face, then using the same method and material glued on the final front panel. There is about 1/16” of material left at all the cutouts so that I can razor knife them out later. This helps when spraying paint and makes it easier to keep the sanding block flat.
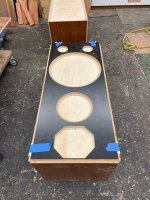
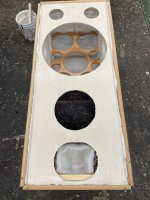
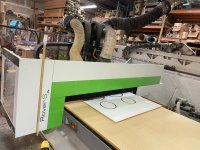
After a couple test panels the final front baffle was cut out on the CNC. I used a test panel to precut the driver and port openings in the inner cabinet face, then using the same method and material glued on the final front panel. There is about 1/16” of material left at all the cutouts so that I can razor knife them out later. This helps when spraying paint and makes it easier to keep the sanding block flat.


Last edited:
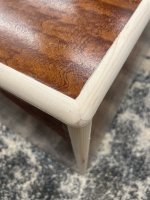
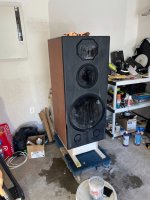
All the corners are Maple. I milled up 5/8” x 5/8” maple and mitered all the corners. They are all glued and taped into place with Tight Bond wood glue.
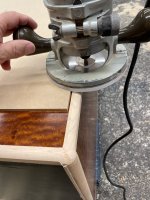
That’s where I ended the day today. Next week I will uses a flush bit and trim the Maple flush to the cabinet face. Then I will use a 1/2” round over bit to radius all the corners.
Then onto painting.
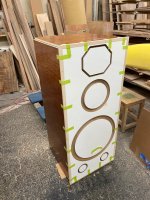
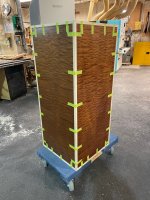
That’s where I ended the day today. Next week I will uses a flush bit and trim the Maple flush to the cabinet face. Then I will use a 1/2” round over bit to radius all the corners.
Then onto painting.


Last edited:
Hi
i can see you place the driver on line,,,,it can influence on the frequency curve,,
TG have the 10" and The horn out of line from the 18"
but anyhow,,,it looks so fine the new Cabinet
Best Bjarne
Yes, Im a symmetrical kind of person. With the narrower baffle the change is slight.
It’s taking me forever to complete these. I’m on my 6th round of sanding and sanding sealer. The grain on this wood is deep.
Just ordered the PA 2500 R and the MP 2500 R T+A Receiver and Player. Should all come together in about 4 weeks.
Very nice finish you've gotten started on, the maple looks sweet. You'll be painting the corners you routered?
BTW, that's a giant workshop. Is it out by Kalihi or Sand Island?
The Maple corners and the front baffle will be painted with an automotive base coat of black, then the whole cabinet will get 2 coats of automotive clear coat.
But first I have to fill all the grain with sanding sealer. Lot of work.
The cabinet shop is in the Ward area, if your familiar with Honolulu.
So after 7 rounds of sanding sealer and sanding (one round almost every Saturday) today was the day to shoot the color and then clear coat. I’m 90% happy with the results. Still have to wet sand the clear coat and polish with a buffer.
Was a lot of masking around all the radius corners. Have 2 medium heavy coats of clear, a little over a half a gallon used.
If it color sands good I’m done, otherwise I might need to spray another couple of coats of clear.
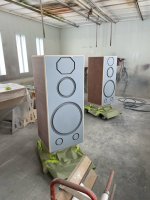
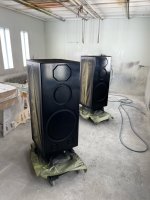
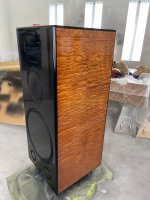
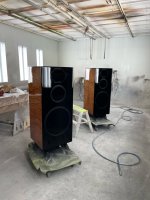
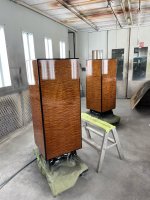
Was a lot of masking around all the radius corners. Have 2 medium heavy coats of clear, a little over a half a gallon used.
If it color sands good I’m done, otherwise I might need to spray another couple of coats of clear.


Last edited:
Marvellous!!
Thanks for the compliment!
This version is beautiful...
Appreciate the comment!
Wet sanded a few test spots today to verify enough thickness throughout, all good.
I’ll take them home now and wet sand/polish them in the garage.
Thanks much! It took me a few weeks to find this veneer. It took 2 sheets, 4’ x 10’.
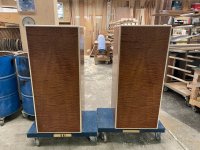
The back panels of each speaker are 99% identical. For the sides and the top the grain runs up one side, across the top and down the other side continuous from the same sheet.
Since both sheets were book matched, I installed the veneer so that when the speakers are finally placed the two inside veneers are matched. This, no matter which speaker is on the left or the right.
So after 7 rounds of sanding sealer and sanding (one round almost every Saturday) today was the day to shoot the color and then clear coat. I’m 90% happy with the results. Still have to wet sand the clear coat and polish with a buffer.
Was a lot of masking around all the radius corners. Have 2 medium heavy coats of clear, a little over a half a gallon used.
If it color sands good I’m done, otherwise I might need to spray another couple of coats of clear.
View attachment 945892
View attachment 945893
View attachment 945894
View attachment 945895
View attachment 945896
Excellent job! Looks great
- Home
- Loudspeakers
- Multi-Way
- Big Speaker Project, 18” + 10” + CD/horn, super tweeter
