I hope it is okay that I'm starting a new thread as the design stage of the project originally scoped out in this thread:
https://www.diyaudio.com/forums/multi-way/327628-mw16p-4-vs-mw16p-8-tw29r-vs-sb29rdc-c000-4-a.html
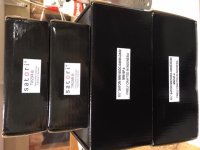
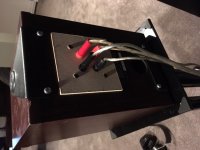
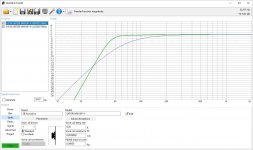
As the title suggests I am ready to start this project. The drivers have been received (pictured). I broke open a cheap pair of two-way speakers to connect in biamp configuration (pictured) and started playing with the miniDSP. Very cool.
Any comments, criticisms, or advice on the way forward will be graciously accepted!
Firstly, here are the results of some guideline checks that others have suggested. It is my understanding that these rules can be broken within reason and/or with good reason:
ka=2 (beaming) rule for midrange/midwoofer - circumference of the midrange cone divided by wavelength of crossover frequency shall not exceed 2.
- 1774 Hz
lobing rule - center-to-center distance between tweeter and midrange shall not exceed the wavelength of the crossover frequency
- center-to-center distance 157mm, crossover wavelength 193mm @ 1774 Hz
power handling rule - at the tweeter's resonant frequency (Fs), the crossover slope is at least -18dB down
- tweeter Fs = 600 Hz
- first order 18 dB down @ 222 Hz, second order @ 443 Hz, third order @ 887 Hz
distortion rule - make sure neither the tweeter nor the midrange is pushed to play with excessive distortion
- can't go too low with the tweeter due to quickly rising distortion below about 2 kHz
time alignment - align electronically and/or mechanically near the crossover frequency
- data published by SBA for TW29R/MW16P - 61 us or 21mm
baffle step - accommodate the baffle step by coordinating the baffle effect and filter/DSP algorithm
- -3 dB down at 489 Hz for 9.5" wide baffle
lobing - TBD
https://www.diyaudio.com/forums/multi-way/327628-mw16p-4-vs-mw16p-8-tw29r-vs-sb29rdc-c000-4-a.html
As the title suggests I am ready to start this project. The drivers have been received (pictured). I broke open a cheap pair of two-way speakers to connect in biamp configuration (pictured) and started playing with the miniDSP. Very cool.
Any comments, criticisms, or advice on the way forward will be graciously accepted!
Firstly, here are the results of some guideline checks that others have suggested. It is my understanding that these rules can be broken within reason and/or with good reason:
ka=2 (beaming) rule for midrange/midwoofer - circumference of the midrange cone divided by wavelength of crossover frequency shall not exceed 2.
- 1774 Hz
lobing rule - center-to-center distance between tweeter and midrange shall not exceed the wavelength of the crossover frequency
- center-to-center distance 157mm, crossover wavelength 193mm @ 1774 Hz
power handling rule - at the tweeter's resonant frequency (Fs), the crossover slope is at least -18dB down
- tweeter Fs = 600 Hz
- first order 18 dB down @ 222 Hz, second order @ 443 Hz, third order @ 887 Hz
distortion rule - make sure neither the tweeter nor the midrange is pushed to play with excessive distortion
- can't go too low with the tweeter due to quickly rising distortion below about 2 kHz
time alignment - align electronically and/or mechanically near the crossover frequency
- data published by SBA for TW29R/MW16P - 61 us or 21mm
baffle step - accommodate the baffle step by coordinating the baffle effect and filter/DSP algorithm
- -3 dB down at 489 Hz for 9.5" wide baffle
lobing - TBD
Attachments
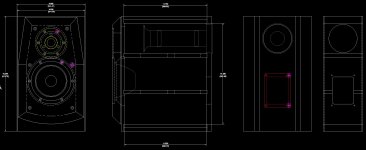
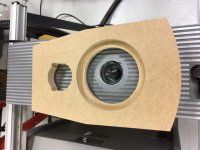
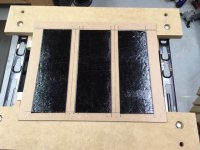
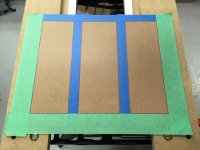
Here are sketches of the front baffle and enclosure. Net volume is approximately 17.5 litres. I plan to experiment with both vented and closed box configurations.
Attachments
Last edited:
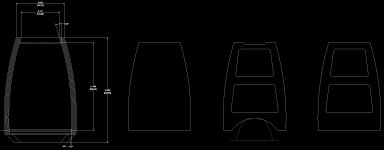
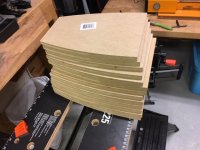
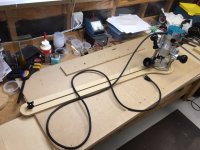
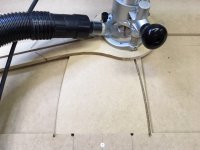
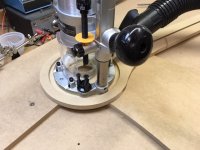
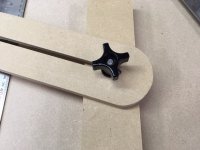
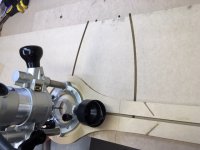
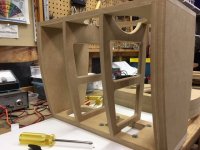
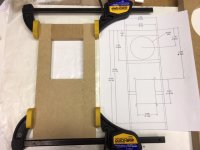
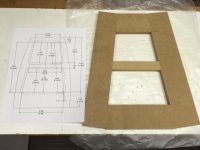
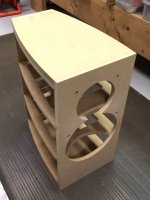
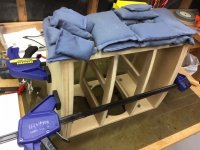
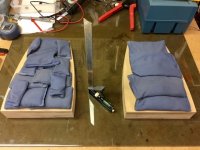
I started cutting wood! I made a larger double-ended jig to cut the shapes that form the top, bottom and internal ribs.
Attachments
What DSP are you going to use?
miniDSP 2X4 HD

Awesome work.
Thanks but you are not seeing how long it takes me to do this!
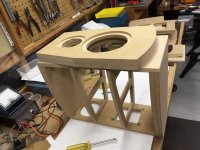
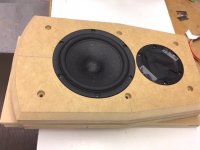
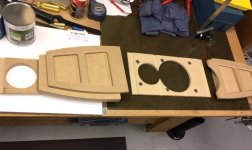
") . I still have a few things to do before I can start putting it together including mounting holes/fasteners for the drivers.
. I still have a few things to do before I can start putting it together including mounting holes/fasteners for the drivers.You've already used some build techniques that are interesting. I saw on your other thread that you used a similar box shape on the practise ones. Is that just thinner MDF clamped into a curve on the sides?
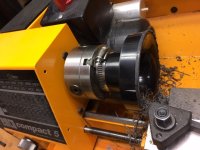
Yes, exactly. 1/8" thick (about 3mm). It will bend easily over the near 36" (914mm) radius.
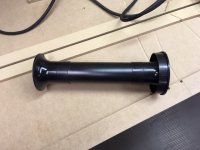
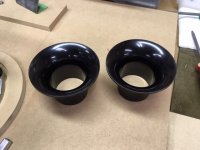
I also turned off part of the external vent tube flange and will use it on the inside. I think the internal flare without the mounting flange will look better on the outside.
Attachments
Interesting project.
When it comes to the testing and setup I've got soooo much to learn...
Thanks but you are not seeing how long it takes me to do this!
Yes, exactly. 1/8" thick (about 3mm). It will bend easily over the near 36" (914mm) radius.
I also turned off part of the external vent tube flange and will use it on the inside. I think the internal flare without the mounting flange will look better on the outside.
Hah. I can definitely relate. I'm in the middle of my first speaker build (kairos) and it has been a slow road.
Hah. I can definitely relate. I'm in the middle of my first speaker build (kairos) and it has been a slow road.
Wow. You might have less experience than me! The Kairos uses the 8 Ohm midwoofer, otherwise the drivers are the same.
Are you building the enclosure from scratch?
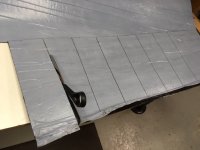
I finally started to glue the enclosures together. I purchased some heavy/lossy material for structural damping of the sides. It seems to be tar-based and is like thick underlayment for roofing. It is self-adhesive but doesn't stick well to the MDF so I decided to use spray contact adhesive. And since it looked like it would be very difficult to install after assembly, I decided to affix it to the inner lamination in advance.
Attachments
The loudspeakers have been fully assembled for a few weeks now and I have been playing with the active crossover/DSP. I have enjoyed the design/build and initial listening process so far!
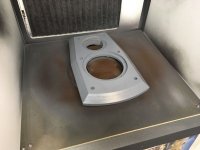
The enclosure was finished using "Black Ash" VVIVID covering. The front baffle was finished using Rustoleum 2X primer, colour, and clear coat (satin).
I'm going to start more serious testing/alignment and have a bit (a lot?) of learning to do on this. First I'll remove the mid woofers and break them in before measuring the T/S parameters. Then I think I'll need to measure what is happening with the speaker in the enclosure without damping material - mainly measuring the impedance vs. frequency for sealed and ported alignments. I haven't thought a lot about this yet and I think I need to make a list of steps in a logical sequence.
Descending into a rabbit hole...
Since I have enjoyed building this project so far and think there may be some benefit in doing so, I am considering building a base for this bookshelf sized speaker to make a 3-way active system at some point. The crossover to the subs could then be perhaps 60 Hz rather than the current 80 Hz. And if I go with a closed box alignment for this bookshelf, the LF 'bridge' to the subwoofers will be even more necessary. Experimentation in this particular listening room suggest LF percussion dynamics will be notably better with the main stereo pair operating to the lower frequency.
The miniDSP will do the high-pass for the bookshelf for this arrangement but what about the low pass for the new LF channels? Do I just parallel the line level connection to another miniDSP? Are there other reasonably priced options?
And another thought. Could I (should I?) make this LF add-on a 1-1/2 way? I could use 2 - 8" drivers with a passive low-pass crossover for one of the drivers. Would this be difficult? This gets into a whole new area (passive crossover design) that I am not familiar with.
The enclosure was finished using "Black Ash" VVIVID covering. The front baffle was finished using Rustoleum 2X primer, colour, and clear coat (satin).
I'm going to start more serious testing/alignment and have a bit (a lot?
) of learning to do on this. First I'll remove the mid woofers and break them in before measuring the T/S parameters. Then I think I'll need to measure what is happening with the speaker in the enclosure without damping material - mainly measuring the impedance vs. frequency for sealed and ported alignments. I haven't thought a lot about this yet and I think I need to make a list of steps in a logical sequence.Descending into a rabbit hole...
Since I have enjoyed building this project so far and think there may be some benefit in doing so, I am considering building a base for this bookshelf sized speaker to make a 3-way active system at some point. The crossover to the subs could then be perhaps 60 Hz rather than the current 80 Hz. And if I go with a closed box alignment for this bookshelf, the LF 'bridge' to the subwoofers will be even more necessary. Experimentation in this particular listening room suggest LF percussion dynamics will be notably better with the main stereo pair operating to the lower frequency.
The miniDSP will do the high-pass for the bookshelf for this arrangement but what about the low pass for the new LF channels? Do I just parallel the line level connection to another miniDSP? Are there other reasonably priced options?
And another thought. Could I (should I?) make this LF add-on a 1-1/2 way? I could use 2 - 8" drivers with a passive low-pass crossover for one of the drivers. Would this be difficult? This gets into a whole new area (passive crossover design) that I am not familiar with.
Attachments

- Status
- This old topic is closed. If you want to reopen this topic, contact a moderator using the "Report Post" button.
- Home
- Loudspeakers
- Multi-Way
- Active Bookshelf with SBA MW16P-4 & TW29R