Hi Everyone,
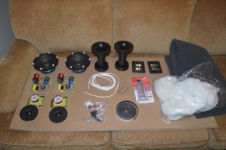
I'm a long-time lurker, and decided to jump into the game with a build of some Zaph Audio SR71s. As a novice level woodworking/electronics DIYer, I thought it's a fairly simple way to get into it, and figured I can handle everything... but expect will hit some bumps in the road.. Will post pics and questions as I go, and am hoping you guys can steer me from bone-headed mistakes. Thanks in advance for any help you can offer!
Bobby C (ID: fodorfolde)
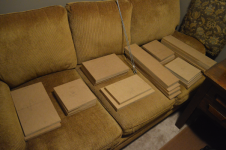
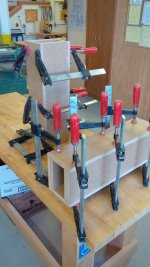
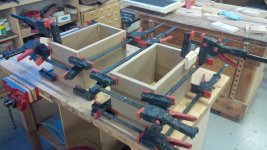
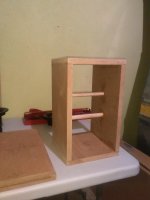
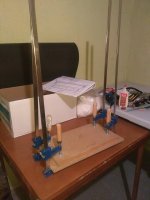
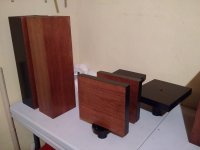
Gluing speaker boxes together.
I disregarded Grade 11 woodworking teacher's teachings and went with biscuits and dowels. Simply didn't have access to tools to do a decent rabbet joing and figured it wouldn't matter in the long run. Someone tell me if I was wrong (for the next build.
I disregarded Grade 11 woodworking teacher's teachings and went with biscuits and dowels. Simply didn't have access to tools to do a decent rabbet joing and figured it wouldn't matter in the long run. Someone tell me if I was wrong (for the next build.
Attachments
")
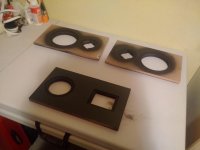
OK, first questions. While putting together a $5 circle jig for the router (so I can cut out holes for the two drivers and the plastic cone on back panel) I realized I don't have have a blueprint for the back panel.
Question 1: does it matter where the port tube/cone opening is set on the back panel? Same thing for the quick connect cup box. I can email John K but considering how much time he's put into this stuff, I hate to bother him with such a question. Can't find a schematic for the back panel, no matter where I look.
Question 1: does it matter where the port tube/cone opening is set on the back panel? Same thing for the quick connect cup box. I can email John K but considering how much time he's put into this stuff, I hate to bother him with such a question. Can't find a schematic for the back panel, no matter where I look.
Last edited:
Look here: http://www.zaphaudio.com/SR71.pdf
The port is more or less at tweeter height, you should only make sure it doesn't stay in the way of the dowels. The same is for the terminals, place the crossover boards where you want them to be and then decide where to place the terminals. Here you can see a photo of the rear: http://www.zaphaudio.com/SR71-back.jpg
Ralf
I disregarded Grade 11 woodworking teacher's teachings and went with biscuits and dowels. Simply didn't have access to tools to do a decent rabbet joing and figured it wouldn't matter in the long run. Someone tell me if I was wrong (for the next build.
Totally fine. MDF can be joined with only glue & clamps if you want. Very straight clean cuts required of course. Mine have held up for years.
Totally fine. MDF can be joined with only glue & clamps if you want. Very straight clean cuts required of course. Mine have held up for years.
Cool! A couple of years of high school woodshop = some common sense, but can't remember the details. It's not like the speakers will be moved/bashed around much... but again, I appreciate your reassurance. Cheers!
I just want to add that unless you are building a ML-TL enclosure, the position of a reflex tube is irrelevant. So apply standard procedure: clear path from woofer to tube, and internal opening at least 5-7 cm from the walls, both conditions should be satisfied if you put it behind the tweeter.I was hoping it wasn't an EXACT measurement, but very much appreciate someone nudging me out of indecision.
Ralf

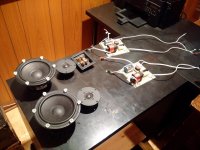
Crossover schematics... huh?
Hi All... This one REALLY has me confused. I am handy with a soldering iron, and can follow instructions as well as the next noob but I'm stumped.
Here is a picture for listing how to wire the crossovers, and a picture of the slightly different setup they sent. Two boards instead of one.
(I emailed Madisound for help, but it's been over a year an don't know if they'll get back to me. They were great before when I had a question, but...)
Attachments
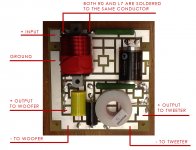
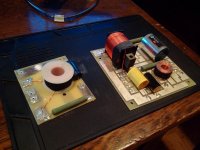

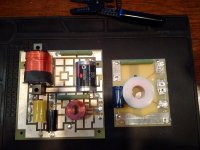
It looks as if you have an additional LCR network which usually can be used to compensate for the impedance midrange peaking, and why you have received it, is unknown to me. Perhaps a mistake, or a gift from a friend. Try to find information whether Zaph provided an upgrade in that sense. You could simulate this whole circuit to see what it does. Don't worry, the other board appears right, just double check its wiring and you are good.
Have a look here: Zaph|Audio - ZA-SR71
Zaph provided also an optional impedance flattening circuit, it seems you have received it.
Ralf
Zaph provided also an optional impedance flattening circuit, it seems you have received it.
Ralf
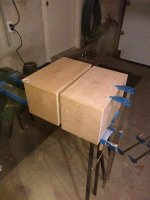
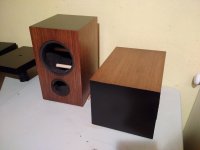
Final Build
So, after a hiccup over how to wire the extra cross-over circuit, I got back to it. Final cabinet /stand build took a ton of time (as expected), and the imperfections in the veneering are battle-scars. Only hitch in then entire build came when I was set to round over the front panels as the designer (Zaph) intended.
Couldn't find a proper bit, and with time running out... I simply ploughed ahead without the round over. Zaph would likely roll his eyes, but I'll be thrilled to get these done. I hope to get in a retro-fix when I have time, and actually look forward to hearing the difference...
So, with just the final assembly left tomorrow, wanted to thank they guys that offered advice and encouragement. Cheers!
Attachments
- Status
- This old topic is closed. If you want to reopen this topic, contact a moderator using the "Report Post" button.
- Home
- Loudspeakers
- Multi-Way
- Zaph Audio SR71 Build: Qs as we go