I fitted some pellegrene waveguides to my tweeters last night (scanspeak-peerless d2608-913000). There was a bit more to it than I'd realised and the tweeters seem very fragile, so I wanted to check I've done this right:
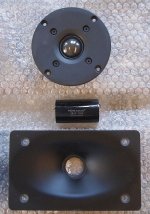
It 'seemed' simple enough, the waveguide, tweeter and (as its an active speaker) a 33uf protection capacitor. (The cap was chosen to give a protective passive crossover point approx 2 octaves below the active 4th order XO I intend to use, but at around 600Hz its below the tweeters Fs so perhaps something of a compromise)

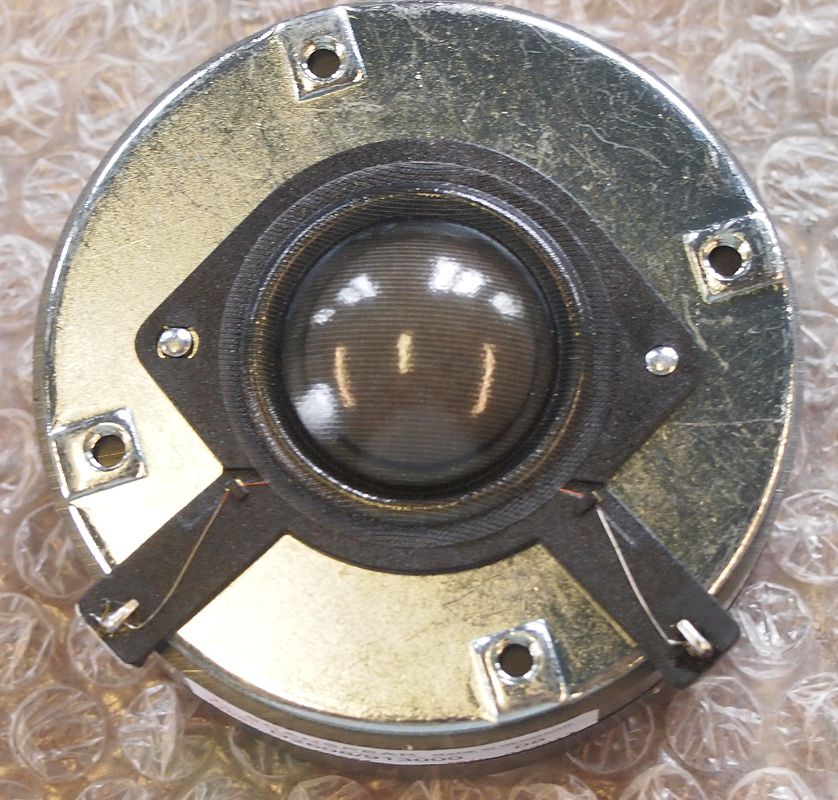
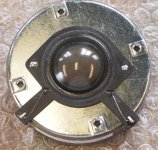
The waveguide has holes that match the holes in the tweeter body, rather than the unoccupied holes in its faceplate. I gather therefore that its normal to remove the factory fitted plate first:
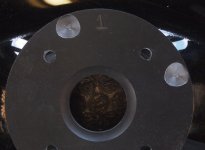
I hadn't expected the (incredibly fragile looking) black plastic/dome/voicecoil assembly to be completely loose underneath, so that caused a heart-stopping moment, but all seemed well.
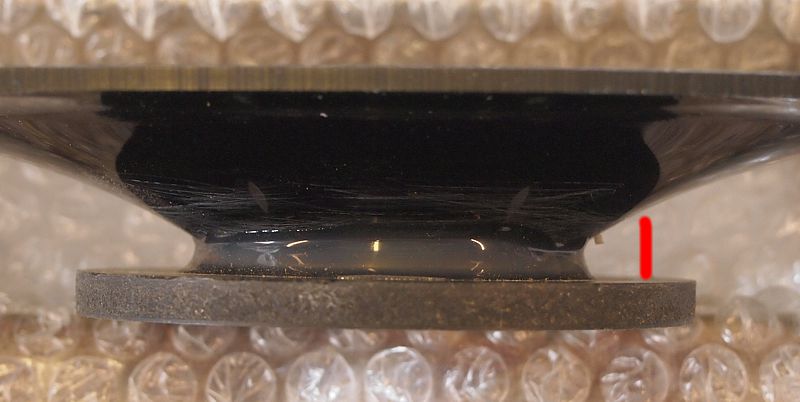
Then the first little challenge. There wasn't the height between the fixing plate and waveguide profile to get long enough screws in (illustrated by the red line):
So I made some studs by sawing down some M4 bolts, such that they could come through the waveguide mounting plate from the other direction

I found it helped not to tighten them down in the tweeter before lowering on the waveguide, leaving them slightly loose allowed some slight movement to line up with the guide's holes.
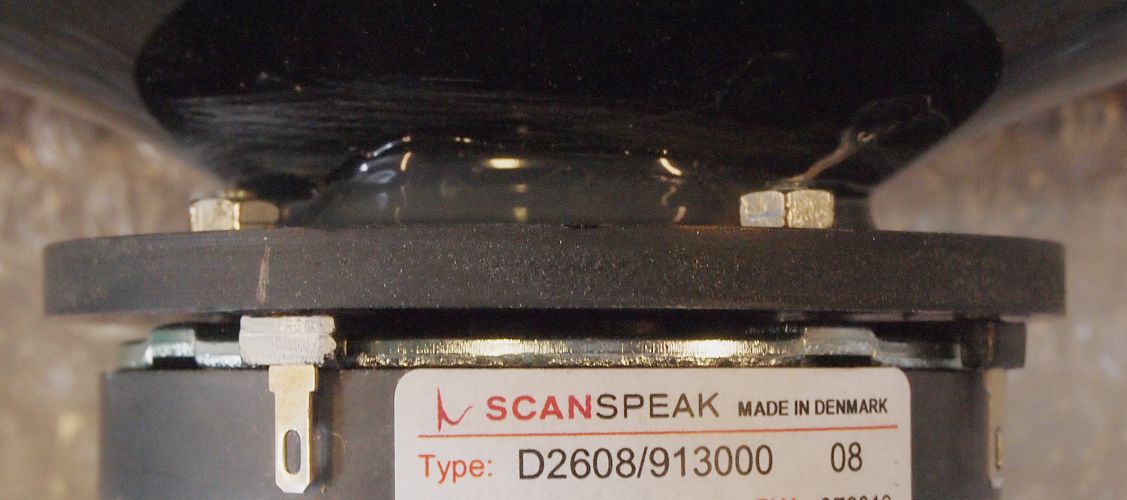
The next little issue was that the top of the tweeter's connection lugs are raised above the rest of the plastic insert. I got the camera angle a bit too low, they're somewhat more prominent than they appear in the picture. When tightening down the waveguide mounting plate this caused the plastic to bend, with the connection lugs being forced in to touch the magnet. I couldn't see if the voice coil part of the plastic was also distorted - I'd imagine probably not due to the clamping force, but either way it didn't seem ideal.

So i used a large drill bit to make two small recesses in the waveguide plate to accommodate the raised bits

The plastic of the mounting plate looks to be clear beneath its black coating.
This is the guide fitted into the tweeter
The waveguide mounting plate clamps the tweeter's voice-coil assembly against the tweeter chassis, which I guess is good. The tweeter's chassis immediately around the threaded mounting holes is punched upwards, the manufacturer's faceplate (which was contoured) also appeared to sit on these when screwed down tightly, whereas the waveguide's mounting plate doesn't quite - it rests on the voice coil assembly alone. I think this may be OK though it would mean perhaps it could be over-tightened so I had to guess how tight to make it.
So no big deal, just slightly more complex than I'd imagined which makes me wonder if I did it right. Does this seem okay?
Thanks,
Kev
It 'seemed' simple enough, the waveguide, tweeter and (as its an active speaker) a 33uf protection capacitor. (The cap was chosen to give a protective passive crossover point approx 2 octaves below the active 4th order XO I intend to use, but at around 600Hz its below the tweeters Fs so perhaps something of a compromise)
The waveguide has holes that match the holes in the tweeter body, rather than the unoccupied holes in its faceplate. I gather therefore that its normal to remove the factory fitted plate first:
I hadn't expected the (incredibly fragile looking) black plastic/dome/voicecoil assembly to be completely loose underneath, so that caused a heart-stopping moment, but all seemed well.
Then the first little challenge. There wasn't the height between the fixing plate and waveguide profile to get long enough screws in (illustrated by the red line):
So I made some studs by sawing down some M4 bolts, such that they could come through the waveguide mounting plate from the other direction
I found it helped not to tighten them down in the tweeter before lowering on the waveguide, leaving them slightly loose allowed some slight movement to line up with the guide's holes.
The next little issue was that the top of the tweeter's connection lugs are raised above the rest of the plastic insert. I got the camera angle a bit too low, they're somewhat more prominent than they appear in the picture. When tightening down the waveguide mounting plate this caused the plastic to bend, with the connection lugs being forced in to touch the magnet. I couldn't see if the voice coil part of the plastic was also distorted - I'd imagine probably not due to the clamping force, but either way it didn't seem ideal.
So i used a large drill bit to make two small recesses in the waveguide plate to accommodate the raised bits
The plastic of the mounting plate looks to be clear beneath its black coating.
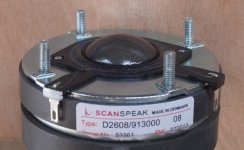
This is the guide fitted into the tweeter
The waveguide mounting plate clamps the tweeter's voice-coil assembly against the tweeter chassis, which I guess is good. The tweeter's chassis immediately around the threaded mounting holes is punched upwards, the manufacturer's faceplate (which was contoured) also appeared to sit on these when screwed down tightly, whereas the waveguide's mounting plate doesn't quite - it rests on the voice coil assembly alone. I think this may be OK though it would mean perhaps it could be over-tightened so I had to guess how tight to make it.
So no big deal, just slightly more complex than I'd imagined which makes me wonder if I did it right. Does this seem okay?
Thanks,
Kev
Attachments
-
 02b_tweeter.JPG112.2 KB · Views: 914
 -
 03_tweeter_nofaceplate.JPG175.9 KB · Views: 647
 -
 04_no_bolt_clearance.JPG84.4 KB · Views: 606
 -
 05_studs.JPG165.2 KB · Views: 681
 -
 06_protrooding_tags.JPG104.9 KB · Views: 620
 -
 07_recesses_drilled.JPG138.5 KB · Views: 608
 -
 08_waveguide_assembled.JPG119 KB · Views: 622
Last edited:
Yeah, I'm having issues with the plastic flexing/vibrating so you're spot on there (I've another thread on that, which has resulted in me ordering some acrylic to strengthen it). This thread was just to check if I fitted it right, so far no-one has said otherwise so i guess its reasonable.
In terms of size and response though, its fine for my immediate requirements - I wasn't looking for a large horn, just a modest guide. Were I to do this again with more time then I agree it would be fun to make my own. I wouldn't need to find a friend; wood turning, casting and fibreglass work are no problem for me. For now though its only one small part of a larger active 3-way build; I'm sure there'll be a MKII later, with more time to spend on individual aspects.
Cheers
Kev
Last edited:
- Status
- This old topic is closed. If you want to reopen this topic, contact a moderator using the "Report Post" button.