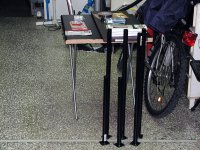
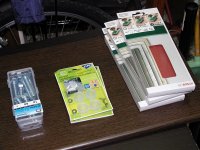
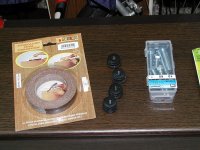
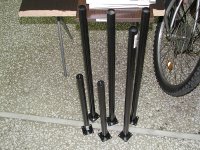
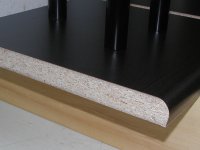
I am up to test my skills as carpenter once more time, the kitchen bench wood cost me 15EUR and I was lucky finding it as single piece in a woods supply warehouse. The four large kitchen feet pipes I found them for free, even so I had to visit Praktiker so to buy few more of them and additional bits that I will need so to finish this project. Spend 55EUR so far, but the true cost of the materials is 80EUR at the store. It is an expensive experiment but I think that I am going to Win ! ")
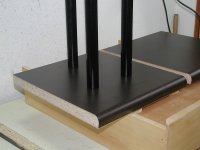
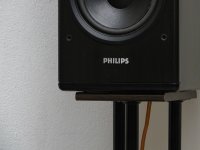
The all idea is to come close to Philips FV815 stand but with three pipes instead of using wood.
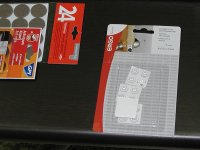
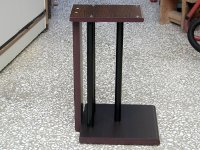
The top base would be invisible under the speaker, I got two new 50cm long kitchen feet, and I will cut the other four larger ones at that size too.
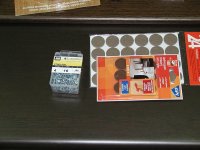
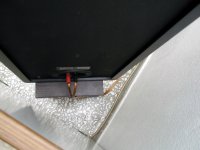
Soft-Gell feet will be at the top plate, acting as isolation.
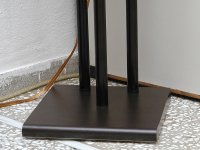
Harder - Gell feet (not plastic) will be placed at the bottom plate instead of spikes.
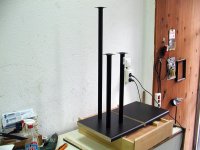
Definably it will be in the end, a simple good looking, and modernized speaker stand.
Total height estimation 57cm that makes it an totally low risk one
Speaker weight 13 Kilos.
.
.
.
The all idea is to come close to Philips FV815 stand but with three pipes instead of using wood.
The top base would be invisible under the speaker, I got two new 50cm long kitchen feet, and I will cut the other four larger ones at that size too.
Soft-Gell feet will be at the top plate, acting as isolation.
Harder - Gell feet (not plastic) will be placed at the bottom plate instead of spikes.
Definably it will be in the end, a simple good looking, and modernized speaker stand.
Total height estimation 57cm that makes it an totally low risk one
Speaker weight 13 Kilos.
.
.
.
Attachments
-
 Speaker-stand_1.jpg355.4 KB · Views: 391
 -
 Speaker-stand_10.jpg249.2 KB · Views: 127
 -
 Speaker-stand_9.jpg248.4 KB · Views: 116
 -
 Speaker-stand_8.jpg285.6 KB · Views: 82
 -
 Speaker-stand_7.jpg235.5 KB · Views: 74
 -
 Speaker-stand_6.jpg277.7 KB · Views: 87
 -
 Speaker-stand_5.jpg300.1 KB · Views: 360
 -
 Speaker-stand_4.jpg310.8 KB · Views: 369
 -
 Speaker-stand_3.jpg335.7 KB · Views: 377
 -
 Speaker-stand_2.jpg372.3 KB · Views: 393
Last edited:
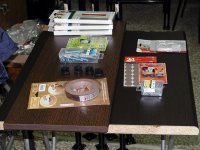
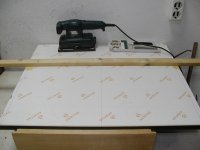
Finally after one hour of careful planing I am ready to start cutting tomorrow.
I am using an old wooden drawer as base this would offer mechanical support in both edges, therefore I do not need a second person to hold the wood.
I did screw over the wood another wooden guide, straight lines with warranty.
Marked down all my cutting lines, and I did use masking tape over the good side of the wood so to avoid chipping.
I did everything by the book, it is 1:00am here, therefore in the new day I will continue my work.
Attachments
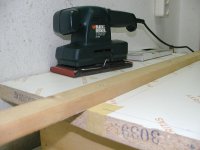
Update from the battle zone.
No matter how good cutting disc you have and even the by use of tape there is no chance to avoid sanding with No 80 grid sandpaper for a spotless finish.
To be continued ..
No matter how good cutting disc you have and even the by use of tape there is no chance to avoid sanding with No 80 grid sandpaper for a spotless finish.
To be continued ..
Attachments
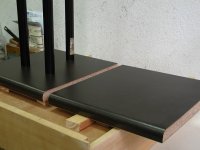
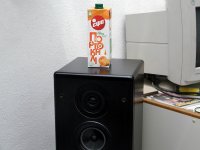
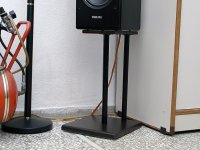
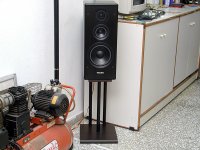
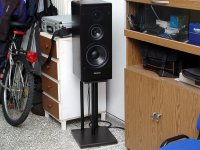
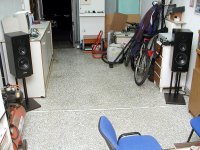
End of the journey !
It is incredible how the bass frequencies spread in the room with the new stands, I never though that it would be such a difference to the better.
Party time with soft drinks
It is incredible how the bass frequencies spread in the room with the new stands, I never though that it would be such a difference to the better.
Party time with soft drinks
Attachments
-
 Speaker-stand_27.jpg211.7 KB · Views: 62
 -
 Speaker-stand_26.jpg185.2 KB · Views: 63
 -
 Speaker-stand_25.jpg235.7 KB · Views: 66
 -
 Speaker-stand_24.jpg182.7 KB · Views: 88
 -
 Speaker-stand_23.jpg257 KB · Views: 93
 -
 Speaker-stand_22.jpg284.3 KB · Views: 96
 -
 Speaker-stand_21.jpg288.6 KB · Views: 86
 -
 Speaker-stand_20.jpg363.1 KB · Views: 72
Yes they came out trully sweet looking, but I came up with an after thought that is to conect the too plates with a pole from the same wood as the bottom one.
Nothing fancy just a 53 x 12 x 3 cm, bolt on at the back, which would add even more stability and will help also as cables management solution. ( I am working on it right now )
Nothing fancy just a 53 x 12 x 3 cm, bolt on at the back, which would add even more stability and will help also as cables management solution.
( I am working on it right now )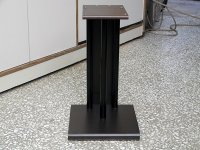
- Status
- This old topic is closed. If you want to reopen this topic, contact a moderator using the "Report Post" button.
- Home
- Loudspeakers
- Multi-Way
- DIY speakers stand (with Professional look)