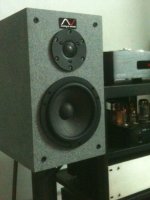
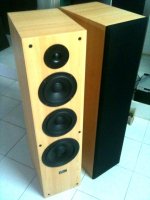
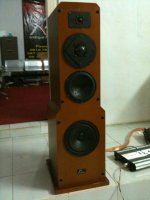
I just wanna share with you my new speakers. I use the sub with my previous speakers but now is used only for movies. the diy speakers have seas excell drivers and are made of polyester resign. The sub have one 12'' audax driver.
i have seen these done before was a very complex build where are your build pics??
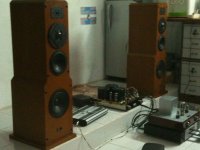
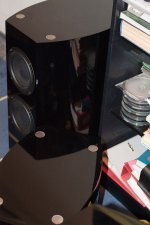
my system
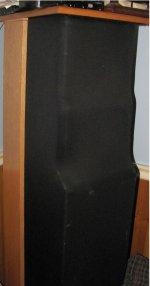
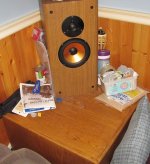
ok first post lets hope this works with attachment sorry bout the bad pics but it a bit of a mess right now
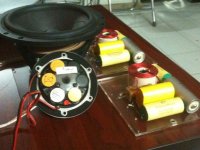
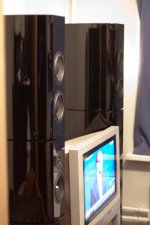
towers have 8 and 9 inch dynaudio drivers, 6.5 inch audux aero, 1 inch vifa tweeter and 3/4 inch seas rear firing supertweeter
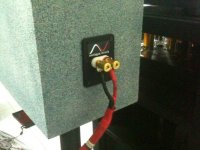
it is a vented bass reflex cabinet for the subs and separate tops for mids and tweets with removable crossover on back
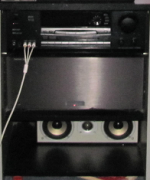
i us my onkyo reciever as a preamp to harmon kardon signature 2.1 to drive all speakers center channel shown is a crap pickup just until i get around to building one
sourrounds are zetag 6.5 inch with vifa tweeters each sits on subwoofer which are dual 15 inch klipsh in isobaric config with ported bass reflex cab internal passive crossovers driven by a beefy yorkville dj amp of approx 3000 watts
mainly only use the towers but hook up the rest for movies
let me know what you think
ps i had alot of help with this but i like the sound very tight bass although the room is small so it gets a bit muddy at high volumes
ok first post lets hope this works with attachment sorry bout the bad pics but it a bit of a mess right now
towers have 8 and 9 inch dynaudio drivers, 6.5 inch audux aero, 1 inch vifa tweeter and 3/4 inch seas rear firing supertweeter
it is a vented bass reflex cabinet for the subs and separate tops for mids and tweets with removable crossover on back
i us my onkyo reciever as a preamp to harmon kardon signature 2.1 to drive all speakers center channel shown is a crap pickup just until i get around to building one
sourrounds are zetag 6.5 inch with vifa tweeters each sits on subwoofer which are dual 15 inch klipsh in isobaric config with ported bass reflex cab internal passive crossovers driven by a beefy yorkville dj amp of approx 3000 watts
mainly only use the towers but hook up the rest for movies
let me know what you think
ps i had alot of help with this but i like the sound very tight bass although the room is small so it gets a bit muddy at high volumes
Attachments
hello,
here is a link with some pictures of those speakers. http://www.diyaudio.com/forums/multi-way/189710-my-new-diy-speakers-project.html Iceage your setup must have a very good and low bass. I had used Audax aerogel speakers as midrange before with very good results. I did not have a opportunity to use dynaudio drivers but as i know they are very good sounding too.
here is a link with some pictures of those speakers. http://www.diyaudio.com/forums/multi-way/189710-my-new-diy-speakers-project.html Iceage your setup must have a very good and low bass. I had used Audax aerogel speakers as midrange before with very good results. I did not have a opportunity to use dynaudio drivers but as i know they are very good sounding too.
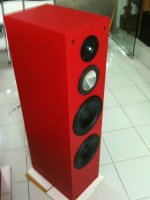
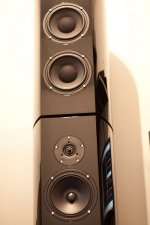
My Klang&Ton Twister Thiel
Hello,
my new projekt ist just finished. From German DIY Speaker magazin 04/2010 I have build the "Twister" projekt with Thiel Speaker.
They sound really great !
Br.
Klaus
Hello,
my new projekt ist just finished. From German DIY Speaker magazin 04/2010 I have build the "Twister" projekt with Thiel Speaker.
They sound really great !
Br.
Klaus
Attachments


Hi..
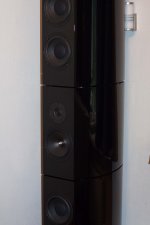
Just sharing some speakers me and boys from Analogue Miracle (custom speaker builder in Jakarta) have made recently.
Bookshelf 2-way AM SS Illuminator
Tweeter: Scanspeak D3004/664000 Illuminator, Pure Beryllium Diaphragm
Woofer: Scanspeak 18WU/4741T00 Illuminator
.. and more speakers coming..
Just sharing some speakers me and boys from Analogue Miracle (custom speaker builder in Jakarta) have made recently.
Bookshelf 2-way AM SS Illuminator
Tweeter: Scanspeak D3004/664000 Illuminator, Pure Beryllium Diaphragm
Woofer: Scanspeak 18WU/4741T00 Illuminator
.. and more speakers coming..
Attachments
Just finished these last week after 7 long months of working on them when I could. Clearwave 4TSE - product page here.
Documentation HERE.


Techtalk build thread
Htguide build thread
CLD Forum build thread
Documentation HERE.
Techtalk build thread
Htguide build thread
CLD Forum build thread
All DIY
GM70 "MPW" 6sn7 => 6h30 => 300b => gm70
Pre: DHP 4p1ł
DIY Avalon Opus Ceramique
CD: CD Transport cdpro2 Dac: na CS4397 i multiple feedback filter
GM70 "MPW" 6sn7 => 6h30 => 300b => gm70
An externally hosted image should be here but it was not working when we last tested it.
Pre: DHP 4p1ł
An externally hosted image should be here but it was not working when we last tested it.
DIY Avalon Opus Ceramique
An externally hosted image should be here but it was not working when we last tested it.
CD: CD Transport cdpro2 Dac: na CS4397 i multiple feedback filter
An externally hosted image should be here but it was not working when we last tested it.
An externally hosted image should be here but it was not working when we last tested it.
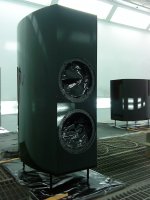
Finally the speakers got some color! So gorgeous now ")
The small fostex speaker has also got some modifications as new damp- material and it's amount that fill the volume. But also a drilled several small holes on the backside for lower the inner pressure... must say it did the job! Now the speaker sounds much cleaner and more "easy listening".
An externally hosted image should be here but it was not working when we last tested it.
The small fostex speaker has also got some modifications as new damp- material and it's amount that fill the volume. But also a drilled several small holes on the backside for lower the inner pressure... must say it did the job! Now the speaker sounds much cleaner and more "easy listening".
Finally the speakers got some color! So gorgeous now
...
Lovely!
Congratulations!
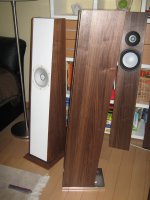
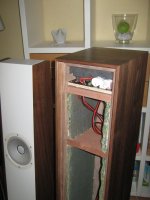
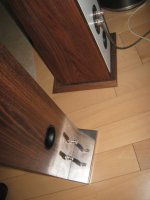
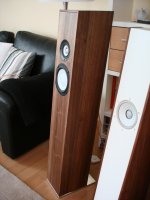
My first DIY loudspeakers
My first DIY loudspeakers
My first DIY loudspeakers
Attachments
I really like what you have done.
How did you angle the edge of the baffle to continue to curve of the side panel?
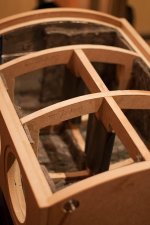
I see in the carcass picture the front baffle edge is square to the front, but in the final speaker it matches the curve of the side panel - how did you do that? (just tying to pick up some construction tips from someone who clearly know what they're doing!)
How did you angle the edge of the baffle to continue to curve of the side panel?
I see in the carcass picture the front baffle edge is square to the front, but in the final speaker it matches the curve of the side panel - how did you do that? (just tying to pick up some construction tips from someone who clearly know what they're doing!)
I really like what you have done.
How did you angle the edge of the baffle to continue to curve of the side panel?
I see in the carcass picture the front baffle edge is square to the front, but in the final speaker it matches the curve of the side panel - how did you do that? (just tying to pick up some construction tips from someone who clearly know what they're doing!)
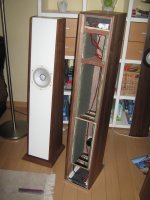
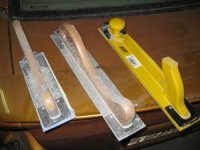
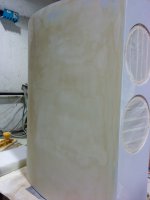
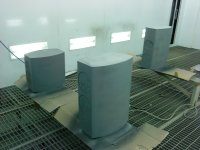
In the first step I was prepared drawings of speaker enclousers in AutoCad software. And you are absolutely rigth to bi noticed, I did build speaker enclousers with square corners of front and rear panels. The reason is that this way easy for assembly of enclousers.
When all enclousers have been completely assembled, I did the following operations:
1) marked the line (on left and rigth sides of baflle) according the dimension from the drawing,
2) cut the angle with electric jigsaw leaving a margin from a line in 1-1,5mm.
3) polished by hand (it is easy to control of angel then if you will use electro tools) with tool on the picture,
4) than we need to cover speakers enclousers using Primer Surfacer (i use Primer Surfacer EPII form Sikkens) and 2K Pastic Primer (i use Sikkens 2K Primer Rapid)
5) and after drying operation, sealed the seams using Glas and Soft tapes of putty (i use Car System).
Attachments


- Home
- Loudspeakers
- Multi-Way
- System Pictures & Description