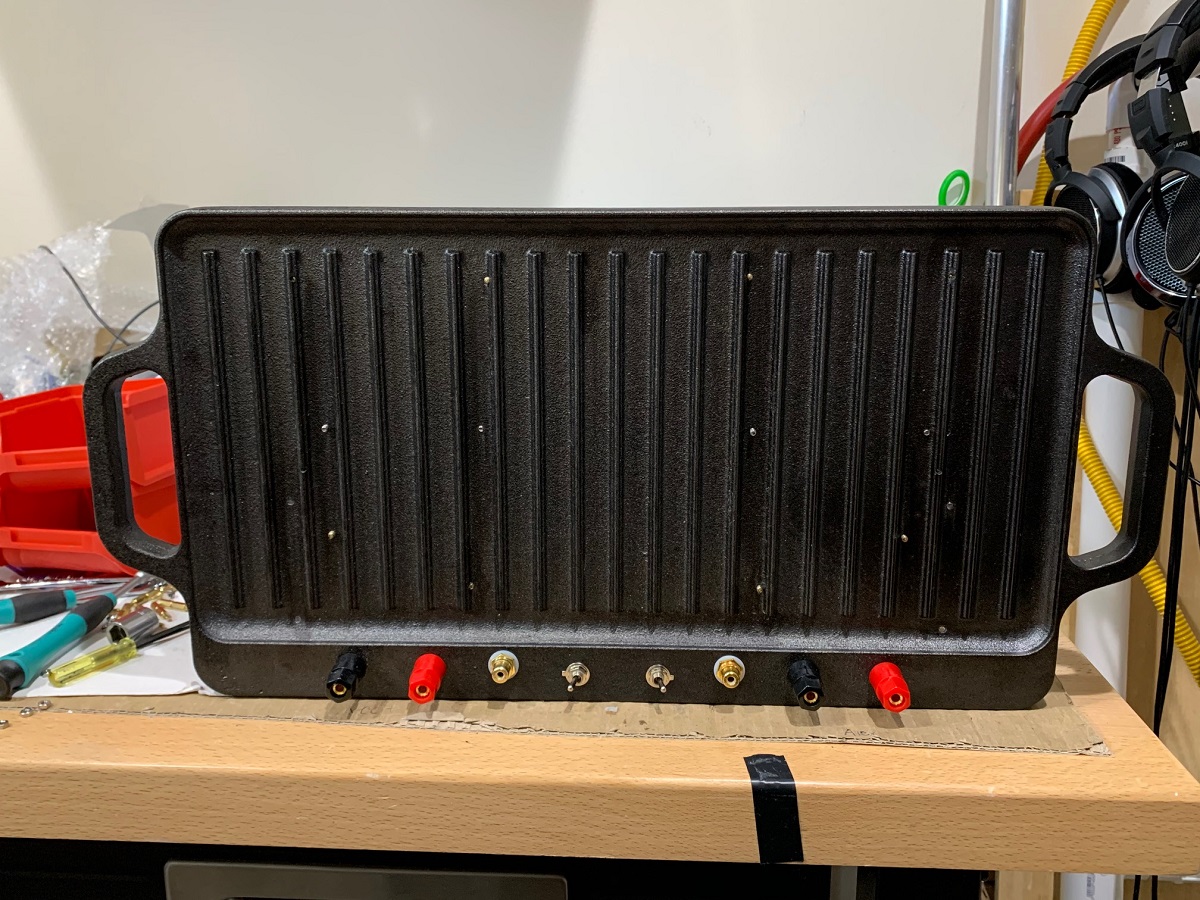
The debut of the Griddle Amp is with the FH9HVX, and it is appropriate as this is a budget build. This is a $10 cast iron griddle from Walmart and it works like a champ.
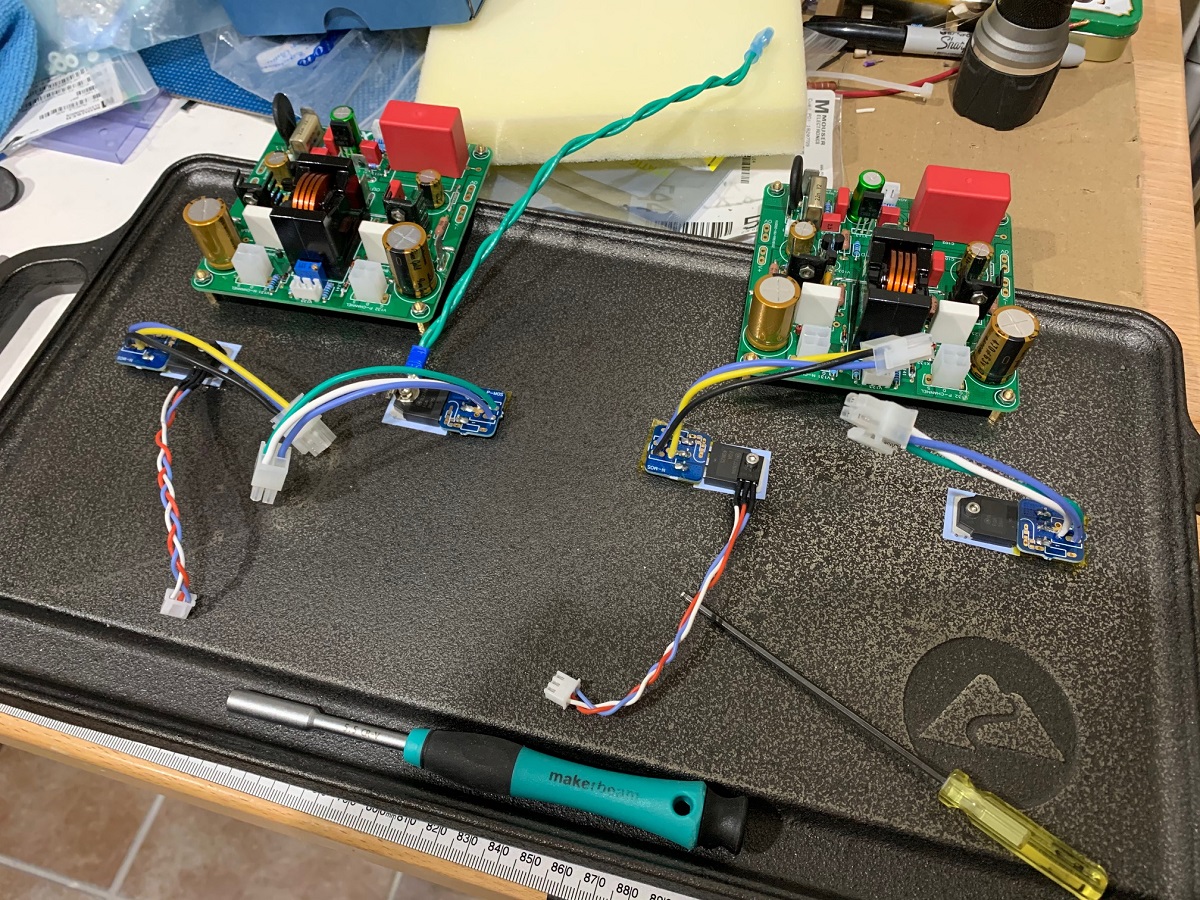
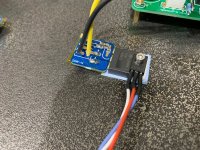
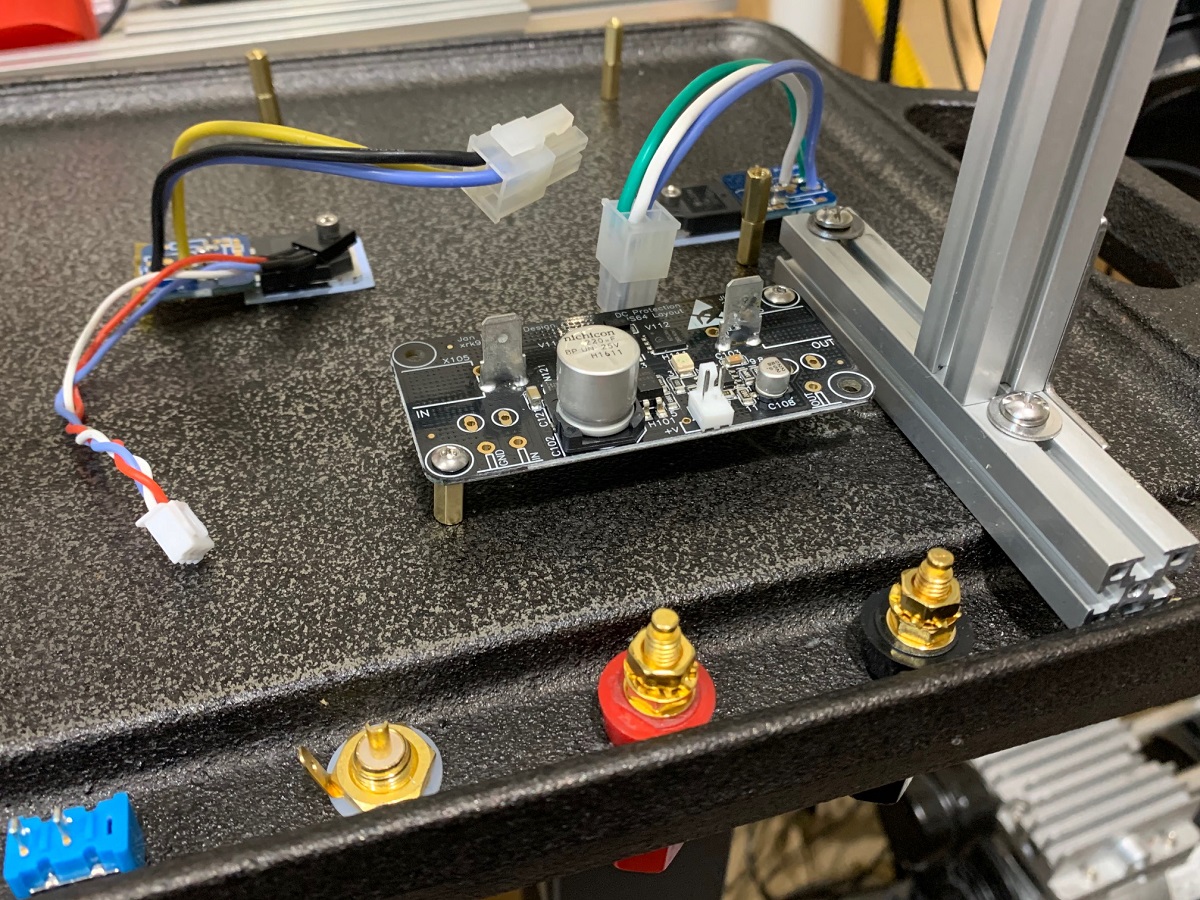
Here I am installing the MOSFETs:
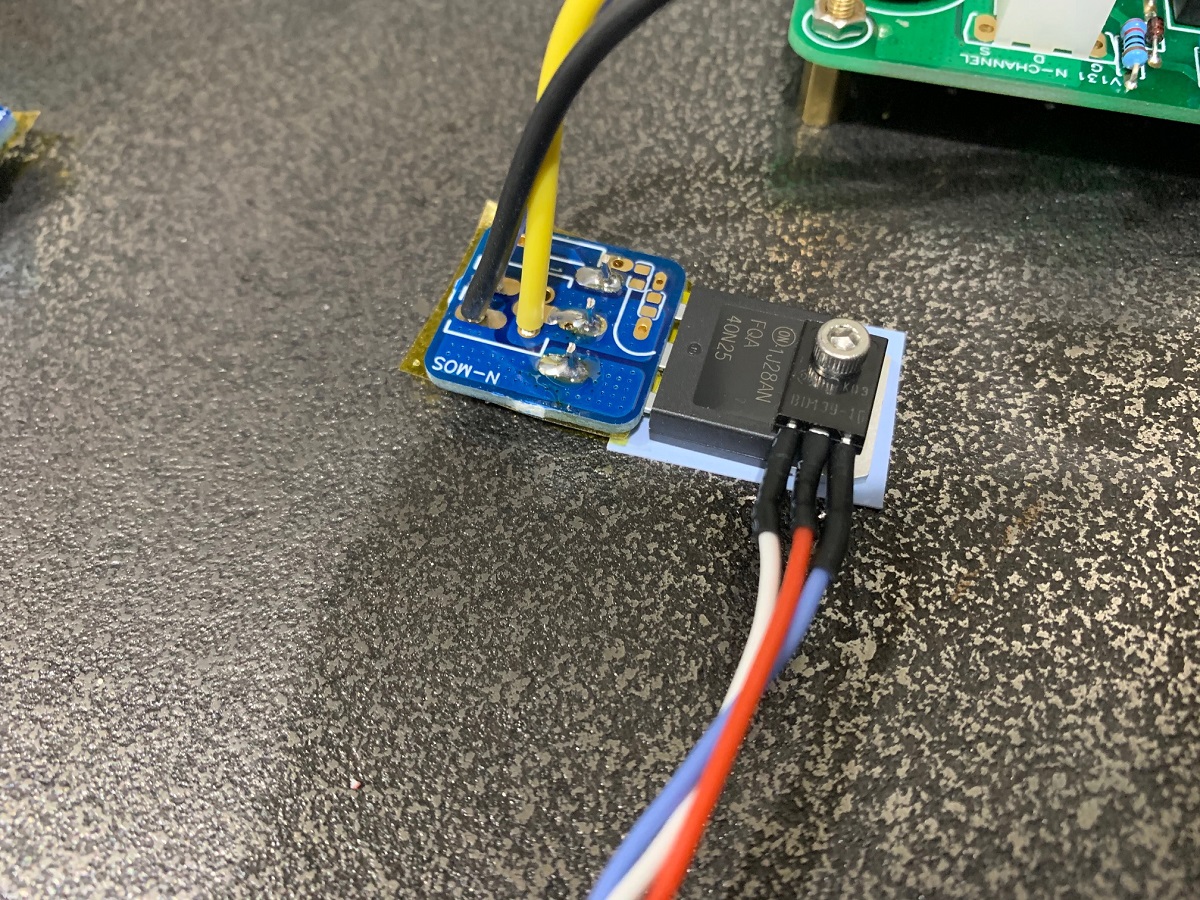
Closeup of the N-channel with the BD139 Vbe multiplier temp sensor:
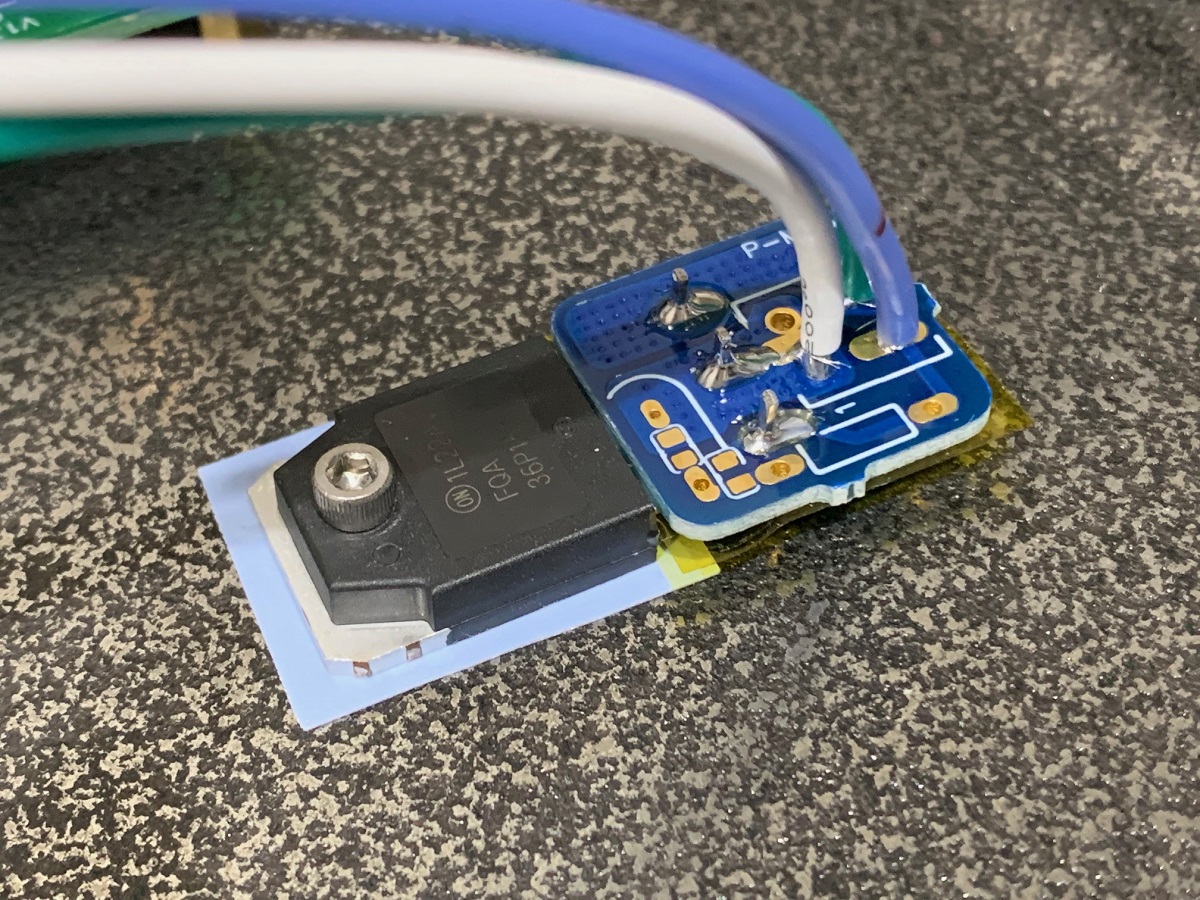
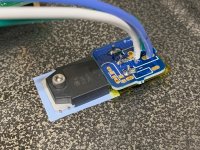
Closeup of the P-channel:
Notice that the installation of the MOSFETs is a separate and much easier operation all by itself rather than having to drill holes exactly with PCB mounted underhung MOSFETS.
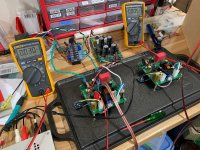
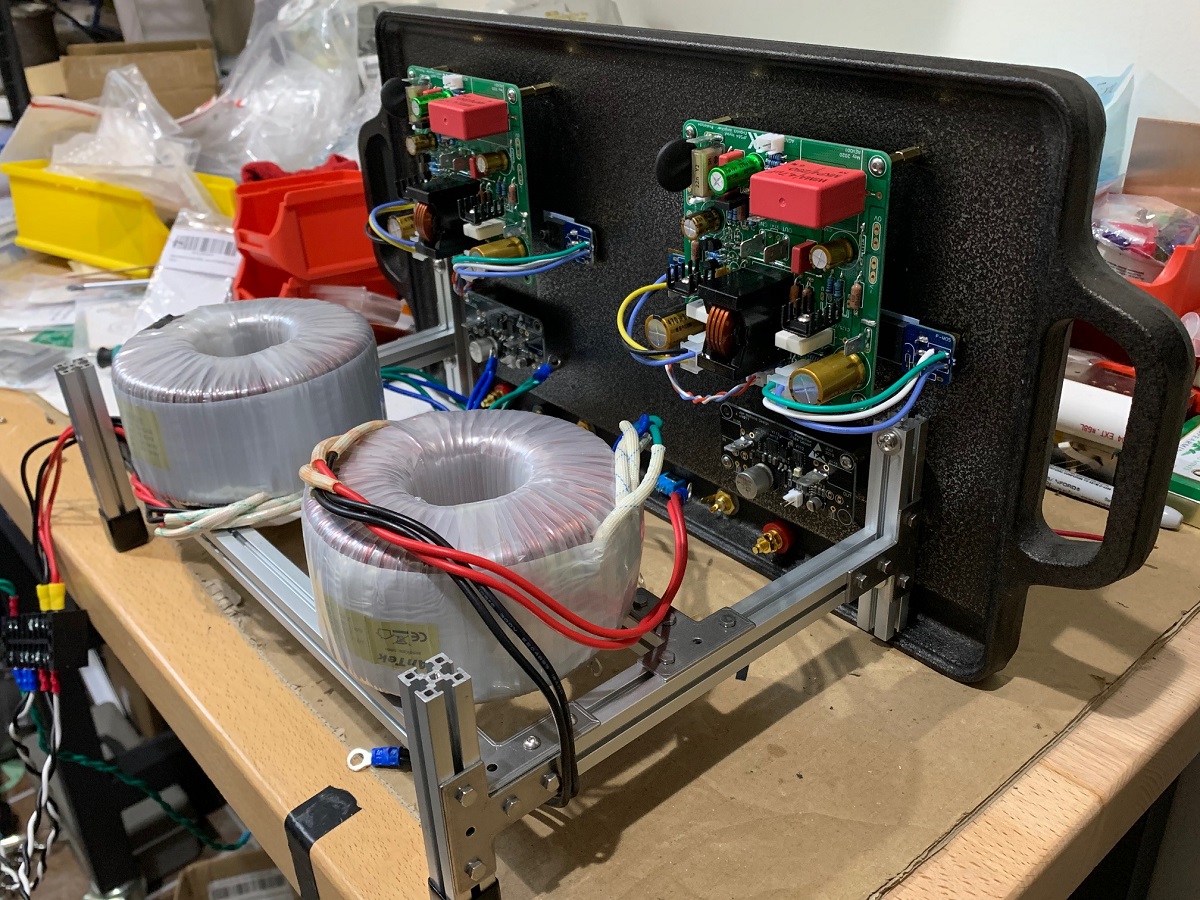
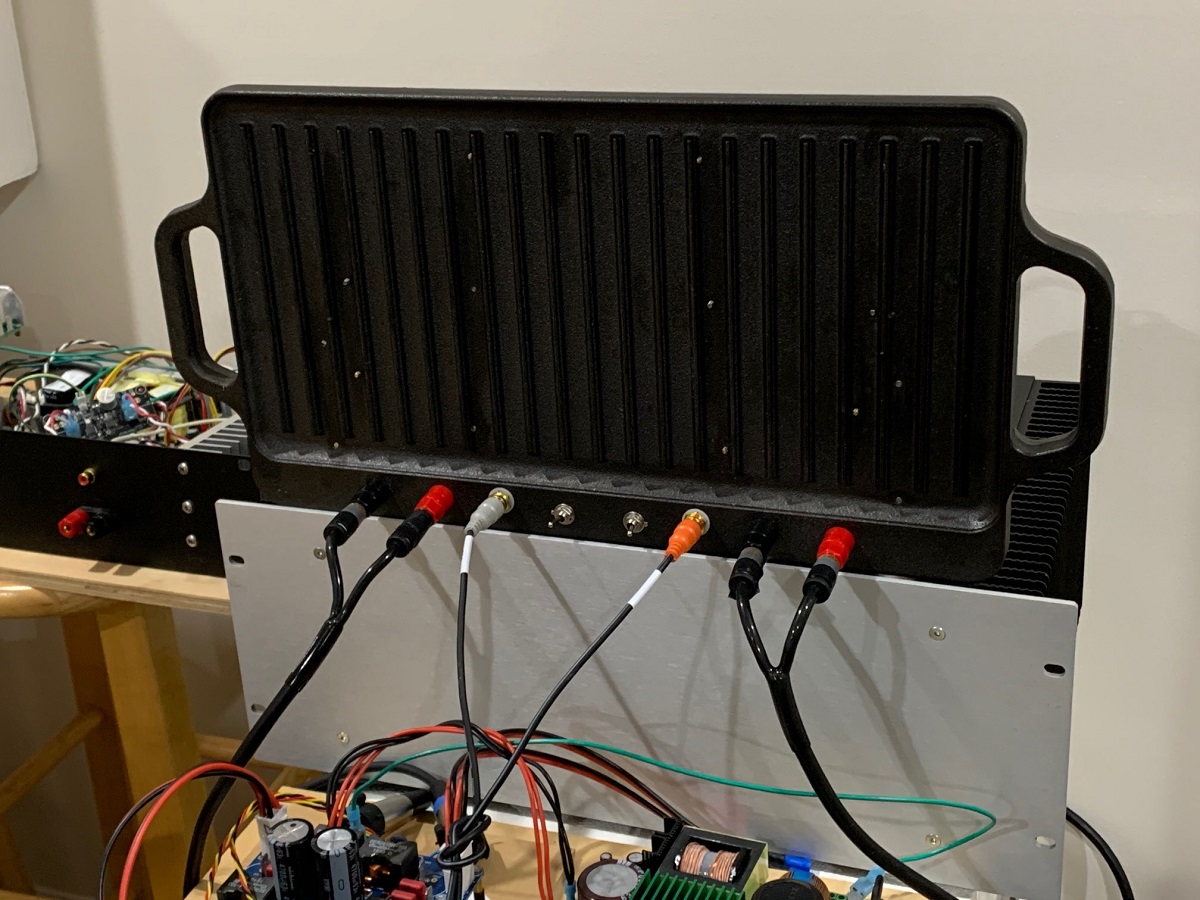
Here is a photo of the FH9HVX Griddle Amp on the bench being tested. I am using my new PTT6.5 and RS28F in WG300 waveguide speaker as the inaugaral test speaker:
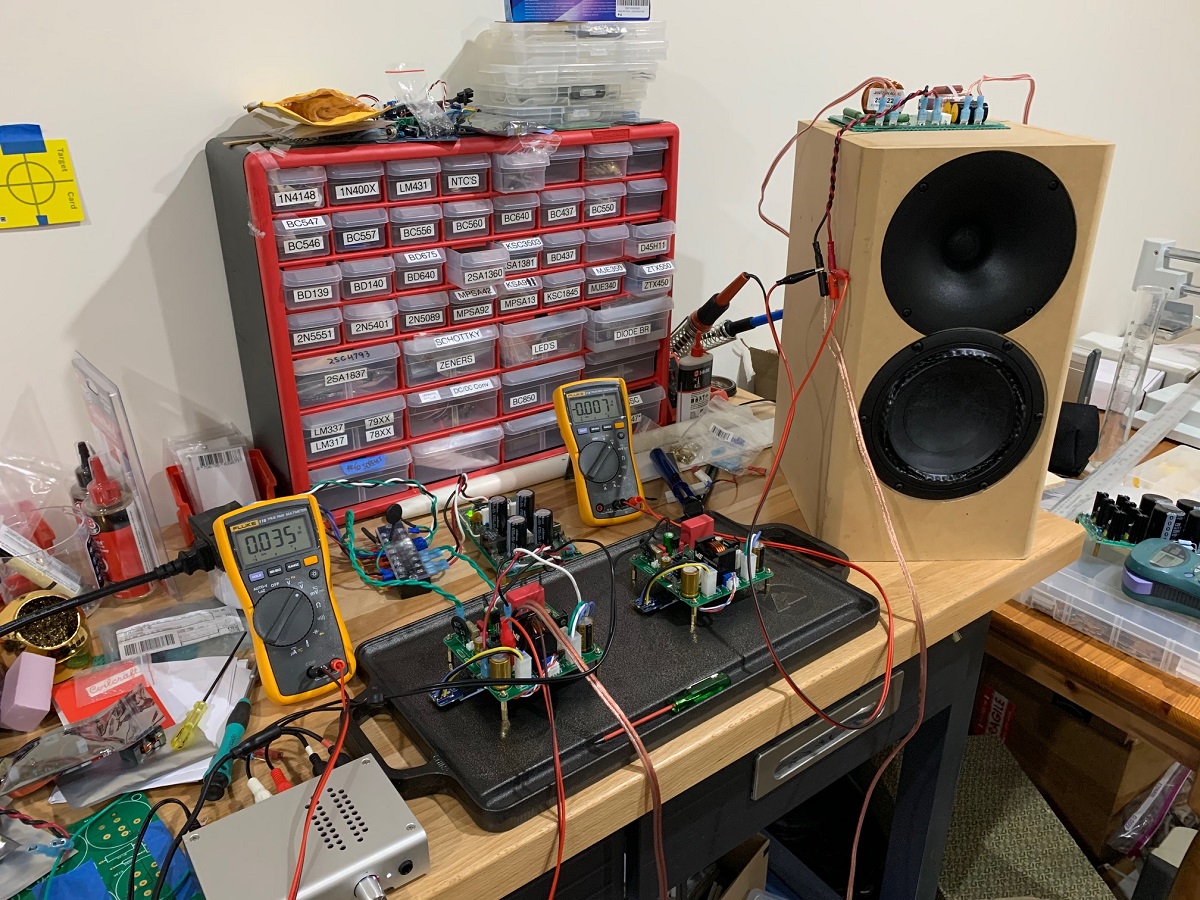
Here is a closer look at the single amp at a time test using a +/-35v CRC PSU (the very first one I made 6 years ago). I am running about 150mA bias current and the DC offset has been a stable 7mV since I powered it up, has not moved, The bias currrent is stable. Playing music at normal volume, the heatsink is 39C near the MOSFET and barely warm 5 inches away. The cast iron is not as conductive as aluminum so there seems to be more temp variations along the griddle. The MOSFET body temp is 52C:

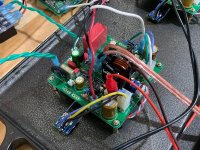
Here is a closeup of the amp under test:

How does it sound? Super - nothing to fault. With a 4x 4700uF CRC PSU, I do not hear any hum with my ear pressed to the speaker cone. It is hard to tell it is even turned on. The amp is very quiet. There is no hiss or sound at all from the dome tweeter either. Great bass, smooth clean sound and can play very loud without strain. I will test with 45V PSU later after I build up my "All C's" PSU using 8x 4700uF per amp with a 32v dual mono trafo. You guys will really enjoy this amp. Very muscular and very clean. Nice detail.
Both Vunce and I have no verified the amp and it is an easy amp to build and simple to startup.
I used a 10ohm 10W series resistor between the PSU and the amp for both rails on the intitial startup. This was a good thing because I detected a large DC offset and immediately turned it off to investigate and found that I forgot to install a single 1N4148 diode V112. For Class AB amps, I do suggest the use of either a light bulb tester, a variac, or a pair of 10ohm power resistors. Once the amp starts up correctly (no crazy offset or high bias currents), you can remove the series resistor. At the mid 500R position on the pot, I was getting close to 0mA bias current. Adjusting a few turns brought it up to 33mV across 0.22ohms or 150mA. If I had not forgotten the the diode, the startup would have been uneventful.
Here I am installing the MOSFETs:
Closeup of the N-channel with the BD139 Vbe multiplier temp sensor:
Closeup of the P-channel:
Notice that the installation of the MOSFETs is a separate and much easier operation all by itself rather than having to drill holes exactly with PCB mounted underhung MOSFETS.
Here is a photo of the FH9HVX Griddle Amp on the bench being tested. I am using my new PTT6.5 and RS28F in WG300 waveguide speaker as the inaugaral test speaker:
Here is a closer look at the single amp at a time test using a +/-35v CRC PSU (the very first one I made 6 years ago). I am running about 150mA bias current and the DC offset has been a stable 7mV since I powered it up, has not moved, The bias currrent is stable. Playing music at normal volume, the heatsink is 39C near the MOSFET and barely warm 5 inches away. The cast iron is not as conductive as aluminum so there seems to be more temp variations along the griddle. The MOSFET body temp is 52C:
Here is a closeup of the amp under test:
How does it sound? Super - nothing to fault. With a 4x 4700uF CRC PSU, I do not hear any hum with my ear pressed to the speaker cone. It is hard to tell it is even turned on. The amp is very quiet. There is no hiss or sound at all from the dome tweeter either. Great bass, smooth clean sound and can play very loud without strain. I will test with 45V PSU later after I build up my "All C's" PSU using 8x 4700uF per amp with a 32v dual mono trafo. You guys will really enjoy this amp. Very muscular and very clean. Nice detail.
Both Vunce and I have no verified the amp and it is an easy amp to build and simple to startup.
I used a 10ohm 10W series resistor between the PSU and the amp for both rails on the intitial startup. This was a good thing because I detected a large DC offset and immediately turned it off to investigate and found that I forgot to install a single 1N4148 diode V112. For Class AB amps, I do suggest the use of either a light bulb tester, a variac, or a pair of 10ohm power resistors. Once the amp starts up correctly (no crazy offset or high bias currents), you can remove the series resistor. At the mid 500R position on the pot, I was getting close to 0mA bias current. Adjusting a few turns brought it up to 33mV across 0.22ohms or 150mA. If I had not forgotten the the diode, the startup would have been uneventful.
Attachments
-
 Griddle-FH9HVX-MOSFETs-Install-04.jpg555.8 KB · Views: 2,900
 -
 Griddle-FH9HVX-MOSFETs-N-ch-05.jpg551 KB · Views: 2,839
 -
 Griddle-FH9HVX-MOSFETs-P-ch-06.jpg519.5 KB · Views: 2,837
 -
 Griddle-FH9HVX-MOSFETs-Setup-07.jpg439.4 KB · Views: 5,014
 -
 Griddle-FH9HVX-MOSFETs-Setup-Closeup1-08.jpg557.7 KB · Views: 3,260
 -
 Griddle-FH9HVX-MOSFETs-Setup-Closeup2-09.jpg598.3 KB · Views: 18,338
Last edited:
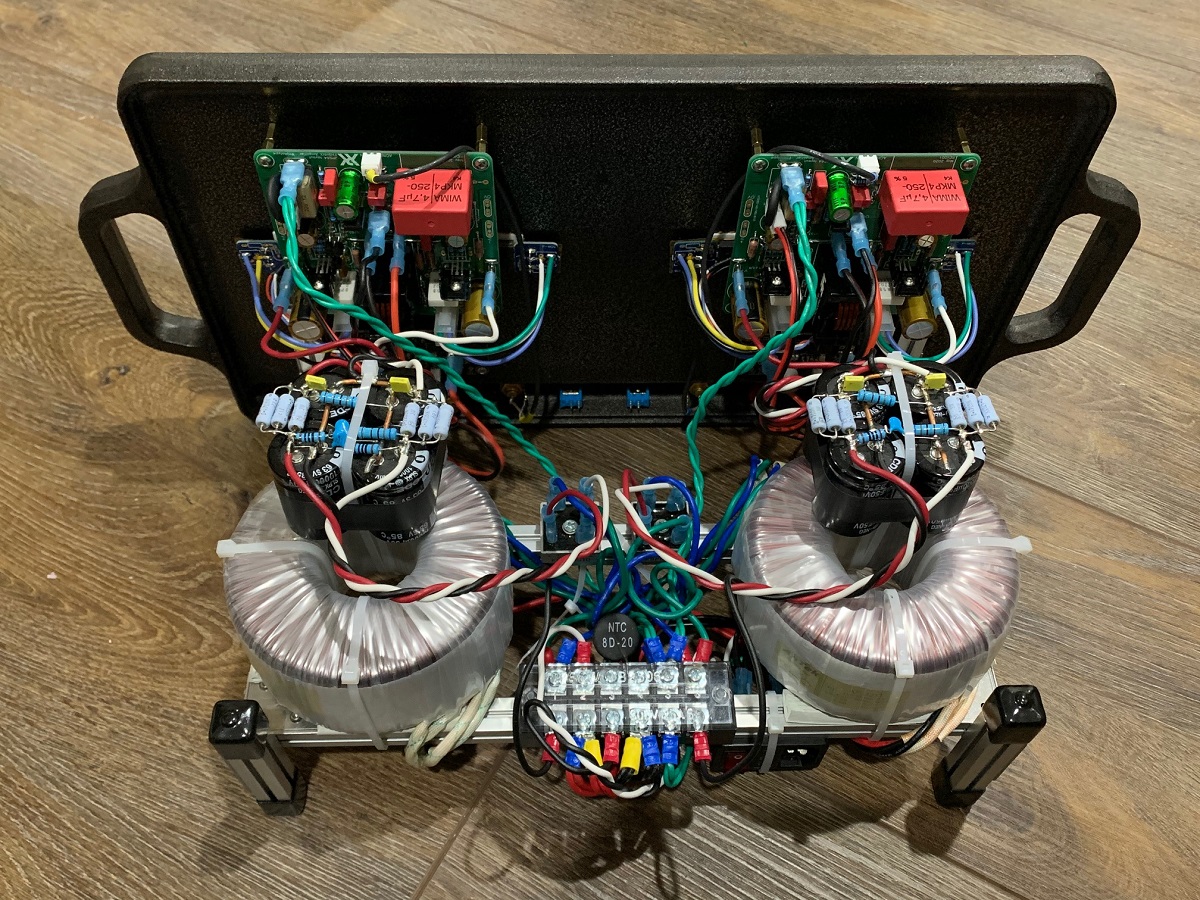
Some more progress on the FH9HVX.

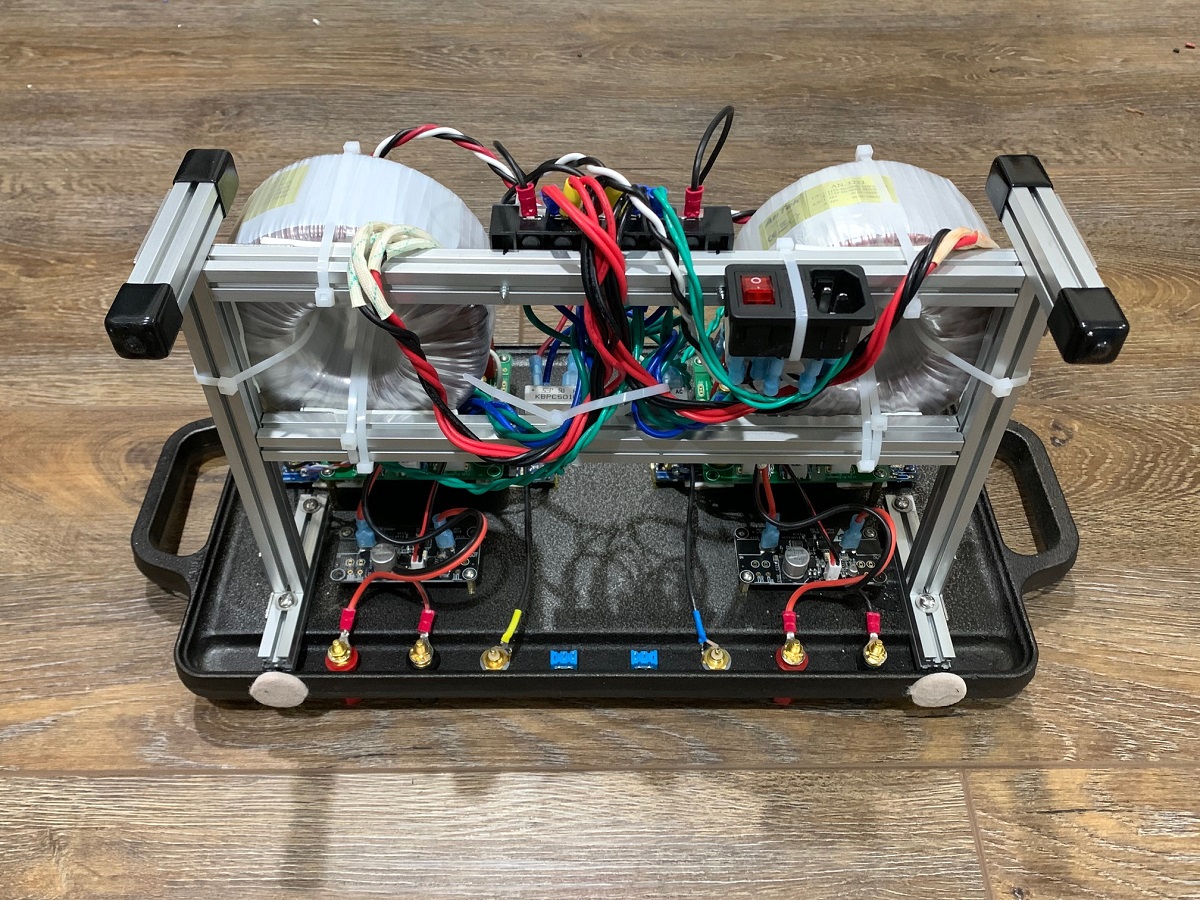
Making the two 8x 4,700uF 63v PSU's next. MakerBeam XL used for frame. It is very rigid - I can pick up the amp with the two handles on the front and it doesn't bend or flex.
More details on the construction in the other thread.
Making the two 8x 4,700uF 63v PSU's next. MakerBeam XL used for frame. It is very rigid - I can pick up the amp with the two handles on the front and it doesn't bend or flex.
More details on the construction in the other thread.

4x 500mm MakerBeam XL beams is only $30. Cut it yourself and costs a lot less. You can make a lot of stuff with that much.
MakerBeam XL Clear Anodized Beams 500x15x15mm (103420) 4 Pieces Amazon.com: MakerBeam XL Clear Anodized Beams 500x15x15mm (103420) 4 Pieces: Home Improvement
MakerBeam XL T Brackets (Pack of 12pcs) for 15mmx15mm Beams. Amazon.com: MakerBeam XL T Bracket (Pack of 12pcs) for 15mmx15mm Beams.: Home Improvement
MakerBeam XL Right Angle Bracket (Pack of 12pcs) for 15mmx15mm Beams Amazon.com: MakerBeam XL Right Angle Bracket (Pack of 12pcs) for 15mmx15mm Beams: Home Improvement
M3 screws:
MakerBeam XL M3x6 Bolts Button Head Socket 6mm 100pcs A2 Stainless Steel Amazon.com: MakerBeam XL M3x6 Bolts Button Head Socket 6mm 100pcs A2 Stainless Steel: Home Improvement
M3 nuts: Shapenty 100PCS 3mm Small Stainless Steel Female Thread Hex Screw Nut Fastener Tool, M3 Amazon.com: Shapenty 100PCS 3mm Small Stainless Steel Female Thread Hex Screw Nut Fastener Tool, M3: Home Improvement
It’s useful to get them precut as the cuts are very clean and ends are tapped. But this kit is very handy for quickly prototyping or building very rigid structures.
My FH9HVX's are finally running in stereo - they sound great! The griddle amp rocks!

Listening on my 10F/RS225 TL's - sounds very good. This amp is very quiet. No noise or hum.

Listening on my 10F/RS225 TL's - sounds very good. This amp is very quiet. No noise or hum.
Last edited:

Finally can crank the amp up loud with the 10F/RS225 TL's. Wow - what a sound! The bass is endless and impresive as are the smooth mids and highs. There is some big power reserves and the amp just never sounds strained. Very impressive and beautiful sounding amp. You guys are in for a treat!
Nice work X!,
Was wondering if there was a reason for using the 15mm makerbeam XL rather than the 10mm maker beam, as there is a substantial difference in price. I am assuming the 10mm is capable of holding the weights of the parts used in building over the short spans required. Thoughts on this?
MM
Was wondering if there was a reason for using the 15mm makerbeam XL rather than the 10mm maker beam, as there is a substantial difference in price. I am assuming the 10mm is capable of holding the weights of the parts used in building over the short spans required. Thoughts on this?
MM
Hi Kokanee,
I have not used the 10mm beams. It may be not strong enough as the 15mm has a substantially greater strength and rigidity advantage. With this 15mm beam I can pick up the close to 40lb amp with the front handles and it doesn’t flex. It feels like a cabinet based amp in rigidity. But for simply supporting the weight of the amp in a static manner and propping up the griddle might be fine to use 10mm. It’s not expensive and comes i. Really handy. Try it.
Hi Jorgovanko,
Most Class AB amps can run without an output Thiele network inductor and parallel 4.7R to 10R resistor. Adding them is optional and helps to provide unconditional stability if you ever connect the amp to a large enough capacitive load, that might otherwise cause oscillation.
You certainly don’t need to use the $12 Wurth inductor. It is way over spec’d but done for a reason to make the amp look cool and provide some eye candy to an otherwise very standard looking amp.
You can wind one using 18ga to 16ga magnet wire - wrap 12 to 15 turns on a 12mm to 15mm cylinder. An AA battery works well. You then need to strip the varnish off the ends. The whole process takes maybe 15min and costs $0.25 for the magnet wire. This is the specified approach for the lower cost BOM.
Last edited:
Finally can crank the amp up loud with the 10F/RS225 TL's. Wow - what a sound! The bass is endless and impresive as are the smooth mids and highs. There is some big power reserves and the amp just never sounds strained. Very impressive and beautiful sounding amp. You guys are in for a treat!
Very nice - plus you can stand it up on its back, crank up the bias and make pancakes!

This is wonderful! Congratulations upon your imagination and your considerable workshop skills. Fan-tastic.
Thank you!
- Home
- Group Buys
- FH9HVX - Budget Conscious 100w Class AB for Lean Times