Which parts are you having a hard time finding? If you build the basic amp without the rotary input selector knob, all the parts are readily available from Mouser/Digikey/Newark/eBay/Aliexpress. One of the things about this amp is that it doesn't use any discontinued JFETs, for example. I think someone in this thread may even have posted a Mouser shopping cart for the parts. Or you can ask and hopefully someone can share their car with you. I don't think anyone put together a parts kit specifically for this amp.
Let me know which parts in particular, I might be able to help you.
Let me know which parts in particular, I might be able to help you.
tubesforme,
If you are planning to build the preamp, you will find post #1 of this thread contains the necessary info and links to the bill of materials files. Once you download those, please let the folks on this thread know which part you are having difficulty with sourcing, I am pretty sure someone will chime in.")
You might already know this, but just to refresh, to get a working preamp you will need (1) The preamp main-board (2) A set of 2 x Daughtercards (1 for each channel) (3) A DC power supply with approx 46-48V DC voltage
The power supply is not part of the GB - you will have to source/build that separately. However there are many examples of what builders have used for their successful projects.
Hope this helps.
If you are planning to build the preamp, you will find post #1 of this thread contains the necessary info and links to the bill of materials files. Once you download those, please let the folks on this thread know which part you are having difficulty with sourcing, I am pretty sure someone will chime in.
You might already know this, but just to refresh, to get a working preamp you will need (1) The preamp main-board (2) A set of 2 x Daughtercards (1 for each channel) (3) A DC power supply with approx 46-48V DC voltage
The power supply is not part of the GB - you will have to source/build that separately. However there are many examples of what builders have used for their successful projects.
Hope this helps.
Hi everyone,
I guess I am a bit late for this but I have a single question:
Would this preamp be suitable to drive the MoFo amplifier?
Or it is not necessary to have a preamp like this as a driver
stage for that amp? I am not sure what input the MoFo needs!
Thanks in advance.
I guess I am a bit late for this but I have a single question:
Would this preamp be suitable to drive the MoFo amplifier?
Or it is not necessary to have a preamp like this as a driver
stage for that amp? I am not sure what input the MoFo needs!
Thanks in advance.
Hi everyone,
I am not sure what input the MoFo needs!
Thanks in advance.
Hello Bassmad,
The MoFo loves this preamp!!
I use this combo on a daily basis and it’s fantastic.
Build both (especially if you have relatively efficient speakers) and you will not be disappointed.
Regards,
Vunce
That's my daily driver combo too for the kitchen upstairs. Amazon Dot driving Aksa Lender driving MoFo driving 93dB 0.53x scale Karlsonator speakers with dual 3FE25 drivers. Superb combination.
The Aksa Lender was designed to drive amps that have 0dB (unity or 1x) voltage gain. To get 25wrms out of an amp requires a preamp that can cleanly make 40Vpp without fuss. This is the preamp that does that. It can drive F4, MoFo, or other amps.
The Aksa Lender was designed to drive amps that have 0dB (unity or 1x) voltage gain. To get 25wrms out of an amp requires a preamp that can cleanly make 40Vpp without fuss. This is the preamp that does that. It can drive F4, MoFo, or other amps.
I'm considering building an F-4 to be driven by this preamp.
I'd love to run them both off of the same +/- 24V linear PSU in one enclosure if possible - could the +24V and 0V feed a DC boost converter for the Aksa Lender with good results?
What affect would the Aksa's draw from the PSU have on the F-4? Would it be better to just stuff an SMPS into the enclosure for the Aksa that also feeds off the mains?
Thanks.
I'm considering building an F-4 to be driven by this preamp.
I'd love to run them both off of the same +/- 24V linear PSU in one enclosure if possible - could the +24V and 0V feed a DC boost converter for the Aksa Lender with good results?
What affect would the Aksa's draw from the PSU have on the F-4? Would it be better to just stuff an SMPS into the enclosure for the Aksa that also feeds off the mains?
Thanks.
You can use the Melbourne, which is this preamp, but configured for dual rail supplies and DC-coupled output as an option. I originally made the Melbourne for use with the M2X but had a mistake on the pinouts of the M2X mounts. The board works fine otherwise and I am using it now with an off-board dual rail cap Mx and it works great. There is also an upgraded mu-follower output stage CCS which now gives the Melbourne slightly (4x) lower THD than the original Aksa Lender and it is able to drive loads as low as 600ohm impedance with no loss in performance. It does have a built in CRCRC, so depending on how clean your +/-24v rails are, you might be able to hook it up without any further PSU in between.
The Melbourne Class A Headphone Amp and Pre-amp
Send me PM if you would like one (will not work with M2X).
PCA Daughterboard for Aksa Lender
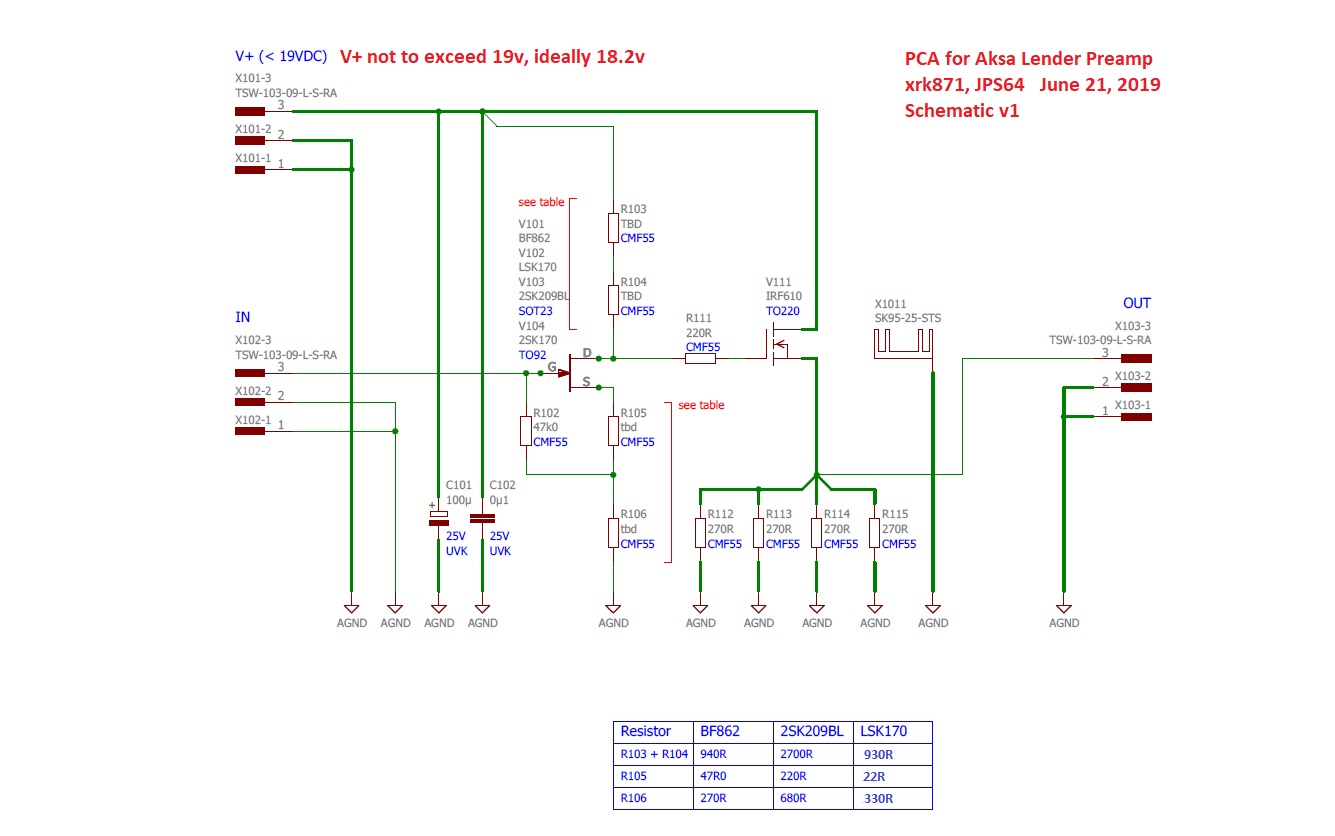
Given how much fun owners of the Yarra preamp are going to be having swapping out their core amplifier daughterboards to try out different topologies (Melbourne, WBA18, and PCA), member Twocents requested that the PCA (Pocket Class A) be made available to owners of the Aksa Lender preamp. Since the PCA is a single rail design and all cap-coupled, it was an easy request and perfect fit for the Aksa Lender motherboard. You can now use big boutique caps and roll caps to your heart's content. Plus, the Aksa Lender motherboard has a terrific low noise power supply built-in. Just make sure not to exceed 19v at V+ pin on the DB itself. I have personnaly found that 18.2v is the sweet spot for the best balance in harmonic profile (for the BF862). For 2SK209 and 2SK170, you will have to experiment on your own. Thanks to JPS64 for his speedy and beautiful layout, we are now offering this as a GB. Please add your name to the interest list below if you want to get this. You can place the pre-order on my Etsy shop.
Schematic:
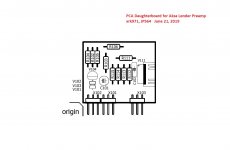
Stuffing Guide:

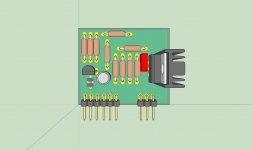
3D render:

Given how much fun owners of the Yarra preamp are going to be having swapping out their core amplifier daughterboards to try out different topologies (Melbourne, WBA18, and PCA), member Twocents requested that the PCA (Pocket Class A) be made available to owners of the Aksa Lender preamp. Since the PCA is a single rail design and all cap-coupled, it was an easy request and perfect fit for the Aksa Lender motherboard. You can now use big boutique caps and roll caps to your heart's content. Plus, the Aksa Lender motherboard has a terrific low noise power supply built-in. Just make sure not to exceed 19v at V+ pin on the DB itself. I have personnaly found that 18.2v is the sweet spot for the best balance in harmonic profile (for the BF862). For 2SK209 and 2SK170, you will have to experiment on your own. Thanks to JPS64 for his speedy and beautiful layout, we are now offering this as a GB. Please add your name to the interest list below if you want to get this. You can place the pre-order on my Etsy shop.
Schematic:
Stuffing Guide:
3D render:
AL PCA GB Interest List:
Twocents - 4 boards
Attachments
Last edited:
Getting a BOM together for the PCA daughter boards, but my goodnessYou can now use big boutique caps and roll caps to your heart's content.
- will this board make music with only 14 components? A very low parts count.The big boutique caps referred to here is for the inputs caps on the motherboard right? The PCA daughter boards only has two caps of which one is a bypass - not much room for cap rolling here.
Last edited:
Yes, I meant there is room on motherboard. PCA was always a small amp so cap rolling was limited. The DCA is much better but if you have an Aksa Lender already, no need to make a DCA - just the little daughter boards will get you there. Yes, it’s low parts count and can be even less if you used 1 big 1W resistor instead of the smaller 4 and licked a single value instead of two above the JFET. So 9 components could still work.
Yes, I meant there is room on motherboard. PCA was always a small amp so cap rolling was limited. The DCA is much better but if you have an Aksa Lender already, no need to make a DCA - just the little daughter boards will get you there. Yes, it’s low parts count and can be even less if you used 1 big 1W resistor instead of the smaller 4 and licked a single value instead of two above the JFET. So 9 components could still work.
Ooh, that's handy, as I have a lender pre already.
This amp works surprisingly well with a heavier load, so make the R124/134 10k output resistor closer to say ~100ohms, and the 600ohm DT990's will work fine. If using with 50ohm headphones then leave the 10k alone.
R124/R134 on the AKSA motherboard I suspect?
I'm stoked to hear this with the 990's!
Yes, on MB. If using BF862, makes sure Vcc at the amp is no more than ~19v, so make DC-DC voltage output about 22v to 23v. With 2sk209 or 2sk170, you can go a a few volts higher if desired. Design is at Vcc of 18v though.
Excellent. I am using BF862's, will confirm correct voltage.
Thank you X!
I am working on getting the BOM for the SMD daughter card and I have a question about R113, the 10K carbon. It looks like most builders are putting a through hole resistor in this place. What is the reason behind this change? Which other components on those boards should be through hole?
Is it better to use MELF resistors than the chip 1206/0805 resistors?
Are there any type of wiring diagrams for the connection of the other cards that come with the main board?
Is it better to use MELF resistors than the chip 1206/0805 resistors?
Are there any type of wiring diagrams for the connection of the other cards that come with the main board?
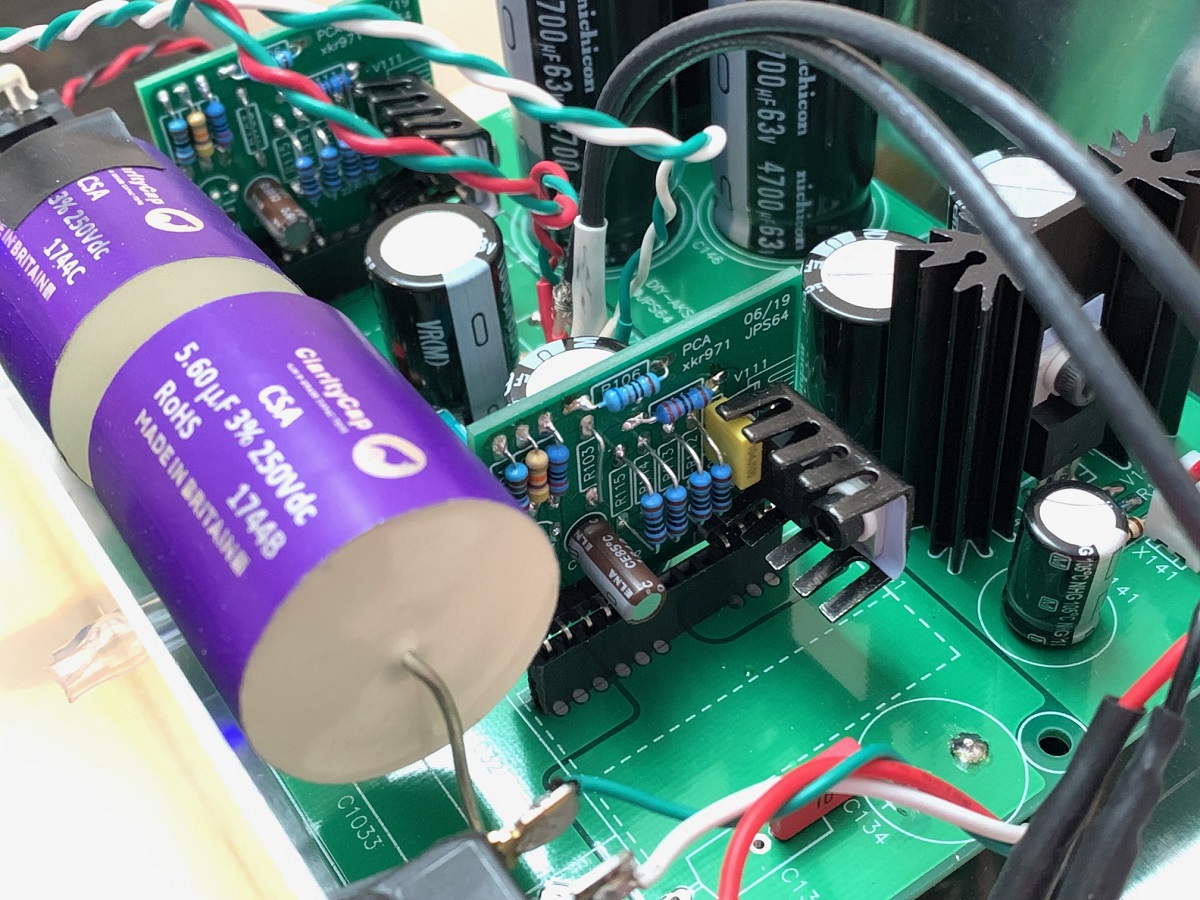
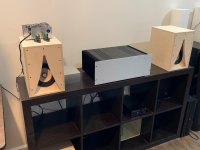
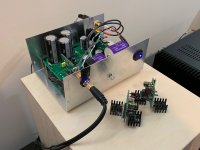
The PCA daughterboard has now been tested and works very well. Listening to it now - driving my M2X (Austin) and W5-2143 XKi speakers.
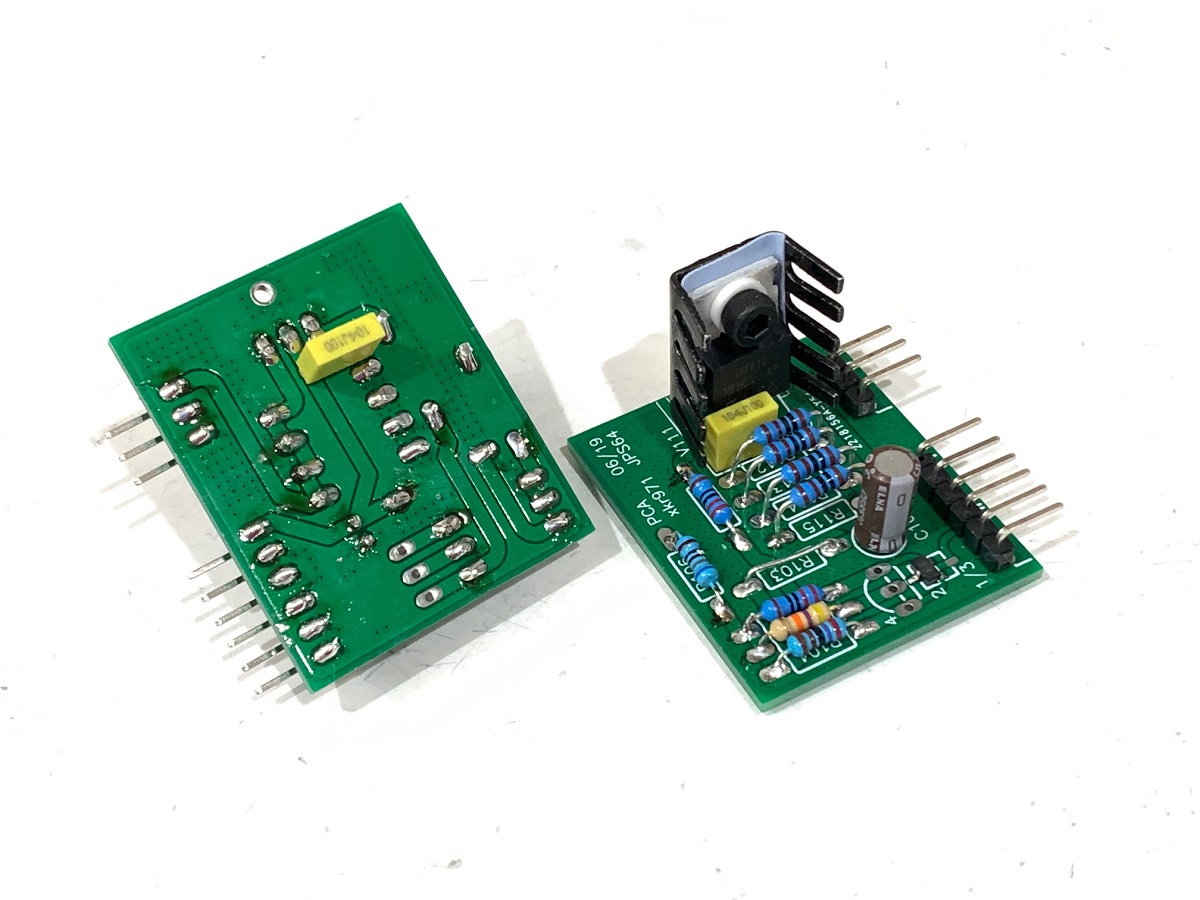
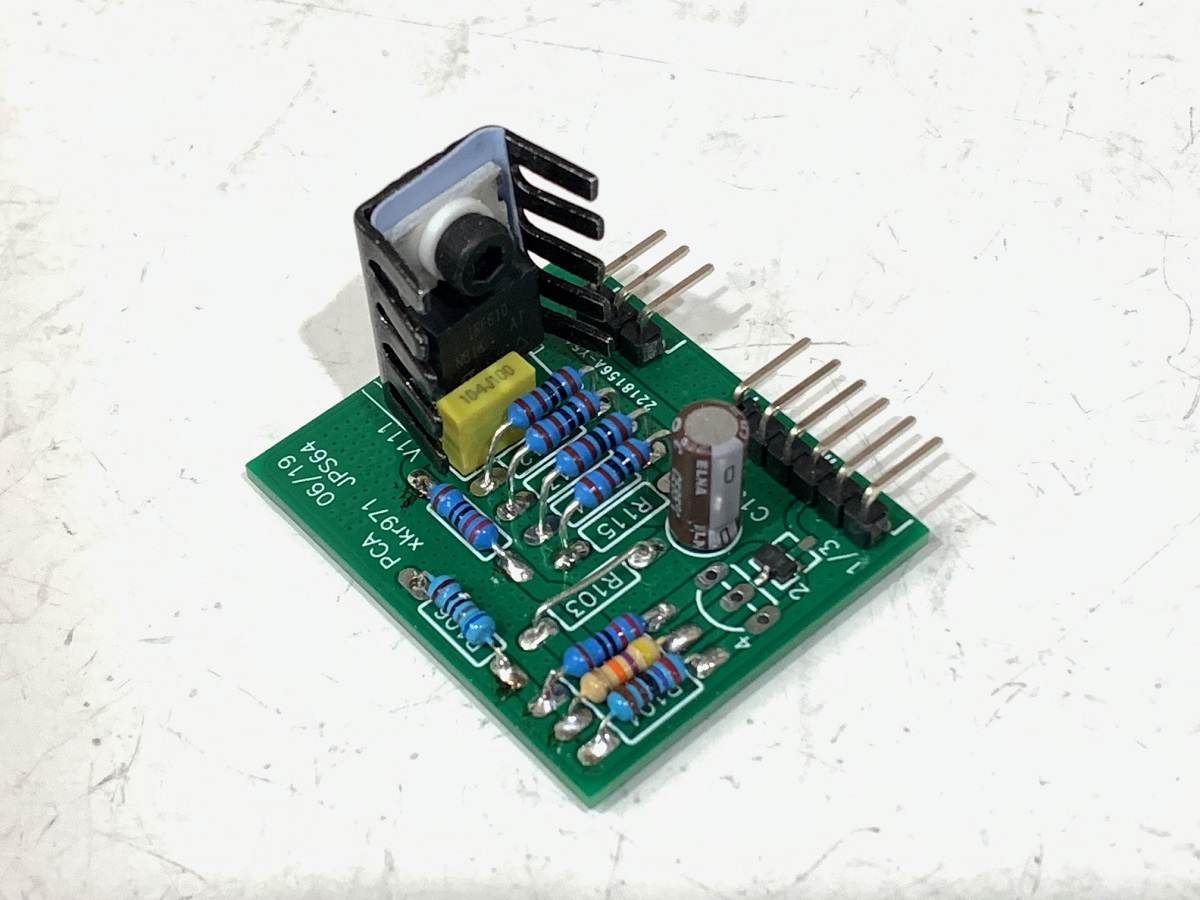
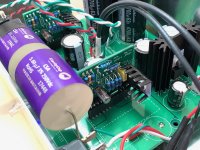
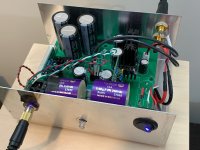
I am using SK209 JFETs as they are more readily available for new builders trying this out. They are a bit different in terms of operational settings so I am still tweaking to get the best settings. They do allow you to use a higher than 19v Vcc. I am driving them with 24v (at the drain of the MOSFET). The source resistors had to be changed to qnty 4 x 1k axial 0.25w metal thin film. This gives a bias current of 62mA - about perfect for a preamp or HPA driving cans higher than 100ohms. The heat dissipation is reasonable - not too hot at all. The 2k7 resistor R3+R4 needs a little adjustment because the voltage at the Source pin is 15.5v, about 3.5v too high - you want it about 1/2vcc. It still plays music but the headroom is reduced. For normal preamp duties, it is not an issue.
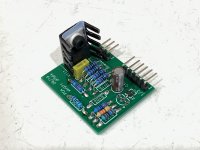
Here are the build photos. The 100nF film cap is could be mounted on the backside to give more breathing room for the heatsink and source resistors. I am using a small stamped serrated fin heatsink and that seems fine.
This has got to be the easiste project I have ever built - it took almost no time at all. Maybe 30 minutes and I have a working and nice sounding preamp!


You can get the PCA daughterbaords for the Aksa Lender here:
PCA Daughterboard for Aksa Lender Preamp | Etsy
I am using SK209 JFETs as they are more readily available for new builders trying this out. They are a bit different in terms of operational settings so I am still tweaking to get the best settings. They do allow you to use a higher than 19v Vcc. I am driving them with 24v (at the drain of the MOSFET). The source resistors had to be changed to qnty 4 x 1k axial 0.25w metal thin film. This gives a bias current of 62mA - about perfect for a preamp or HPA driving cans higher than 100ohms. The heat dissipation is reasonable - not too hot at all. The 2k7 resistor R3+R4 needs a little adjustment because the voltage at the Source pin is 15.5v, about 3.5v too high - you want it about 1/2vcc. It still plays music but the headroom is reduced. For normal preamp duties, it is not an issue.
Here are the build photos. The 100nF film cap is could be mounted on the backside to give more breathing room for the heatsink and source resistors. I am using a small stamped serrated fin heatsink and that seems fine.
This has got to be the easiste project I have ever built - it took almost no time at all. Maybe 30 minutes and I have a working and nice sounding preamp!
You can get the PCA daughterbaords for the Aksa Lender here:
PCA Daughterboard for Aksa Lender Preamp | Etsy
Attachments
-
 AL-PCA-verification-01.jpg190.3 KB · Views: 1,093
 -
 AL-PCA-verification-02.jpg251.3 KB · Views: 1,057
 -
 AL-PCA-verification-03.jpg417.4 KB · Views: 1,073
 -
 AL-PCA-verification-04.jpg301.9 KB · Views: 486
 -
 AL-PCA-verification-05.jpg266.7 KB · Views: 1,013
 -
 AL-PCA-verification-06.jpg279.8 KB · Views: 483
Last edited:
- Home
- Group Buys
- AKSA's Lender Preamp with 40Vpp Ouput GB