Hi all. A couple months ago I finished up work on these speakers, right around the time I started reading through here.

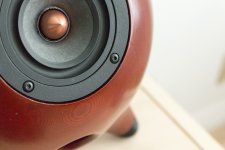
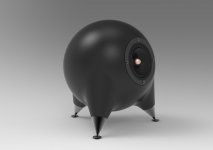
I'm using the Dayton Audio PS95-8 which I like quite a bit, although I'm no expert, I think they compare very well to other off-the-shelf offerings I've heard. I arrived on these drivers after testing 4-5 others of varying cheapness with earlier versions of my enclosure design.
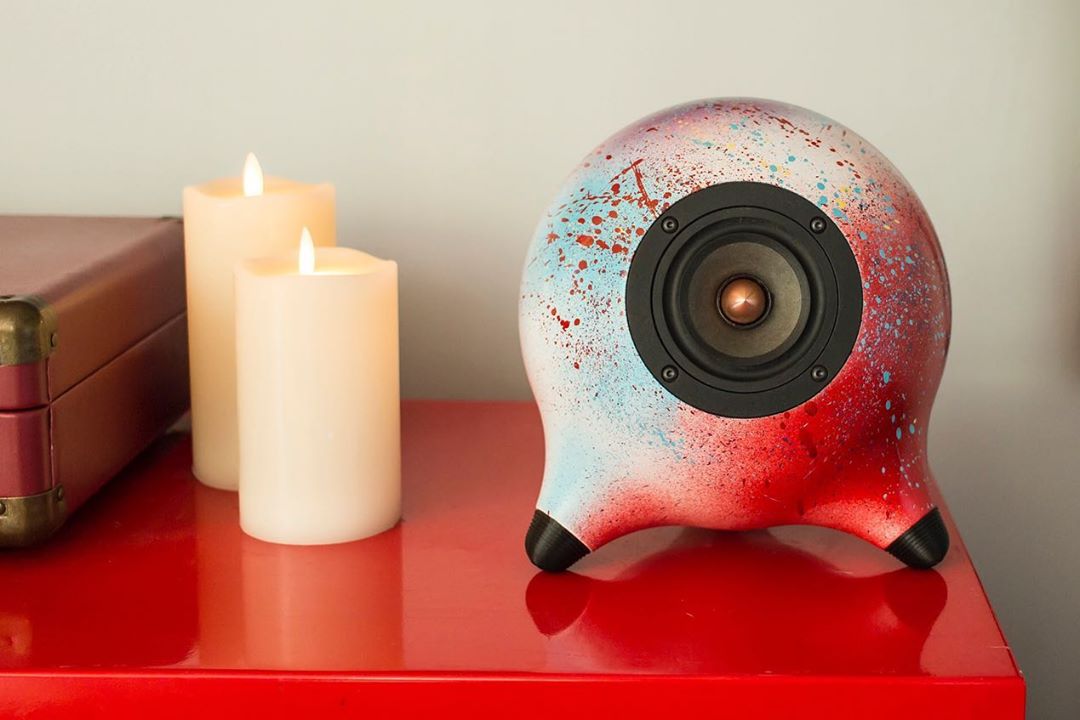
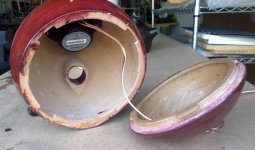
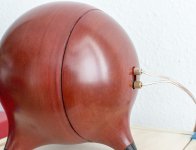
The enclosures are 3D printed in a "wood" material, which is 60% bioplastic and 40% ground wood fiber. The enclosure volume is about 0.1 cu.ft, which is basically the biggest I can print on my smallest 3D printer, the walls are about 3/8" using quite a bit of printing material but making it very rigid. They're also stuffed with a moderate amount of polyfill trying to make up for the relatively small volume.
Of course, after finishing up this project I immediately fell into a million ideas for what to do next... I'll probably do a subwoofer next, and then a center channel, and then new front channels with the same full-range drivers plus a tweeter, finally using my existing speakers as rear channel I'll have a full 5.1 of my own creation. For now I'm waiting for a microphone adapter to show up later today so I can plug it into my sound card and get some better readings on response.
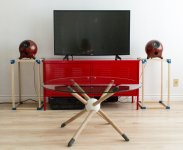
This is where the project stands today. I'll follow up in later posts with some of how I arrived here.

I'm using the Dayton Audio PS95-8 which I like quite a bit, although I'm no expert, I think they compare very well to other off-the-shelf offerings I've heard. I arrived on these drivers after testing 4-5 others of varying cheapness with earlier versions of my enclosure design.
The enclosures are 3D printed in a "wood" material, which is 60% bioplastic and 40% ground wood fiber. The enclosure volume is about 0.1 cu.ft, which is basically the biggest I can print on my smallest 3D printer, the walls are about 3/8" using quite a bit of printing material but making it very rigid. They're also stuffed with a moderate amount of polyfill trying to make up for the relatively small volume.
Of course, after finishing up this project I immediately fell into a million ideas for what to do next... I'll probably do a subwoofer next, and then a center channel, and then new front channels with the same full-range drivers plus a tweeter, finally using my existing speakers as rear channel I'll have a full 5.1 of my own creation. For now I'm waiting for a microphone adapter to show up later today so I can plug it into my sound card and get some better readings on response.
This is where the project stands today. I'll follow up in later posts with some of how I arrived here.
Attachments

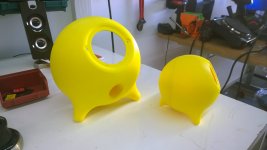
Except for some rough hand sketches that came before this, this is where it started. My original design was much larger than where I eventually arrived, the first pictures shown here (yellow 3D prints) are scale models to test my closure mechanism. When I liked the design I moved on to the full-scale printing. At this point I was just using whatever cheapest plastic I had available at the time... these earlier designs for larger speakers used a LOT of printer filament.
Attachments
After wiring these early versions up with some cheap-o drivers I was very dissatisfied with the quality of sound I was hearing. The first design was about a 0.3 cubic foot volume and used a port which I was probably too amateur to calculate correctly. I like to tell myself it's because of how I placed the port on the sphere and the angle it was at meant the calculations probably required some calculus above my head. I went through a bunch of revisions of port size and dimension, some through reprints and some through manually cutting and altering my existing prints. Unfortunately I'm terrible at keeping track of things so I don't remember all the different port dimensions I tried, it varied for each driver I used and with each prototype. I played a lot with visual details too, like proportions of the 3D printed rubber feet and placement of the binding posts. It took me a while to get a design that I felt looked polished.
The last picture here shows when I switched to using the wood material on the printers.
The last picture here shows when I switched to using the wood material on the printers.
Attachments
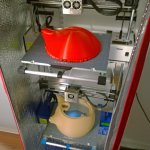
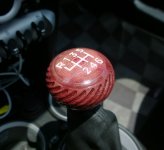
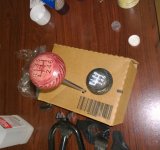
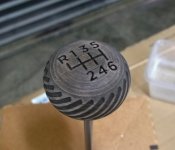
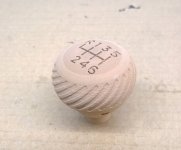
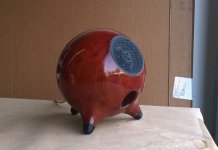
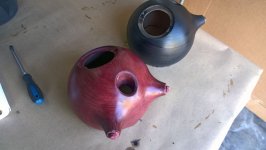
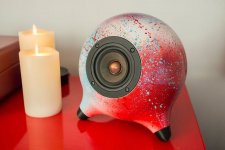
From here the quality of the sound jumped up considerably. Going to the "wood" material helped a ton, even using the same driver, the sound went from thin and tinny to much warmer and natural seeming... for lack of better technical description. I still wasn't happy with the drivers but I put some effort into finishing these speakers with a technique I originally tried making a shift knob for my Mini Cooper. I included photos of the shift knob process as I didn't really get great process photos of it during the speakers.
You can see what the raw 3D printed wood looks like, then after some sanding and a round of staining, and some sanding again, you start to see some natural-ish wood grain start to appear. I would go back and forth between sanding and staining until I was happy with the appearance, then use an amber-dyed shellac to clear over it and add some warmth to improve the realism... the 3D printed wood looked kind of "cold" to my eye without the amber-dyed clearcoat.
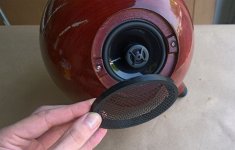
This version of the speaker used a 3D printed speaker grill to hide what I thought was a pretty ugly looking driver. Later on I removed the grill because I think the PS95-8's are quite good looking. You can also see some other details of my construction method here.
You can see what the raw 3D printed wood looks like, then after some sanding and a round of staining, and some sanding again, you start to see some natural-ish wood grain start to appear. I would go back and forth between sanding and staining until I was happy with the appearance, then use an amber-dyed shellac to clear over it and add some warmth to improve the realism... the 3D printed wood looked kind of "cold" to my eye without the amber-dyed clearcoat.
This version of the speaker used a 3D printed speaker grill to hide what I thought was a pretty ugly looking driver. Later on I removed the grill because I think the PS95-8's are quite good looking. You can also see some other details of my construction method here.
Attachments
-
 WP_20.jpg413.5 KB · Views: 137
 -
 WP_201.jpg536.1 KB · Views: 97
 -
 WP_2016.jpg293.7 KB · Views: 91
 -
 WP_2.jpg309.5 KB · Views: 107
 -
 WP_20161213_12_28_10_Pro__highres.jpg185.6 KB · Views: 98
 -
 WP_20161213_12_31_32_Pro__highres.jpg157.8 KB · Views: 123
 -
 WP_20161213_12_33_32_Pro.jpg630.6 KB · Views: 139
 -
 WP_20161213_12_29_14_Pro__highres.jpg208.7 KB · Views: 116
 -
 WP_20161201_14_13_14_Pro__highres.jpg176.7 KB · Views: 124
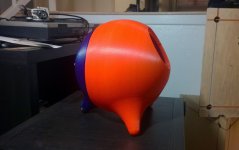
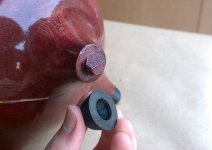
This brings me to my penultimate design. The major change being using the PS95-8 in place of the other cheap-o's I had been trying ("saving" money just turned out to be a waste of money). I made some small changes to the placement and size of the feet, the mounting for the binding posts, removed the speaker grill, and also added a 3D printed gasket to go in between the two main parts of the housing to solve some air leak problems.
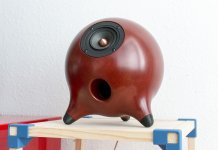
At this point all of my fussing with the port had almost paid off, the speakers sounded lovely except for some specific frequencies I would only hear occasionally in certain songs that would just boom out louder than all others. It happened infrequently, but often enough to bother me. I ended up printing little plugs to close up the ports and compare the sound... it lost a little bass but overall it still sounded great. I just used the EQ on my receiver to increase the bass a little bit to compensate and left the ports plugged up. I decided I was going to leave ports behind for a while until I got more experienced... my next project I'll probably play around with passive radiators.
I listened to and enjoyed the speakers as they are shown here for a little over a year until I got the itch to make changes. Along with removing the port I decided to downsize them so that A. it wouldn't take so much expensive material to print, B. my wife wanted to use my speaker stands for light stands in the bedroom, and C. they wouldn't take up so much space on the entertainment cabinet.
Attachments
You could make some good side cash making those little speakers and the shifting knobs. Nice work

Thanks!
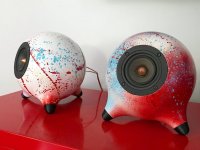
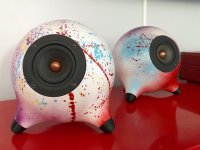
So this brings us to today in terms of the design. One other change I made for the final version was lowering the facing angle of the speaker driver by about 10 or 15 degrees I don't remember exactly how much. My old house had a big living room with high ceilings and a split level office area above my entertainment area, so I made the original speakers to angle higher to fill the space and get more sound up to the second level. Once we moved into a house with a smaller living room it didn't make sense to aim sound at the ceiling...
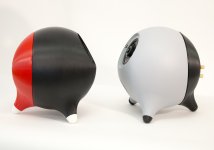
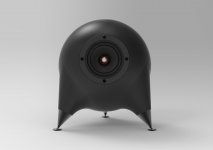
A couple more photos of the finished speakers as they are today, along with an exploded view animation from my CAD model... and some renders I've been tinkering with for other aesthetic changes in my spare time. Someone told me the 3D printed feet looked a bit amateurish, made it seem like a piggy bank, so I rendered up a version using spikes instead. It was quick but I think it looks pretty cool... although the spikes are about 100x more expensive than the print material.
Someone also suggested I try printing these without any seam, as one big solid piece, to improve the smoothness of the internal geometry and eliminate the need for the gasket in between. I'm very curious to try that, but the way the 3D printers work it would actually require quite a lot of extra material to get wasted to support the internal cavity. It's probably worth a shot though.
Attachments

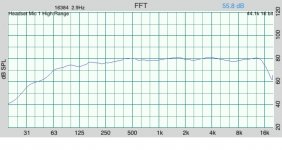
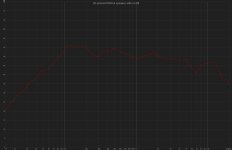
Two measurements, the dark one is from REW the light one is from AudioTools iPhone app, both using Dayton Audio iMM-6 calibrated mic.
The REW measurement was done from my PC with a cheap little mini-amp, mic set about 1.5 feet away from the speaker, amp volume was maxed and was EQ'd flat.
The AudioTools measurement was taken from my actual usual listening position, on my couch about 7-8 feet away from the speakers, using my Sony receiver, also EQ'd flat but nowhere near maxed out.
Attachments

Someone also suggested I try printing these without any seam, as one big solid piece, to improve the smoothness of the internal geometry and eliminate the need for the gasket in between.
I've understood that a irregular internal surface is a good thing in these "roundish" designs? I would leave it as is, or if you want to, you could try some diffuser structure inside. Of course you need to have a measuring kit if you want to go that far in tweaking. Those kind of modifications can be hard to hear, or too easy to hear (placebo)

Hello Singaud
It is a nice project you have here, and I have seen your kickstarter campaign which seems to be going well for you so far. Wish you the best of luck!
What did you do to prepare for the kickstarter launch? Also what wood like filament are you intending to use. Does it have wood particles in it or is it like Polywood which mimics its properties without any worries about clogging nozzles?
Dayton PS95-8 is a solid driver choice. Lightweight, low inductance, good high frequency control and at a decent price.
Paul
Very nice project singaud! Thanks for telling us about “wood” filament and I would expect it sounds better due to the built in dampening that occurs when a composite material is used. Sound waves don’t travel as far in a mixed composite because of the many interfaces that are impedance mismatches for wave propagation - hence energy is absorbed as heat.
There was another thread where we looked at printing the “stuffing” by making high porosity but fine grained in-fill. You can use less wall material on shell and still be strong plus the filament now is your polyfill. You need room for rear basket and some space for binding posts and area around entrance to port.
There was another thread where we looked at printing the “stuffing” by making high porosity but fine grained in-fill. You can use less wall material on shell and still be strong plus the filament now is your polyfill. You need room for rear basket and some space for binding posts and area around entrance to port.
And to think I just bought myself a 3d printer...
 let me know if you have any troubles with printing, I have years of experience developing the machines themselves and I'm happy to help
I've understood that a irregular internal surface is a good thing in these "roundish" designs? I would leave it as is, or if you want to, you could try some diffuser structure inside. Of course you need to have a measuring kit if you want to go that far in tweaking. Those kind of modifications can be hard to hear, or too easy to hear (placebo)
Perhaps, I considered adding a spiked design to the inside like the pyramidal dampening material you see in anechoic chambers. I'm worried that the added geometry might drag my computer to a crawl though... For now I'm testing internal filler materials. More on that at the bottom of post...
Hello Singaud
It is a nice project you have here, and I have seen your kickstarter campaign which seems to be going well for you so far. Wish you the best of luck!
What did you do to prepare for the kickstarter launch? Also what wood like filament are you intending to use. Does it have wood particles in it or is it like Polywood which mimics its properties without any worries about clogging nozzles?
Dayton PS95-8 is a solid driver choice. Lightweight, low inductance, good high frequency control and at a decent price.
Paul
Thanks for the kind words, and yea it's exciting! I was avoiding talking about the Kickstarter here for fear of running up against the ad rules on the forum, but since you've outed me
 I did a lot of local networking and "focus testing" at bars, gatherings, meetups, etc. Made contacts with suppliers for most of my components and materials so I know I'm getting manageable prices on components, made a whole bunch of examples to test my production times to make sure I could deliver. I have a LOT of 3D printers from my last job, right now I'm going through and making sure they're all in running order. I honestly probably should have done more advance marketing but the campaign seems to be running well as you said so fingers crossed!
The wood material has real wood fiber, I have had a couple instances of the material getting worn out in the extruder side and then getting burned in the nozzle causing a bad blockage and needing to toss the nozzle out. It's a possibility but I've learned to avoid it pretty successfully just through setting up my prints to be pretty conservative in terms of speed and other settings.
Love the design Singaud! Very inspiring.
When you say that the design uses lots of filament..how much roughly would you say they consume per enclosure?
I've got my eyes on a 3d printer at the mo but want to gauge how much material cost would be.
Most filament can be had cheap but the stuff I'm using is about $35/kg retail price. I use it because it has the highest percentage of wood in the material, other similar materials I have used in the past can be found for $30/kd. For this design, one whole speaker uses about a pound/500g of wood... or $17-ish dollars worth.
Very nice project singaud! Thanks for telling us about “wood” filament and I would expect it sounds better due to the built in dampening that occurs when a composite material is used. Sound waves don’t travel as far in a mixed composite because of the many interfaces that are impedance mismatches for wave propagation - hence energy is absorbed as heat.
There was another thread where we looked at printing the “stuffing” by making high porosity but fine grained in-fill. You can use less wall material on shell and still be strong plus the filament now is your polyfill. You need room for rear basket and some space for binding posts and area around entrance to port.
Thanks! I'll search for that post you're talking about, sounds interesting.
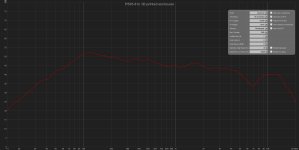
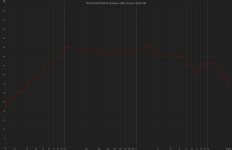
Tested something I've been curious about for a while this morning... My wife got a subscription to this food delivery service that uses recycled shredded denim to insulate the food in their boxes. I looked the stuff up and a lot of people use it for homes because its a good insulator and also very sound dampening. I was curious how this would work in place of polyfill, so I ran some REW tests to check it out.
The first attached image is with no filler, the second with poly fill, and the third with denim. I think I kept the setup the same for all tests, but I did one of them last night so I may have missed something.
Attachments

Last edited:
Try melamine miracle eraser sponges. Aka generic BASF “Basotect”.
Sound Damping and absorption material
Sound Damping and absorption material
- Status
- This old topic is closed. If you want to reopen this topic, contact a moderator using the "Report Post" button.
- Home
- Loudspeakers
- Full Range
- My 3D printed full-range project