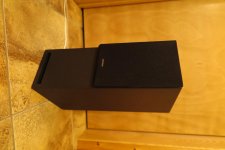
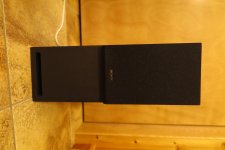
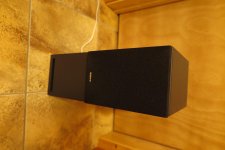
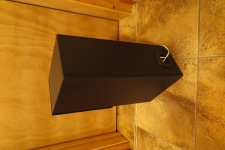
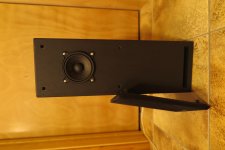
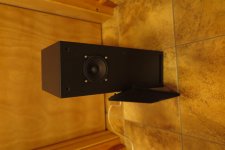
A few photos of this build, since I finally finished them off. Up till now they were sitting in my living room with no paint, and with one side just wedged on, not glued.
Attachments
 )
)Thanks!
I'm considering doing another pair with the FaitalPro 3FE25 instead of the 3FE22, see a question I asked over here:
https://www.diyaudio.com/forums/full-range/88787-tabaq-tl-tang-band-254.html#post5990770
I'm considering doing another pair with the FaitalPro 3FE25 instead of the 3FE22, see a question I asked over here:
https://www.diyaudio.com/forums/full-range/88787-tabaq-tl-tang-band-254.html#post5990770
Yes, I definitely considered a sub, and might do one one day for my house, but the idea behind these speakers is that they are something I can mass produce for friends of mine, see this post:
TABAQ with FaitalPro 3FE22
and this post:
TABAQ with FaitalPro 3FE22
for an explanation.
TABAQ with FaitalPro 3FE22
and this post:
TABAQ with FaitalPro 3FE22
for an explanation.
Earlier, Xrk recommended the P830986, I haven't heard that one but I have the similar P830987 in some baby labs, which I do like. They have a detailed presentation and 2mm xmax. The Bjorn meister has also recommended the P830987 in Tabaq. At parts express the P830986 and the 87 are about the same price as the 3fe25.
Last edited:
I will also highly recommend these drivers - they work extremely well in the TABAQ and give unbelieveable good and tight bass.The Bjorn meister has also recommended the P830987 in Tabaq.
TABAQ
Luigiman:
Nice job on the speakers!
Could you comment on your experiences working with the particle board? Your cuts certainly look clean. How about gluing them? Any chip outs, or crumbling? Is this your final material to build speakers for your friends?
Right now my local Habitat for Humanity has a 3' tall stack of 4' x 8' sheets of fairly fine particle board for $10 per sheet. No damage. I thought about buying 10-20 sheets for use for shelving, but had not thought about speakers.
Homebuilder:
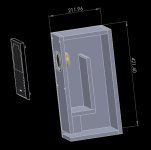
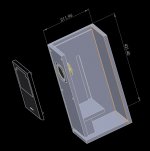
I think the particle board is the best! But I'm a little biased, since I get it for free as cover sheets on pallets of wood at work. I also have access to Solidworks, and a CNC, so what I do is cut slots in the right and left sides with the CNC, and then rip all the baffles, front, back , top, bottom to width on a table saw. See the attached pics from Solidworks to hopefully get an idea of how I do it.
I definitely use glue for assembly, what works well with my method is to glue all baffles to one side, then the other side just press fits on but can be removed. Like this I can test and adjust stuffing, etc., then when I am happy I just glue the other side on. I put a low cost plastic terminal pair on the back and connect up with crimp spade terminals. Then when the whole box is glued, I belt sand the top and front to level up the joints, and chamfer all edges. Then I fill the edges of the particle board with putty, which makes a nice smooth finish all over the box, and when I paint you don't see the edges/joints. I prefer matt black acrylic paint.
For the pair I just made I had some Sony front grills, but I plan to make a front grille with thin ply/particle board covered with cloth that covers the whole front of the box.
I definitely plan to use this method/material for the speakers I make for my friends.
Attachments
- Status
- This old topic is closed. If you want to reopen this topic, contact a moderator using the "Report Post" button.
- Home
- Loudspeakers
- Full Range
- TABAQ with FaitalPro 3FE22