Chdsl So you have gyprock glued directly onto a brick and mortar wall and you want to try an exciter on the gyprock? Is that what you're saying?....
I know all what you said. It is done 'dot and dab' way. I've got to find a piece of gyprock to play with it to check how the sound is, before trying. If it works, then, I'd carve panels off the wall, clear the back to a certain depth, so there'd be a void, and fix them elastically to the brick wall with the exciter on the back of the panel. Of course, if gyprock would give good sound. Actually, I am looking for thin honeycomb sheet, aluminium or carbon. Right now, shops are closed, covid problems. Many don't import, what's available are too expensive. Hope to try this out in July-August. I'd still have to get the wife on my side.
")
Pictures
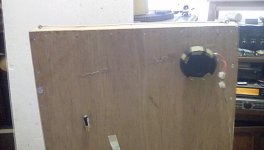
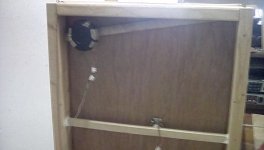
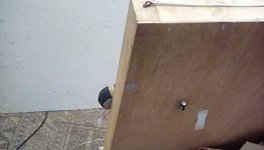
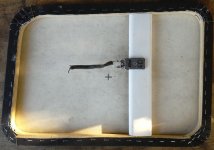
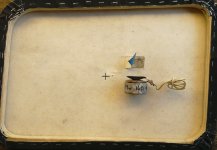
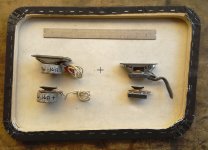
Different positions of the exciter.
First pic on the back of the 6x4cm wood.
Then on the back of the 25mm.
Lastly on the front of the 25mmm position,using the same drill hole.
All recordings made with the panel facing forwards.
All just random positions.
Steve.
Different positions of the exciter.
First pic on the back of the 6x4cm wood.
Then on the back of the 25mm.
Lastly on the front of the 25mmm position,using the same drill hole.
All recordings made with the panel facing forwards.
All just random positions.
Steve.
Attachments
Last edited:
Setup for easier measurements
Anyone with experience with LF measurements? Ive been finding it difficult to get outside what with a lot of rain, wind, and carting everything in and out for 15 mins of measurement.
I was wondering whether the following setup would work:
We have a 2-storey house, and I also have some scaffolding. I'm thinking about setting up the speaker on the scaffolding, about 2-3m from a small window (which is set in a long wall), about 3-4m above the ground, and at 45 degrees to the wall. I would have the mic just poking through a hole in centre of a plywood panel set in the external window frame and flush with the brick wall.
I'm guessing/hoping that:
* No reflections from behind or above, or the side facing away from wall.
* Negligible reflection from below? (OTOH material is concrete in the location).
* Reflections from the wall & plywood panel should not reach the mic, being directed away to the sides.
* Measurements would be +6dB due to mic being set in a plane?
* I guess that with most power being dissipated in other directions, I won't need too much bracing for the panel to prevent resonances.
Or is this plan fatally flawed somehow?
Last edited:
Carbon fiber + nomex honeycomb sandwich DML panel construction projectsorry if i already asked
but has anyone used a carbon sheet or honeycomb carbon?
Pway.
I'm not sure how this type of measurement is going to help understand the in room response of a dml?
It ignores 50% of the output from the rear of the panel and the effects this will have on the room(good and bad).
Unless you are doing this for a specific reason?
What is it you are trying to achieve?
Steve.
Steve
I want to be able to compare measurements so as to check whether they are in accord with the theory, make a prediction, confirm or debunk, incrementally improve. And share something repeatable if I make progress. Not much point if it's obscured by the room. The room is a confounding variable which can be removed. At the end of the day of course you must deal with the room.
Paul
Pway.
I believe In the 50s G A Briggs(wharfedale speakers) used to hang his drivers from a crane out in the open.
This was away from buildings and tree's and the ground.
He could also measure the dispersion characteristic by rotating the panel or moving the microphone.
Are you saying you are measuring the panels from the side only?
Steve
No, measuring from the front mainly. I've done some research and the idea is basically the same as what I think is called 'lofted' or 'flown' ground plane measurement, except sideways. And it would have worked the way I describe I think, except I remembered we have eaves.
But it was worth investigating lofted bc it works the same and it may be a bit easier to set up and repeat on our concrete driveway.
But it was worth investigating lofted bc it works the same and it may be a bit easier to set up and repeat on our concrete driveway.
Tried It Liked It
I used this method for my first build and was very happy with the results. I made a pair of exciters out of some 10 watt TV speakers by removing the cage and cone and epoxying them directly to 14" 19" - 50/50 treated EPS.
The frame was 1 1/2" in from the edge and used 2- 1" pieces of weatherstripping foam on each "frame" facing attached with super glue.
Also used a spline running horizontally across the back. They sound pretty good and am using them to compliment my box speakers at the moment.
Thank you for your input Eric, I really appreciate it.
You are right about the idea that these should appear like floating panels as much as possible, but I recognize that they do need support, and the frame suggestion you describe sound like an excellent idea.
I've gone ahead and bought 16 meters foam tube which i've modeled in with a frame design as you described.
I decided on a D-tube as you can see on the picture, as I imagine this will give a better suspension.
I 3D modeled in the woodframe for the tube using the same 1/5" wood as I used or the panels. This helps me keep a low profile and I have leftover from the panels I can use, hopefully it's strong enough.
It is placed 2" in from the edge.
Then in using a piece of MDF i also have enough of from scraps to mount the frame to the ceiling mount (which I already made). I cant center the ceiling mount due to acoustic panels in the ceiling, let me know if this is confusing and i'll take a picture.
Only questions remaining is if I understood your design idea right, and if I should spline mount or free mount the exciter. I'm probably going to build it to be able to do both, and I can listen and decide for myself!
Thanks again for your suggestion, and please let me know if this all sounds right to you or not!
I used this method for my first build and was very happy with the results. I made a pair of exciters out of some 10 watt TV speakers by removing the cage and cone and epoxying them directly to 14" 19" - 50/50 treated EPS.
The frame was 1 1/2" in from the edge and used 2- 1" pieces of weatherstripping foam on each "frame" facing attached with super glue.
Also used a spline running horizontally across the back. They sound pretty good and am using them to compliment my box speakers at the moment.
So everyone asks how to get more bass from a DML. Listen to this guys DML's:
Matty Hughes - YouTube
Look at the latest uploads (1 week to 1 month old). The vids are all the same, but play different electronic music with the bass enhanced a bit.
He also has a few older vids using a different acrylic panel with only 2 of the exciters on it.
Yes those are clear acrylic panels about 20" x 22" by 1/4" using 4 of the cheap 24 watt Dayton exciters in series/parallel to create a 4 ohm load (96 watts per side). He basically uses the parts express instructions/tutorial on building a DML...
And yes he admits he likes bass and does turn the bass control up on his cheap amp. The music seems to be basically electronic but no doubt the bass is there but the high's seem muted a bit and overall sound is quite unbalanced. But I look at it as simply how much bass you can get from a small panel DML with multiple exciters.
geo
My contribution to the quest of experimentation with DML's..
This is the best design that I've worked on to this point! Mid/Highs are very nice and plenty of bass. I added sticks from the circle towards the lower corner for s&g's but I believe the bass response was better without them!
The wooden circle provides plenty of sound for the mid/highs. The canvas creates smooth bass. Just make sure the wood items are securely glued to the canvas. I used spray adhesive used in car interior repairs for headliners. I ran a bead of hot glue around all edges just to be sure..
Here's some pics.. Enjoy!
ImageShack - Canvas Speakers
OGKOG says that these canvas speakers sound better from behind so I am going to try this canvas type of build but glue the wood circle to the front side of the canvas. I will mask a circle with tape in the center of the board the size of the exciter mounting area and cut that area of the canvas away from behind once the glue cures (3M 27 Spray Adhesive).
I doubt it will resolve the sounding better from behind thing but seems to be a worthwhile experiment. Of course I have to fab an exact replica done the "traditional" way to compare. Hopefully I can get the canvases stretched close to the same tension.
I'll be using another set of fairly new 10w TV speakers I've converted to exciters. The last set sounds pretty good on 3/4" EPS....14"x19".
I'll be getting some "real" exciters in the future now that travel restrictions are better and friends are traveling more. Exciters ordered through Amazon Mx. are over double the price compared to the states. I can wait to get twice as many. I really don't need any of these speakers but the bug has bitten!
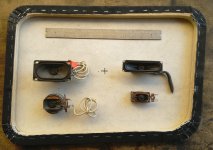
Photos of my first canvas build. Layout has left and top sides on an angle leaving a 90 degree for the others with varying radii all around. Used 3/4" heavy duty plywood beveled with 4" grinder from inside to outer edge slightly to avoid "canvas slap". Piece of 2 1/4" plastic trim used as spine that exciter fits in snugly for testing purposes.
The canvas is from a painting I started years ago and abandoned, just regular gesso canvas with the thin black acrylic paint. The wooden disc is 7" and is super thin, maybe 1 1/2 mil. I masked an area in the center with the blue tape to be cut out from the rear after the 3M 27 Spray Adhesive cured. Didn't bother lining the wood grain as this will be black also If I decide down the road to use it.
I used the smaller 10w homemade exciter because it was easier to make the spine (these things are super sensitive to proper mounting, they have to be pretty much perfect) You can see how I trimmed the cones down to level with the top of the voice coil and used tape to aid in pouring to level using the epoxy. Even the 5 min. epoxy will not be super hard until the next day which results in a bit more volume, which brings me to the results.
It really has good sound, just not loud enough. Compared to my 14"x19" ESP panels (with almost identical exciter) I am currently using alongside my small JBL bookshelfs and old Fisher 150w sub, I just can't hear them. The efficiency is terrible even for this small 7" thin wooden disc. I would say they are a 1/4 of the db fom the EPS. I connect it through the B Speaker terminal and EPS through A so I can switch between the two easily and I have to throw the juice to this canvas/wood panel to get near the volume of the EPS. Once near the same level though, I really like the sound better than the EPS. Way more natural sounding throughout! If this panel didn't get drowned out by my JBL's, I would definitely use a set of these.
I am going to be getting some "real" exciters in the future and will revisit this panel for sure. For now though, it's off to the Cabo dump to have a look see at what I can find to help quench my DML thirst.
Attachments
Last edited:
A quick tip here for reusing exciters.... I use the super shiny silver sheet metal tape (not that gray duct tape) to cover the contact area on both the exciter and panel then epoxy the two together. Leave some extra tape protruding from the exciter all around so you can get an exacto knife or whatever in there to peel the exciter from the tape, then deal with the leftovers on the panel.
ta dum
ta dum
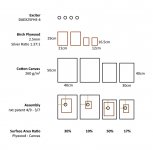
Canvas DML Testing
So, I am currently planning my second test run on the Canvas DML Design.
I ll have 4 different Canvas DMLs to test and compare.
Material:
4x Dayton DAEX25FHE-4
2x Cotton Canvas 30x40cm (260g/m²)
2x Cotton Canvas 40x50cm (260g/m²)
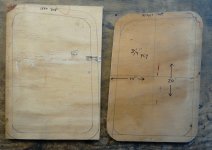
2x Birch Plywood 2.5mm 600cm² (aspect ratio 1.37:1)
2x Birch Plywood 2.5mm 200cm² (aspect ratio 1.37:1)
Preparation:
1. Attaching using the nxt patent ratio 4/9 - 3/7
Measuring Frequency Response of:
1. all 4 Canvas Panels
2. Effect of adding beads of transparent silicone as suggested by offgridkindaguy
3. Effect of adding Gesso Primer to the Canvases to increase its stiffness
4. Effect of adding inserts between the frame and the canvas to increase the tension/stiffness even further
I am not quite sure in what setting I ll measure the Canvas Panels. I d like to do it far field or on a ground plane outside to exclude room interference for now...
Any ideas on what to improve or add to the 'test-protocol'?
So, I am currently planning my second test run on the Canvas DML Design.
I ll have 4 different Canvas DMLs to test and compare.
Material:
4x Dayton DAEX25FHE-4
2x Cotton Canvas 30x40cm (260g/m²)
2x Cotton Canvas 40x50cm (260g/m²)
2x Birch Plywood 2.5mm 600cm² (aspect ratio 1.37:1)
2x Birch Plywood 2.5mm 200cm² (aspect ratio 1.37:1)
Preparation:
1. Attaching using the nxt patent ratio 4/9 - 3/7
- plywood panels to wooden framed canvases using spray adhesive
- exciters to plywood panels using toddincabo's super shiny silver sheet metal tape approach
- spline between wooden frame and exciter
Measuring Frequency Response of:
1. all 4 Canvas Panels
2. Effect of adding beads of transparent silicone as suggested by offgridkindaguy
3. Effect of adding Gesso Primer to the Canvases to increase its stiffness
4. Effect of adding inserts between the frame and the canvas to increase the tension/stiffness even further
I am not quite sure in what setting I ll measure the Canvas Panels. I d like to do it far field or on a ground plane outside to exclude room interference for now...
Any ideas on what to improve or add to the 'test-protocol'?
Attachments
Last edited:
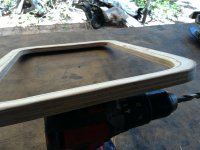
Bernardy.
Although I mounted my small ply panel dead centre of the canvas frame,I did offset the exciter on the ply.
But I did notice that in the patent for this type of panel,that they mounted both centrally?
I presume to keep the panel from wobbling at low frequencies,as this is mainly pistonic at these frequencies,supposedly down to 20hz(although mine only went down to 40hz)
Which is the best or ideal position ,I'm not sure.
The canvas is quite lossy ,and helps damp the ply,so offsetting might not be so necessary?
I do have 3 spare canvas picture frames ,so at sometime I do intend to test this out,and make a few adjustments as well.
Just a thought.
Steve.
- Home
- Loudspeakers
- Full Range
- A Study of DMLs as a Full Range Speaker