Keeping in mind that the manufacturer's and most 3rd party measurements would be taken at 1 meter distance, and that Mark endeavors for as wide dispersion as possible in the upper mids and highs, I'd not be surprised if some of what you're experiencing is from very early diffraction from what appears in the photos to be be a sharp bevel edge on the supra-baffle. I've always flush mounted all MA drivers, whether on the main front panel or supra baffle mounting plates.


Yesterday I installed floor spikes on pucks and the bass tightened up ALOT. I may have been hearing the wood floor before the spikes but I doubt it because the hard wood is on cement. I think I was hearing cabinet resonance. My immediate thought is to add more stuffing to extend the lower end.
I'm not sure if the spikes will stay.
What I will attempt is a felt treatment (s) around the bezel and up to the edge if the surround.
I'm not sure if the spikes will stay.
What I will attempt is a felt treatment (s) around the bezel and up to the edge if the surround.
I'm curious, what is the recommendation in terms of plinths/spikes for the Pensils? Mine are standing on the wooden floor, but it's not super even so there is a slight wobble, which i am not a fan of. How far from the floor can you put them and still expect the response to be as intended?
Whatever you're happy with and works for you. This is as much (more) a question of room acoustics, system & personal preference as anything else. In general I wouldn't raise them by much more than about 1in if you want to maintain optimum vent coupling, but whether you do or not is another matter. Adjustable spikes or spacers are your friend. ")
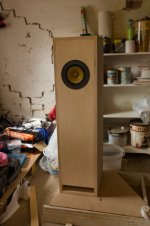
Finally had some time to look through the pictures from building my 10p Pensils. I haven't yet had the chance to do the finish or play around with stuffing, that will be a summer project. They were finished in August and have kept me entertained since!
This was another speaker project I did with my dad (our first project was a pair of Manzanitas for him - those are posted in the Manzanita thread).
Some piccies:
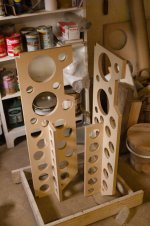
Holey brace. An easy way to figure out when you've made enough holes is to weigh the pieces you've cut out and divide the weight by that of the brace before cutting it. In my case, i actually didn't weigh before i started taking out holes, so i just added the weights of brace and cutout pieces together and used that as a total weight, knowing it would underestimate the % of material removed. IIRC i got to around 40%.

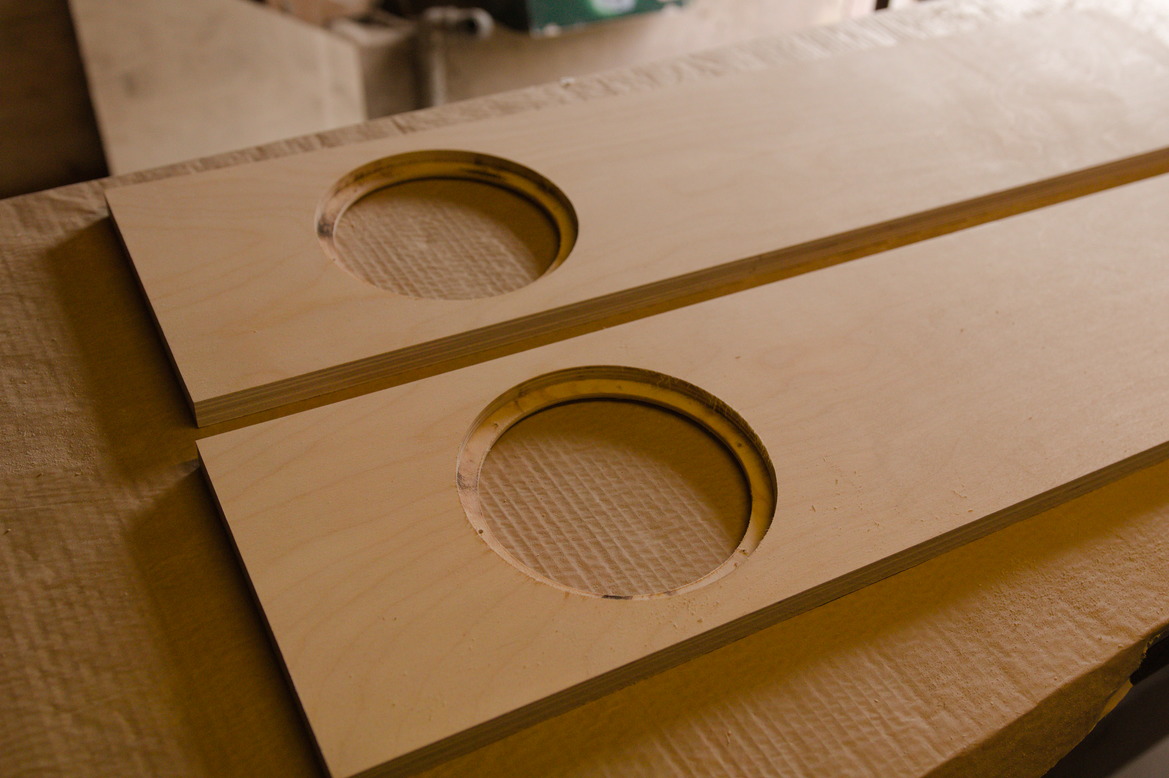
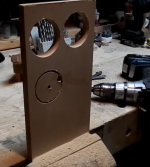
Baffle. I am still a routing noobie and have a geeky sort of appreciation for the look of a baffle cut for flush-mounting
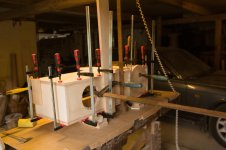
Glue up. We wanted to glue up in parallel but didn't have enough clamps...

Stuffing. 300g per speaker. MDM-4 (i think). The gasket tape is monacor MDM-35. The backs are removable, but i haven't played around with stuffing yet.
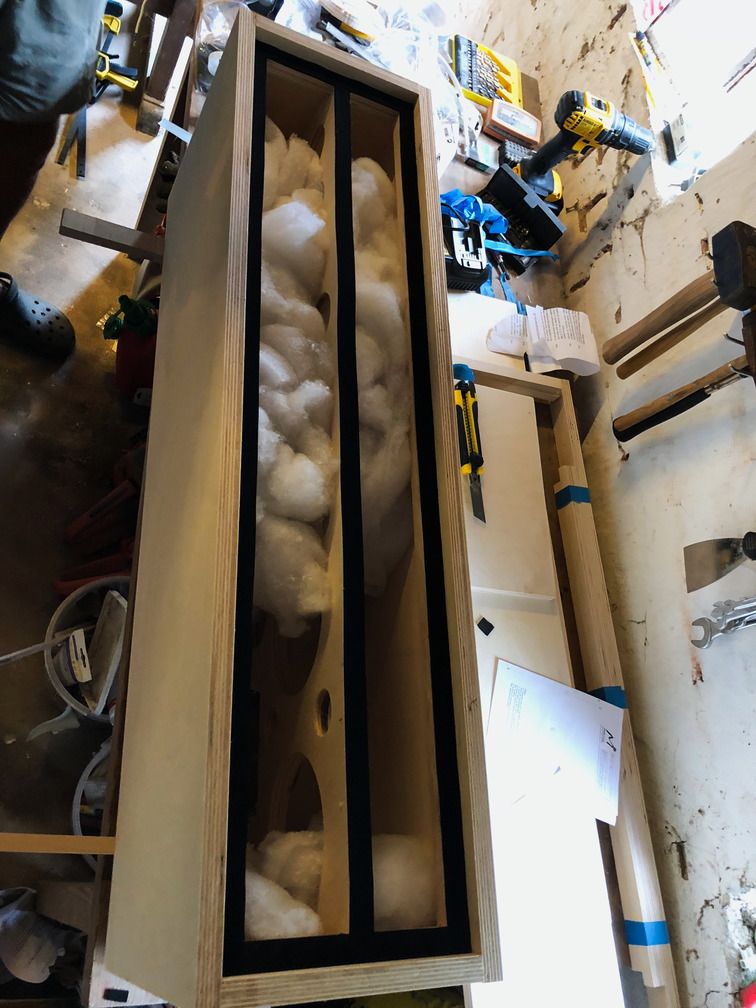
First one done! Quite fiddly to get the holey brace to fit snugle against the back of the driver. We had to trim quite a bit of material and ended up with a piece of gasket tape between the wood and driver.

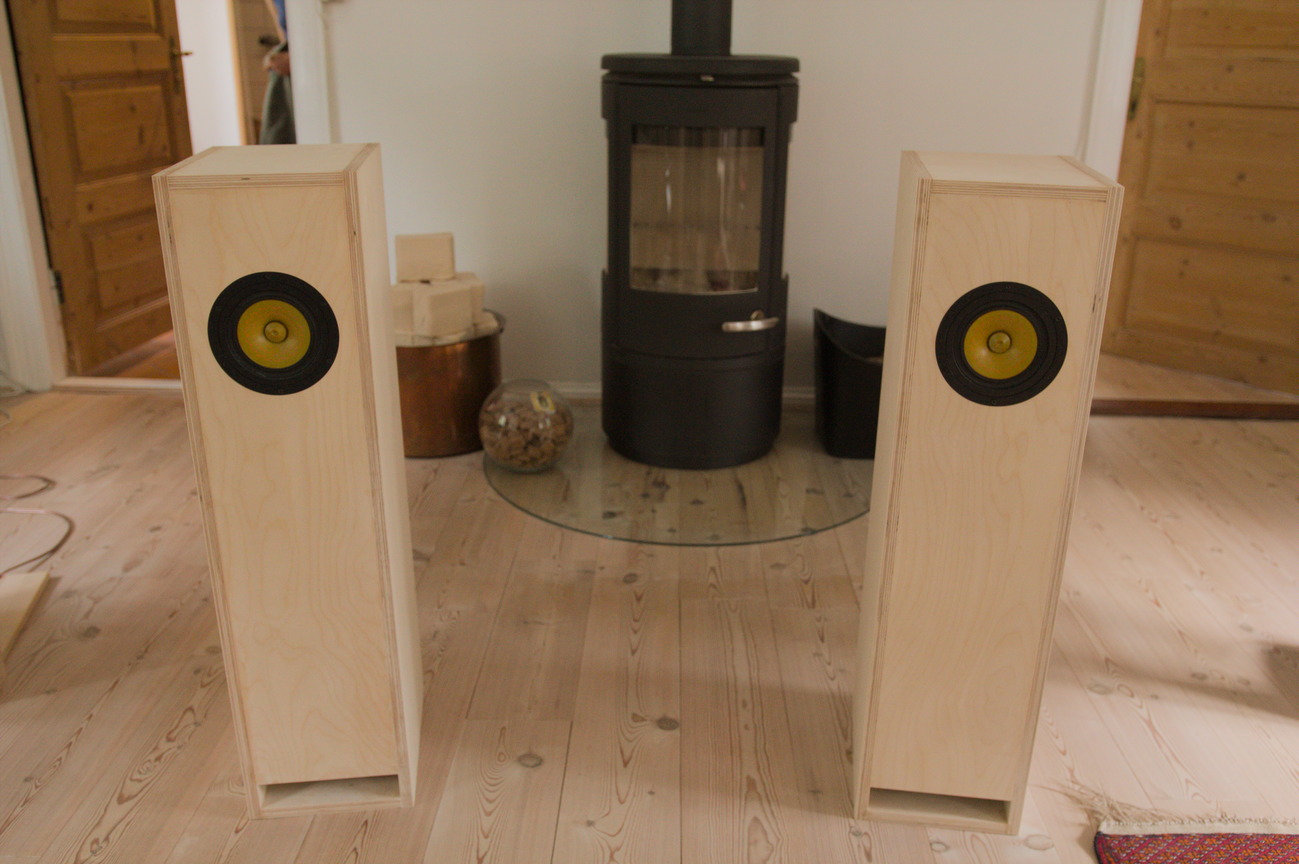
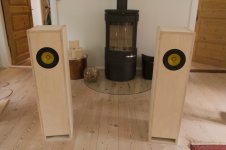
Pair done. Drivers from Dave, lemon yellows with orange footprints, i think they look great!
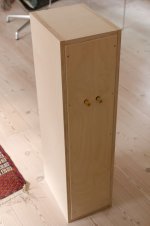
 Back with removable panel. The gasket tape was quite thick so the edges of the back stuck out a bit so we cut a bevel with the router and pretended it was on purpose

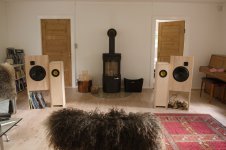
Listening tests vs Manzanitas. The Manzas sound gorgeous in that room and they like my dads old Marantz PM-64. The Pensils couldnt quite keep up in the bass department, but they won for clarity, smoothness and imaging (though i wouldnt say the Manzas image poorly, but definitely in a different way). That said, they did produce impressive amount of bass in that large-ish living room, also considering the distance to the back wall. Here, in my quite a bit smaller one they are perfect, and they seem to have made good friends with my BA3 Pre/FW F6 combo

Kudos to Dave and Scott
This was another speaker project I did with my dad (our first project was a pair of Manzanitas for him - those are posted in the Manzanita thread).
Some piccies:
Holey brace. An easy way to figure out when you've made enough holes is to weigh the pieces you've cut out and divide the weight by that of the brace before cutting it. In my case, i actually didn't weigh before i started taking out holes, so i just added the weights of brace and cutout pieces together and used that as a total weight, knowing it would underestimate the % of material removed. IIRC i got to around 40%.
Baffle. I am still a routing noobie and have a geeky sort of appreciation for the look of a baffle cut for flush-mounting
Glue up. We wanted to glue up in parallel but didn't have enough clamps...
Stuffing. 300g per speaker. MDM-4 (i think). The gasket tape is monacor MDM-35. The backs are removable, but i haven't played around with stuffing yet.
First one done! Quite fiddly to get the holey brace to fit snugle against the back of the driver. We had to trim quite a bit of material and ended up with a piece of gasket tape between the wood and driver.
Pair done. Drivers from Dave, lemon yellows with orange footprints, i think they look great!
Listening tests vs Manzanitas. The Manzas sound gorgeous in that room and they like my dads old Marantz PM-64. The Pensils couldnt quite keep up in the bass department, but they won for clarity, smoothness and imaging (though i wouldnt say the Manzas image poorly, but definitely in a different way). That said, they did produce impressive amount of bass in that large-ish living room, also considering the distance to the back wall. Here, in my quite a bit smaller one they are perfect, and they seem to have made good friends with my BA3 Pre/FW F6 combo
Kudos to Dave and Scott
Attachments


Last edited:
“The gasket tape was quite thick so the edges of the back stuck out a bit so we cut a bevel with the router and pretended it was on purpose.”
You’ve learned the best way to fix a mistake is to make it a feature! Trying to actually fix it by hiding it usually makes it more obvious. Best to hide it in plain sight.
I also love the way the Manzanitas are being used for storing large books and firewood! Helps them blend better with the decor!
You’ve learned the best way to fix a mistake is to make it a feature! Trying to actually fix it by hiding it usually makes it more obvious. Best to hide it in plain sight.
I also love the way the Manzanitas are being used for storing large books and firewood! Helps them blend better with the decor!
Holey brace. An easy way to figure out when you've made enough holes is to weigh the pieces you've cut out and divide the weight by that of the brace before cutting it. In my case, i actually didn't weigh before i started taking out holes, so i just added the weights of brace and cutout pieces together and used that as a total weight, knowing it would underestimate the % of material removed. IIRC i got to around 40%.
An even easier way is to post pictures and ask Dave, he'll tell you where you need more holes...
Beautiful job, I aspire to do wood working like that. How did you make those holey braces so perfect. I'm glad mine are hidden inside and will not be seen again...
Thanks guys, I am very happy with the outcome though i have to say part of the reason they came out so nice was down to the accurate work of my dad's neighbor who took care of cutting the wood in his workshop.
Mancave, the big holes were done by router, the smaller ones with a hole saw for a cordless drill - i think chrisb mentioned that approach at some point. It works pretty well, but you have to take it easy with the drill. We did manage to kill one cordless in the process Anyways, it's not a place that makes a lot of sense to be very particular about neatness since it is not going to be visible
Mancave, the big holes were done by router, the smaller ones with a hole saw for a cordless drill - i think chrisb mentioned that approach at some point. It works pretty well, but you have to take it easy with the drill. We did manage to kill one cordless in the process
Anyways, it's not a place that makes a lot of sense to be very particular about neatness since it is not going to be visible Two tips I've found useful:Mancave, the big holes were done by router, the smaller ones with a hole saw for a cordless drill - i think chrisb mentioned that approach at some point. It works pretty well, but you have to take it easy with the drill. We did manage to kill one cordless in the process
1. use a hammer drill
2. pre-drill a through-hole which overlaps the circumference of the hole saw's circle, which lets the dust fall out and not choke up the cut.
YouTube
Attachments
I usually clamped a stack of both brace pieces of each size along with a scrap of MDF to ensure all holes where in the same place on each part, as well as to reduce grain blow-out on bottom side of plywood. I’d also run a ligh pass of 45dg chamfer bit on both sides of all hole to eliminate splinters that can make for fun slivers to dig out. On a pair of Pensils for A7 or 10s, those braces could take longer to cut and nest the light kiss of fit to driver magnet than the rest of the build before veneer & finishing.
Guys, is this "Pensil" box comparable to bass reflex?
If so, what would be the tuning frequency of this cabinet?
I got myself a batch of Alpair 10.3's... 10 pieces =)
So far I've made a pair of 16 liter 43Hz reflex boxes. Love them.
Now I'm working on a 11 liter SC4 style box.. I'm thinking about making it a center speaker for home theater use..
All of these boxes are modded of 70's-80's speakers with busted elements.
Now I got my eyes on a pair of old ~27 liter tall floor standing boxes with busted elements.. Wonder if anything could be made out of these.. They don't seem to make sense in WINISD
- Home
- Loudspeakers
- Full Range
- Pensils for Alpair 10.3 & Alpair 10p