Hi All,
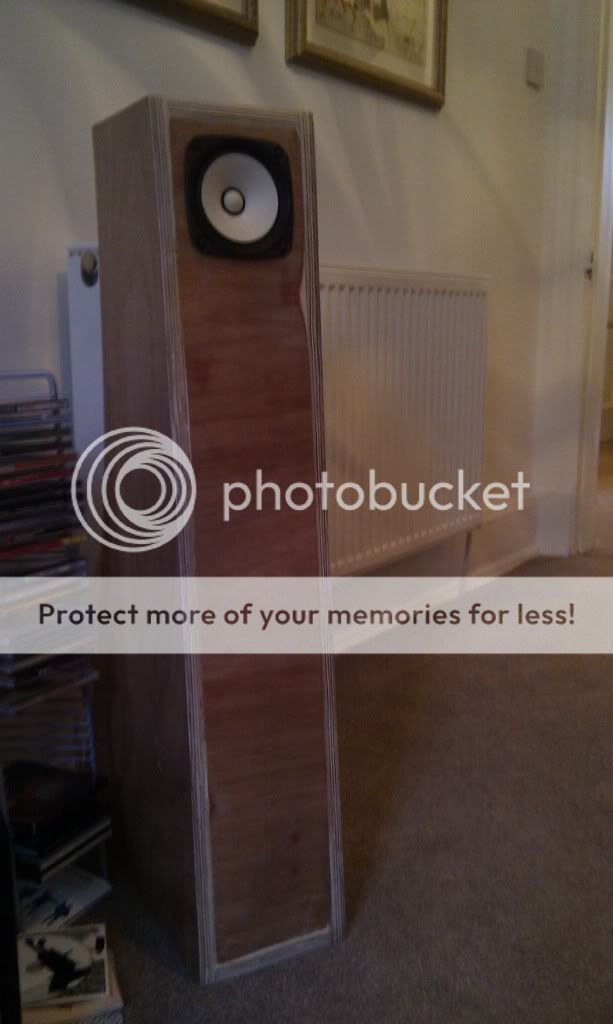
I built some Frugel Horn Mk 3s about a month ago and I've finally got round to take some photos and post the results.
First things first. They sound amazing. I'm not a hi-fi buff, but to my untrained ears, when coupled with an old cambridge audio amp and cd player I liberated from a dusty corner in my uncle's garage, they produce the best quality recorded sound I've heard.
Second things second. This is my first DIY project. Ever. So I know the build isn't perfect! I'll share some lessons learned in my subsequent posts.
Lastly, thanks to the designers of the Frugel Horn. Thanks for sharing!
I chose to use 18mm hardwood ply for the build. I chose the 18mm over the 15mm as I wanted a chunkier pair of speakers. In hindsight, I would have gone for the 15mm, as the 15mm design's baffle covers the entire front face of the speakers. i.e. it covers the sides the top and the bottom when viewed from the front. This would make the finishing easier, particularly if your ply has holes in the layers.
An alternative of course is to make sure you get good quality ply. I think I was ripped off at the saw mill with poor quality ply that had holes in the layers. This meant I needed to use wood filler to get an even finish. However, it is hard to match the colours, and it is tough to sand once dried.
I used a non-gloss, clear wood varnish. 3 coats. The red tinges you can see on the baffles are from where I got too frisky with a belt sander and sanded through the top layer to a lower, darker layer of the ply.
Finally, when cutting the wood, make sure to use the appropriate plan: 18mm or 15mm. Stupidly, I made some cuts using the 15mm plan, but was lucky in that I just needed to trim them down to the correct 18mm dimensions. Had it been the other way, using 18mm plans to cut 15mm ply, I would of wasted a lot of wood.
When gluing, I didn't have any clamps, so I just laid the sides on the floor, added glue to the side plates along marked lines, then put the baffle, back, interior, top and bottom in place (applying glue to them too). Wood glue immediately has enough stickyness to hold the boards in place and you have up to 10 minutes to adjust them until they are perfectly in place. After I was happy with their positions, I placed heavy paint posts flush to the sides to give some stability, then balanced heavy objects on the top. It worked a treat.
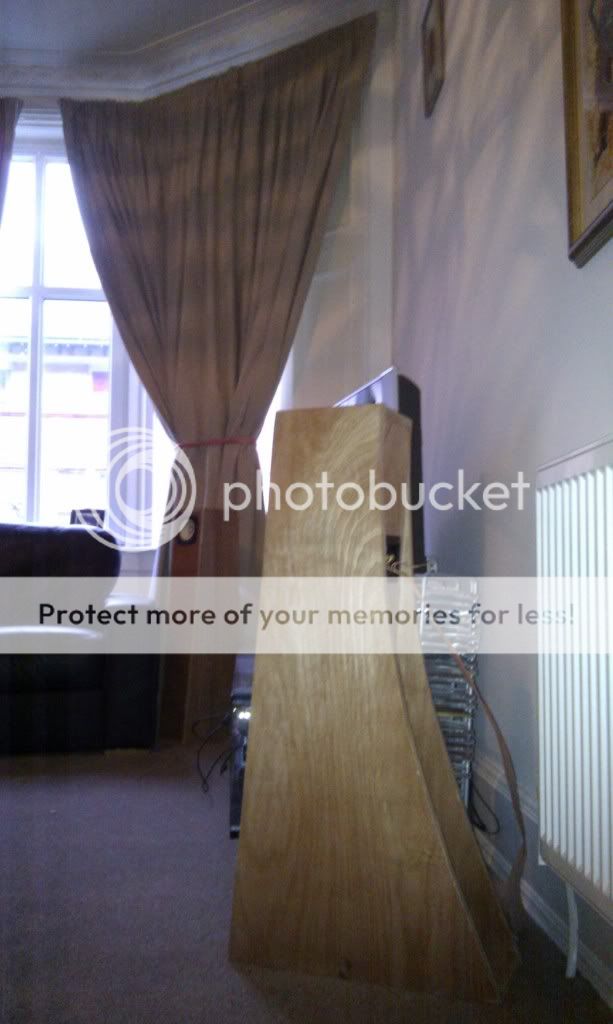
The reason the alignment didn't come out perfectly in the end result was due to me not being able to cut 5 degree edges to the ply. I used a plane to attempt it, but it wasn't a great result. Another factor, was that the baffle actually curves slightly. Another sign of poor quality ply perhaps. Anyway, I didn't have enough wood to change it.
The reason the alignment didn't come out perfectly in the end result was due to me not being able to cut 5 degree edges to the ply. I used a plane to attempt it, but it wasn't a great result. Another factor, was that the baffle actually curves slightly. Another sign of poor quality ply perhaps. Anyway, I didn't have enough wood to change it.
I used synthetic pillow stuffing and old carpet underlay for the baff. The underlay I glued in place using impact glue which worked well.
I used quite thick electrical cabling for the internal wiring. I think the diameter was about 2mm copper (can't remember exactly). Although I understand there is a direct relationship between the quality of the sound and the thickness of the wire, I would have used thinner wire in hindsight. The rigidity of the thick wire makes it awkward to solder in place.
A final few notes on soldering. Watch out for the speaker magnet! It seems obvious as I write this, but the soldering iron will be strongly attracted to the speaker magnet. Also, be carful when heating the driver contacts not to melt the soldered connection further along the circuit towards the speaker cone.
While I haven't started cutting wood yet, I do have the wood and drivers. The build starts as soon as I finish the current three way build (yes I'm a double agent). I plan to go with the CHR70.3s, but I will also try EL70s.
while not every scratch or kit builder may be able or want to post photos, how about a roll call - I'd be curious as to how many pairs / models of drivers to date
- Status
- This old topic is closed. If you want to reopen this topic, contact a moderator using the "Report Post" button.
- Home
- Loudspeakers
- Full Range
- My Frugel Horn Mk3 Build