You can probably build these in less time than it takes to read the instructions. For some of you this will fall into the, 'how to boil water' category, but I would appreciate your comments and feedback.
The Concrete Sandwich - a very simple, extremely affordable loudspeaker project.
Ingredients (per loudspeaker)
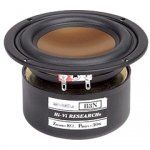
One three inch full-range driver
One two-hole full-size concrete block
MDF (Medium Density Fiberboard) or particle board sufficient to cover 'front' and 'back' of concrete block (front and back = the sides with the holes)
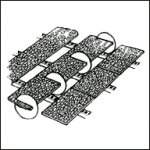
OSB (Oriented Strand Board) sufficient to cover 'front' (optionally 'back' if using particle board instead of MDF) of concrete block
Nine or eighteen flat-head wood screws
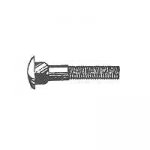
Four long carriage bolts
Four nuts for carriage bolts
Eight fender washers
Some wire
Some stuffing
Tools
Hole saw
Saw
Drill
Countersink bit
Screwdriver
Socket set for carriage bolts
Soldering iron
Four 'C' clamps
Router (opt)
Sandpaper
Hammer and chisel, or a concrete saw (optional, but recommended)
Building - stage 1
Cut (or have the lumberyard cut) the MDF and OSB to the size of the open-holed faces of the block including the block's 'frame'. A slight reveal of the block 'frame' edges is optional.
Mark the location for mounting the driver on the baffle-side piece of MDF and OSB. It should be centered in the 'top' hole. Using a hole saw and drill, cut out the speaker opening in the MDF. Dry fit and test for clearance. (You'll actually be mounting the driver to the OSB.}
Similarly, but a little more carefully, use the hole saw to cut the driver opening in the OSB.
Line up the edges of the baffle-side MDF (inside) and OSB (outside), check that the two driver holes line up, then dry screw the OSB to the MDF with the screw heads on the OSB (front) side. Use a countersink bit to allow the wood screws to be flush with the face of the baffle.
Chamfer the outside front edges of the OSB using a router or sandpaper to ease the sharp edges.
Connect the speaker cable to the driver terminals. Use plain for + and marked/ribbed for - (or the opposite, but be consistent). The cable will connect directly to the amp output.
Front mount the driver (still a dry mount) to the OSB side of the baffle sandwich.
...
Note: you may want to record the following tuning tests. The human ear tends to forget if too much time elapses between samples. Recording quality isn't critical, you're listening for bass response primarily.
Tuning - stage 1
Stand the block/front baffle assembly on end and using the four 'C' clamps attach the MDF portion of the rear panel to the assembly. The concrete block should be loosely sandwiched between the front baffle and the rear panel. Main thing is you don't want to squash the speaker cable (Radio Shack used to sell a nice flat 14 twin - they may still stock it, but over-tightening the 'C' clamps should still be avoided). To create a temporary gasket, you can use leftover speaker cable or roll-up some paper towels and tape into thin cylinders.
At this point the speaker cable should be routed between the rear panel and the concrete block. And the assembly should not yet be ported.
Play some music and listen to the speaker in the 'sealed' enclosure.
Remove the rear panel, re-tighten the 'C' clamps and listen to the same music through the speaker in the now open-backed enclosure.
Caution: Avoid bass-heavy music and very loud music at this point of the tuning procedure.
Tuning - stage 2
Loosen the 'C' clamps and slide the rear panel up exposing a slot between the bottom of the rear panel and the top of the concrete block's cross-piece. Try several different sized openings. Tighten the 'C' clamps for each time.
Note: through this stage, all your tuning activities have been reversible. If you especially like what you've heard so far, you may want to use another concrete block for stage 3.
Tuning - stage 3
Create an air opening between the upper and lower chambers of the concrete block by sawing or chiseling away the outer edge of the rear of the cross-piece. Do this with the block far away from your stereo having removed everything else.
Reassemble and dry fit the front sandwich and rear panel using the 'C' clamps as in stage 2. However the slot should now vent the lower (non-speaker-containing) chamber.
Again, try various sizes of slot opening. Once you're close, stuff with your favorite stuffing (long fiber wool, fiberglass, etc.) and fine tune for tight bass. You still want to avoid extreme bass or volume.
If you are happy with the results, build the other Concrete Sandwich and fine tune some more but using the pair this time.
Building - stage 2
Note: the driver should not be mounted at this point.
Mark where the rear MDF panel meets the top of the concrete block and remove the excess. If you plan to use a sandwiched rear panel mark OSB also and remove the excess. Dry screw the rear panel sandwich together using wood screws.
Line up the tops of the front and rear panels and clamp the panels using the 'C' clamps. Mark a spot in each corner of the rear panel ( but no lower than an inch or so above the bottom of the rear panel) for the carriage bolts. Turn over and transfer the markings to the front baffle. Make sure the pattern looks OK from the front. Drill the four holes from the front through both panels. Avoid the wood screws..
Front mount the driver (still dry mount) to the OSB side of the baffle sandwich. Using fender washers and carriage bolts, dry fit the front and rear assemblies with the concrete block sandwiched in between. Tighten the nuts to the bolts to suit.
Give a final pre-assembly listen.
Finishing -
There's no absolute need to apply a finish, but you'll probably want to. If for no other reason than to seal the wood. The driver should be removed one last time for the finishing step.
The concrete block is going to be rough so you may want a heavy coat of durable paint on the outside at least. Another option would be wrapping the block and panel edges with leather or Tolex or something like that. Covering the bottom with felt can help protect your furniture.
Assembly - Dry fit everything together but this time tighten the screws holding the driver and the bolts a little more than you had during the tuning phases.
Enjoy - If you are concerned about blowing the drivers, order a second set and then test the limits of the first set to your heart's content. For the price of a meal, the peace of mind may be worth it.
Options -
If you decide to recess and flush mount the driver for some reason, then you may want to recess the carriage bolts also. I wouldn't recommend flush mounting because the need for making a perfect circle is much greater.
Sealing the driver mounting is not a bad idea. A suitable gasket may be included with the driver depending on the manufacturer.
Sealing the box with gaskets or silicon? Listen for a while first before doing this.
Finishing the inside of the chambers and the backsides of the baffle and rear panel in damp environments is probably a good idea.
If you want to use banana plugs for speaker connections, make sure the spacing between the plus and minus posts lines up with a standard dual banana plug. Use a red post for plus and a black post for minus. The tabbed side of a dual banana plug should be minus.
If you use Neutrik NL4 Speakons for speaker connections I'd recommend settling on either pin 1 (+ & -) or pin 2 (+ & -) and sticking with it. (Your favorite sub-woofer manufacturer may have already made the choice for you - you want what your sub doesn't.) Pass through the unused pair if you use two Neutrik NL4s on a box.
Limitations? Yes. No earth-shaking bass from a three inch driver so you may want to use subs. And if you use subs, then you may want to add tweeters for balance. And if you add tweeters then you may want to... You get the idea. Accept that these are what they are. You can get started for less than the price of a cheap date (plus shipping) with these guys:
HiVi B3N 3" Aluminum Driver Round Frame 297-428
Buy two sets of drivers so you won't be heartbtoken if you destroy the first pair.
The catch is you can't get away with using just any old amp.
If you decide you like what the Concrete Sandwich speakers do, then maybe build a box with interior parameters that exactly match the drivers you have. Or upgrade to some Lowthers or Western Electric 8" or something. In the meantime, based on a co-writer's experience with the same drivers in an ipe wood box with similar interior space, they should be quite listenable.
best,
john
The Concrete Sandwich - a very simple, extremely affordable loudspeaker project.
Ingredients (per loudspeaker)
One three inch full-range driver
One two-hole full-size concrete block
MDF (Medium Density Fiberboard) or particle board sufficient to cover 'front' and 'back' of concrete block (front and back = the sides with the holes)
OSB (Oriented Strand Board) sufficient to cover 'front' (optionally 'back' if using particle board instead of MDF) of concrete block
Nine or eighteen flat-head wood screws
Four long carriage bolts
Four nuts for carriage bolts
Eight fender washers
Some wire
Some stuffing
Tools
Hole saw
Saw
Drill
Countersink bit
Screwdriver
Socket set for carriage bolts
Soldering iron
Four 'C' clamps
Router (opt)
Sandpaper
Hammer and chisel, or a concrete saw (optional, but recommended)
Building - stage 1
Cut (or have the lumberyard cut) the MDF and OSB to the size of the open-holed faces of the block including the block's 'frame'. A slight reveal of the block 'frame' edges is optional.
Mark the location for mounting the driver on the baffle-side piece of MDF and OSB. It should be centered in the 'top' hole. Using a hole saw and drill, cut out the speaker opening in the MDF. Dry fit and test for clearance. (You'll actually be mounting the driver to the OSB.}
Similarly, but a little more carefully, use the hole saw to cut the driver opening in the OSB.
Line up the edges of the baffle-side MDF (inside) and OSB (outside), check that the two driver holes line up, then dry screw the OSB to the MDF with the screw heads on the OSB (front) side. Use a countersink bit to allow the wood screws to be flush with the face of the baffle.
Chamfer the outside front edges of the OSB using a router or sandpaper to ease the sharp edges.
Connect the speaker cable to the driver terminals. Use plain for + and marked/ribbed for - (or the opposite, but be consistent). The cable will connect directly to the amp output.
Front mount the driver (still a dry mount) to the OSB side of the baffle sandwich.
...
Note: you may want to record the following tuning tests. The human ear tends to forget if too much time elapses between samples. Recording quality isn't critical, you're listening for bass response primarily.
Tuning - stage 1
Stand the block/front baffle assembly on end and using the four 'C' clamps attach the MDF portion of the rear panel to the assembly. The concrete block should be loosely sandwiched between the front baffle and the rear panel. Main thing is you don't want to squash the speaker cable (Radio Shack used to sell a nice flat 14 twin - they may still stock it, but over-tightening the 'C' clamps should still be avoided). To create a temporary gasket, you can use leftover speaker cable or roll-up some paper towels and tape into thin cylinders.
At this point the speaker cable should be routed between the rear panel and the concrete block. And the assembly should not yet be ported.
Play some music and listen to the speaker in the 'sealed' enclosure.
Remove the rear panel, re-tighten the 'C' clamps and listen to the same music through the speaker in the now open-backed enclosure.
Caution: Avoid bass-heavy music and very loud music at this point of the tuning procedure.
Tuning - stage 2
Loosen the 'C' clamps and slide the rear panel up exposing a slot between the bottom of the rear panel and the top of the concrete block's cross-piece. Try several different sized openings. Tighten the 'C' clamps for each time.
Note: through this stage, all your tuning activities have been reversible. If you especially like what you've heard so far, you may want to use another concrete block for stage 3.
Tuning - stage 3
Create an air opening between the upper and lower chambers of the concrete block by sawing or chiseling away the outer edge of the rear of the cross-piece. Do this with the block far away from your stereo having removed everything else.
Reassemble and dry fit the front sandwich and rear panel using the 'C' clamps as in stage 2. However the slot should now vent the lower (non-speaker-containing) chamber.
Again, try various sizes of slot opening. Once you're close, stuff with your favorite stuffing (long fiber wool, fiberglass, etc.) and fine tune for tight bass. You still want to avoid extreme bass or volume.
If you are happy with the results, build the other Concrete Sandwich and fine tune some more but using the pair this time.
Building - stage 2
Note: the driver should not be mounted at this point.
Mark where the rear MDF panel meets the top of the concrete block and remove the excess. If you plan to use a sandwiched rear panel mark OSB also and remove the excess. Dry screw the rear panel sandwich together using wood screws.
Line up the tops of the front and rear panels and clamp the panels using the 'C' clamps. Mark a spot in each corner of the rear panel ( but no lower than an inch or so above the bottom of the rear panel) for the carriage bolts. Turn over and transfer the markings to the front baffle. Make sure the pattern looks OK from the front. Drill the four holes from the front through both panels. Avoid the wood screws..
Front mount the driver (still dry mount) to the OSB side of the baffle sandwich. Using fender washers and carriage bolts, dry fit the front and rear assemblies with the concrete block sandwiched in between. Tighten the nuts to the bolts to suit.
Give a final pre-assembly listen.
Finishing -
There's no absolute need to apply a finish, but you'll probably want to. If for no other reason than to seal the wood. The driver should be removed one last time for the finishing step.
The concrete block is going to be rough so you may want a heavy coat of durable paint on the outside at least. Another option would be wrapping the block and panel edges with leather or Tolex or something like that. Covering the bottom with felt can help protect your furniture.
Assembly - Dry fit everything together but this time tighten the screws holding the driver and the bolts a little more than you had during the tuning phases.
Enjoy - If you are concerned about blowing the drivers, order a second set and then test the limits of the first set to your heart's content. For the price of a meal, the peace of mind may be worth it.
Options -
If you decide to recess and flush mount the driver for some reason, then you may want to recess the carriage bolts also. I wouldn't recommend flush mounting because the need for making a perfect circle is much greater.
Sealing the driver mounting is not a bad idea. A suitable gasket may be included with the driver depending on the manufacturer.
Sealing the box with gaskets or silicon? Listen for a while first before doing this.
Finishing the inside of the chambers and the backsides of the baffle and rear panel in damp environments is probably a good idea.
If you want to use banana plugs for speaker connections, make sure the spacing between the plus and minus posts lines up with a standard dual banana plug. Use a red post for plus and a black post for minus. The tabbed side of a dual banana plug should be minus.
If you use Neutrik NL4 Speakons for speaker connections I'd recommend settling on either pin 1 (+ & -) or pin 2 (+ & -) and sticking with it. (Your favorite sub-woofer manufacturer may have already made the choice for you - you want what your sub doesn't.) Pass through the unused pair if you use two Neutrik NL4s on a box.
Limitations? Yes. No earth-shaking bass from a three inch driver so you may want to use subs. And if you use subs, then you may want to add tweeters for balance. And if you add tweeters then you may want to... You get the idea. Accept that these are what they are. You can get started for less than the price of a cheap date (plus shipping) with these guys:
HiVi B3N 3" Aluminum Driver Round Frame 297-428
Buy two sets of drivers so you won't be heartbtoken if you destroy the first pair.
The catch is you can't get away with using just any old amp.
If you decide you like what the Concrete Sandwich speakers do, then maybe build a box with interior parameters that exactly match the drivers you have. Or upgrade to some Lowthers or Western Electric 8" or something. In the meantime, based on a co-writer's experience with the same drivers in an ipe wood box with similar interior space, they should be quite listenable.
best,
john
Fun concept, but...
An externally hosted image should be here but it was not working when we last tested it.
Here's a stack of potential Concrete Sandwich enclosures. Each one just waiting to be stuffed with a three inch full range driver.
And here is a three inch full range driver just waiting to be stuffed into a concrete block very much like one of the ones in the picture preceding it.
Next is a drawing of Oriented Strand Board being cut to shipping size. For the Concrete Sandwich, the retailer (i.e. Home Despot or Lowes) will be happy to cut into smaller sizes for a small additional fee.
After that is an illustration of a carriage bolt. This is not to scale since it came up in a search for a long carriage bolt and this was linked to a 10" model.
Then, the common North American wood screw (flatheadus slotus americanus)
Seriously, the Concrete Sandwich is little more than a concrete block sandwiched between a couple pieces of engineered wood. And one of the pieces of wood has a three inch speaker mounted in it. I'll try to come up with a drawing at some point, but I'm not a great visual artist. If I ever need another set of loudspeakers, I'll build a pair but I don't have the room for them myself. It just seemed like a nice thing to post what with the depression going into its fourth year and all. I hope it sparks some ideas as to how to take advantage of a less-than $12 driver that sounds pretty darned good. And if you don't like that driver, there are other cheap ones that probably sound good too. It's just that I've heard some of my own lyrics played through that particular driver, and I liked what I heard.
best,
john
Attachments


- Status
- This old topic is closed. If you want to reopen this topic, contact a moderator using the "Report Post" button.