That post just above shows a very good example of the flare technique.
http://www.madaboutsound.com/prod_det.asp?cid=104&sa=cf&ctid=6
http://www.madaboutsound.com/prod_det.asp?cid=104&sa=cf&ctid=6
loninappleton said:That post just above shows a very good example of the flare technique.
http://www.madaboutsound.com/prod_det.asp?cid=104&sa=cf&ctid=6
I noticed that too when I clicked on it earlier today. That really helps out a lot. I bought a rasp for doing that but I'm not sure it is the correct tool for the application....let me explain
My situation is a bit unique since I've already attached the baffles. There just simply isn't enough room in the compression chamber to use the rasp at its fullest. If I used VERY short strokes with the rasp it would work but would probably drive me insane.
I ended up buying a little dremel bit that looks like it will get the job done. I'll be able to maneuver it around quite a bit better I think.
An externally hosted image should be here but it was not working when we last tested it.
italynstylion said:My situation is a bit unique since I've already attached the baffles.
I've been in that situation many times. Rasp works fine.
dave
planet10 said:
I've been in that situation many times. Rasp works fine.
dave
I can see it as a problem if one is trying to do this from the opposite side where you can't get much pressure on a file.
loninappleton said:I can see it as a problem if one is trying to do this from the opposite side where you can't get much pressure on a file.
It isn't as easy working from the front on an already fixed baffle, but it works.
dave
I received the drivers yesterday and I'm going to start work on opening up the back side of the baffle where the speaker mounts.
I know I need to fill up the compression chamber a bit to get the horn action to be lower. What sort of stuff do I fill it with? I assume it has to be something totally solid right? Also, my drivers each came with a small soft circular pad type thing. What is this intended for? Does that go behind the driver to lessen the back wave re-entering the cone?
I know I need to fill up the compression chamber a bit to get the horn action to be lower. What sort of stuff do I fill it with? I assume it has to be something totally solid right? Also, my drivers each came with a small soft circular pad type thing. What is this intended for? Does that go behind the driver to lessen the back wave re-entering the cone?
italynstylion said:I know I need to fill up the compression chamber a bit to get the horn action to be lower. What sort of stuff do I fill it with? I assume it has to be something totally solid right? Also, my drivers each came with a small soft circular pad type thing. What is this intended for? Does that go behind the driver to lessen the back wave re-entering the cone?
Irregular shaped wooden blocks would be good for fill... then you can add them incrementally.
The wool felt pad is intended to be glued onto the back of the magnet to reduce reflections.
dave
italynstylion said:Awesome, thanks for the quick response dave.
Do other than the felt pad is there anything else soft I should be putting in the compression chamber?
That you'll want to "tune" by ear - with irregular surfaces in the chamber from the wooden blocks Dave suggested, you may not need as much damping, so I'd start with thin felt / underpadding material on one side wall and the bottom of the chamber.
Use a mono source (such as FM radio ) to compare treated to non treated enclosures, listening for reductions of coloration (if any)
Chris, thank you for explaining that further. I'm going to give that a shot. What things have you guys all used in the compression chambers to fill the space? I was thinking about using some wooden dowels that I'd slide into place. I'd use a a few different diameter dowel types to make sure it was an irregular surface.
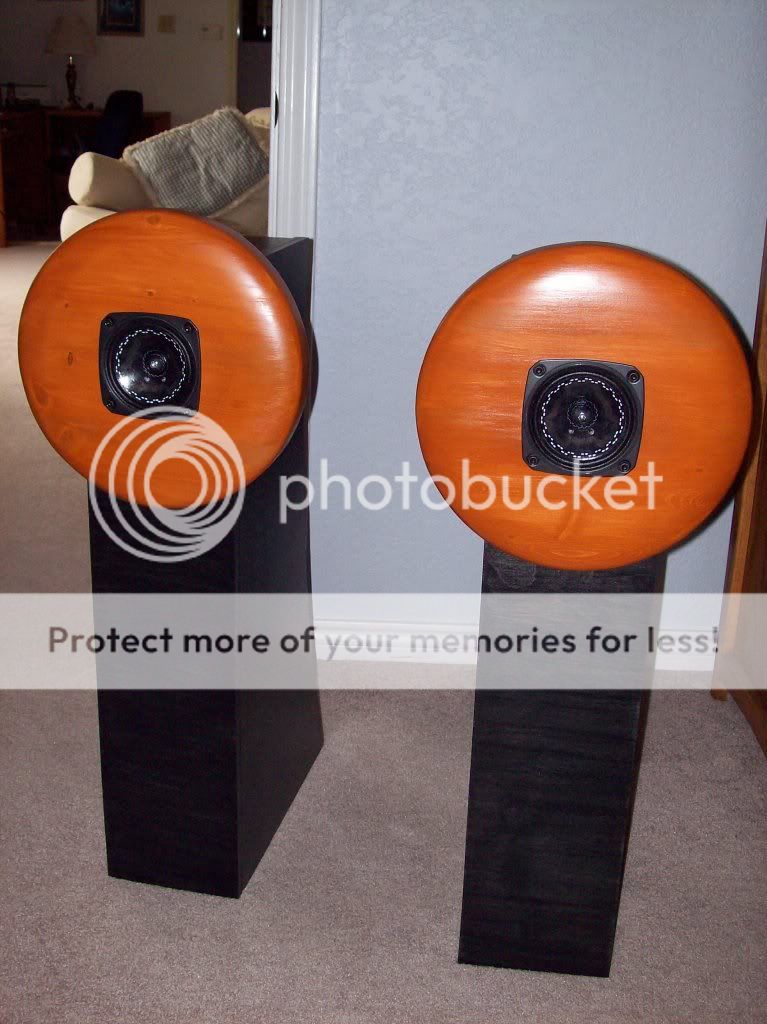
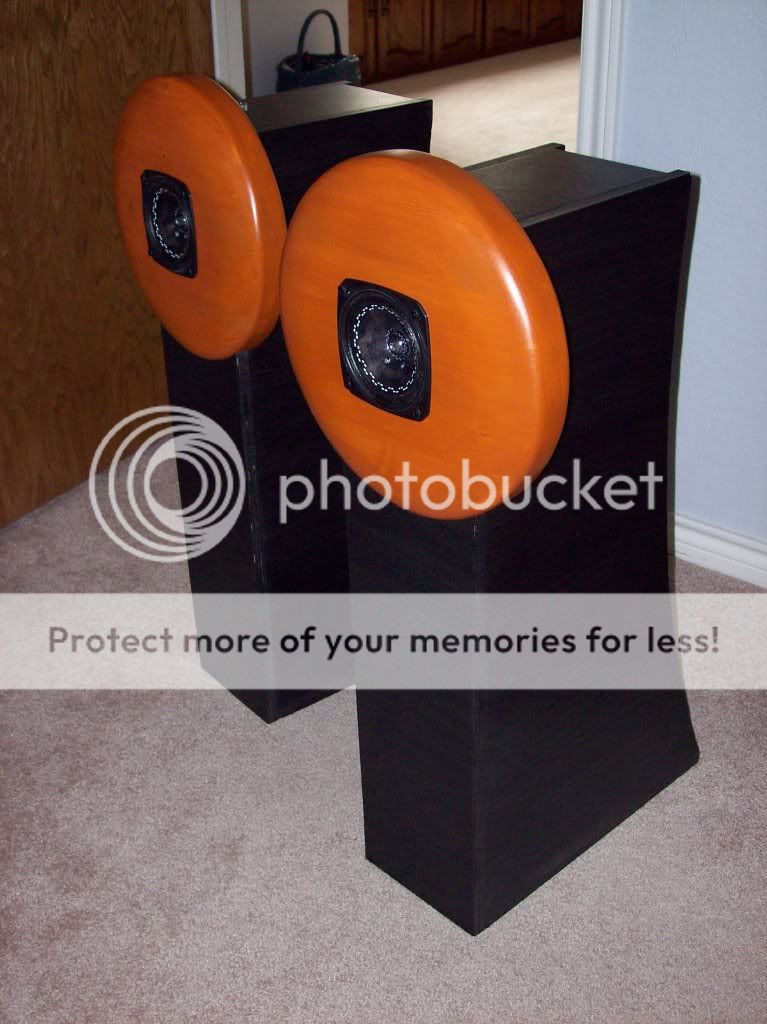
I just finished these kids up about 40 minutes ago. I'm loving them so far. I've now experienced a level of detail that I didn't know existed before now. There are things in recordings that I never even knew were there. I have yet to fill up the compression chambers but I'll go on the advice from Chris and Dave when I get to it. How much does this vary the horn action? Is it a few hz or more like 10-20?
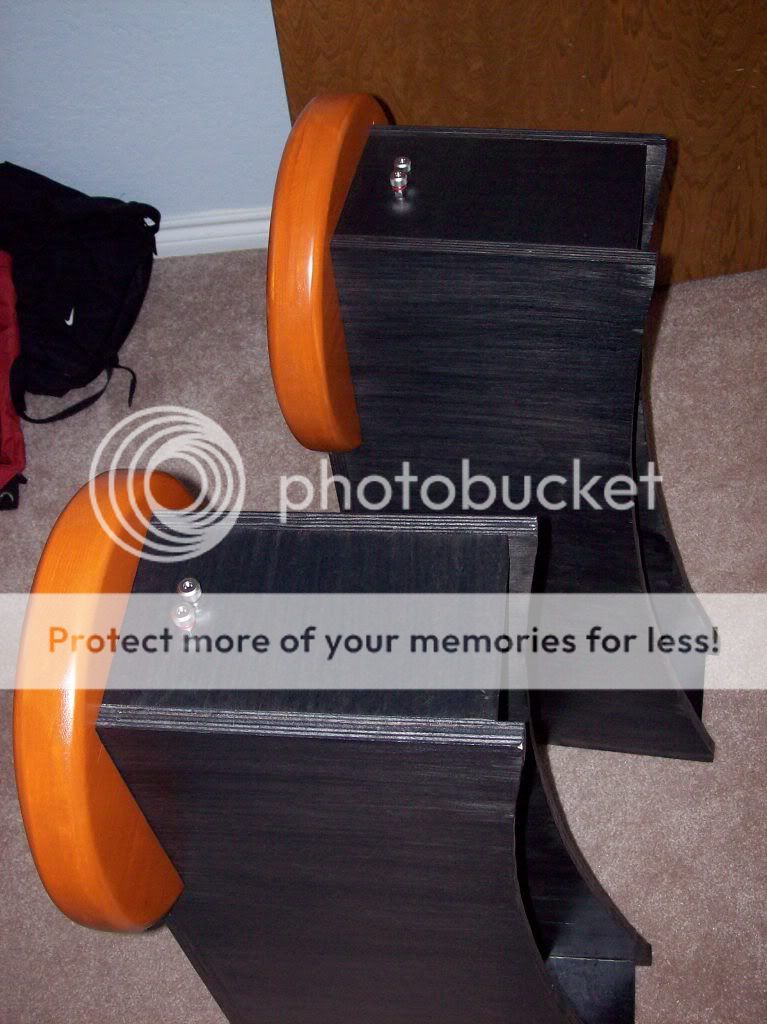
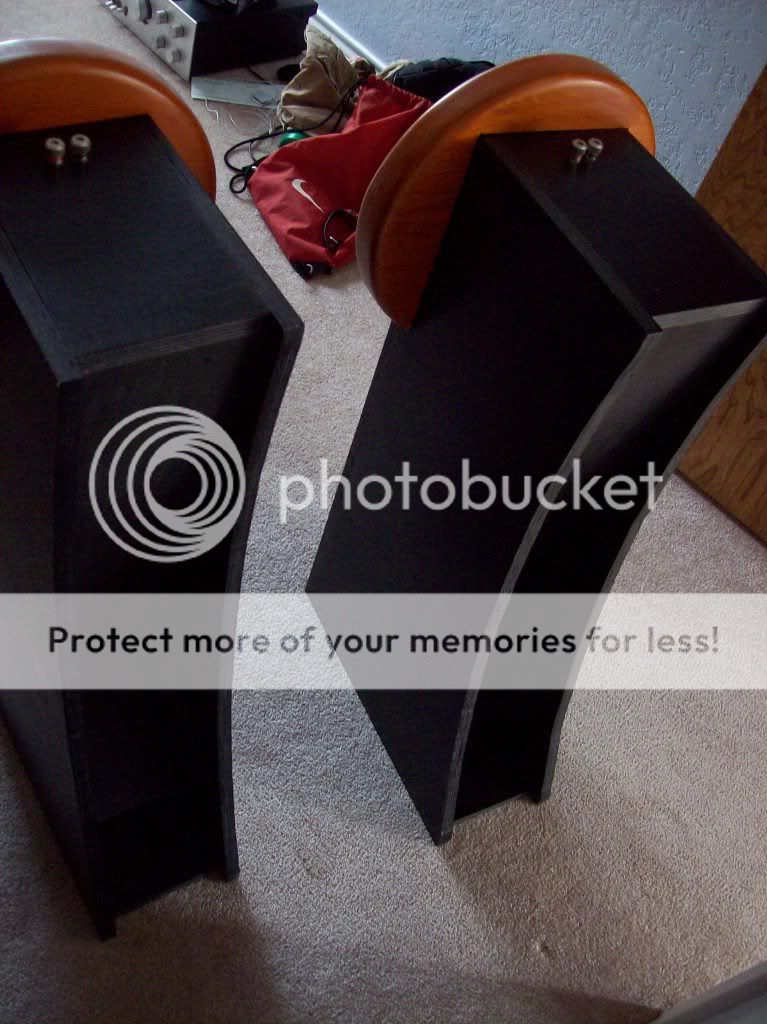
Either way, here are some pictures of the final product. I flared the inside of the baffle as you guys instructed me to do. The rasp was near impossible to use in that area so I ended up using the rotary attachment. It did a good job and made short work of it.
Also, I stumbled upon the ultimate win in Lowes two days ago. I was able to find threaded inserts! Honestly, having now used these I'll never use another T-nut...ever. These were amazing and ended up letting me flare out the whole bottom of the baffle.
A big thanks goes out to Dave for a great job on the drivers and everyone else who gave advice in this thread. Thank you.
Pics.....
Having only built one pair, my solution to adjusting back-chamber volumes is to cut filler blocks that fit the angled rear wall of the chamber. and to screw them into that wall, adding/subtracting as necessary. Having said that, my front baffle is in 2 pcs., with the driver mounted in a (removable) baffle the size of the back-chamber.
Good Luck!
Don
Good Luck!
Don
italynstylion said:What things have you guys all used in the compression chambers to fill the space?
We started out with paint cans (with pain tin them
") )
)Dowels are good. Make them different lengths, cut he end pointing at the driver at an angle.
dave
italynstylion said:I'll be making the deflector when I get the nerve. I'm holding off on it at the moment because I'm not sure if I'm going to integrate some small subs into them. For now I'll just enjoy these.
It's well worth the effort to build the rear deflectors and experiment with room placement, before deciding if /how much bass reinforcement these might need. (i.e. YMMV)
BTW, the deflectors are a great place to use up any MDF scraps - either by stacking pieces, or building an enclosure large enough to mount a small woofer on the back panel. While you'd be hard pressed to find a plate amp that could be shoe-horned into the same triangular enclosure, the CSS SDX7 would be a great candidate driver, along with outboard amp of your choice. This is something Dave & I have talked about for at least 2 years, and just never past the cocktail napkin stage.
Frugel "stealth" woofer
To follow up on above post, for those interested, Dave has modeled the SDX7at about 21 liters for this application - which is approx 3x the cubic volume of the original deflector design.
A full height triangular deflector, 310mm on each side and 380mm on the back, with some cross bracing would nicely accommodate one driver per side.
Outboard amp(s) make the most sense.
- Status
- This old topic is closed. If you want to reopen this topic, contact a moderator using the "Report Post" button.
- Home
- Loudspeakers
- Full Range
- My Frugel-Horn Build