The Boonton setup was for a commercial/military market instrument that would need to withstand a lot of abuse. Its actually designed to allow reading the HD on active 220V power lines. Overkill perhaps but pretty bulletproof. That's why all the extra effort and the fuses should everything else fail to protect.
Depending on a micro for AGC stuff is fine but maybe too slow/unreliable to protect the input from overrange, which is why Boonton has the comparators at the front end. Sending feedback to the host PC is a fine idea. I would personally like a little app that would show the input voltage AC, watts with a preset load, the input frequency when it can be determined and can pass that info to the analysis software assuming it can use that info. REW may be a candidate as may HPW for using that input. The micro will need to be programmed to an optimum range output for the specific card since there are several possible optimums.
Depending on a micro for AGC stuff is fine but maybe too slow/unreliable to protect the input from overrange, which is why Boonton has the comparators at the front end. Sending feedback to the host PC is a fine idea. I would personally like a little app that would show the input voltage AC, watts with a preset load, the input frequency when it can be determined and can pass that info to the analysis software assuming it can use that info. REW may be a candidate as may HPW for using that input. The micro will need to be programmed to an optimum range output for the specific card since there are several possible optimums.
Update:
Comparators have been eliminated. It saves 2 IO pins on the microcontroller and eliminates about 20 resistors and a chip. I am not too worried about the micro being too slow for the overrange, because the input should theoretically be protected from that by the depletion FET current sources and the diode clamps.
I think that feedback to the host PC is a great idea, though I will be the first to admit that PC interfacing and software design is a bit over my head, so to speak. I may be able to do some reading up and figure something out.
Also attached is a first stab at a PCB layout. As can be seen, it's not done yet, and there are still a fair number of things that haven't been connected. As I expected, this project is pushing my layout skills. Feedback is welcome. I'm not going to pretend to be a genius with PCB layout, especially where it actually matters like this project. A ground plane will be added, but that is the final step before exporting gerber files.
The resistors in this are all 1206 SMD parts, which I have grown to prefer over through-hole resistors for almost everything. The op-amps are all DIP footprints (though adapter PCBs to allow the use of SMD parts like the OPA1656 are available on ebay for less than $.02 each). I did this so that one has the option of using through-hole chips. It also means I can use an IC socket with cheap op-amps while I'm debugging the autorange circuit, since popping a socketed TL072 is less frustrating than a $5 chip that requires hot air to remove.
Attachments
Thanks,
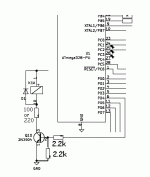
I hope that it will be useful to at least a few other people. The diodes serve two functions, and admittedly they are not a particularly great solution. They drop some voltage, which is useful since the relays are being powered by + 15V, even though they are 12V relays, so any little bit of voltage drop is welcome. Additionally, I have had issues where logic devices have an off voltage that isn't 0 V. It has caused me a few issues in the past, though it's probably better to just use a resistor rather than diodes.
I hope that it will be useful to at least a few other people. The diodes serve two functions, and admittedly they are not a particularly great solution. They drop some voltage, which is useful since the relays are being powered by + 15V, even though they are 12V relays, so any little bit of voltage drop is welcome. Additionally, I have had issues where logic devices have an off voltage that isn't 0 V. It has caused me a few issues in the past, though it's probably better to just use a resistor rather than diodes.
...powered by + 15V, even though they are 12V relays,
I have had issues where logic devices have an off voltage that isn't 0 V....
A couple hundred ohms to the relay gives the 2.9V drop you want.
The low-level for TTL (ancient technology) is 0.8V. So a naked transistor "can" turn-on for a "low" level. A diode (or a Darlington) works. But the usual technique is a resistor voltage divider and pull-down. You can even buy transistors with this network built-in.
Attachments
H713: Have you considered using a similarly priced Arduino Nano from ebay with a mini/micro USB connector and onboard USB-serial converter, instead of the plain MCU chip? If placed at the edge of the PCB, a connection to PC would be available, possible to use by any later firmware upgrade. Also trivial to upgrade the firmware from Arduino IDE via the USB connection.
H713: Have you considered using a similarly priced Arduino Nano from ebay with a mini/micro USB connector and onboard USB-serial converter, instead of the plain MCU chip? If placed at the edge of the PCB, a connection to PC would be available, possible to use by any later firmware upgrade. Also trivial to upgrade the firmware from Arduino IDE via the USB connection.
That's a great idea, and I'll definitely implement it. Normally I would use the bare chip to save cost and board space, but it seems like the nano is a much better option for this application. I can get rid of the crystal, it makes programming a snap, and it is definitely more DIY friendly.
Also, any thoughts on moving the relays for filter card selection onto the cards themselves? It would probably clean up the main board layout a bit.
You can also consider an STM32. There are lots of variants to choose from and if you choose one with built-in USB PHY, they come free with DFU capable bootloader and USB DFU app. Well, even the non USB parts probably have the DFU bootloader but it obviously won't work over USB.
You can also consider an STM32. There are lots of variants to choose from and if you choose one with built-in USB PHY, they come free with DFU capable bootloader and USB DFU app. Well, even the non USB parts probably have the DFU bootloader but it obviously won't work over USB.
For this project, I think I want to stick with Arduino. For a lot of things I would probably consider learning how to work with another chip that might be better suited, however, the huge maker community support for Arduino means that I think it will be a benefit for this particular project.
I'm trying to make this a relatively DIY-friendly project, so that someone who doesn't have a lot of past experience with microcontrollers can put it together.
At the same time, I'm also trying to make it expandable. Ideally the THD of the input amplifier will be extremely low, so with the use of a Twin-T notch filter in one of the filter card slots it should be possible to look at distortion levels far below what something like a QA401 would normally be able to see.
By the way, if anyone has suggestions to improve the performance of the attenuator or input amplifier, do speak up. I mostly started the PCB layout so that I could start considering the physical aspect of the design. I am not opposed to making changes to the schematic at this point.
STM32F401s come in a very similar package and price to Arduino Nano. The widely used clones can be programmed by Arduino IDE using basically the same procedure and code Using Black Pill STM32F401 with the Arduino IDE! – Hobby Components Blog . 32bits, 84MHz, 96kB RAM, 512kB flash, 12b ADC, floating-point unit, many times faster than the 16MHz 8bit AVR . E.g. this company Upgrade Version STM32F401 512KB ROM Development Board V3.0 STM32F401CEU6 STM32F411CEU6 STM32F411 Learning Board 84Mhz 96KB RAM|Integrated Circuits| - AliExpress has a github repository will details GitHub - WeActTC/MiniF4-STM32F4x1: MiniF4-STM32F401CCU6/STM32F401CEU6/STM32F411CEU6 Product Literature . Actually running an Arduino sketch on these guys is wasting their resources because they can easily run a real preemptive multitasking OS, e.g. ChibiOS free embedded RTOS - ChibiOS Homepage
The newer STM32F411s cost the same and are even more powerful, supported in Arduino IDE 1.9.
These boards have no value for this project at its current stage of complexity, but adding new features can quickly benefit from their extra speed and performance (lower monitoring latency while communicating with the PC, much faster rms calculation, adding a cheap TFT LCD instead of the LEDs, etc.). IMO worth considering when designing a new project in 2020/21.
Interesting that they can be programmed using the Arduino IDE. I'll look into them. I think for the version 1 of this, I'm going to stick with the Arduino Nano. My first priority is to get all the analog sections ironed out and behaving the way they should.
There will certainly be a revision 2 however, and the STM32F401 may be of interest for that.
Realistically though it isn't the processing capabilities of the Atmega328 that will be a major limitation, it's the number of IO pins.
As of right now I am revising the layout around the expansion connectors, since I'm not entirely happy with the way it currently is done.
Realistically though it isn't the processing capabilities of the Atmega328 that will be a major limitation, it's the number of IO pins.
If I count correctly the F401/411 board should give you 34 GPIOs, compared to 22 of Arduino Nano. But any port expander can solve lacking pins easily.
Hi, maybe these could be alternative microcontrollers (25 - 46 5v I/Os) Teensy USB Development Board too. They are cheap and also easily programmable via the Arduino IDE and posses an USB port.
I think that as of right now, the need for an STM32 board is borderline. The additional IO is nice, and the additional processing capabilities could be beneficial in the future. The Teensy boards are rather costly and, IMO, won't offer any advantage over the STM32 for this.
I'm still waffling on whether to use an SMT32 or an Arduino Nano for the first iteration. KiCad already has symbols and footprints for the Nano, while it does not have any for the STM32. I'm going to do some digging to see what I can come up with in that regard, since making them myself is a fair bit of time.
Admittedly the ability to use a simple 20 x 2 character display would be pretty neat, but presently would require more IO pins than are available on a Nano.
Regardless your AVR/STM32 decision: most Kicad symbols/footprints/3D models are already available in one of the sources
Would this do?
black pill - Search -
EasyEDA
GitHub - yet-another-average-joe/Kicad-STM32: STM 32 library for KiCad
Would this do?
black pill - Search -
EasyEDA
GitHub - yet-another-average-joe/Kicad-STM32: STM 32 library for KiCad
Alright, here's an update. This is a completed first draft of the PCB layout. I ended up using a Nano for this version simply because there are a lot of other things that need to be verified and worked out, and I decided I would rather get those issues worked out using a platform I am more familiar with. In any case, the I2C pins aren't in use and I brought them out to a pin header so that they are available for expansion modules.
In general, I would really appreciate any feedback people can give on this PCB layout. I have attached an image of the finished layout as well as an image of the finished layout without the ground plane (easier to read).
In general, I would really appreciate any feedback people can give on this PCB layout. I have attached an image of the finished layout as well as an image of the finished layout without the ground plane (easier to read).
Attachments
Have you considered using some relay driver IO, such as the inexpensive ULN2803? It would save a lot of components and space, IMO.
Do you have a plan for an enclosure? I am not sure the current Nano placement allows connecting the USB cable through the enclosure wall directly (this placement has proven to work for me https://www.diyaudio.com/forums/att...nsation-measurement-setup-20200313_175131-jpg )
Do you have a plan for an enclosure? I am not sure the current Nano placement allows connecting the USB cable through the enclosure wall directly (this placement has proven to work for me https://www.diyaudio.com/forums/att...nsation-measurement-setup-20200313_175131-jpg )
I specifically considered how the Nano USB port could be made available on the front panel, and I decided it would be better to use something like this to bring the connection out to the front (or back) panel and thereby minimizing the physical stress on the board. Mini USB connectors are delicate little flowers.
I'm embarrassed to say I hadn't considered a relay driver chip, that would probably have been smart. Since I don't expect it will really affect performance, that might make its way into the V2 PCB layout, but is a good idea (and much more elegant).
As for the chassis, I personally will probably build it into a 1U rackmount chassis. I got a whole bunch of dead ETCNET Video nodes for free a while back, and I was just going to repurpose the chassis from one of them. They already have a bunch of the necessary D-size cutouts for XLR connectors, so I only have to add a couple more to be essentially done. I chose to use simple screw terminal positions on the board since everyone has their own preferences for connectors. For me, XLR inputs make the most sense, others may choose TRS or a pair of BNCs for the differential input. Obviously the use of short, well-shielded cable is recommended for wiring up the input connectors.
Assuming this works as well as I hope it will, others may choose to build it and I wouldn't necessarily recommend a 1U rackmount chassis for most people.
- Home
- Design & Build
- Equipment & Tools
- Measurement Interface for Sound Card