a smallish second box could be on the end of an umbilical out of sight and allow the main case to be smaller, but 1 big case is cool too. as you hint at though, it has the added benefit of keeping the transformers away from the circuit and it makes layout a hell of a lot easier to avoid having to think about where you are routing the AC.
shielding on the trannies secondaries will just provide a capacitive coupling to ground and maybe worsen crosstalk, I doubt it will do much as far as shielding, as its EMI you are trying to protect against, not RFI. all you can do is keep them as short as you can, twist each secondary separately and just try and run it along the chassis as much as you can, tied down with twist ties or something.
shielding on the trannies secondaries will just provide a capacitive coupling to ground and maybe worsen crosstalk, I doubt it will do much as far as shielding, as its EMI you are trying to protect against, not RFI. all you can do is keep them as short as you can, twist each secondary separately and just try and run it along the chassis as much as you can, tied down with twist ties or something.
shielding on the trannies secondaries will just provide a capacitive coupling to ground and maybe worsen crosstalk, I doubt it will do much as far as shielding, as its EMI you are trying to protect against, not RFI. all you can do is keep them as short as you can, twist each secondary separately and just try and run it along the chassis as much as you can, tied down with twist ties or something.
Excellent thanks, the shielding is a pain in the a#%&re to do anyway
I had lots of teething issue but finally got everything working properly a few weeks ago.
I have been rebuilding DQ DAC 1 to implement the whole Hi FiDUINO thing with DQ mods.
Ever since I started the DQ DAC 1 build (12 mths ago) I have been trying to get the Touch Screen function on the various screens I have used to work but to no avail. Now I have rebuilt DAC 1 I thought it was time to try again, especially as Henning has released extra Libraries to assist in that area.
After many hours of coding & recoding it finally all came together, I'm sure somebody with more code experience could have got it working much quicker than I did.
I have created what I call a simple screen that is the default display & the standard HiFiDUINO settings screen is called as necessary.
The touch screen is a work in progress.
Of course I could not have done this without the assistance of many Diyer's, to whom I thank again
TP BIII Arduino Mega DAC Build Touch Screen - YouTube
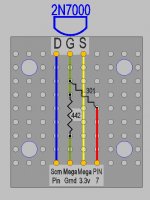
Ive had to do minor modifications to the screen to get to the backlight so I can dim it or turn it off when the DAC turns off. Originally I wanted to turn the whole screen off like I do with DAC 2, but if I do that the Touch function causes the code to lockup. The screen supplier has previously advised me that rather than using resistors to lower the voltage (from 5v to 3.3v) and using the PWM to dim and or turn off the screen. I am better off using a transistor to do the job.
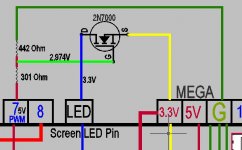
But I cannot get it to work & it has go me seriously confused. I have set the transistor up like the attached diagrams. The way I assume it is suppose to work is, when the PWM voltage from Pin 7 is applied to the gate the transistor turns on and off (just like the PWM) so as I adjust the duty cycle of Pin 7 the voltage at the Drain will change. I have attached the 3.3v from the MEGA to the Source but I always have 4v!!! not 3.3V at the Drain even if there is no voltage at the Gate.
Can anyone help with this? please
Attachments
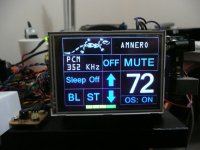
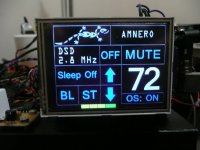
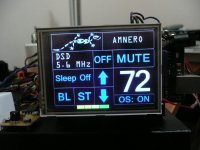
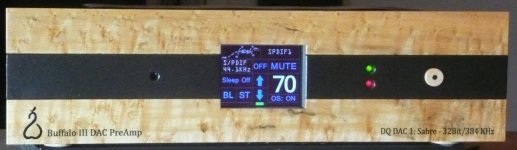
Another personal mountain has been climbed, a long time ago I set my sights on being able to play Hi Res music, at the time I was only thinking 192khz. I was very happy when I got the Amanero feeding through the sample rates you see below.
It really is only a academic exercise though, as in the near term I wont be downloading may files of this size to play. It's always very satisfying when you get where you want to go.
If you look closely you will also see the Oversampling is On & No dropouts, it's been a good night.
Many thanks to HiFiduino for his great blog & help.
Attachments
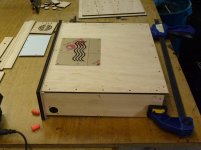
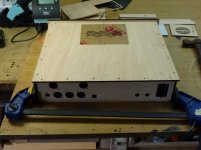
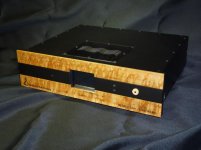
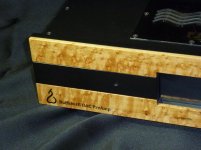
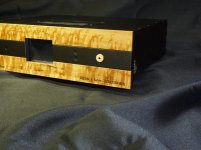
Finally it's time for the case, plywood, carbon fibre, perspex & Birdseye maple
I did manage to draw the top outer leaf & the bottom outer leaf the wrong size but fortunately I made them too big.
This will take a while I imagine.
I did manage to draw the top outer leaf & the bottom outer leaf the wrong size but fortunately I made them too big.
This will take a while I imagine.
Attachments


Kewl! I anxiously await pics of your completed case!
I got tired of my all black Lenco turntable plinth and recently did a maple wrap to match the arm boards. Corner accents are walnut.
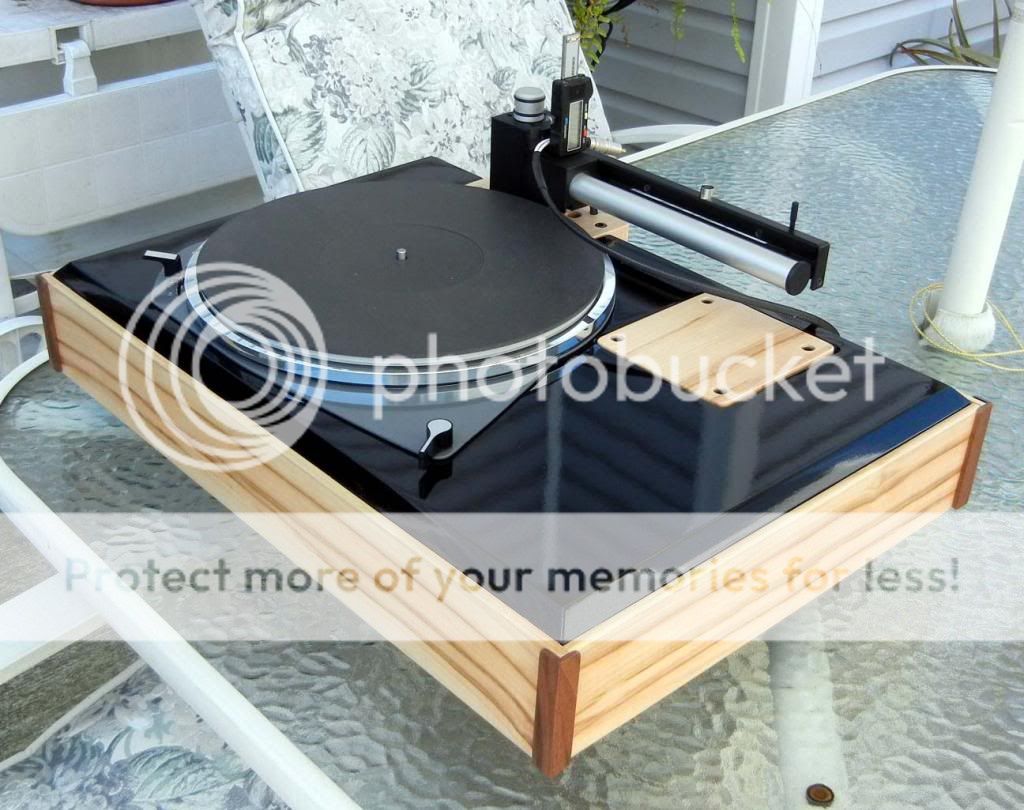
Nice work, I like a touch of timber.
Another personal mountain has been climbed, a long time ago I set my sights on being able to play Hi Res music, at the time I was only thinking 192khz. I was very happy when I got the Amanero feeding through the sample rates you see below.
It really is only a academic exercise though, as in the near term I wont be downloading may files of this size to play. It's always very satisfying when you get where you want to go.
If you look closely you will also see the Oversampling is On & No dropouts, it's been a good night.
Many thanks to HiFiduino for his great blog & help.
Wow!
 Your buffalo build is one of the most impressive build i have seen so far!
Siang
Wow!
Siang
Thank you
David
- Status
- This old topic is closed. If you want to reopen this topic, contact a moderator using the "Report Post" button.
- Home
- Source & Line
- Digital Line Level
- DQ DAC 2, BIII SE, Tube-I-Zator, Arduino, Amanero Build