I hope me asking a question on how to avoid gaining audio knowledge is not too un-fanatic, and it is not meant to belittle your (frighteningly complex) hobby.
So.
I like 3D printing.
And I would like to play around with different (smallish, because of build volume restrictions) enclosure designs until I find the nicest one for my home.
And I would like to do this without getting into yet another hobby, if at all possible ( ... at least I can try). So I would like to bypass all the knowledge-intensive parts (measuring a driver, simulating it with different volumes and designs, evaluating response curves and deciding which one corresponds to ´nice´sound ..... ), if at all possible.
So my question is :
Can an audio-fanatic distill its knowledge into a set of parameters that sufficiently describe an enclosure so that it will at least sound ´okay´?
I hope that something like the following is possible:
- Take well-known driver a
- Put it in a volume x
- Put in a port of area y and length z
- make sure that no two walls are more than l cm apart and/or parallel to each other
-> And whatever you do, you will get ´good enough´ sound down to soandso Hz.
This would allow me to happily try out shapes without fearing that it is utter nonsense from the beginning.
Would this be possible - or is enclosure design far too complex to be distilled down to a finite set of parameters like in my example ? And if yes, which parameters would be neccessary?
Thanks for your time !
Start with a proven design and just print it. The small miniOnken trapezoids should actually be easier than building a pir of wood.
This is the 5 litre FE103 SOL/FF105wk trapezoid.
The smaller ones for FF85wk/Alpair 5.2/3, CHN50. Faital Pro 3F22 boxes which are half the volume. My very small miniOnken for the Scan Speak 3F has also been 3D printed.
dave
This is the 5 litre FE103 SOL/FF105wk trapezoid.
The smaller ones for FF85wk/Alpair 5.2/3, CHN50. Faital Pro 3F22 boxes which are half the volume. My very small miniOnken for the Scan Speak 3F has also been 3D printed.
dave
Hi Yunmen,
I've printed a few. Mainly just to give it a bash while also adding features that would be a challenge if starting from flat bits of wood.
Suggest havingnthe first go with a pair of 3 or 3.5 inch full range drivers that have a resonance under 100 Hz (under 80 would be better) and a Qts less than 0.7 as I am going to suggest porting it. The Vas will ideally be around 2 l. The flatter the response the better too.
If you find such a driver avaliable where you're based and report back with the build volume of your 3D printer, and the parameters for the driver, I'd be happy to suggest a box volume and port length.
Ideally you'll want to put a lot of effort into stiffening and support structures for the walls and use a high fill ratio. Alternatively, if you design the outer wall to have a cavity you can fill with sand or plaster, then even better. Flimsy light weight enclosures are not good...
Which CAD software are you using?
Cheers,
Phil
Thanks for your thoughts.
@planet10 - simply printing is what I do at the moment, as a first step. Guess I´ll have to see how this works out. But this is not my goal.
But taking some proven - let´s say µOnken - negative spaces on the inside and putting them in a new outside (nice thing with 3d printing is that the two can be totally separate) could be a smart starting point.
Still, these designs are heavily influenced by (toatally necessary) plywood-thinking. Straight surfaces, parallel walls, easily glue-able 90°-angles. But totally unneccesary in printing. Could taking the interior volume of some Onken design, but in Egg-Shape, prove beneficial ?
(and yes, I guess these are noob questions)
@Phil - Thanks for your kind offer, this was what I was hoping for (again, if at all realistically possible).
It seems that in Germany, I have quite a good selection of drivers with soundimports.eu. As I lack any knowledge of respectable brands and popular choices, I started with some models mentioned in other 3D-projects online, and they all seem to fit your criteria. Hopefully, one of these 3 will seem okay to work with to you, alternatively I also can search a bit more for better fitting Vas. Any other option is of course okay. In ascending order of price :
dayton audio dma90 4
Resonance 88Hz
Qts 0.45
Vas 2.2l
dayton audio nd91 4
Resonance 74Hz
Qts 0.41
Vas 1.4l
tang band w3 2141
Resonance 75Hz
Qts 0.39
Vas 3,2l
I work with FreeCad - seems a bit clumsy at times, but so far I was able to get everything done that needed doing. Sometimes OpenSCAD. The printer is a Prusa MK3S with a build volume xyz of 250x210x210mm.
And yes, using filled chambers instead of high infill makes sense and is what I would try to do. Sand seems safe enough, thought about silicon glue - not that expensive and quite easy to apply out of these big construction-syringes
You can have a look at these for inspiration. Different from "plywood designs for sure:
Tozzi One Kit | Markaudio
Lautsprecher Shop | Markaudio Tozzi One Kit Pearl PAAR | Lautsprecher Selbstbau
Not sure these are easy to clone and they are maybe not the best you could do.
I´d look at Dave´s site with regards to enclosures and drivers. (FF85, Mark Audio´s, Faital 3FE etc.)
You probably googled around but here´s some more inspiration:
3D Printed Speaker: 6 Projects That Rock the Most | All3DP
"speaker box" 3D Models to Print - yeggi
If I had a 3D printer I´d try to stay away from rectangular enclosures simple because you can and it is easy and advantageous.
Also consider rigidity of the whole thing and weight as plastic is light (chamber with sand or so?).
Last edited:
Here is an egg shaped one for the Monacor SPX-31 M incl. model file(s):
Mona aus dem 3D-Drucker – Lautsprecher selber bauen
If it wasn´t so expensive to have them printed I´d be tempted!
Mona aus dem 3D-Drucker – Lautsprecher selber bauen
If it wasn´t so expensive to have them printed I´d be tempted!
It is! Would love to hear that driver! Would you share your model?Small is beautifull.
"It is! Would love to hear that driver! Would you share your model?"
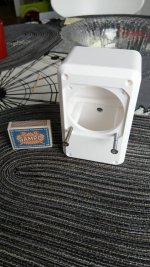
Oh, It´s an early proto on hold. I haven´t decided the mounting yet.
Maybe a nice bottle, speaker on top wrapped with led stripe and an acoustcally transparent (enough) lampshade to cover all up.
Double-duty . . .
Oh, It´s an early proto on hold. I haven´t decided the mounting yet.
Maybe a nice bottle, speaker on top wrapped with led stripe and an acoustcally transparent (enough) lampshade to cover all up.
Double-duty . . .
Thanks for the suggestions !
But I fear this is not quite where I want to go - most models on thingiverse/yeggi look nice, but the fact that most of them are made for ´any 3 inch driver´ tells me that the designer paid no real attention to at least the design basics.
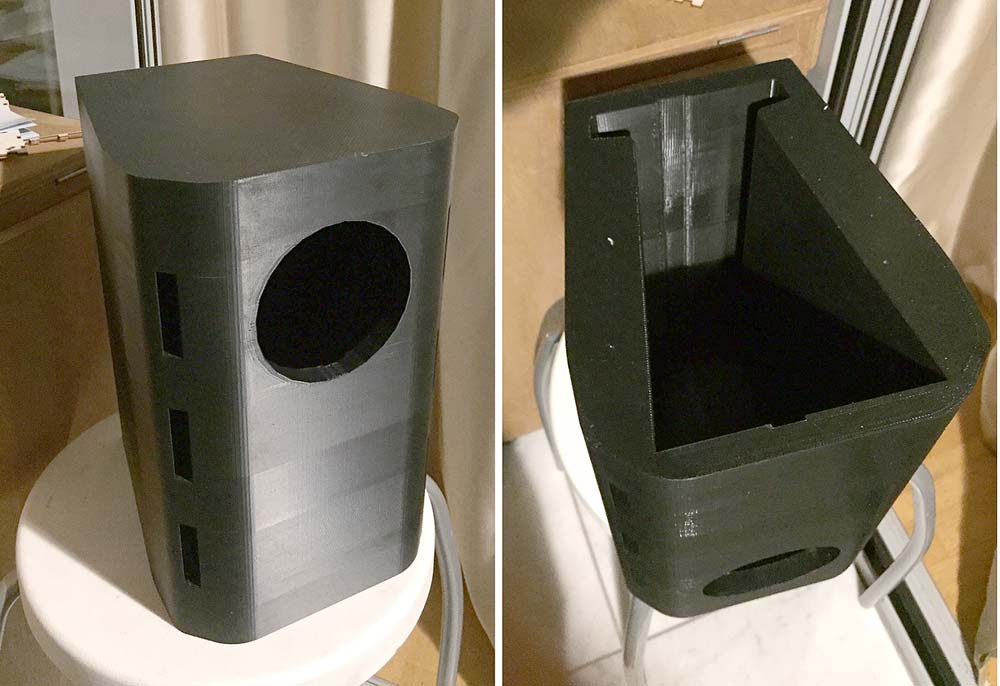
Still, there are some designs that look a bit more reassuring - my first that is printing at the moment is the P-Cube, I am quite curious how this works out.
But still, I want to gain at least a basic level of control by knowing which specific parameters of an enclosure (volume, port, whatever) are needed for a specific driver.
@joensd - thanks for the links. Apart from what I said above, the Eggs look quite nice. I´ll keep them in mind as off-the-shelf design.
Expensive print ? They seem to need around 500g of PLA per enclosure, and you can get the kilo from 13 (cheap shiny Sunlu) to 25 € (nice matte stuff). Plus electricity. If I can help, let me know.
@pelanj/CGL - would you share some parameters/thinking that got into your designs or your work with a specific driver here ?
(If, as I wrote, designing by basic parameters is indeed viable up to a point)
But I fear this is not quite where I want to go - most models on thingiverse/yeggi look nice, but the fact that most of them are made for ´any 3 inch driver´ tells me that the designer paid no real attention to at least the design basics.
Still, there are some designs that look a bit more reassuring - my first that is printing at the moment is the P-Cube, I am quite curious how this works out.
But still, I want to gain at least a basic level of control by knowing which specific parameters of an enclosure (volume, port, whatever) are needed for a specific driver.
@joensd - thanks for the links. Apart from what I said above, the Eggs look quite nice. I´ll keep them in mind as off-the-shelf design.
Expensive print ? They seem to need around 500g of PLA per enclosure, and you can get the kilo from 13 (cheap shiny Sunlu) to 25 € (nice matte stuff). Plus electricity. If I can help, let me know.
@pelanj/CGL - would you share some parameters/thinking that got into your designs or your work with a specific driver here ?
(If, as I wrote, designing by basic parameters is indeed viable up to a point)
µOnken
Strange nomenclature. The miniOnkens are not Onkens, they just look like it. There are a number of micro (µ) sized ones, which are 2-2.5 litres.
Still, these designs are heavily influenced by plywood-thinking.
It is very much. You can be very sure i have given much thot on how 3D printing can be used to go pst limits of flat material. Things like walls with “chaotic foam”, smoothed/curved walls, much more stocastically distributed bracing, 3D printed “damping”. Lots of experiemnting to do.
If one is doing a WAW, then enclosures that mimic the midEnclosure in the Nautiluses or the Fujitsu 10s.
Here a really nice example in dark walnut.
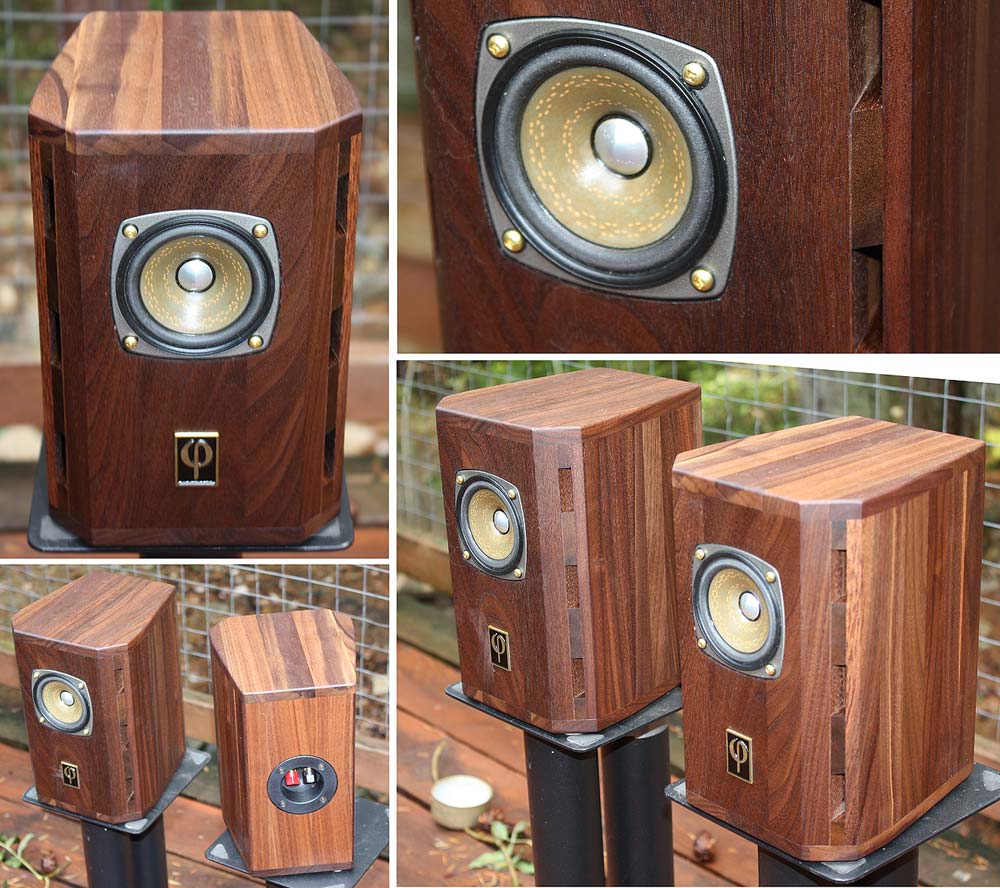
More examples here: miniOnken/Fonken gallery pictures only
dave
3FE22
Right up there with the Fostex FF85wk, and Alpair 5.2/5.3 (CHN-50 sneaks in too) are in my experience, better than any the OP has listed.
dave
@dave - I gather that these designs originate from you personally? Quite impressive.
A 2-2.5 litre micro design indeed sounds good. Are there measurements or data of the volumes available dependent on the drivers used?
The drivers mentioned by you and pelanj seem to be available here and some are quite inexpensive. If these are better than the ones mentioned by me, that's very fine by me.
Yes. The success of the original Fonken in the early 2ks has led to literaly hundreds of box designs using the particualr alignment developed. These all use the highR vents to advantage in a number of ways. The ones i have shown are 5 & 2.5 litres, the largest so far 135 litres.
I also help Scott out with drawings of his designs.
dave
I also help Scott out with drawings of his designs.
dave
So, to quantify things a bit - looking at the plans, the micro Fonken has a 2,1l main volume, 2 ports of 5,15 cm^2 with 14,5 cm length and an insert with three 25mm holes and two further openings - and this for an FF85WK.
Which other parameters are to be taken into consideration when building one? What freedoms are there to remix? Has the volume to be square ore are trapezoid or egg shapes okay? Is the ratio in which the two sub-volumes are divided by the insert of importance? I also guess the 3.5 to 1 width/height ratio of the ports is of importance for flow resistance...
Which other parameters are to be taken into consideration when building one? What freedoms are there to remix? Has the volume to be square ore are trapezoid or egg shapes okay? Is the ratio in which the two sub-volumes are divided by the insert of importance? I also guess the 3.5 to 1 width/height ratio of the ports is of importance for flow resistance...
I use Hornresp for checking the enclosure response. Closed box for a 3FE22 is fine somewhere around 1.2 l per driver. Shape can be any, but you need to keep the internal volume of the box and port area and length in case of a bass reflex. My 3D skills are not great, so mine are more or less square boxes. You can find something here: FaitalPro 3FE22 projects (nice little full range driver!) and in my other threads here regarding 3D printing.
Looking at the pictures - the µFonkenSET seems best suited to printing. Is this a proprietary / monetarized design or are the measurements (to have a guideline to start with) availiable somewhere ?
But apart from ´remixing´ an existing design and to come back to the original question - given these popular drivers, are there successfull parameters to design a box around these seemingly popular drivers, or is it indeed best to stick with an existing design and perhaps modify it ?
Is there risk by turning a proven cuboid design and turning it into another shape while keeping the volume and port dimensions ?
@pelanj - thank you very much for your hints concerning the 3FE22. Good to hear that in a closed box, I can not make great mistakes. Which dimensions would you suggest for a ported design ?
Will have a look at your projects - cannot say that my 3D skills are great either, but there is just the wish to self-design what I will find on my desktop.
Thanks a lot for the offer pelanj - this would indeed be very helpful.
If I do not want to get overboard with glueing, I am limited by the printer´s build volume of xyz of 250x210x210mm. This should be sufficient for the 2,5l mentioned, but of course - smaller is always better.
I guess your software assumes cuboid shapes and round ports. I wonder if it could be beneficial to deviate from this, as all I have is a bit of impressions from googling around. If possible, I would appreciate some further input to the validity of this :
- I read that non-parallel walls are beneficial and would build the volume in a trapezoid shape (if possible in all 3 dimensions). Is this legitimate ?
- I also read that straight corners are to be avoided, so I would round corners (while keeping total volume). Good or bad Idea ?
- Which constraints exist for port placement ?
I guess the inner opening has to be farthest from the driver ?
Can the outer opening be placed anywhere ?
- I read that by deviating from the round port design, flow resistance increases (more wall area per port volume). Is there a handy formula for calculating equivalent port diameter for arbitrary port designs of known circumference/area ratio?
This would give me freedom in port design while still following the simulation.
~edit~ okay, 5 minutes of googling and I can answer this myself. Sorry
I hope I don´t go too far with beginner questions - thanks in advance
Mathias
Last edited:
- Home
- Design & Build
- Construction Tips
- 3D printing enclosures without actual knowledge