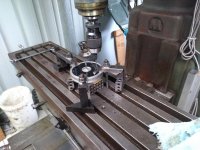
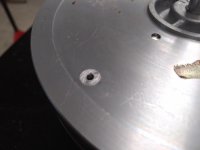
Started to repair the sub platter today.
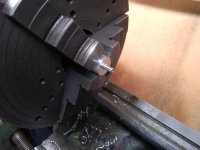
First pic I'm setting up to centre the quill on the damaged thread. Milled the hole out 6mm and turned up a plug to fit. I've glued the plug in with permanent loctite. I figured the load is lateral so little to no force upwards on the thread.
.
First pic I'm setting up to centre the quill on the damaged thread. Milled the hole out 6mm and turned up a plug to fit. I've glued the plug in with permanent loctite. I figured the load is lateral so little to no force upwards on the thread.
.
Attachments
Yes the lathe is mine.
lucky to own one and know how to use it.
Unfortunately, I always have to rely on external artisans who never have the time and desire to do private people some simple work, even pleading on their knees.

Maybe there's one of these near you, and maybe they have a lathe and/or mill.lucky to own one and know how to use it.
Unfortunately, I always have to rely on external artisans who never have the time and desire to do private people some simple work, even pleading on their knees.
hackerspaces.org
I'm a member of Freeside Atlanta and we have a Busy Bee and a Bridgeport!
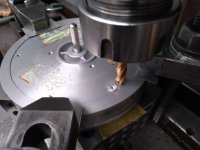
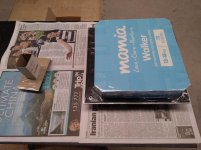
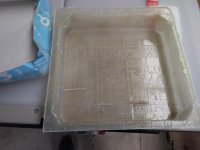
Some progress. I made 2 holes............. I figured it would be easier to mould the holes for the SP10 and tonearm instead of having to machine holes into the resin. I made a cardboard cover for the bottom of the SP10. This allows a little wiggle room to move the TT around to square it up. I have ordered 20kg of ISO resin which has not arrived yet so I made this with regular resin.
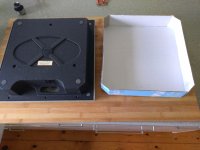
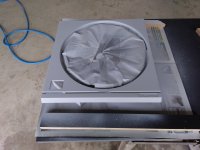
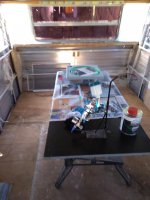
I decided to paint the SP10 black as I have some chassis black left over. I have an old caravan I used for storage which I used as a spray booth. Primer was sprayed with a rattle can and top coat I used the gun. As careful as I was with cleanliness I still got a bit of dust in the top coat.
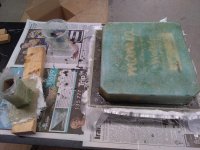
I have the motor back together after cleaning the bearing and replacing the thrust pad and ball. The ball had a small amount of wear, but what was interesting was the ring around the ball where it seated in the bearing, you could feel the ring with a fingernail.
.
I decided to paint the SP10 black as I have some chassis black left over. I have an old caravan I used for storage which I used as a spray booth. Primer was sprayed with a rattle can and top coat I used the gun. As careful as I was with cleanliness I still got a bit of dust in the top coat.
I have the motor back together after cleaning the bearing and replacing the thrust pad and ball. The ball had a small amount of wear, but what was interesting was the ring around the ball where it seated in the bearing, you could feel the ring with a fingernail.
.
Attachments
-
 P_20190929_144347.jpg977.7 KB · Views: 130
 -
 P_20190929_121003.jpg699.5 KB · Views: 140
 -
 P_20190929_153928.jpg1,000.1 KB · Views: 132
 -
 P_20190930_133204.jpg450.3 KB · Views: 124
 -
 P_20190930_155142.jpg734 KB · Views: 149
 -
 P_20191001_104545.jpg370.5 KB · Views: 139
 -
 P_20191001_114815.jpg552.7 KB · Views: 150
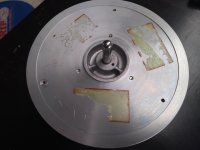
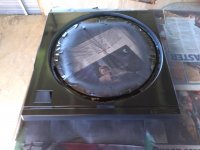
I did not want paint on the motor mounting surface.
Is there a valid reason to avoid painting? I have always painted the whole chassis above and below.
Will painting the whole chassis make a difference - I do not know.
I wondered why Technics went to the trouble of NOT painting the inner chassis where the motor mounts. In a production environment it would have much easier/cheaper to paint the whole thing.
So I decided to leave the inner chassis raw.
I wondered why Technics went to the trouble of NOT painting the inner chassis where the motor mounts. In a production environment it would have much easier/cheaper to paint the whole thing.
So I decided to leave the inner chassis raw.
I wondered why Technics went to the trouble of NOT painting the inner chassis where the motor mounts. In a production environment it would have much easier/cheaper to paint the whole thing.
perhaps for the same reason that cars inside the doors or under the covers have little or no color than outside, saving on paint costs.
Where the eye does not see it is not necessary to show an excellent finish.
Last edited:
Yes but there is over spray inside the doors because they do not mask cars. My SP10 had no over spray so it must have been masked with something.
My thoughts were that paint is flexible and may effect the rigid coupling between the motor and chassis. Just a hypothesis so I didn't paint it.
My thoughts were that paint is flexible and may effect the rigid coupling between the motor and chassis. Just a hypothesis so I didn't paint it.
Why not make a seal - similar to a speaker driver interface to the speaker cabinet? The practical use of this is that if you use paper of the type children draw on with crayons you will damp some of the motor vibrations from reaching the top-plate. Such paper has been used very successfully as interleaf layers in stacked sheet stacked + bronze plinths.
Why not make a seal - similar to a speaker driver interface to the speaker cabinet? The practical use of this is that if you use paper of the type children draw on with crayons you will damp some of the motor vibrations from reaching the top-plate. Such paper has been used very successfully as interleaf layers in stacked sheet stacked + bronze plinths.
...this paper is sold in the UK as 'sugar paper'.
- Home
- Source & Line
- Analogue Source
- The Incredible Technics SP-10 Thread