Just in case anyone is interested, i am planning to put on here the progress of my build of a Tubes4hifi PH16 Phono amp Vacuum Tube Audio PH16 phono preamp
Just a quick bit about me, I have not picked up a soldering iron for about 30 years so this will be a warts and all description, Hopefully to help anyone else who is thinking of starting a "kit Build" and is worried that it could be a bit daunting.
I will be placing at the end the itemised full cost in time and money to build
After quite a bit of research, I decided on the PH16 and as Roy was helpful with my initial questions.
As I am in the UK I have ordered just the parts kit so the transformer and enclosure will be sourced here, but am planning to make this look a bit different to usual diy valve amps.
The kit has arrived, and i have bought a new solder station from maplins, I have also ordered a toroidal transformer from Terry at Canterbury Windings Home
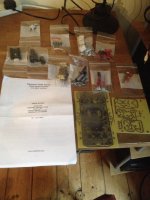
here are all the parts and where it will be built.
Would be grateful for any advice and will be happy to answer any questions as i go.
Just a quick bit about me, I have not picked up a soldering iron for about 30 years so this will be a warts and all description, Hopefully to help anyone else who is thinking of starting a "kit Build" and is worried that it could be a bit daunting.
I will be placing at the end the itemised full cost in time and money to build
After quite a bit of research, I decided on the PH16 and as Roy was helpful with my initial questions.
As I am in the UK I have ordered just the parts kit so the transformer and enclosure will be sourced here, but am planning to make this look a bit different to usual diy valve amps.
The kit has arrived, and i have bought a new solder station from maplins, I have also ordered a toroidal transformer from Terry at Canterbury Windings Home
here are all the parts and where it will be built.
Would be grateful for any advice and will be happy to answer any questions as i go.
Attachments
Good luck with the build which I will follow with interest.I built one of their SP14 linestages last year and must say it is an excellent sounding piece of kit.A friend borrowed it for a while and it was nearly as good as his Audio Note pre only the lack of a remote letting it down!
What is the gain of the PH16?
What is the gain of the PH16?
Last edited:
Roys Kits are delivered with the components in separate bags so the power supply resistors are in one bag, caps in another
amplifier stage resistors, caps and loading resistors all in separate bags.
the instructions/manual/schematics/circuit diagrams are clear and well written.
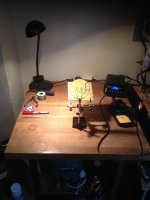
So once set up from a trip to Maplins with new solder station, Multimeter isopropyl alcohol (for cleaning the boards) a third hand (Magnifying glass, with crocodile clips to hold the work to allow two hands to do the soldering) A roll of Silver Solder, heat shunt, and wire (green, red,black and a length of low cap coax) I was ready to go.
I printed of a resistor colour code chart to identify the resistances and checked them with the multimeter,1. to check i was right and 2. to match resistors in pairs which was unneccessary as the majority of the resistors are quality dale resistors which were pretty spot on.
Stage One:
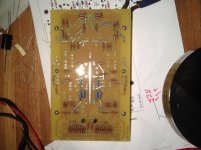
As it has been decades since i have picked up a soldering iron I decided to start with the Power supply first, after cleaning the boards with the isopropyl alcohol (to remove grease/fingerprints etc) putting on the standoffs I started.
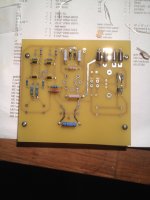
all resistors first, then diodes and capacitors..
Just a tip for anyone wanting to use the silver lead free solder, make sure you have a powerful enough soldering Iron as the silver solder has a higher melting point than usual lead multicore solder ie savbit.
all went very smoothly and here is the finished power supply
Tomorrow: the amplifier
amplifier stage resistors, caps and loading resistors all in separate bags.
the instructions/manual/schematics/circuit diagrams are clear and well written.
So once set up from a trip to Maplins with new solder station, Multimeter isopropyl alcohol (for cleaning the boards) a third hand (Magnifying glass, with crocodile clips to hold the work to allow two hands to do the soldering) A roll of Silver Solder, heat shunt, and wire (green, red,black and a length of low cap coax) I was ready to go.
I printed of a resistor colour code chart to identify the resistances and checked them with the multimeter,1. to check i was right and 2. to match resistors in pairs which was unneccessary as the majority of the resistors are quality dale resistors which were pretty spot on.
Stage One:
As it has been decades since i have picked up a soldering iron I decided to start with the Power supply first, after cleaning the boards with the isopropyl alcohol (to remove grease/fingerprints etc) putting on the standoffs I started.
all resistors first, then diodes and capacitors..
Just a tip for anyone wanting to use the silver lead free solder, make sure you have a powerful enough soldering Iron as the silver solder has a higher melting point than usual lead multicore solder ie savbit.
all went very smoothly and here is the finished power supply
Tomorrow: the amplifier
Attachments
After researching all the phono preamp kits out there I also concluded that the PH16 should be the best sounding. I plan to build a phono preamp next summer and will be following this thread.
I am a believer in premium power supplies and high parts quality. I may throw in my 2 cents on these issues as this project moves along.
I am a believer in premium power supplies and high parts quality. I may throw in my 2 cents on these issues as this project moves along.
Stage 2 Amplifier section;
After seeing the bewildering choice of valves available priced from £6 a piece teslas to £100+ siemens, telefunken and amperex.
so I decided as this is my first build and getting it working was the first priority I plumped for the cheap teslas. I sourced a set of 4 from Langrex-Electronic Valves And ComponentsSpecialising In Original British, German And American Tubes. (very helpful and also supplied the 12x4 rectifier tube for the power supply.)
On Roys VTA instruction parts list i noticed there was an option to upgrade the signal path capacitors to sonicaps , so i decided to do a bit of research and again was stunned at the choice and price range of audio grade capacitors.
wanting to get the best sound i could but within a budget I have bought 8 polypropylene audio grade capacitors from maplins. Search audio capacitors | Maplin
obviously not the best but i think they will be an improvement on the supplied WIMA capacitors and like the valves there is an opportunity to upgrade these as and when required.
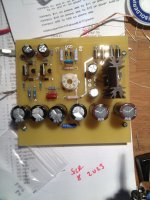
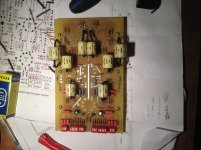
So, same as the power supply I started with the resistors, jumper leads, Dip switches then the normal and electrolytic capacitors and finished with the audio grade caps and valve bases.
Just a quick note on the dale resistors, they are not coded with the colour bands but with a 4 digit number whereas the first 3 numbers are the value and the last number is the multiplier, so;
10R0 = 10 Ω
2152 = 21.5 k Ω
2494 = 2.49 M Ω
once i got used to this it is a much quicker way of reading the values.
Anyway again everything went together well, and it is refreshing to find all the components listed to be there with nothing missing nor nothing extra well done Roy
Here is the stage build of the amplifier section:-
Tomorrow, enclosure choice, hardware and a bit of carpentry!
After seeing the bewildering choice of valves available priced from £6 a piece teslas to £100+ siemens, telefunken and amperex.
so I decided as this is my first build and getting it working was the first priority I plumped for the cheap teslas. I sourced a set of 4 from Langrex-Electronic Valves And ComponentsSpecialising In Original British, German And American Tubes. (very helpful and also supplied the 12x4 rectifier tube for the power supply.)
On Roys VTA instruction parts list i noticed there was an option to upgrade the signal path capacitors to sonicaps , so i decided to do a bit of research and again was stunned at the choice and price range of audio grade capacitors.
wanting to get the best sound i could but within a budget I have bought 8 polypropylene audio grade capacitors from maplins. Search audio capacitors | Maplin
obviously not the best but i think they will be an improvement on the supplied WIMA capacitors and like the valves there is an opportunity to upgrade these as and when required.
So, same as the power supply I started with the resistors, jumper leads, Dip switches then the normal and electrolytic capacitors and finished with the audio grade caps and valve bases.
Just a quick note on the dale resistors, they are not coded with the colour bands but with a 4 digit number whereas the first 3 numbers are the value and the last number is the multiplier, so;
10R0 = 10 Ω
2152 = 21.5 k Ω
2494 = 2.49 M Ω
once i got used to this it is a much quicker way of reading the values.
Anyway again everything went together well, and it is refreshing to find all the components listed to be there with nothing missing nor nothing extra well done Roy
Here is the stage build of the amplifier section:-
Tomorrow, enclosure choice, hardware and a bit of carpentry!
Attachments
Last edited:
Stage 3 the enclosure!
first decision was enclosed valves, or exposed. Pros & cons:-
exposed valves make it obvious it is a valve phono stage but for whos benefit? I know it is a valve phono stage and want it for top sound quality not as a "look at me i have gone retro statement" (the rack of vinyl says that anyway!)
Don't get me wrong I want it to look good but the layout of the valves of the top fascia would mean extremely accurate machining and finishing to make it look professional.
the other problem with exposed valves is the dust/cleaning aspect of it.
So you can probably guess from above I have decided to go with the fully enclosed chassis/enclosure.
I have also decided to purchase the enclosure and this was my first choice High Quality Enclosures for Audio, DIY Hi-fi & Electrical projects
but at nearly £140 for the enclosure the cost was too prohibitive.
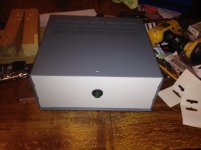
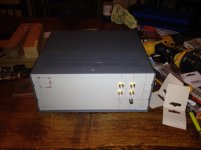
so after a lot of trawling the internet and sourcing the other items i needed (rca plugs, IEC inlet filter, Mains inlet plug, on off switch ) I found this Buy General Purpose Enclosures 3Ux279Dx305W Electronic Enclosure RS SAC3.0D2W2 online from RS for next day delivery.
£33+vat much more like it!
A boring box but with excellent ventilation.
So now to "tart" it up
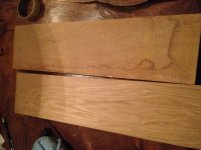
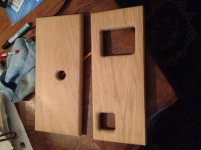
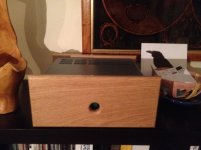
Two lengths of oak plank offcuts blagged from my local Joiners and a few hours with a sander, router and some beeswax I have ended up with this(see if you can spot the not so deliberate mistake!):-
Tomorrow, Putting it all together
first decision was enclosed valves, or exposed. Pros & cons:-
exposed valves make it obvious it is a valve phono stage but for whos benefit? I know it is a valve phono stage and want it for top sound quality not as a "look at me i have gone retro statement" (the rack of vinyl says that anyway!)
Don't get me wrong I want it to look good but the layout of the valves of the top fascia would mean extremely accurate machining and finishing to make it look professional.
the other problem with exposed valves is the dust/cleaning aspect of it.
So you can probably guess from above I have decided to go with the fully enclosed chassis/enclosure.
I have also decided to purchase the enclosure and this was my first choice High Quality Enclosures for Audio, DIY Hi-fi & Electrical projects
but at nearly £140 for the enclosure the cost was too prohibitive.
so after a lot of trawling the internet and sourcing the other items i needed (rca plugs, IEC inlet filter, Mains inlet plug, on off switch ) I found this Buy General Purpose Enclosures 3Ux279Dx305W Electronic Enclosure RS SAC3.0D2W2 online from RS for next day delivery.
£33+vat much more like it!
A boring box but with excellent ventilation.
So now to "tart" it up
Two lengths of oak plank offcuts blagged from my local Joiners and a few hours with a sander, router and some beeswax I have ended up with this(see if you can spot the not so deliberate mistake!):-
Tomorrow, Putting it all together
Attachments
Last edited:
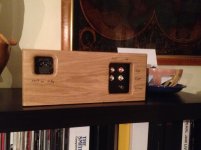
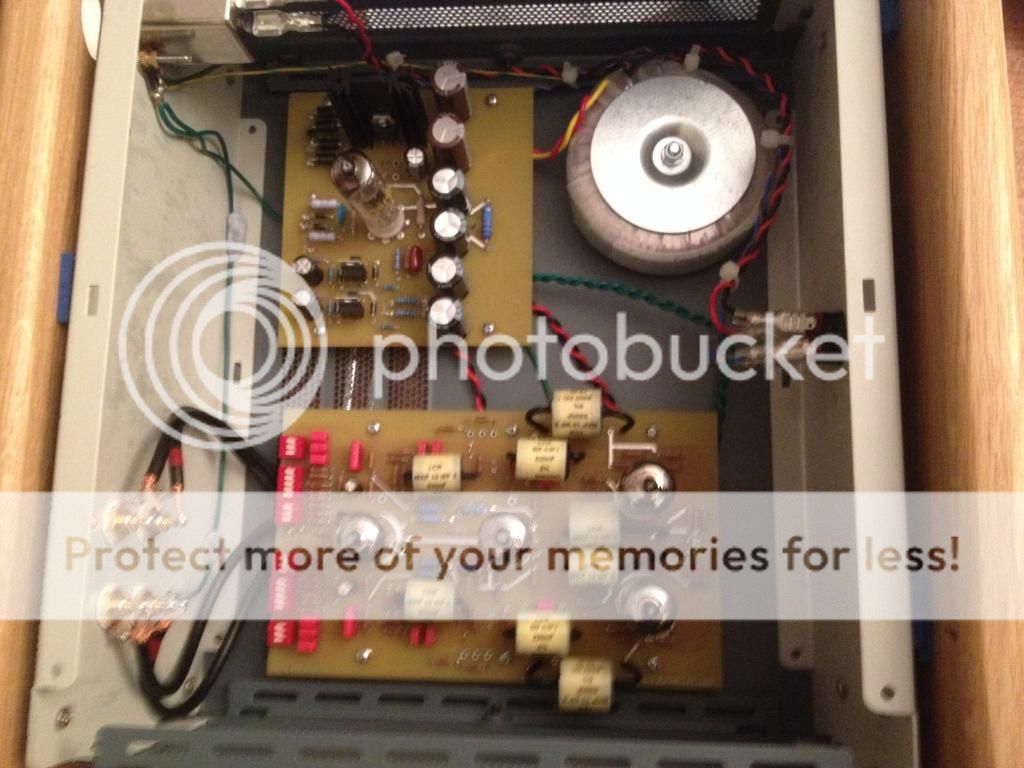
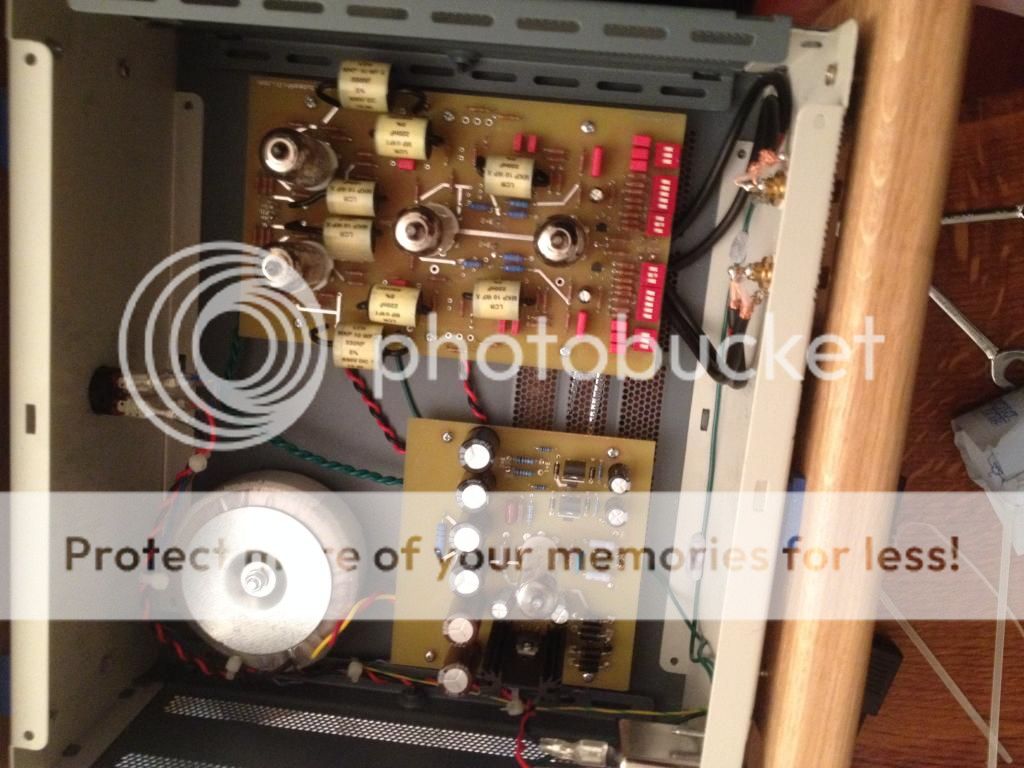
Stage 4:- Putting it all together
First i fixed the wooden fascia to the chassis so the fascia is not quite touching the chassis but is held away slightly from it with foam rubber pads, my theory is that any ringing or vibrations that can effect the chassis will be damped by the foam and dissipated through the wood. probably snake oil but who knows!
All the components in place so the first thing i did was to clean all of the solder joins of flux with isopropyl alcohol and a toothbrush, it needed a couple of goes to get both undersides of the boards spotless but for me worth the effort.
Now came what i found to be the hardest part of the build; connecting transformer,power supply and amp section together.
first I placed all parts and drilled the holes in the chassis then cut the connecting wires to length. Now for the next stage you need good light, and a clear workspace!
there are 24 places where wires need to be connected to the circuit boards and if you make this kit don't make the mistake I did. there are a number of places where the hole for the wires is right next to a component hole. in two of these holes the solder had creeped into the wire hole when soldering the component, so probably 30 minutes wasted with desoldering braid to get those clear before i could put the wire through.
The other thing I would do with hindsight is to solder the input/output cables into place from the top of the board rather than from below (like Roy has for the inputs in his pictures) as the cable I used was Low capacitance coax cable from maplins Coax URM76 50Ω Low Capacitance Cable Black (priced per metre) | Maplin which is stiff and awkward to bend and as they are touching the bottom chassis it defeats the point of the isomounts supplied with the kit. I will be changing these over.
the wiring just needs a bit of planning and thought before you start if you do that it should go hitch free for you.
My main considerations were to keep the transformer and mains input as far away from the input/output areas as possible this is also the reason why the mains input is at the top rear rather than lower down.
I could have got the lower enclosure just, as the rectifier tube is taller than the 6922 tubes but i think i would have needed the wider chassis to stop things getting cramped on the rear of the unit.
finally an email to Roy at VTA/tubesforhifi with a question regarding the grounding and isolation of the RCA plugs Which was answered promptly and the final power leads were twisted with plugs soldered on and the power supply, amp board and transformer were fixed into place.
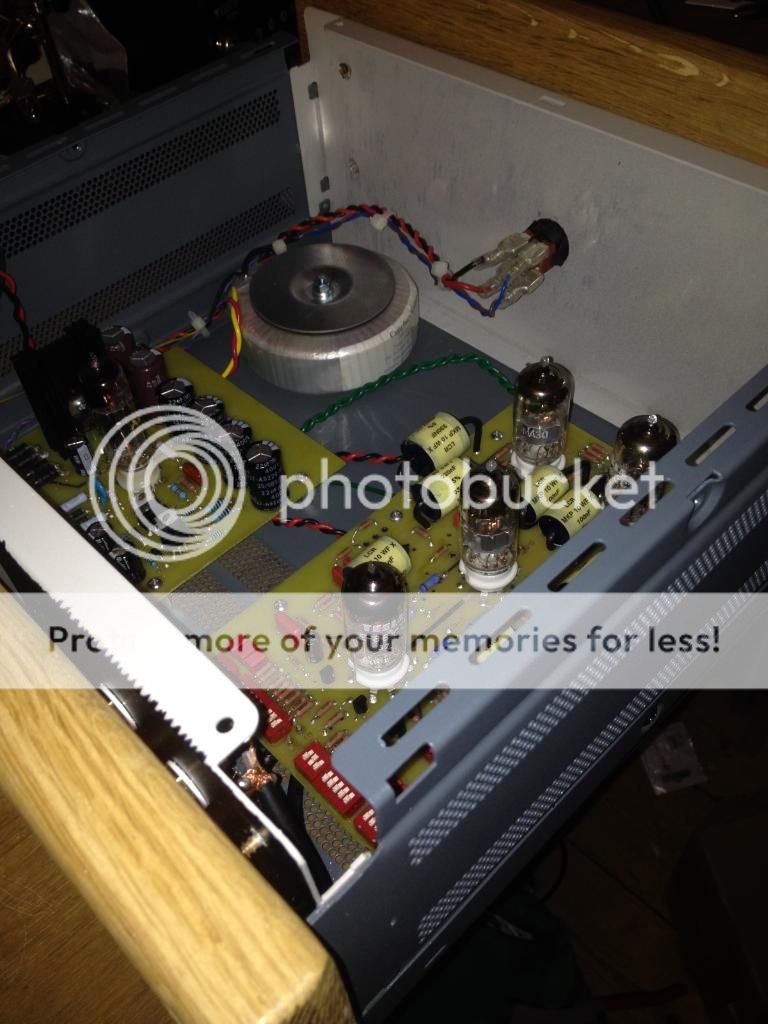
Finally all valves were placed in the holders.
after spending so long putting it all together I was very apprehensive about switching it on!
Roy Recommends using a variac on all new circuits so you can build the mains voltage up slowly. I haven't got one so this was do or die time!
so it was plugged in, and I pressed the on button and the Led light came on (so i had done at least one thing right), and then there was a few seconds of panic!
this is my first valve equipment and Roy says Check that all 5 valves are lighting up...................they were not, but at least there was no smoke!
then I saw it, the rectifier tube started to glow followed by the 4 6922 valves.
relief and a smile started to form, at least visually it was working.
So there are a few voltage checks to make
Heater voltages recommended 12.5vdc actual 12.6vdc
B+1 recommended 180Vdc actual 177Vdc
B+2 recommended 175vdc actual 169vdc
I emailed Roy as I was worried about the slight variance and he replied as quick as ever that these were good voltages.
It was getting late at this point so the unit was unplugged and and the part that matters (the sound testing) starts tomorrow. I will not give a review of the sound quality until I hear that the phono stage components have settled down so you will have to wait for a week or so till my full review is posted.
for now here are a few pics of the internals:-
tomorrow full costings, and some tips from a beginner for beginners or for anyone who is thinking about making one of these but is not sure if they could do it.


First i fixed the wooden fascia to the chassis so the fascia is not quite touching the chassis but is held away slightly from it with foam rubber pads, my theory is that any ringing or vibrations that can effect the chassis will be damped by the foam and dissipated through the wood. probably snake oil but who knows!
All the components in place so the first thing i did was to clean all of the solder joins of flux with isopropyl alcohol and a toothbrush, it needed a couple of goes to get both undersides of the boards spotless but for me worth the effort.
Now came what i found to be the hardest part of the build; connecting transformer,power supply and amp section together.
first I placed all parts and drilled the holes in the chassis then cut the connecting wires to length. Now for the next stage you need good light, and a clear workspace!
there are 24 places where wires need to be connected to the circuit boards and if you make this kit don't make the mistake I did. there are a number of places where the hole for the wires is right next to a component hole. in two of these holes the solder had creeped into the wire hole when soldering the component, so probably 30 minutes wasted with desoldering braid to get those clear before i could put the wire through.
The other thing I would do with hindsight is to solder the input/output cables into place from the top of the board rather than from below (like Roy has for the inputs in his pictures) as the cable I used was Low capacitance coax cable from maplins Coax URM76 50Ω Low Capacitance Cable Black (priced per metre) | Maplin which is stiff and awkward to bend and as they are touching the bottom chassis it defeats the point of the isomounts supplied with the kit. I will be changing these over.
the wiring just needs a bit of planning and thought before you start if you do that it should go hitch free for you.
My main considerations were to keep the transformer and mains input as far away from the input/output areas as possible this is also the reason why the mains input is at the top rear rather than lower down.
I could have got the lower enclosure just, as the rectifier tube is taller than the 6922 tubes but i think i would have needed the wider chassis to stop things getting cramped on the rear of the unit.
finally an email to Roy at VTA/tubesforhifi with a question regarding the grounding and isolation of the RCA plugs Which was answered promptly and the final power leads were twisted with plugs soldered on and the power supply, amp board and transformer were fixed into place.
Finally all valves were placed in the holders.
after spending so long putting it all together I was very apprehensive about switching it on!
Roy Recommends using a variac on all new circuits so you can build the mains voltage up slowly. I haven't got one so this was do or die time!
so it was plugged in, and I pressed the on button and the Led light came on (so i had done at least one thing right), and then there was a few seconds of panic!
this is my first valve equipment and Roy says Check that all 5 valves are lighting up...................they were not, but at least there was no smoke!
then I saw it, the rectifier tube started to glow followed by the 4 6922 valves.
relief and a smile started to form, at least visually it was working.
So there are a few voltage checks to make
Heater voltages recommended 12.5vdc actual 12.6vdc
B+1 recommended 180Vdc actual 177Vdc
B+2 recommended 175vdc actual 169vdc
I emailed Roy as I was worried about the slight variance and he replied as quick as ever that these were good voltages.
It was getting late at this point so the unit was unplugged and and the part that matters (the sound testing) starts tomorrow. I will not give a review of the sound quality until I hear that the phono stage components have settled down so you will have to wait for a week or so till my full review is posted.
for now here are a few pics of the internals:-
tomorrow full costings, and some tips from a beginner for beginners or for anyone who is thinking about making one of these but is not sure if they could do it.
Last edited:
ok we are down to the costings for this unit
Description Cost
PH16 Low gain Version +shipping @ $300 £201.87
VTA/Tubesforhifi
Customs Charge £36.00
240V/200V/12v Transformer £62.72
Canterbury Windings
1 12x4 valve, 4 E88CC valves £42.60
Langrex
phono sockets, grounding post, switch £19.13
solder, connectors,wire, £33.26
upgrade audio capacitors x8 £40.38
All from Maplins
inlet filter, enclosure,fuse, kettle plug, £68.34
RS
timber blagged from merchants
Total £504.30
Tools used
Solder station and third hand £50.00
Dremel (to cut the mains inlet hole) £30.00
Wire strippers, cutters, router, sander, multimeter, screwdrivers, Isopropylalcohol. all from own tools
So basically if you get the kit from roy and you have the tools you can build this without the upgraded capacitors for under £470.00
Roys price of $649 +$29 shipping comes to +£413.75 at todays exchange rates so when you add the wire and solder it is pretty close
so depending on the sound it could be expensive or it could be an absolute bargain! Review to come!
Tips.(for beginners)
Cleanliness, make sure circuit boards are clean with isopropyl before starting any soldering.
Make templates on paper of the mounting holes from the circuit board before starting
put the standoffs on the board before soldering it makes it easy.
Start with the smallest components (resistors) and finish with the largest (caps, valve bases)
twist the wires by putting the ends in a portable drill and holding the other end. (much more even twists)
check off the components on the stock list as you go
take time planning the layout in the chassis before wiring everything together
if in doubt email Roy...............great support
KIT REVIEW
Clear concise instructions, circuit diagrams, and component plan.
components within close tolerances and packed in separate bags for each stage of the build.
Quality through hole circuit boards and mounting hardware.
Easy to follow and I did not have any problems with the build at all.
As a kit highly recommended. and to be honest if you are slightly handy and have a bit of common sense I would say a beginner would not have too much trouble making one of these.
By the way it works as well!
may get a review out next week but to be fair to Roy I want to give the components a fair chance to settle in

the review is on its way I am starting tonight but i thought i would qualify my credentials to submit a review!
By trade I am a property developer and habitual upgrader of hifi which means that when i am at the end of a project and short if cash to get it finished the hifi goes! so I see my buying hifi as a saving scheme!
so this is a list of my equipment and the changes i have made to it
dual 505 nad 3020 amp
then arcam amplification and the cd stage
five years ago i rediscovered vinyl and spent a long time trying to get the sound just right!
michell gyrodec was first with an origin live silver arm rondo red cartridge
the first phono stage was a cambridge 640 i think it sounded awful and was quickly replaced by a trichord dino and after a while the separate power supply, now we were getting somewhere.
next the arm was replaced by a origin live conqueror mk 3 (superb arm) and the cartridge with dynavector 10x5. i was listening to all of this through kef refence 105/3 speakers which i had refoamed my self (I have pictures of the full process if anyone wants them)
as one house sold and i had some cash spare and i got into naim amplification and went from the basic model up to the 252 with supercap and the 300 power amp I also bought a unitiqute to stream music from the computer and then i bought the naim ovator 400 which are very good if you have about 6 months to run them in!.
Another property another cashflow problem the naim gear had to go apart from the unitiqute.
two months later a Leema ageena phonostage came up for sale on the second hand market, I was after one of these before so i bought that .... this was a revelation in sound and one of those moments where the penny drops.
The turntable sounded better through the leema and then the unitiqute than the trichord did through £15k of naim amplification.
It finally sunk in just how important the phono stage is.
flush with cash again i bought from analogue seduction in peterborough an Avid volvere sequel SP and put the conqueror arm on that with a dynavector 17d3 .. still something missing from the sound i kept messing with the vta and could not get it right finally found a second hand smeV arm and the karat cartridge was replaced with another dynavector xx2MKII
Finally I was there, no urge to fiddle it was just right! I now had my reference turntable!
so as the leema had two inputs it was time to see what all the fuss was about with the linn LP 12. I had four or five linns and the nearest i got to liking the sound was with an ittok arm, arkiv cartridge circus bearing and lingo power supply.
Sorry to all the Linn fans there but I had two turntables set up and the one that got all the playtime was the Avid, it beat the linn on all counts it was admittedly more "hifi" but it was also more like live music!
Another project underfunded meant that the avid, the linn, the leema, the dynavectors had to go
So as you can see I have had quite extensive experience listening to a wide range of equipment.
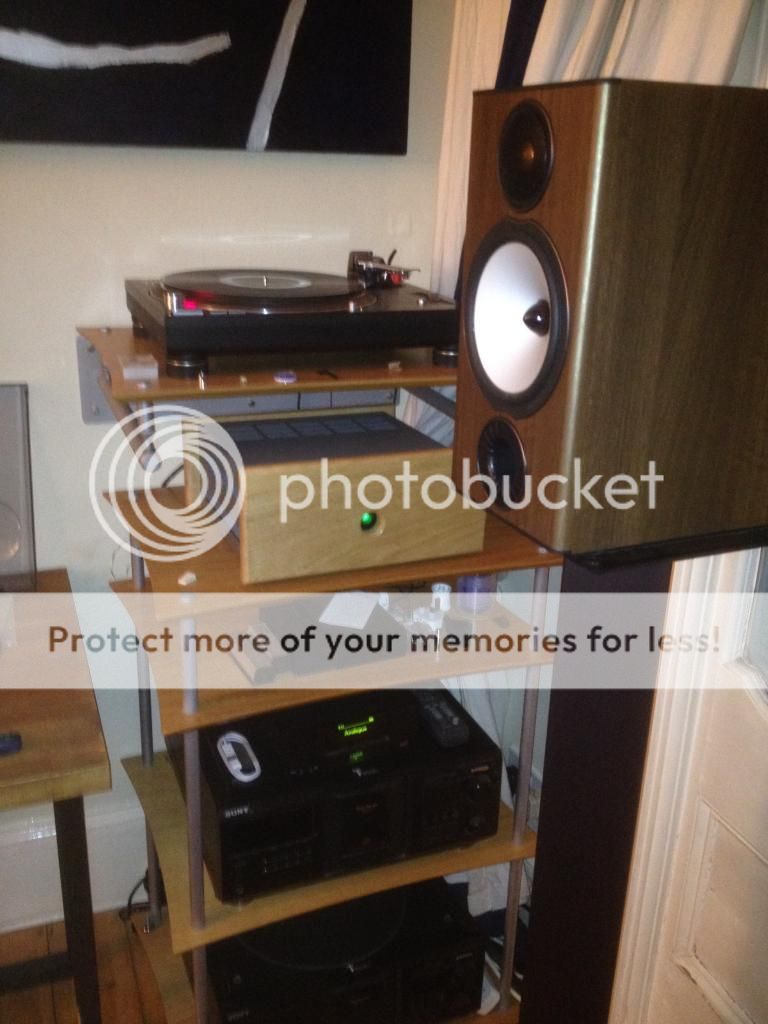
what i have for now is low budget gear and this is what i will be doing the review on,
turntable is technics sl 1210 mk5
Cartridge rega Bias 2
amplification Unitiqute
and speakers monitor audio Bronze BX2
room is 12'x15' and not perfect as it has a bloody great oak table in the middle of it, but I know the acoustics of the room and can judge the difference between different components.
I will be comparing the VTA PH16 with the
trichord dino with the dino + power supply @£800
Leema ageena £3500
One the trichord because it is close to the cost of the ph16 build if you put on a dealers markup
And two the leema because can it realistically get anywhere near that performance?
.....to be continued


By trade I am a property developer and habitual upgrader of hifi which means that when i am at the end of a project and short if cash to get it finished the hifi goes! so I see my buying hifi as a saving scheme!
so this is a list of my equipment and the changes i have made to it
dual 505 nad 3020 amp
then arcam amplification and the cd stage
five years ago i rediscovered vinyl and spent a long time trying to get the sound just right!
michell gyrodec was first with an origin live silver arm rondo red cartridge
the first phono stage was a cambridge 640 i think it sounded awful and was quickly replaced by a trichord dino and after a while the separate power supply, now we were getting somewhere.
next the arm was replaced by a origin live conqueror mk 3 (superb arm) and the cartridge with dynavector 10x5. i was listening to all of this through kef refence 105/3 speakers which i had refoamed my self (I have pictures of the full process if anyone wants them)
as one house sold and i had some cash spare and i got into naim amplification and went from the basic model up to the 252 with supercap and the 300 power amp I also bought a unitiqute to stream music from the computer and then i bought the naim ovator 400 which are very good if you have about 6 months to run them in!.
Another property another cashflow problem the naim gear had to go apart from the unitiqute.
two months later a Leema ageena phonostage came up for sale on the second hand market, I was after one of these before so i bought that .... this was a revelation in sound and one of those moments where the penny drops.
The turntable sounded better through the leema and then the unitiqute than the trichord did through £15k of naim amplification.
It finally sunk in just how important the phono stage is.
flush with cash again i bought from analogue seduction in peterborough an Avid volvere sequel SP and put the conqueror arm on that with a dynavector 17d3 .. still something missing from the sound i kept messing with the vta and could not get it right finally found a second hand smeV arm and the karat cartridge was replaced with another dynavector xx2MKII
Finally I was there, no urge to fiddle it was just right! I now had my reference turntable!
so as the leema had two inputs it was time to see what all the fuss was about with the linn LP 12. I had four or five linns and the nearest i got to liking the sound was with an ittok arm, arkiv cartridge circus bearing and lingo power supply.
Sorry to all the Linn fans there but I had two turntables set up and the one that got all the playtime was the Avid, it beat the linn on all counts it was admittedly more "hifi" but it was also more like live music!
Another project underfunded meant that the avid, the linn, the leema, the dynavectors had to go
So as you can see I have had quite extensive experience listening to a wide range of equipment.
what i have for now is low budget gear and this is what i will be doing the review on,
turntable is technics sl 1210 mk5
Cartridge rega Bias 2
amplification Unitiqute
and speakers monitor audio Bronze BX2
room is 12'x15' and not perfect as it has a bloody great oak table in the middle of it, but I know the acoustics of the room and can judge the difference between different components.
I will be comparing the VTA PH16 with the
trichord dino with the dino + power supply @£800
Leema ageena £3500
One the trichord because it is close to the cost of the ph16 build if you put on a dealers markup
And two the leema because can it realistically get anywhere near that performance?
.....to be continued
Last edited:
Part 1
So the review! Sorry it has taken so long.
Initial listening
I have a number of reference tracks which I know sound gorgeous on vinyl but show up the faults of any equipment, I will get to these later. I started playing these and there is one word that sums up the sound ……Disappointing.
The bass is muddy, there is detail there but not right and the soundstage is not great, everything sounds like a curtain has been placed in front of the speakers after playing a few tracks from each album with a variety of music, I stopped it is not good. I stopped for the night.
The next night it was very slightly better but the dino was miles better and there was definitely a lack of bass so I changed the cartridge loading from 47k to 33k. It was an improvement but still I was wondering ‘is this the warm sound valves are supposed to produce?’ if that is the case my next project will be bought solid state and this is the end of my diy path.
The next day I noticed I had left the ph16 on overnight, everything had opened up and it was a touch clearer but if I had auditioned this in a hifi store I would not consider it.
So time to look over what I had done … had I made a mistake somewhere?, will I have to send it to the states to get Roy to check it over ?
Then I remembered I had got really cheap Tesla valves, so after an evening of research the ones to have seemed to be Tungsram 6922 and so I ordered some from Watford valves for £130 unfortunately they emailed to say they were not available. The only other place I could find them were from upscale audio in the states but at $330 +shipping I was not prepared to part with that much money for something that could still sound terrible.
So onto ebay we go and I found these advertised as mullards
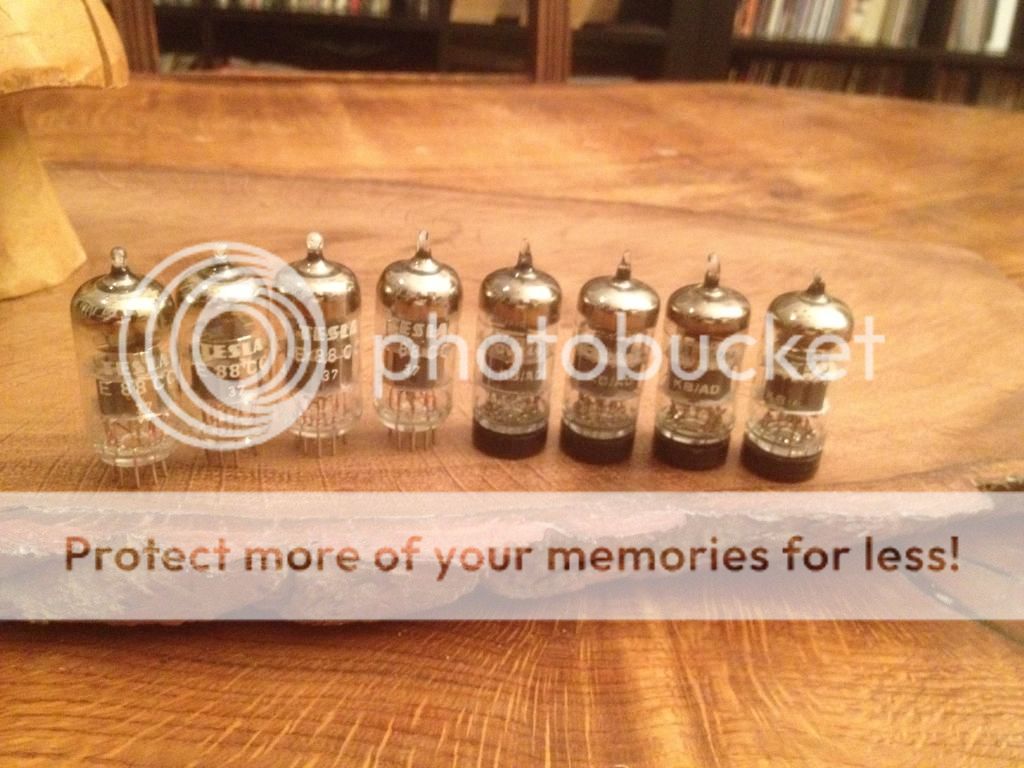
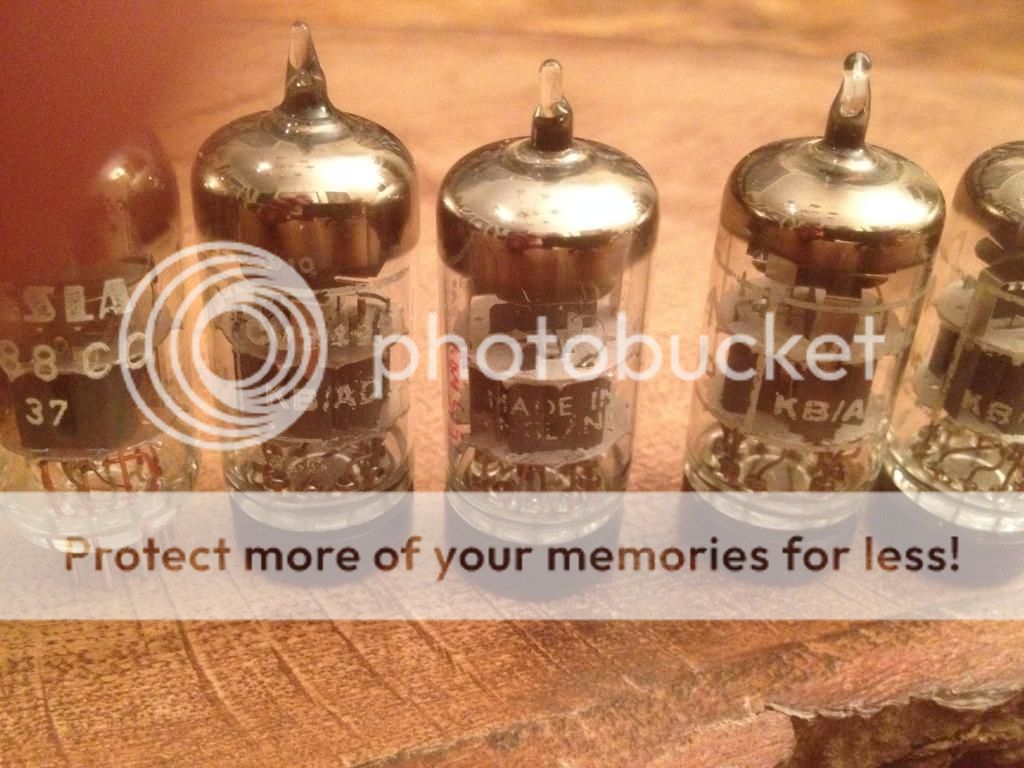
but after a bit more research found out they were Brimar cv2492 made in the Rochester plant cost £100 (probably overpaid for these but if anyone wants to sell me some cheaper I will have the lot!)
Because these have made all the difference!
If any one is sick of hearing the words night and day I am with you but that is what these have done. Bass seemed slightly too much there though and then I remembered I had changed the cartridge loading so back to 47k and it seems pretty much spot on.
Two nights of listening casually to music and leaving the unit on for 48 hours it seems to have settled down to a constant sound and then it happened.
That magical moment when you play a track and all the hairs start to bristle on your neck and arms and strangely I could feel it all over .
All of a sudden the next track I wanted to play came to mind this was not going to be a reference track review this was a let things flow and see what happens moment .
This is looking promising !
Already it has thrashed the Dino can it get up to the performance of the Leema ageena?
You are going to have to wait as I now want to listen and take notes
Tube rolling? Nothing wrong with Roys circuit or components, put in the best tubes you can afford!
Part 2 of the Review with track by track comments as soon as I have finished
So the review! Sorry it has taken so long.
Initial listening
I have a number of reference tracks which I know sound gorgeous on vinyl but show up the faults of any equipment, I will get to these later. I started playing these and there is one word that sums up the sound ……Disappointing.
The bass is muddy, there is detail there but not right and the soundstage is not great, everything sounds like a curtain has been placed in front of the speakers after playing a few tracks from each album with a variety of music, I stopped it is not good. I stopped for the night.
The next night it was very slightly better but the dino was miles better and there was definitely a lack of bass so I changed the cartridge loading from 47k to 33k. It was an improvement but still I was wondering ‘is this the warm sound valves are supposed to produce?’ if that is the case my next project will be bought solid state and this is the end of my diy path.
The next day I noticed I had left the ph16 on overnight, everything had opened up and it was a touch clearer but if I had auditioned this in a hifi store I would not consider it.
So time to look over what I had done … had I made a mistake somewhere?, will I have to send it to the states to get Roy to check it over ?
Then I remembered I had got really cheap Tesla valves, so after an evening of research the ones to have seemed to be Tungsram 6922 and so I ordered some from Watford valves for £130 unfortunately they emailed to say they were not available. The only other place I could find them were from upscale audio in the states but at $330 +shipping I was not prepared to part with that much money for something that could still sound terrible.
So onto ebay we go and I found these advertised as mullards
but after a bit more research found out they were Brimar cv2492 made in the Rochester plant cost £100 (probably overpaid for these but if anyone wants to sell me some cheaper I will have the lot!)
Because these have made all the difference!
If any one is sick of hearing the words night and day I am with you but that is what these have done. Bass seemed slightly too much there though and then I remembered I had changed the cartridge loading so back to 47k and it seems pretty much spot on.
Two nights of listening casually to music and leaving the unit on for 48 hours it seems to have settled down to a constant sound and then it happened.
That magical moment when you play a track and all the hairs start to bristle on your neck and arms and strangely I could feel it all over .
All of a sudden the next track I wanted to play came to mind this was not going to be a reference track review this was a let things flow and see what happens moment .
This is looking promising !
Already it has thrashed the Dino can it get up to the performance of the Leema ageena?
You are going to have to wait as I now want to listen and take notes
Tube rolling? Nothing wrong with Roys circuit or components, put in the best tubes you can afford!
Part 2 of the Review with track by track comments as soon as I have finished
Part 2
The Blessing Prince of the deep water MCA10070
I want you
This track starts with thunder in the background and is a polished production but this is the first time I have heard the rain, it always sounded like a faint crackling but I could hear for the first time I have heard the rain.
Where the hell have my speakers and side walls gone? The soundstage is wider than seems possible and William Topelys voice is smack bang in the centre and so smooth.
The second track Delta rain has a bass drum in the intro which has the full impact and decay of a live drum. There is a female guest vocalist on this track and her voice is more haunting than I have ever heard it.
On the third track bird house this is a very staccato type of track and I can hear that there is terrific attack on notes, basssline and drum beats. I can promise you this ”aint no slouch!”
Lets see how this does music!
Michelle shocked short sharp shocked cooking vinyl CVLP1
If love was a train
Fast driving track with a lot going on and the ph16 takes it with ease dynamics are fantastic and this is as close I have heard to live, apologies to the neighbours. I have this loud at the moment and the gaps between tracks is dark not quite as quiet as the Leema there is a slight valve hiss but only at louder than listenable levels
Anchorage
One of my all time top tracks
It has been a while since I played this and the sound is fuller than remember and the ph 16 keeps this sounding so natural, the realism of her voice needs to be heard.
While I am in this American/ bluegrass folk theme lets go to
timbuk3 Eden Alley IRS records MIRG1034
Tarzan was a blues man
If anyone knows this it starts with a driving drum followed by a hard hitting bass line then a harmonica solo …. Separation and detail are faultless
The next track
Easy
I love this track there is sharp percussion throughout and Barbara McDonalds voice has enormous lifelike presence and there again is the dynamics space and air around the instruments.
John cougar mellencamp Lonesome Jubilee Mercury MERH109
Check it out
The real Life
Cherry bomb
This phono stage does musicality three tracks that must be played in order not one dissapoints
WARNING:- I planned to play one track from each album that is just not going to happen this is going to be a long review!
Lets check out the bass
Massive Attack Collected VirginV3017
Angel
Standmounts don’t do bass………they do now!
A very dark track with deep drums and a bassline that goes lower than most the ph16 is handling it all. With cymbals ringing out and everything where it should be. This is a difficult track for a lot of systems to play well, either the bass elements drown out the higher frequencies or it doesn’t sound powerful. I would say the balance between light and shade is excellent
Teardrop
Absolutely no sibilance on the voice which I have noticed before and there is height and depth to the music.
Howling Wolf the London sessions Chess 60008
Speakers corner repress
The red rooster
This is a fantastic recording and worth hunting down
Again detail is terrific you can hear clearly Charlie watts is using brushes on the drums the piano of Steve Winwood is the most realistic and you can ascertain when he hits the keys harder piano is a difficult instrument to get right but this is the closest I have heard it sound.
I have a particularly sensitive ear for out of balance left/right components and I can happily say that the positioning of instruments and central voice are accurate.
Eric Clapton unplugged Reprise 9362-49869-3
Side 1! The whole of side 1 I did warn you,
Detail, Dynamics and ambience in spades
I am not a great lyrics man I have always considered the human voice to be another instrument but the voices are so realistic you cannot fail to listen to them.
During Hey Hey I had to stop typing in to the computer because the performance sounds so realistic I started to feel like I was at the concert and rudely sending text messages so I had to stop and just listen
Bon Iver for emma forever ago Jagjaguwar JAG 115
Skinny Love
Simon Cowell should be strung up just for the crimes he has allowed to be commited to this song!
Sound stage has narrowed, I can hear the acoustics of where it was recorded , probably the most intimate I have heard this song.
Pachelbel Canon Decca 411 973-1
We had this as our wedding music each instrument can be picked out easily and now I can hear this was recorded in a much larger venue
Miles Davis Kind of Blue MOV Legacy MOVLP 019/88697638941
So What
Massive soundstage with instruments placed all over the room and with great depth and detail
Counting Crows August and everything more Geffen gef24528
Very rare Denmark only press but there are a few good reissues
An almost perfect debut album.
Perfect Blue buildings
Anna Begins
one word “sublime”
Courteeners, Falcon polydor a&m2729354
The opener
An album that is not a great pressing/recording and has always sounded better digitally to me.
Although the vocals and dynamics and the drive through the music was better than I have heard The PH16 cannot make a poor pressing sound great
Summary
I could go on I have jazz, heavy rock, classical, blues, pop, dance, reggae, but these are the tracks the PH16 chose for me and I could go on listening but it is getting late and I have a roofing delivery coming at 7:30 am tomorrow.
So what are the stand out points of the PH16?
1. Soundstage, it projects the acoustics of the room it was recorded in, if your listening room is smaller don’t worry it will knock down the walls
2. Dynamics, air and attack and decay are every where which is the key to getting the next point
3. Realism, if it was recorded live you will be in the venue, if not you just got sneaked into the recording studio
4. Voices are so lifelike they demand your attention, and piano sounds probably the best I have heard
5. Detail, if it is on the recording you will hear it
6. Bass, I was concerned that a valve phonostage would be bass light…. I needn’t have worried.
7. Musicality , the speed and attack of the transients will have your feet tapping your wife dancing and both of you singing along
So How does it compare to the dino and Leema?
Features:-
poorly compared to the other two, the dino is switchable MM/MC and the loading can be adjusted from the bottom of the case.
The leema is amazing , two inputs, balanced mode operation,multiple cartridge presets.
PH16 can be made in MM &MC mode but it is a matter of changing a number of components. Cartridge loading can be altered but it means getting inside the case to do it. So scores are Dino= 5, Leema= 8
PH16= 2
Placement:-
all three are sensitive to how close they are placed to other components with the leema being the worst then the PH16 then the dino
Soundstage:-
The PH16 wins this hands down with the Leema coming a close second I would score this as PH16=8 Leema=7 dino=5
Dynamics:-
Again the PH16 just edges it over the leema but for me it is these microdynamics that make a recording sound real
PH16=8 leema =7.5 dino =5
Detail:- I thought I would be comparing this PH16 to the dino but that is an also ran, the ph16 can match the leema with nuances no problems. With both of these you will hear things on your recordings that you never realised were there. PH16 =8.5 leema=8.5 dino =6.5
Realism:-
The ph16 is so close to putting you “there” but the leema was no slouch either it just did it in a different way but the way the PH16 does voices it has got to be PH16 =8.5 leema =8 dino= 4.5
Bass:-
The leema ageena wins by a shade here but my memory of the leema was with floormounters but the PH16 is mighty close PH16=8 leema=8.5 dino =6
Musicality:- not sure if it is the slightly extra bass of the leema but although close the PH16 is just slightly behind (but this may have something to do with floormounters with the leema and stand mount speakers with the ph16)…. But I am trying to grade these from memory so you be the judge. PH16 =8 Leema ageena 8.5 dino=6.5
So totals
PH16 = 51
Leema Agena=56
Trichord Dino= 38.5
Surprising for me as I would have thought the PH 16 would be more closely matched to the dino than the Leema more surprising is if you take the features points away and just judge on the music you get this:-
PH16= 49
Leema Ageena = 48
Trichord Dino = 33.5
Don’t get me wrong the Dino is an excellent stage especially with the upgraded power supply and I was happy with it for a long time.
If I had endless pots of money and wanted solid state the leema would get my cash. Until you work out the cost.
If you make two PH16s MM & MC you would still have over £2000 to spend on records.
So the PH16 is a keeper and I will be rebuilding my system around the PH16 in the future. I cannot wait till I can afford to buy my reference turntable and play it through this as I have little doubt it will blow the leema into the water.
The cost has gone up with the different tubes to about £580 to build, this is an absolute bargain. Go and order one today!!
If you don’t think you can, I am open to commissions!...........I have the bug.
Thanks for bearing with me and my terrible writing style, and I hope this has been informative.
Now has anyone got some tungsram 6922s ?
this cannot get any better can it?
- Status
- This old topic is closed. If you want to reopen this topic, contact a moderator using the "Report Post" button.
- Home
- Source & Line
- Analogue Source
- Building the VTA, tubes4hifi PH16 Phono Stage