Frank,
...putting the TA in a "neutral" position and then letting the lower magnet "find a home" then tightening down the lower magnet cup ...
Also is there any benefit to rotating the lower magnet axially to find a good "happy" location as well, once I have found a good co-radial position?
Thanks again,
Muggs
Since they would be sitting on top of each other, the attracting force is so strong that the magnets will never consistently find a perfectly centered position.
Sheer rotation does not suffice. You need (360°)sideways movement or rotation and fore/aft movement for a perfect centering job.
Cheers,
F.
Frank,
OK, thank you.
Sorry, for the second part of my question, I probably did a poor job explaining.
So, after moving the lower magnet left/right, fore/aft to center the two magnets, will rotating the lower magnet (at the fixed location) have any good/bad effect on the TA swing?
Muggs
OK, thank you.
Sorry, for the second part of my question, I probably did a poor job explaining.
So, after moving the lower magnet left/right, fore/aft to center the two magnets, will rotating the lower magnet (at the fixed location) have any good/bad effect on the TA swing?
Muggs
hi Frank
yes you got me thinking..so I'm down to few option to play around..
I am going to try to tweak till the vtf is less variance so the damping is not that much. that should liven up the sound some.
BR
Anthony
Hi Antony,
hows is working the TA?
Adelmo
Hello Muggs,
So, after moving the lower magnet left/right, fore/aft to center the two magnets, will rotating the lower magnet (at the fixed location) have any good/bad effect on the TA swing?
No, unless your sphere-profile is uneven, - like, when the magnet wasn't centered well before grinding the surface. Your high point after grinding will then be off-center...
Best,
Frank
Hii AdelmoHi Antony,
hows is working the TA?
Adelmo
very good thank you I think I solved all problems and finally comfortable with all the compromises. very confident it will work very well.
the 3d printer nozzle works great. I use 0.8mm for 0.5mm fishing line. so can do final adjustment to adjust the gap of the magnet.
I bought a machine drill press but alas very poor accuracy. so this is what I could do best. tried drilling magnet but I got the wrong kind of drillbit. I think I need diamond.
all road lead to Rome once a smart man said.
thinking of remachining new parts waiting for the dreaded covid lock down before I can go to my friend.
BR
Anthony
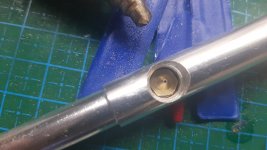
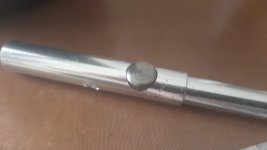
Attachments
A can of worms!!!
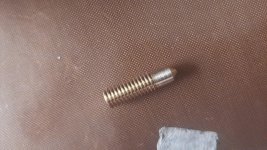
Talk of magnet drilling will open a large can of worms around here. Having said that, When I drilled my magnet, I did not use a diamond bit. In fact, I purchased the drills from Harbor Freight it was the imperial set, can’t remember what they are made of, quite the comprehensive set though. Anywho, I drilled my 3/8” magnet mounted in a collet(equal tension on all sides) collet then attached to my mini lathe. Slow cutting with fluid to help reduce heat. If you are using a chuck make sure the drill bit is good & center with as little side to side movement as possible. If you crank the speed up high and don’t see any “wobble” it’s a good start. Chatter and drifting may still be an issue. You may or may not know these things already if not hope it helps.
Talk of magnet drilling will open a large can of worms around here. Having said that, When I drilled my magnet, I did not use a diamond bit. In fact, I purchased the drills from Harbor Freight it was the imperial set, can’t remember what they are made of, quite the comprehensive set though. Anywho, I drilled my 3/8” magnet mounted in a collet(equal tension on all sides) collet then attached to my mini lathe. Slow cutting with fluid to help reduce heat. If you are using a chuck make sure the drill bit is good & center with as little side to side movement as possible. If you crank the speed up high and don’t see any “wobble” it’s a good start. Chatter and drifting may still be an issue. You may or may not know these things already if not hope it helps.
hi Strike3
I'm sure with enough patience and proper tooling it can be done.
Execution my problem here since I'm using a Chinese cheap drill. it's already wobbling.
so I have plan a b c.. and I pick one what works best in my situation. luckily 3d printing nozzle is there. it's centerd and perfect hole alignment. I inverted the nozzle and so the pivot pt is 1 to 2 mm above the magnet. best I could hope for.
I think I can just adjust the magnet gap and play some with counterweight . to get it right all left to be done.
the sound and tracking is already alright before revision. vtf is all over the place however. I'm very optimist this revision to get the center pivot solid perpendicular and better magnet shape will make it Alot better. lastly a more precise armboard . all will be working in a month or two.
my dream is to get a soundsmith cart next for this. delicious yes?
BR
Anthony
almost done
happy with the result of re machining parts.
also buy a dozen magnet all fits differently find the one that can correct fit to the hole for magnet.
i had tough time tying the string took me 3 hours it's very very short that's why. eventually I used a modified knuckle using 2 strings to get the knot as close as need to be.
burning in cable and in few weeks I'm done
BR
anthony
Attachments
OK, I can't take it anymore! I am NOT an audiophile nor do I play one on TV, I'm just a designer, modelmaker, woodworker, tinkerer (who needs a turntable). I have read every line of this blasted post up to page 129 and I can't take it, I had to jump to the end and say, I'm in.
So, as I understand it, my humble version of the Schroder tonearm will look something like the attached.
3/8 x 1/4 - N52 magnets in aluminum TA section and lower “cup”, separated by ~.060” iron “wafer” one drilled and countersunk for the thread knot.
Does anything look really wrong to anyone?
Also, I would be remiss if I didn’t profusely thank Mr. Schroder (Frank) for his willingness to share his hard-fought knowledge, as well as his kindness to everyone that has commented in this forum. THANK YOU! Even if this becomes nothing more than a learning experience for me, I will be forever grateful for what I have learned here.
Muggs
Thats the best representation of a diy Reference that I have seen on here. Well done ! .It is exactly as I built mine. The facing magnet faces are of course though curved in a certain way to maintain the correct and constant VTF and azimuth as the cartridge tracks through the record.
Some people might notice that the magnet is not drilled so that the pivot point is made in the center of the arm and not on the bottom surface of it.
Other people won't care and will keep recommending that the magnet should be drilled
")
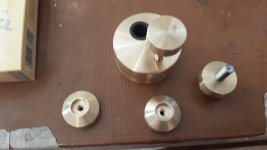
drilling such a small hole to have a center perpendicular axis is difficult let alone tying a stop knot that is so short. the 3d nozzle is great for this. the top side can be modified so can adjust the magnet height with turn of the screw.
even the top and bottom inserts it's made precisely I ordered more pieces and luckily got one that fits the fitting more perfectly. magnet sits more parallel. this is the tough one
I bought a bunch of magnets and found the perfect fit for each hole and grinded the top one more so it's thinner. also making the pivot as close to the magnet
the counter also bored slightly more center than before and heavier. aiming for either 10 to 10.5 inch tonearm.
teflon itube inserts is added to tonearm so the hole is now 2mm
closest to ideal within my capability. and appreciation for the ideas brought forth by Mr Frank. and support from Adelmo
devil is in the detail.. now I appreciate how much time and care is required to do this arm and why a simple design cost asmuch.. makes it cheap. not a simple make and assemble. can't get rich doing this. it's a love of the art, science and music.
with the total cost I could buy 2 2nd hand good condition tonearm but this is great fun, priceless. thank you everyone here for clarifications.
Last edited:
all assembled and done.
much better results with same carts. better detail. stage size depth and saturation. Bass and transient is better too. I'm satisfied.
Thank you all and especially Frank , Adelmo for assistance
youtube clips for your kind perusal
August 15, 2021 - YouTube
August 15, 2021 - YouTube
August 15, 2021 - YouTube
BR and stay Safe
Anthony
Last edited:

hi Adelmo,
variance of tonearm. height is not as difference. raising the tonearm via on the fly vta does not change vtf much. maybe by 0.05 grams. also the screw on counter works great now for adjusting 1gram plus minus. and stable.
used to be all over the map the vtf.. so I think it's ok
BR
anthony
very adjustable and accurate
I found a fundamental mistake. the tonearm should be mounted closer to the turntable but maintaining the pivot to spindle. so the counter weight can move closer to the pivot without getting stuck.
It's difficult since I need a tightly placed arm lifter and I'm forced to stay at it is. my design flaw.
this tonearm is indeed worth its effort. listening for a week. it's almost like listening to a very low jitter system. the bearing free frictionless makes the cartridge a dream tracker.
it also behaves like some of the great tonearms. it's like the tonearm isn't there.. transparent. less coloration but more music. I could listen to it whole day long.
BR
Anthony

diy Frank schroeder. re mounting - YouTube
remounted so I could replace it with a even heavier and more center counter weight without getting stuck . apparently this is the way to mount it. the more centered counter weight have less vtf variance with diff thickness.
clearly better match of compliance. I think it's safe to say this beats my favorite tweaked out sic bearing Epa100 technics. and what I think is superb. FR24.
the image is now huger, taller and wider. fuller bass. even better energy than before.
amazing amazing tonearm. Thank You Frank! for providing so much help. without the explanation I don't think it will be a success.
BR
Anthony
Last edited:
hi Adelmo,
variance of tonearm. height is not as difference. raising the tonearm via on the fly vta does not change vtf much. maybe by 0.05 grams. also the screw on counter works great now for adjusting 1gram plus minus. and stable.
used to be all over the map the vtf.. so I think it's ok
BR
anthony
very adjustable and accurate
Well done,
Best regards
Adelmo
Hi Frank
in all your designs..
which areas you think is the most important to affect the quality of sound production, transparency. clarity.
you mention say for example. true linear tracking but still have issues with stylus deflection.
Damping that does not effect the fidelity of carts.
say got the best error tracking but sound is sub par.whereas 9 inch tonearm could sound better
which areas of the tonearm need to be addressed.. for great sound and what kind of compromise is reasonable.
BR
Anthony
Hi guys! Happy New Year everyone.
I'm new to this forum and have many, many questions about Frank's tonearm. May I ask them? I hope this topic is still alive and someone is reading it.
First, how does string length affect bearing quality? Which string length is preferable - large (30-50 mm) or small (15-25 mm)?
Secondly, is it necessary to strive to ensure that the tip of the cartridge needle and the suspension point of the tonearm are in the same plane?
I've been reading the entire thread for a week now, but unfortunately I haven't found answers to these important questions. If this is my carelessness, please tell me where it is described.
Best wishes GorUni.
- Home
- Source & Line
- Analogue Source
- DIY Schroeder Tonearm???