Got the wood last night and I'll probably start doing cuts tonight. I'll post pics of the progress.
I'm going to make a slight change to the plans. I prefer speakers elevated, usually slightly above my ears. So I'm going to build an empty section under the speaker to elevate them, probably 12", but I'll do some measurements and see what I like. I'll also put a hole in it so that it can be filled with lead shot (mostly because I have a lot of lead shot sitting in a jar)
I'm going to make a slight change to the plans. I prefer speakers elevated, usually slightly above my ears. So I'm going to build an empty section under the speaker to elevate them, probably 12", but I'll do some measurements and see what I like. I'll also put a hole in it so that it can be filled with lead shot (mostly because I have a lot of lead shot sitting in a jar)
Last edited:
Starting the cuts. Out of respect for the designer, I won't go into details on the measurements, other than I've decided that I'm going to elevate the speakers by 8" by building the empty area under them into the box. This will put the drivers a little closer to where I like them. This is also not likely to be a quick build, as I have some higher priority stuff to take care of, so I'll be working on these as time permits.
Here is the first part, cutting the side pieces
For comparison, here is one side piece next to one of my Fraglehorns (same dimensions as the Frugalhorn, just with a straight cut back)
Here is the first part, cutting the side pieces
An externally hosted image should be here but it was not working when we last tested it.
For comparison, here is one side piece next to one of my Fraglehorns (same dimensions as the Frugalhorn, just with a straight cut back)
An externally hosted image should be here but it was not working when we last tested it.
Got a little inspiration. I'm going to steal sismik11's color scheme here
The plan as to just use the birch ply, and put some edge trimming on it, but instead I'm going to copy this idea of painting the back and leaving the face natural. I'll router a gap to separate the front from the back, which should give it a little bit of a "floating" look, similar to the one above. This should help cover up for my lack of woodworking skills.
The plan as to just use the birch ply, and put some edge trimming on it, but instead I'm going to copy this idea of painting the back and leaving the face natural. I'll router a gap to separate the front from the back, which should give it a little bit of a "floating" look, similar to the one above. This should help cover up for my lack of woodworking skills.
Last edited:
Lots of rain this weekend, so tinkering with the speakers a little. Here I've cut all of the pieces and placed them, loosely, where they belong
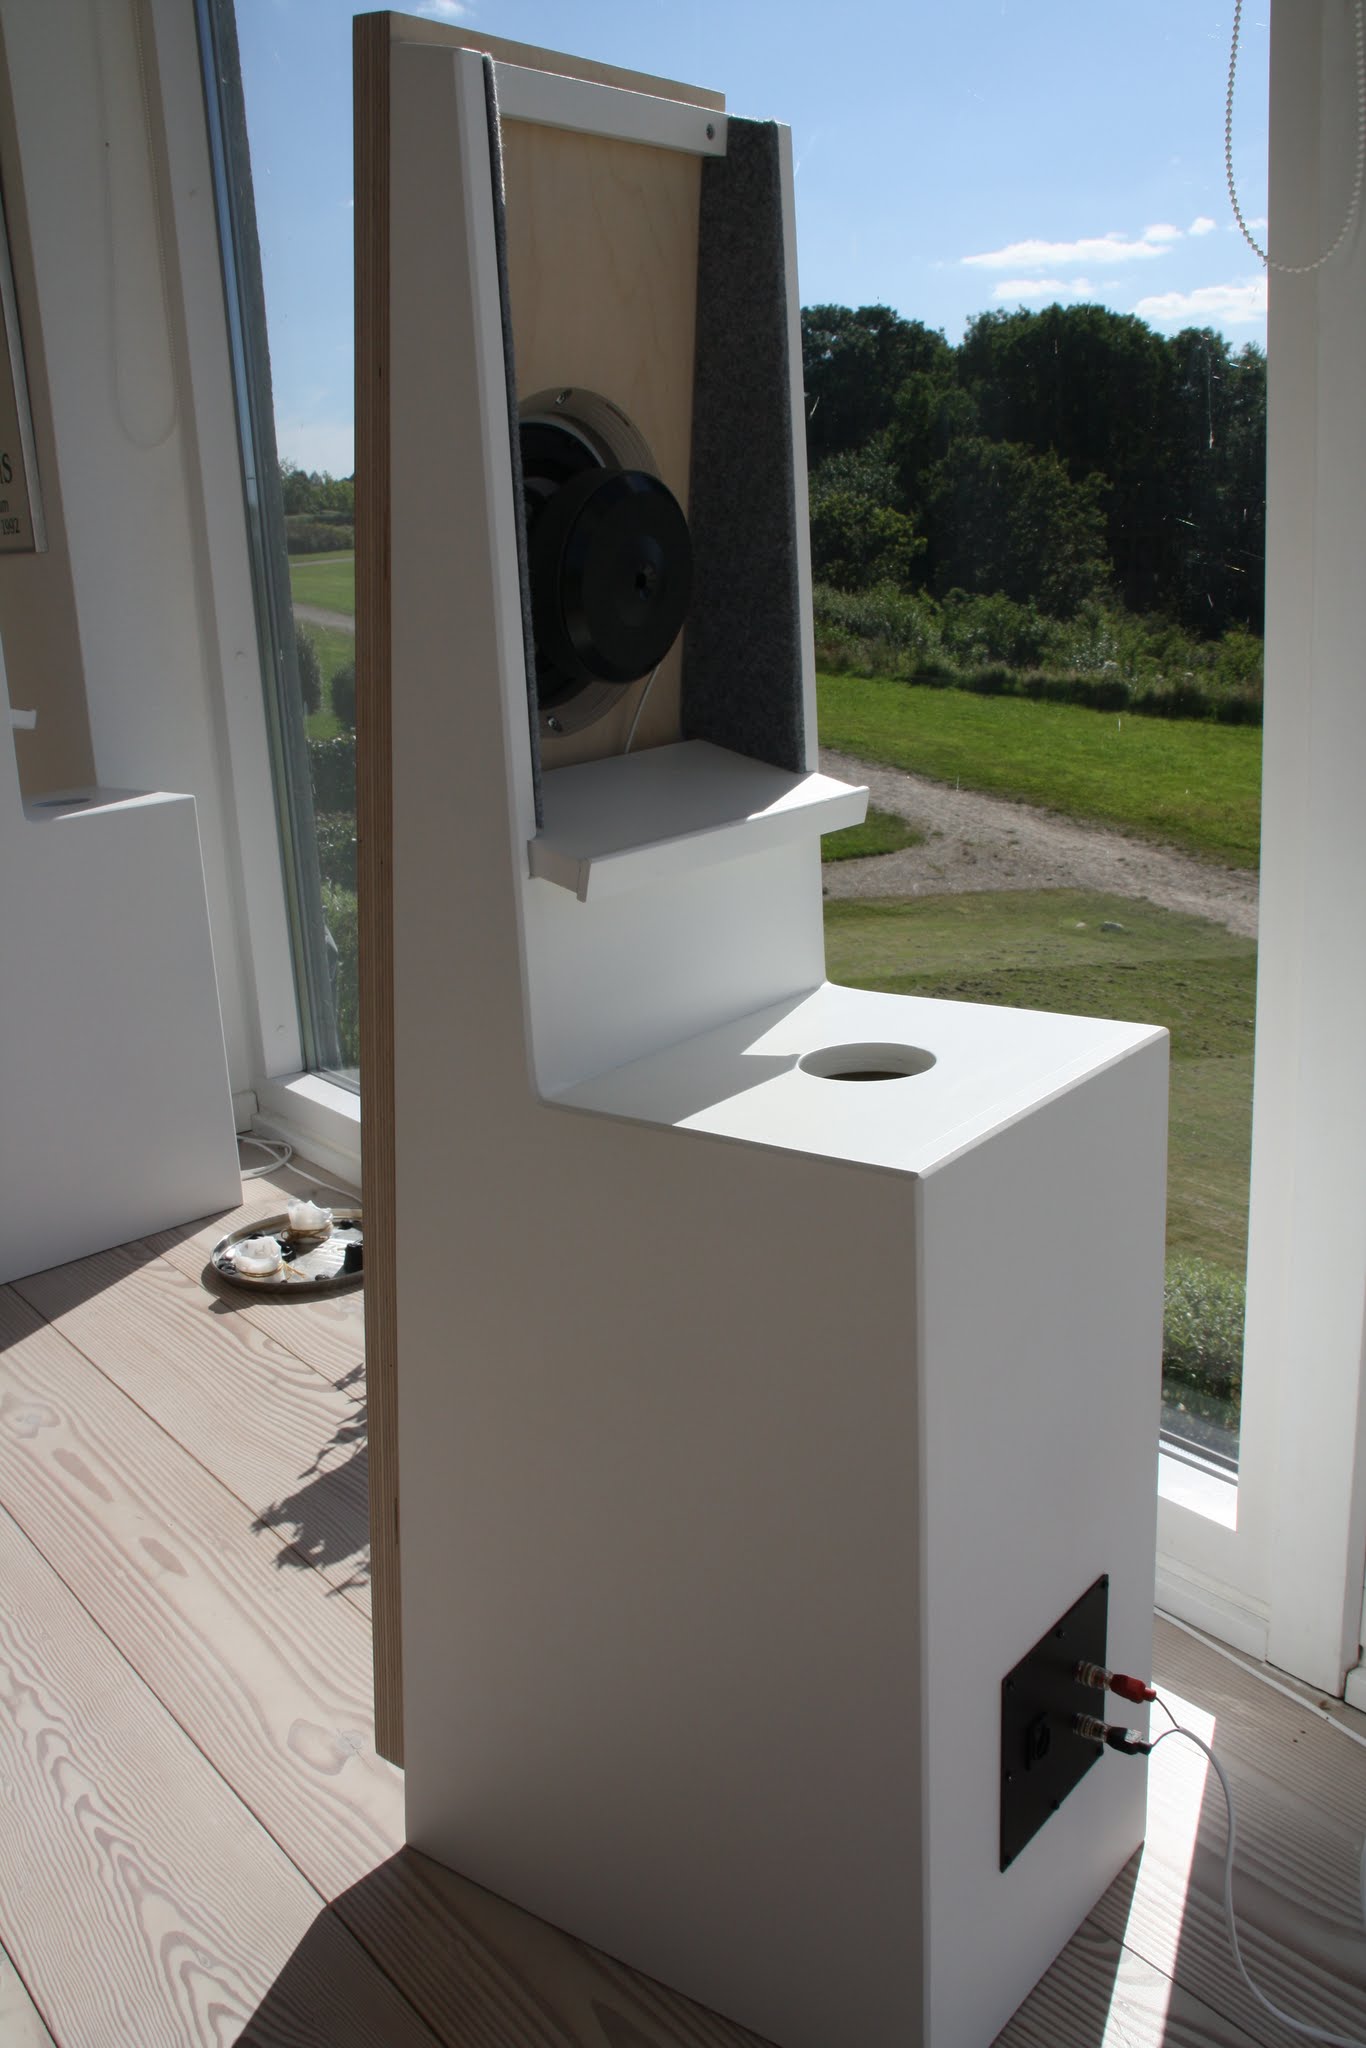
I am not equipped to make a proper curved back, so I'm going with a straight cut on the back of the speaker. Here I've just clamped it together, nothing is glued, so I can get a realistic size evaluation. They aren't small. I'd say they are comparable in size to a Martin Logan SL3.
The face pieces I'll do last, as they will get a very different treatment than the rest of the speaker.
An externally hosted image should be here but it was not working when we last tested it.
I am not equipped to make a proper curved back, so I'm going with a straight cut on the back of the speaker. Here I've just clamped it together, nothing is glued, so I can get a realistic size evaluation. They aren't small. I'd say they are comparable in size to a Martin Logan SL3.
An externally hosted image should be here but it was not working when we last tested it.
The face pieces I'll do last, as they will get a very different treatment than the rest of the speaker.
Did you have any problems getting the inside pieces at "perfect" right angles to the sides?
I've not been able to assemble similiar-sized speakers without the help of screws (and plenty of clamps as well) because the inside pieces either lean to one side, or shift around. I've not tried dowels or biscuits.
I've not been able to assemble similiar-sized speakers without the help of screws (and plenty of clamps as well) because the inside pieces either lean to one side, or shift around. I've not tried dowels or biscuits.
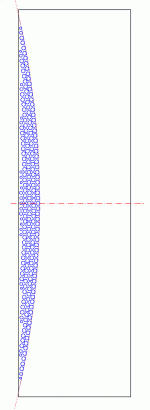
Like the FH series they will be compromised without the curved back (which is a functional part of the design -I didn't put it in for jollies / to look pretty ") ). If you can't do it any other way, mark it out with ruler & pensil, roughly cut to ~'close' to the outer edge of the line with a jigsaw or similar & shave with a plane to reach the target curve. It's worth it.
). If you can't do it any other way, mark it out with ruler & pensil, roughly cut to ~'close' to the outer edge of the line with a jigsaw or similar & shave with a plane to reach the target curve. It's worth it.
). If you can't do it any other way, mark it out with ruler & pensil, roughly cut to ~'close' to the outer edge of the line with a jigsaw or similar & shave with a plane to reach the target curve. It's worth it.Like the FH series they will be compromised without the curved back (which is a functional part of the design -I didn't put it in for jollies / to look pretty
I'm just not setup to make a clean cut with a jig-saw on a curve right now. I understand not having the curve may have an impact, but for now I'm working with the tools I have. I may look at improving my curve cutting ability on v2.0.
Last edited:
Did you have any problems getting the inside pieces at "perfect" right angles to the sides?
I've not been able to assemble similiar-sized speakers without the help of screws (and plenty of clamps as well) because the inside pieces either lean to one side, or shift around. I've not tried dowels or biscuits.
I use a combination of corner clamps, regular clamps, and if needed I pull out the biscuit cutter. With those tools I haven't had any issue making 90 degree joints that are very solid. I highly recommend a biscuit cutter, but then I'm clearly not an expert.
Did you have any problems getting the inside pieces at "perfect" right angles to the sides?
I've not been able to assemble similiar-sized speakers without the help of screws (and plenty of clamps as well) because the inside pieces either lean to one side, or shift around. I've not tried dowels or biscuits.
I'm starting to set the pieces, here is how I do the 90 degree bends
An externally hosted image should be here but it was not working when we last tested it.
I'm going to be building this pair without the biscuit joiner in most cases, as given the size of the side panels, it's hard to get them lined up right with the joiner....that, and I'm lazy
I occured to me after I took that picture that what I'm doing there is acutally not the right way to do it. To get a good 90, and ensure good fit, I usually try to assemble 2 parts at once, at different angles. So I went down and did this:
By butting 2 pieces, it helps ensure a better fit. It's also important that all cuts of the internal pieces were initially made on the table saw with the same guide setting, all at once. It's nearly impossible to make 2 cuts and try to get the guide set to the same place both times. Also, when I cut the internal parts to length, I cut matching parts at the same time to ensure they have exactly the same length.
An externally hosted image should be here but it was not working when we last tested it.
By butting 2 pieces, it helps ensure a better fit. It's also important that all cuts of the internal pieces were initially made on the table saw with the same guide setting, all at once. It's nearly impossible to make 2 cuts and try to get the guide set to the same place both times. Also, when I cut the internal parts to length, I cut matching parts at the same time to ensure they have exactly the same length.
Like the FH series they will be compromised without the curved back (which is a functional part of the design -I didn't put it in for jollies / to look pretty
Hey, one question. There's no mention of preferred placement for these speakers. Up against a wall, in a corner, or out in the room?
I'm just not setup to make a clean cut with a jig-saw on a curve right now. I understand not having the curve may have an impact, but for now I'm working with the tools I have. I may look at improving my curve cutting ability on v2.0.
That's why I suggested 'roughly cut to ~'close' to the outer edge of the line with a jigsaw or similar & shave with a plane to reach the target curve' -you wouldn't have to make a clean cut with a jigsaw -just cut it as close & neat as possible to the target and then use a plane (or a spokeshave) for the finishing work, as they did in ye olde days.
Once you have one, you've effectively got a template, so the others should be quicker & easier to refine. That said, I'm no woodworking expert. On the other hand, for the sake of a couple of extra hours work with a plane, it seems a shame not to.
Last edited:
Hey, one question. There's no mention of preferred placement for these speakers. Up against a wall, in a corner, or out in the room?
It's largely room / system (and personal taste) dependent, hence not giving specific positioning advice. Theoretically corner loading is optimal, though not required. Assuming no changes have been made to the design then minimum distance to the front wall is about 12in (preferably 15in) and tailor from there as required. If you have corners, then more or less the same advice, with about 20in to the side wall.
Last edited:
- Status
- This old topic is closed. If you want to reopen this topic, contact a moderator using the "Report Post" button.
- Home
- Loudspeakers
- Full Range
- Woden Victor build starting