Exactly James!
I now realise that the OPT's are squirting flux into the tubes, which is resulting in some noise. Putting a metal sheet between the OPT and tube cures that. I was not expecting this having firmly grounded the OPT shields.
I am thinking of having a polished metal screen at that position. Rotating the OPT's is too much of grief at this stage.
Lesson learnt")
I now realise that the OPT's are squirting flux into the tubes, which is resulting in some noise. Putting a metal sheet between the OPT and tube cures that. I was not expecting this having firmly grounded the OPT shields.
I am thinking of having a polished metal screen at that position. Rotating the OPT's is too much of grief at this stage.
Lesson learnt
DI Project
Work of the newbie, sorry just want to share my effort:
My Modified Pre-amp from Tono Pre-amp.
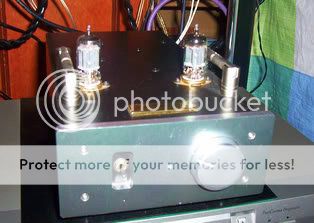
My DIY Flying mole digital amp
12mm Alluminum anodized faceplate hair line finished.
Work of the newbie, sorry just want to share my effort:
My Modified Pre-amp from Tono Pre-amp.
My DIY Flying mole digital amp
An externally hosted image should be here but it was not working when we last tested it.
An externally hosted image should be here but it was not working when we last tested it.
An externally hosted image should be here but it was not working when we last tested it.
12mm Alluminum anodized faceplate hair line finished.
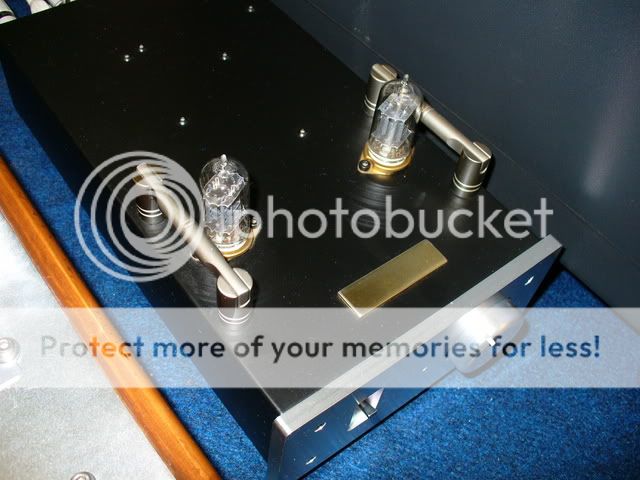
These are my DIY Tube Pré and Monoblock Amplifiers!
The eletric project was not made by me, but i'm the designer of the cabinets made of stainless steel. It was designed in CAD (Microstation) and laser cutted before soldering.
The Pré uses 6sn7's and have a separate power supply. The moboblocks uses 6sn7's on pre stage and EL34 on output stage. Vampire RCA connectors and separate mono volume knobs on thr Preamp.
An externally hosted image should be here but it was not working when we last tested it.
An externally hosted image should be here but it was not working when we last tested it.
An externally hosted image should be here but it was not working when we last tested it.
An externally hosted image should be here but it was not working when we last tested it.
An externally hosted image should be here but it was not working when we last tested it.
An externally hosted image should be here but it was not working when we last tested it.
An externally hosted image should be here but it was not working when we last tested it.
An externally hosted image should be here but it was not working when we last tested it.
The button in the middle was made to be a channel selector, but it isn't working.
An externally hosted image should be here but it was not working when we last tested it.
An externally hosted image should be here but it was not working when we last tested it.


Guijs said:These are my DIY Tube Pré and Monoblock Amplifiers!
I wish you could help me with my metal work
Fantastic and very artistic. Shawn.Thanks everybody .
The metal is 2mm thick stainless steel, dasigned in Microstation and cutted with a laser-cut machine. Then brushed and solded.
The electronics on the monoblocks are mounted on a top piece that is screwed. So, if I need to change the amplifier project, I just need to change the top piece!
This is a drawing designed for a friend of mine, and it will be real in the next months. Its a Preamp with 6sn7's just like mine, but without a separate power supply. The power is a stereo transistor amplifier with about 100w per channel.
Thanks!!!
Guilherme
.The metal is 2mm thick stainless steel, dasigned in Microstation and cutted with a laser-cut machine. Then brushed and solded.
The electronics on the monoblocks are mounted on a top piece that is screwed. So, if I need to change the amplifier project, I just need to change the top piece!
This is a drawing designed for a friend of mine, and it will be real in the next months. Its a Preamp with 6sn7's just like mine, but without a separate power supply. The power is a stereo transistor amplifier with about 100w per channel.
An externally hosted image should be here but it was not working when we last tested it.
Thanks!!!
Guilherme
a degree of satisfaction from ...
What is your degree of satisfaction from a tube pre-amp and dual mono-block solid state amplifiers ... compared to say, all tubes or all solid state ??
(I am deep in the throws of building system(s) for exactly your kind of setup = tube pre-amp & ss amps.)

What is your degree of satisfaction from a tube pre-amp and dual mono-block solid state amplifiers ... compared to say, all tubes or all solid state ??
(I am deep in the throws of building system(s) for exactly your kind of setup = tube pre-amp & ss amps.)
My setup is all tube. It's a Tube Pre amp and a dual monoblock tube amplifiers. The project with the tube pre amp and the SS amplifier was made for a friend of mine.
The craftsman who build the eletronics for me makes excelent Tube AND Solid State preamps and amplifiers. But I like more tube amplifiers, I thinks t sounds more natural. My friend choose the SS amplifier because he have a large room and floorstanding speakers, so he needs power. I use my monoblocks to play Ellis Audio 1801b bookshelfs (I'm building yet) to use in a small room. So 30w is fine for me. But I'll use a subwoofer with a SS amplifiers.
My opinion is that a very good DIY project can beat the majority of the amplifiers in the market. And a very good Tube amp and SS amp, sounds very close.
photos / tube + tube v. tube + SS
Guijs: " ... The project with the tube pre amp and the SS amplifier was made for a friend of mine. The craftsman who build the eletronics for me makes excelent Tube AND Solid State preamps and amplifiers. ..."
Field reports are what I'm after ... anything pro or con regarding tube pre-amp & tube power amps verses tube pre-amp plus solid state power amps, stereo, multichannel or whatever.
All of this is of interest for our project(s).
....
And you pictures and results are not only very impressive, I believe that they would make for an interesting art musium exhibit ... what do you have for speakers? (pics?)
Banned
Joined 2002
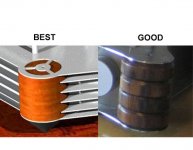
jleaman said:I don't like how the speaker terminals on the back are so far spaced. I think you should get a different kind of wood possibly a cheeri dark wood maybe a solid round piece. And the volume pot you picked is not a good one. ? maybe just to test the amp with ?
Good Critique. There is an industry standard for jack post spacing which allows many types of connectors and I do like my dual banana connectors.
IMO, the solid wood detail is better than the groovy version.
I bet the "metal man" could machine some nice dials from solid metal stock or even wood to play off the other wood details on the other units.
Still, I love your look.
Shawn.
Attachments
Banned
Joined 2002
TomWaits said:
Good Critique. There is an industry standard for jack post spacing which allows many types of connectors and I do like my dual banana connectors.
IMO, the solid wood detail is better than the groovy version.
I bet the "metal man" could machine some nice dials from solid metal stock or even wood to play off the other wood details on the other units.
Still, I love your look.
Shawn.
Perfect ilistration
esactly what i was thinking Hello!
Thanks for the critics, I totally agree with you. But all this have and explanation .
Binding posts:
I don't like how it is spaced too. I've made a mistake in my drawings. I wanted it to be more spaced than the usual but I did it too much... but this is not a problem, just if I need to change the posts, and as I don't see it happening (it's solid copper Edison-Price), i'm ok with that.
Wood detail/cilinders:
This part is not ready. I thought about a lot of types of materials to put there: Solid Wood, Marble, Acrylic, Glass, solid aluminum, solid brass, etc... Marble and Acrylic is too expensive. Aluminum is not expensive but I prefer another kind of material that is not metal. Solid wood is great, I tryed "Imbuia" but I didn't like the pieces (wood too dark) and they where not perfect. This wood that you see in the photo is just some small pieces that I put there just to fill the space but is not the final version.
I'm finishing my speakers, the wood finish will be "Pau-Ferro" that looks like rosewood but is more "red". I want to make the wood pieces in this finish too.
BTW, this is the bookshelf that i'm working at the moment :
Thanks!
Guilherme
Thanks for the critics, I totally agree with you. But all this have and explanation
.Binding posts:
I don't like how it is spaced too. I've made a mistake in my drawings. I wanted it to be more spaced than the usual but I did it too much... but this is not a problem, just if I need to change the posts, and as I don't see it happening (it's solid copper Edison-Price), i'm ok with that.
Wood detail/cilinders:
This part is not ready. I thought about a lot of types of materials to put there: Solid Wood, Marble, Acrylic, Glass, solid aluminum, solid brass, etc... Marble and Acrylic is too expensive. Aluminum is not expensive but I prefer another kind of material that is not metal. Solid wood is great, I tryed "Imbuia" but I didn't like the pieces (wood too dark) and they where not perfect. This wood that you see in the photo is just some small pieces that I put there just to fill the space but is not the final version.
I'm finishing my speakers, the wood finish will be "Pau-Ferro" that looks like rosewood but is more "red". I want to make the wood pieces in this finish too.
BTW, this is the bookshelf that i'm working at the moment
:An externally hosted image should be here but it was not working when we last tested it.
Thanks!
Guilherme
- Home
- Amplifiers
- Tubes / Valves
- Photo Gallery