I thought I would share my little tube amp story with all you folks before I powered it up for the first time (just in case). About 5 years ago i started looking for a tube amp for my 2ch setup, i found some good sounding stuff. But what I really wanted as a statement type of amp. What I really wanted was a CJ premier 12 (or was it the 11?). I spent months looking for a used one. But after shipping and all it was just out of my price range.
I had previously built a 1W pure class A discrete BJT headphone amp (Still being used daily !) so I had alittle confidence and decided to build my own tube amp. Well the whole project started simple and just got alittle out of hand. I figured if i was going to go through all the hassle of building an amp of my own i didnt want to regret any of choices (yes I am aware how ironic this is now). I settled pretty early on that i wanted a PP kT88/6550 amp, i didn't want to limit my future speaker selection. After looking around it became obvious that I would use some kind of williamson type amp. I eventually settled on the schematic on the Plitron website. My tube expert buddy recommended some changes to it (wishing now I just left it stock), unfortunately he has disappeared on me. So with that settled I started picking components and decided I didn't want to use any electrolytic caps (I was young and stupid at the time, now I am old and bitter") ).
).
I know this is very superficial but I spent the most time and effort on the chassis. I looked around this site for a long time and just didn't see anything I would stare at and admire while listening to music (nothing personal). I simply refused to use a Hammond box, I spent alot of time looking around for chassis that would live up to my "standards" and didn't find anything I could afford. So I decided to build my own chassis by hand (my only concession was a drill press) from scrap aluminum. My only real goal was to have a minimal number of bolts and/or nuts showing. The only hardware I wanted to show was that nessessary for the construction of the chassis itself. I didnt want to see any hardware from the mounting of internal electric components. Basically this meant retarded thickness of alum and drilling/tapping work.
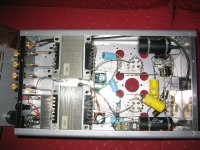
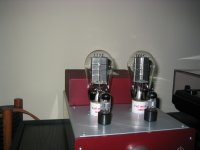
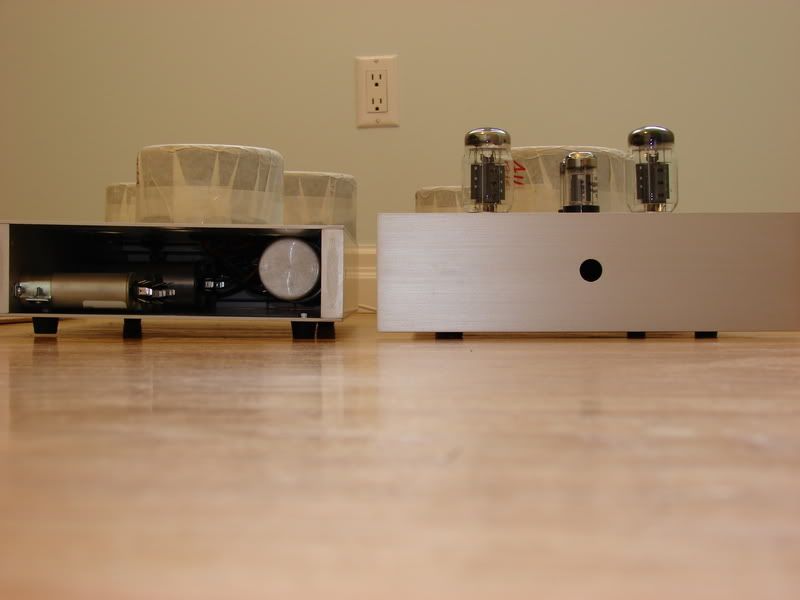
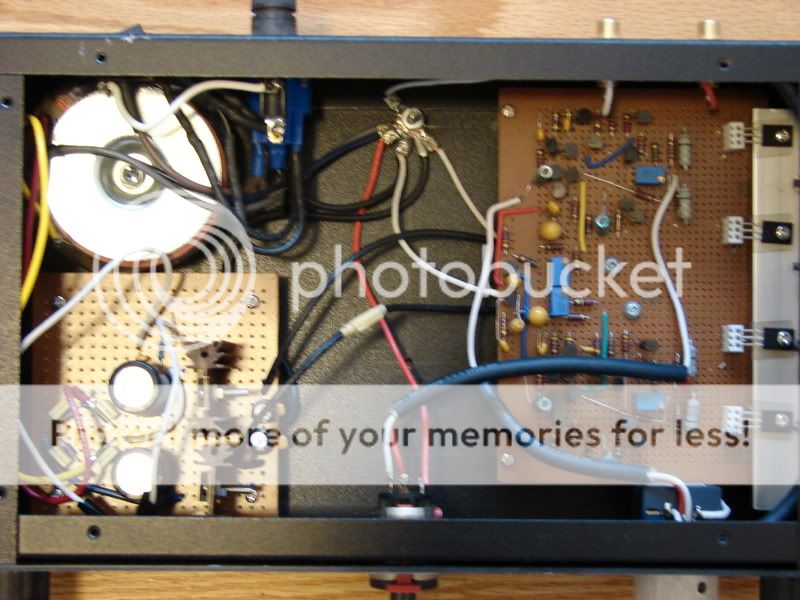
Well building this chassis killed me. I lost ALL interest in both finishing the amp and audio in general. I switched over to a new hobby, one that I still love and devote way to much of my free time to. But the hobby is a good weather hobby so I found myself this winter wanting to finish my tube amps. So the amp is more or less ready for testing. Here it is in its current state.
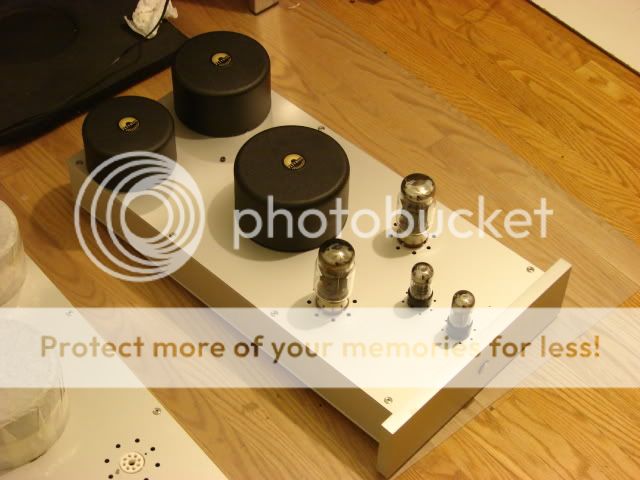
If you guys haven't already heard enough from me and want to see more photos of the amp at various stages of construction Ill post some tomorrow.
I had previously built a 1W pure class A discrete BJT headphone amp (Still being used daily !) so I had alittle confidence and decided to build my own tube amp. Well the whole project started simple and just got alittle out of hand. I figured if i was going to go through all the hassle of building an amp of my own i didnt want to regret any of choices (yes I am aware how ironic this is now). I settled pretty early on that i wanted a PP kT88/6550 amp, i didn't want to limit my future speaker selection. After looking around it became obvious that I would use some kind of williamson type amp. I eventually settled on the schematic on the Plitron website. My tube expert buddy recommended some changes to it (wishing now I just left it stock), unfortunately he has disappeared on me. So with that settled I started picking components and decided I didn't want to use any electrolytic caps (I was young and stupid at the time, now I am old and bitter
).I know this is very superficial but I spent the most time and effort on the chassis. I looked around this site for a long time and just didn't see anything I would stare at and admire while listening to music (nothing personal). I simply refused to use a Hammond box, I spent alot of time looking around for chassis that would live up to my "standards" and didn't find anything I could afford. So I decided to build my own chassis by hand (my only concession was a drill press) from scrap aluminum. My only real goal was to have a minimal number of bolts and/or nuts showing. The only hardware I wanted to show was that nessessary for the construction of the chassis itself. I didnt want to see any hardware from the mounting of internal electric components. Basically this meant retarded thickness of alum and drilling/tapping work.
Well building this chassis killed me. I lost ALL interest in both finishing the amp and audio in general. I switched over to a new hobby, one that I still love and devote way to much of my free time to. But the hobby is a good weather hobby so I found myself this winter wanting to finish my tube amps. So the amp is more or less ready for testing. Here it is in its current state.
If you guys haven't already heard enough from me and want to see more photos of the amp at various stages of construction Ill post some tomorrow.
I know what you mean about chassis building! One time, after sawing by hand many pieces of 6mm thick aluminium channel outside in the hot sun trying to keep to a line with the sweat running in my eyes, I couldn't even think about the project for some weeks.
I must say though,you have made a lovely job.
I must say though,you have made a lovely job.
Last edited:
Extremely impressive work! That amp looks great!
I wish I had the knowledge and resources to do such work. If I did, I'd be in business building amps and preamps all day long. My father is like that and can build shortwave radios, amplifiers, etc, etc without even looking at a schematic. He just starts building and in a few weeks he has a wonderfully working piece of equipment on his bench.
Maybe one of these days I'll grow enough knowledge and balls to build my own gear. You should be greatfull you can do such wonderful work.
Member
Joined 2009
Paid Member
Well building this chassis killed me. I lost ALL interest in both finishing the amp and audio in general.
This hobby has done that to me too, on more than one occasion. I nearly fell at the first hurdle when I couldn't get the pcb making process working. Chasis work is a royal PITA. And I never made anything as neat as yours - really good work.
Tell us more !

I think we all have been discouraged by something along the way when building a tube amp or some other project. We get impatient and want to see / hear the results and they cannot come fast enough sometimes.
I am into RC planes / helicopters and these things will try your patience too, but you have to pace yourself and remember to enjoy "the hobby".
Amp looks great. What about an underside shot and more pix in general?
I am into RC planes / helicopters and these things will try your patience too, but you have to pace yourself and remember to enjoy "the hobby".
Amp looks great. What about an underside shot and more pix in general?
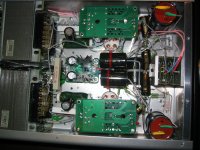
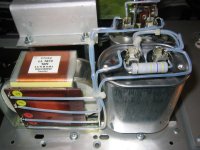
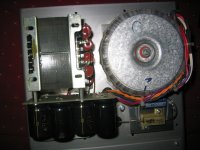
Being a bit more explicit, this was the amp before the upgrade.
I only kept the case and the OPT. I've started in 2006 and ended this year. Step by step, having the most of each one.
I only kept the case and the OPT. I've started in 2006 and ended this year. Step by step, having the most of each one.
Attachments
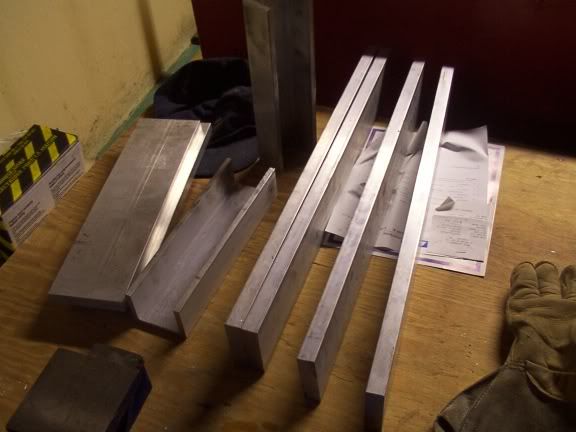
Thank you folks for the kind words. If this whole amp project goes well I actually plan to tackle a preamp, I think ill do the Frank's Ultimate Preamp, but this time I won't build the chassis. Anyways here are some more photos. Here are the raw materials for the chassis. I think I paid like $50-100 for all the aluminum bits.
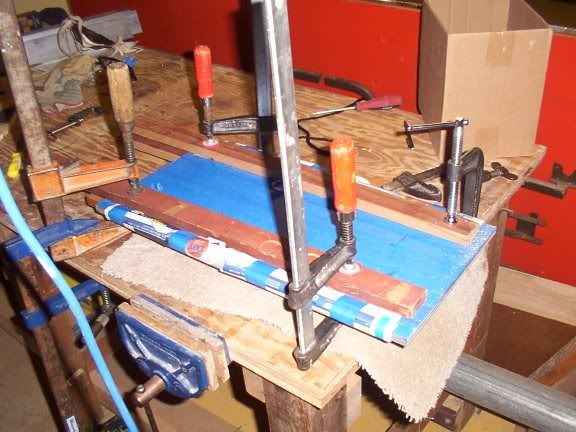
Here is how I matched the tops and bottoms together.
Next is the amp covered in $1000 worth of painters tape.
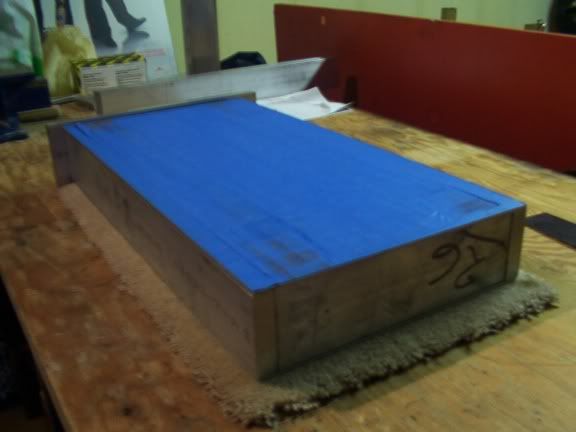
After this begun the drilling and sanding (to get a brushed aluminum finish) period of the amp's life. As you can imagine this was a dark period and thus no photos
These photos shows some more of the details, the sides and front are composed of 3/4" alum flats, the tops and bottom are 1/8" sheets and the back is a 1/2" U channel.
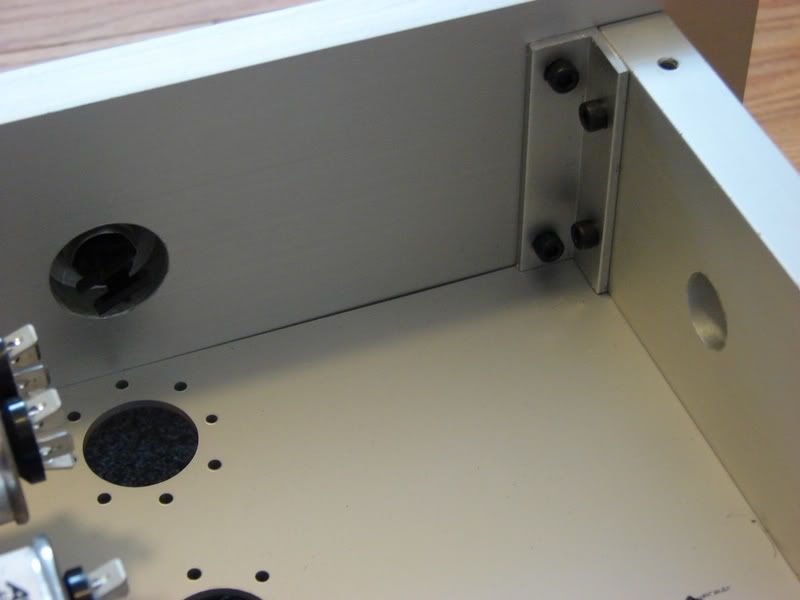
In the imagines the lines of the alum don't line up perfectly, but they will when I am done. I need to tweak the sheets while I tighten the bolts so they all line up like they are suppose to. Before I broke them down to be anodized all the joints where razor edge perfect.
Here is some of the planning on part layout I did. Due to the large physical dimensions of the parts I used planning the layout was very tricky. So I used photo shop to do the planning. While It is far from perfect or near the quality of some of the jobs I have seen on this site it was the best I could come up with
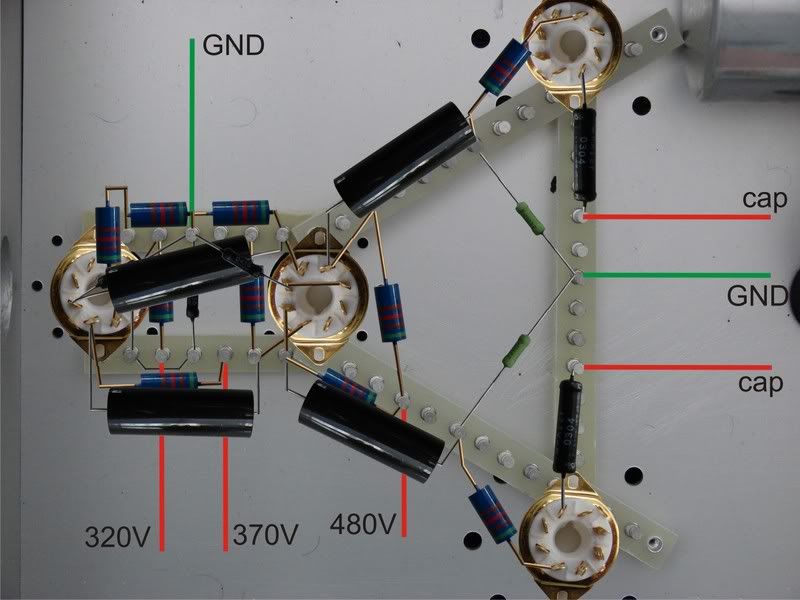
Here is what that looks like with real parts
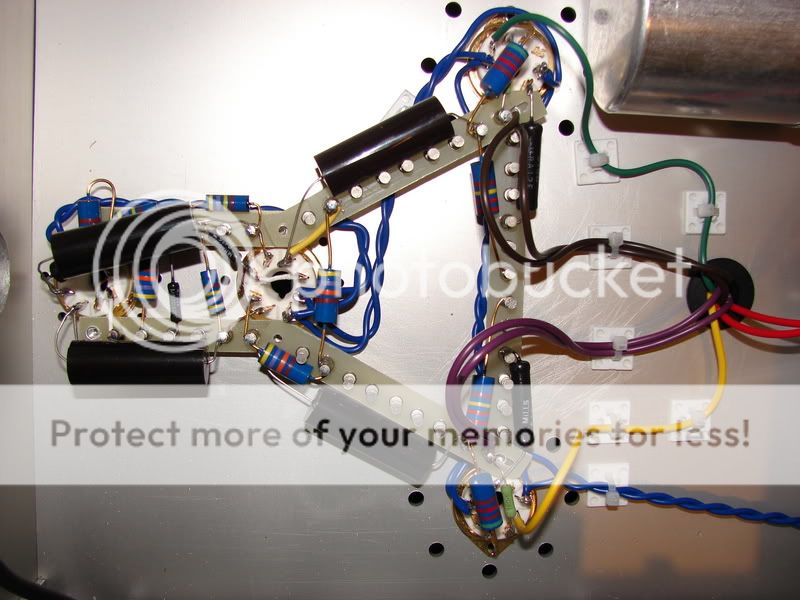
My local input stage ground
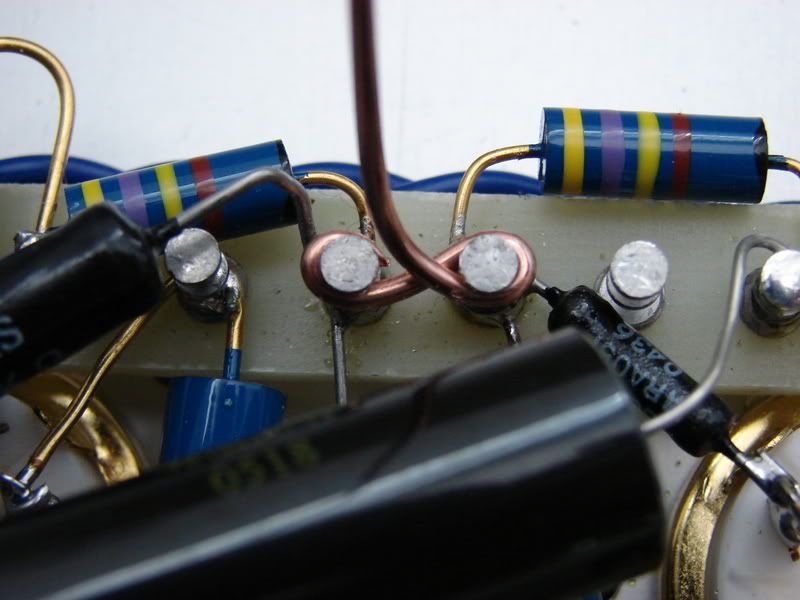
And My "star" ground"

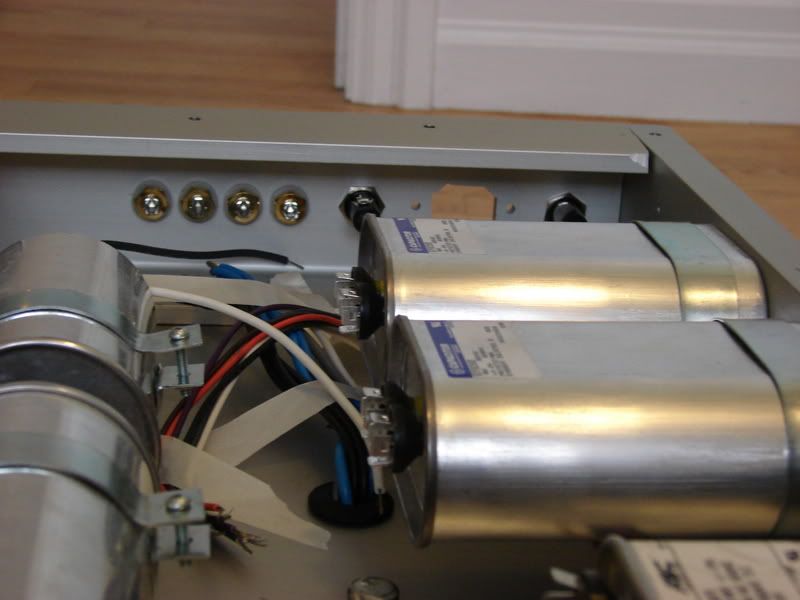
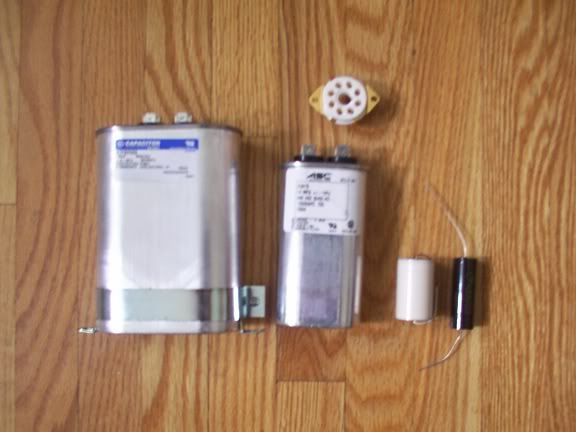
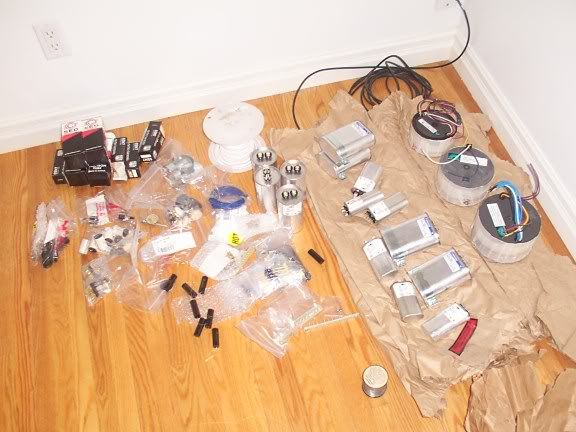
Here are some early photos that didn't really fit anywhere else. Here are the caps used on the project.
And all of the parts I somehow have to fit into the chassis' when done
Well those are all the photos I took along the way. I had planned to take alot more but you know how it goes when you are working. If you folks wanna see anything in particular just tell me and ill snap a new photo for you.
Here is how I matched the tops and bottoms together.
Next is the amp covered in $1000 worth of painters tape.
After this begun the drilling and sanding (to get a brushed aluminum finish) period of the amp's life. As you can imagine this was a dark period and thus no photos
These photos shows some more of the details, the sides and front are composed of 3/4" alum flats, the tops and bottom are 1/8" sheets and the back is a 1/2" U channel.
In the imagines the lines of the alum don't line up perfectly, but they will when I am done. I need to tweak the sheets while I tighten the bolts so they all line up like they are suppose to. Before I broke them down to be anodized all the joints where razor edge perfect.
Here is some of the planning on part layout I did. Due to the large physical dimensions of the parts I used planning the layout was very tricky. So I used photo shop to do the planning. While It is far from perfect or near the quality of some of the jobs I have seen on this site it was the best I could come up with
Here is what that looks like with real parts
My local input stage ground
And My "star" ground"
Here are some early photos that didn't really fit anywhere else. Here are the caps used on the project.
And all of the parts I somehow have to fit into the chassis' when done
Well those are all the photos I took along the way. I had planned to take alot more but you know how it goes when you are working. If you folks wanna see anything in particular just tell me and ill snap a new photo for you.
My father is like that and can build shortwave radios, amplifiers, etc, etc without even looking at a schematic. He just starts building and in a few weeks he has a wonderfully working piece of equipment on his bench.
Your situation is the opposite of mine: my father is not handy AT ALL, and doesn't understand or appreciate my building passion. Enough with the father-son issues
I can't understand you put your project aside for that long! Most of us here will agree the chassis work is the worst part of building an amp, you did an absolutely amazing job!
Using photoshop to determine the layout, good idea, I always just started building and decided on the spot where what would go. Takes quite a few builds to gain some experience how not to get yourself in trouble.. Only recently I started using pencil & paper to plan a layout
Absolutely outstanding!!!
I wish I had the time to do a chassis like that... It looks wonderful.
We all hope that your project comes to it's conclusion - a pair of beautiful working amps that make it all seem worthwhile. (Which it is!) Stick to it - you are almost there... The payoff is soon!!
I wish I had the time to do a chassis like that... It looks wonderful.
We all hope that your project comes to it's conclusion - a pair of beautiful working amps that make it all seem worthwhile. (Which it is!) Stick to it - you are almost there... The payoff is soon!!
This was my first DIY audio project (and basically my first real electronics DIY). It is a retardly overpower headphone amp, it can actually power small speakers.
There are a few reasons I was able to just let the amp sit unfinished. #1 was my other hobby, RC helis, they are very time and effort intensive so I was distracted. #2 Was my day job is a Phd student in Electrical Engineering and sometimes working on the amp just seems like homework.
There are a few reasons I was able to just let the amp sit unfinished. #1 was my other hobby, RC helis, they are very time and effort intensive so I was distracted. #2 Was my day job is a Phd student in Electrical Engineering and sometimes working on the amp just seems like homework.
- Status
- This old topic is closed. If you want to reopen this topic, contact a moderator using the "Report Post" button.
- Home
- Amplifiers
- Tubes / Valves
- My first and last DIY tube amp !