I believe the Triode/UL switch will go in the space between the OPT's near the PCB Edge.
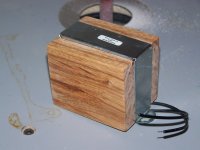
The choke is not shown since it will be banished to the underside of the amp.
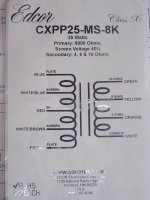
I will probably use some lacquer thinner and remove some of the coating from the PT since it seems to be dripping all over the place.
The choke is not shown since it will be banished to the underside of the amp.
I will probably use some lacquer thinner and remove some of the coating from the PT since it seems to be dripping all over the place.
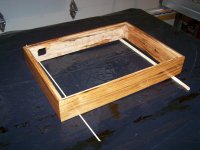
Extreme Makeover Triad Choke Edition
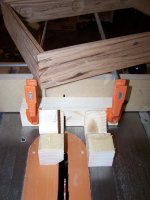
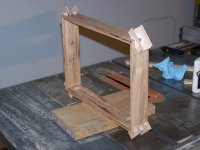
Well, I decided I didn't want a 3" tall chassis so I built some "end caps" for my C-14X.
They are built with the same Hickory that the chassis will be made of so I think it will look nice up top.
I don't know if I will paint the frame black or just leave it to match the top cover and the MR Cap.
Well, I decided I didn't want a 3" tall chassis so I built some "end caps" for my C-14X.
They are built with the same Hickory that the chassis will be made of so I think it will look nice up top.
I don't know if I will paint the frame black or just leave it to match the top cover and the MR Cap.
Attachments
")
This looks like it's going to be good! I'm looking forward to your thoughts on sound.
I finished a Simple SE recently and, contrary to what some might expect, the fact that my SET came out wonderfully makes me want to build something else, not stop building and be satisfied. Some kind of sickness. The Simple PP is on my short list of imminent obsession.
I finished a Simple SE recently and, contrary to what some might expect, the fact that my SET came out wonderfully makes me want to build something else, not stop building and be satisfied. Some kind of sickness. The Simple PP is on my short list of imminent obsession.
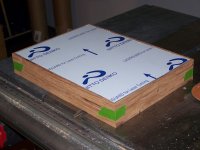
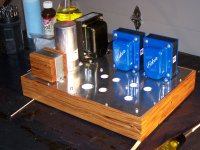
Chassis In Progress
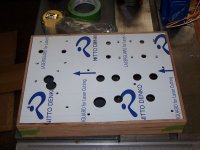
Here is my raw chassis and a mock up with my stuff on it to mark the holes.
Tomorrow I will bring the top plate in to work and have my welder poke a bunch of holes in it.
I will spend a bunch of time on this thing over the weekend and I hope to be listening to it Sunday evening.
This will be my third amplifier.....
#1 AudioSector LM4780 Dual Mono
#2 Pass DIY F4 w/ Broskie Aikido Preamp
#3 Tubelab Simple P-P
#4 ?????? Maybe a 100W/ch F5T Who Knows
Attachments
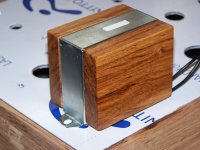
More Progress
I have the top plate all drilled out.
My welder at work was kind enough to punch the big holes for me, it took him like 10min.
I will hopefully have the chassis drilled and glued up tonight.
The choke has it's endcaps in place and it looks mighty fine.
I have the top plate all drilled out.
My welder at work was kind enough to punch the big holes for me, it took him like 10min.
I will hopefully have the chassis drilled and glued up tonight.
The choke has it's endcaps in place and it looks mighty fine.
Attachments
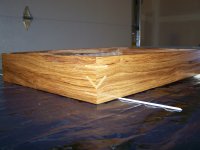
Chassis Finished
The final coat of oil just went on.
I will make final modifications to the PCB after dinner and start assembling this thing.
I really want to be listening to it tomorrow and I think I'm on track.....barring any oopses.
The final coat of oil just went on.
I will make final modifications to the PCB after dinner and start assembling this thing.
I really want to be listening to it tomorrow and I think I'm on track.....barring any oopses.
Attachments
Well.....While I wait for this last coat to cure I will be removing the 150uF cap and putting the 47uF in it's place.
One bit of confusion is where to attach the MR cap to?
I could solder the 47uF to the terminals on the MR cap and then run leads to the board but I need to trace the board back and see where I can install the MR, I believe it goes on the terminal blocks @ the PT input.
One bit of confusion is where to attach the MR cap to?
I could solder the 47uF to the terminals on the MR cap and then run leads to the board but I need to trace the board back and see where I can install the MR, I believe it goes on the terminal blocks @ the PT input.
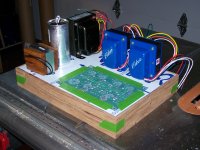
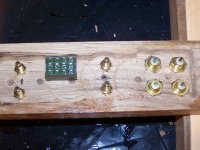
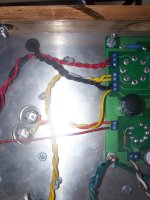
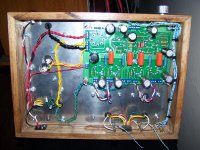
Bolted Up
Well....Now I have all the parts bolted up and I will move on to wiring everything together.
I will wire this without a volume pot for now since I don't have one.
I will be driving this off of my android anyway.
At some point I will put a TKD pot in it when cash frees up.
Well....Now I have all the parts bolted up and I will move on to wiring everything together.
I will wire this without a volume pot for now since I don't have one.
I will be driving this off of my android anyway.
At some point I will put a TKD pot in it when cash frees up.
Attachments
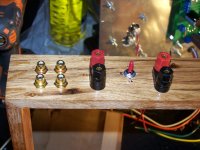
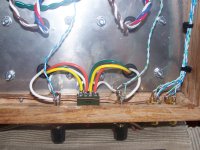
OH MAN!!!!
Was soldering that DP3T switch a pain in the butt!
It will be really nice to have a single set of binding posts though.
Originally I was going to use the switch for the T/P/UL selector but after further thought I figured I would just use UL.
At some point I will use this with a bi-amp scheme with line level crossovers and I will switch this to Triode mode to drive my tweeters.
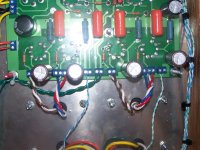
Bad Noises Happening HEEEELLLLLPPPPP!!!!!
I am having major problems with my SPP.
I have a BRRRRRR noise coming out of both channels equally.
I have tried reversing the feedback lines and I get screaching instead of BRRRRR.
I have tried reversing the Plate/Screen wires and still no change.
Please Help, I have the "My Simple P-P" thread going and 6L6 has been most helpful so far.
Attachments

- Status
- This old topic is closed. If you want to reopen this topic, contact a moderator using the "Report Post" button.
- Home
- More Vendors...
- Tubelab
- My Simple P-P Build